Table of Contents
The Windows 11 start menu looks quite different from that of Windows 10. Despite it being classy, not most users love it. The Windows 11 start menu contains pinned applications, recommended applications, and a button containing all the applications. Again, this is quite different from the Windows 10 start menu.
Some complaints raised concern the complex nature of the start menu and that you have to make extra clicks to get all applications. Other users generally hate that the Windows 11 start menu interface differs from those of previously released Windows versions. For instance, in the previous releases, Windows 10, 8 & 8.1, the start menu was left-centered, while in Windows 11, the start menu is centered.
You might have already tried to change the position of the start menu from center to left to remember that of Windows 10 using the taskbar settings, but you realize it only changes the position, not the entire look and feel of the start menu. Therefore, to bring back the classic Windows 10 menu, we shall do some registry tweaks. So stick to this article to learn how to get the Windows 10 start menu in Windows 11.
Step 1) Launch the registry editor
To launch the registry editor commonly referred to as “Regedit,” we shall use the Run menu. Open the Run menu by clicking on the (Windows key + R) at the same time. Alternatively, you can type “Run” on the start menu. After launching the run dialogue box, type “Regedit,” then click the “OK” button

regedit
- Once the registry editor application has opened up, navigate to the left panel, locate the “HKEY_CURRENT_USER” and click on the arrow just before “HKEY.”

HKEY_CURRENT_USER
- A list of items will be displayed once you click on the arrow. From the list, locate the “software” and press the arrow just before it.
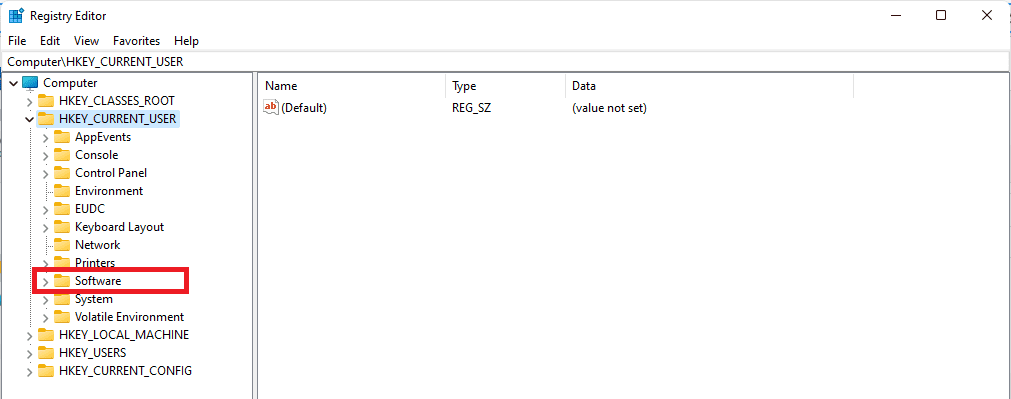
software
- Another list of items will display. For example, scroll down and find “Microsoft,” then again press the arrow behind it.
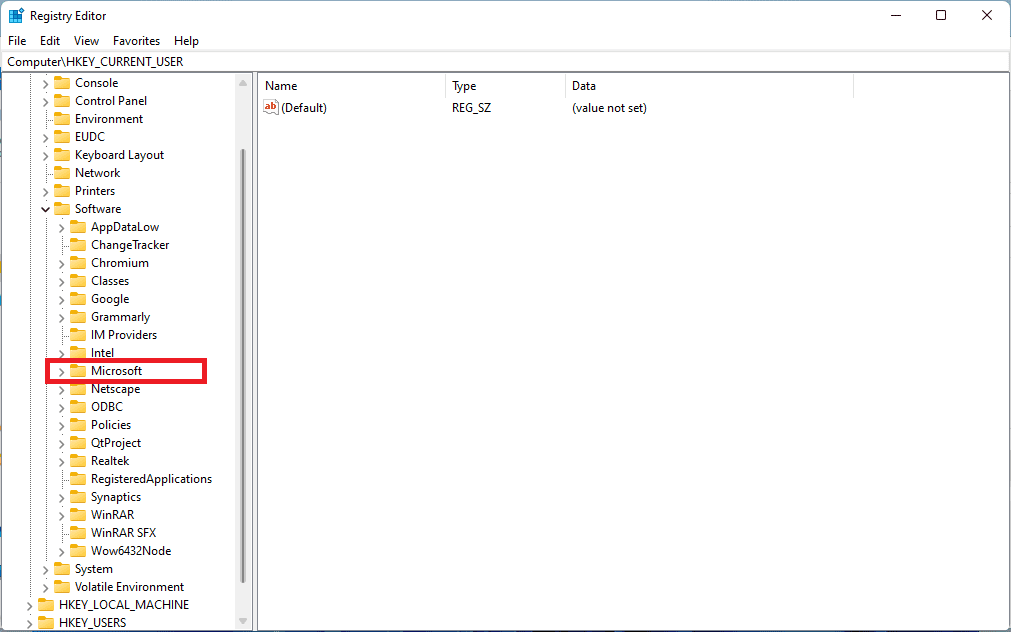
Microsoft
- This will display another list. Now scroll down and locate “Windows.” Again press the arrow key to display a list of extra items.
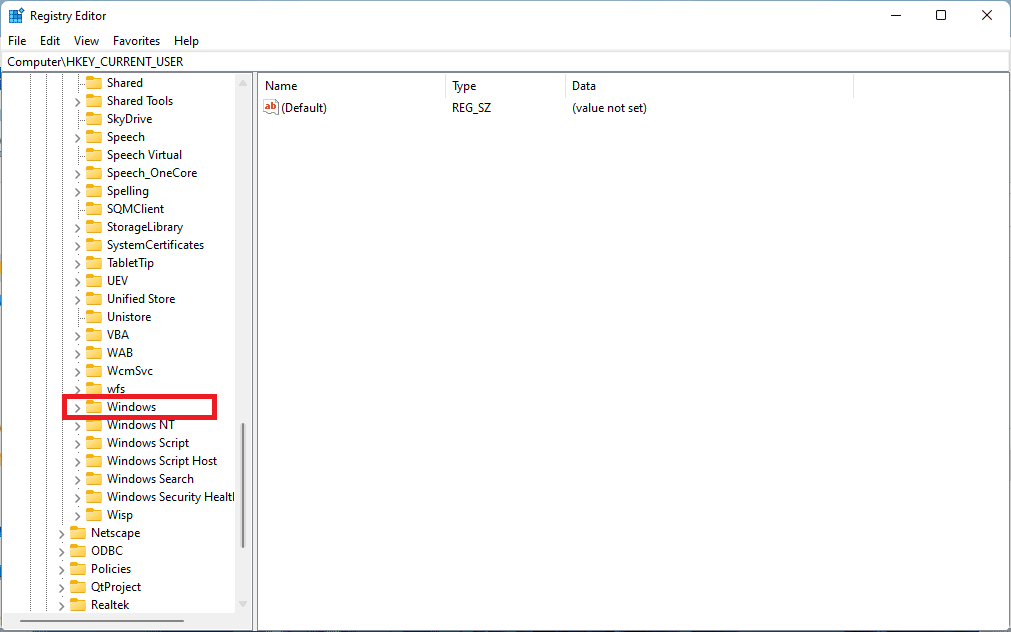
windows
- Navigate to “CurrentVersion” and press the arrow behind it once again. Another list will be displayed.
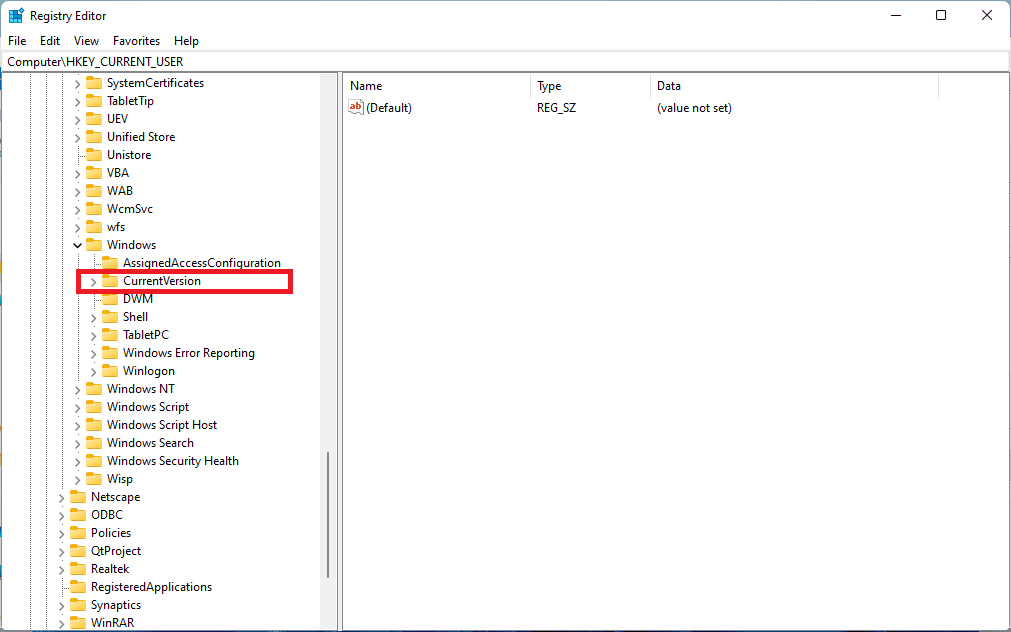
CurrentVersion
- Locate “Explorer,” then click on the arrow.
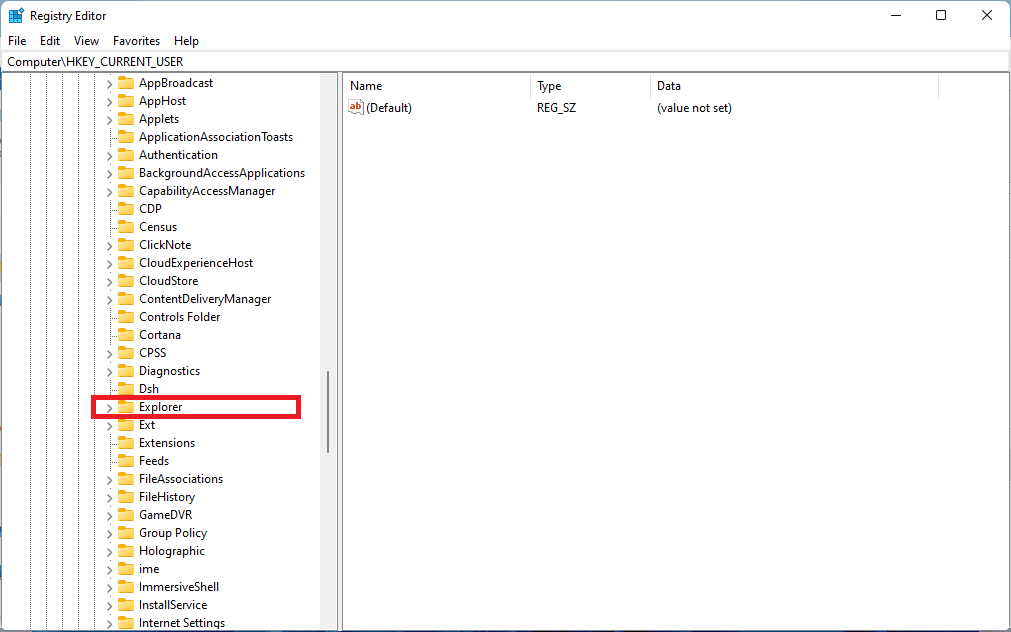
explorer
- Now find “Advanced” and click on it, not the arrow-like we have been doing. A table containing a “Name”, “Type” and “Data” column will be displayed as shown in the image below:
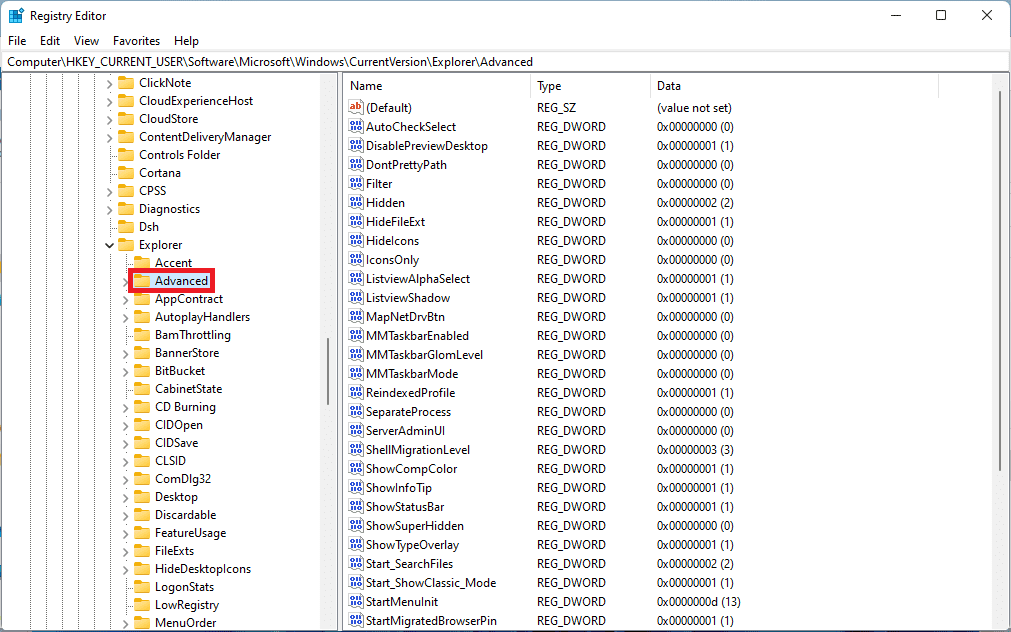
advanced
Step 3) Create a new DWORD (32-bit) value
- After reaching the Advanced tab as shown in step 2 above, right-click on a space on the right pane of the advanced window, just after the “Data” column. A button called “new” will be displayed. Hover your mouse on the “new” button and select “DWORD (32-bit) value” from the list of items displayed.
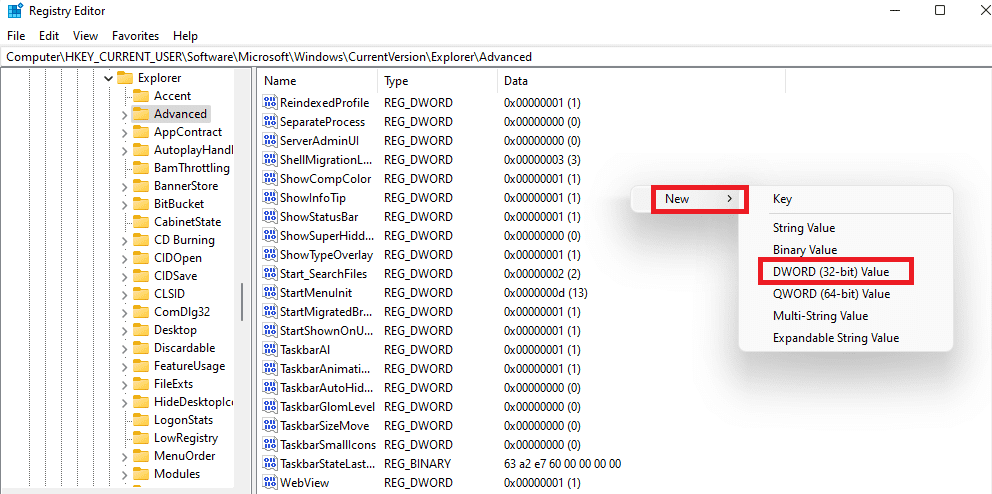
DWORD (32 bit) value
- Once you click on “DWORD (32-bit) value,” the system will create a new registry key named “New Value #1” or #2 depending on how many DWORD (32-bit) values you already made in the past. But assuming this is your first trial, then you will get “#1”.
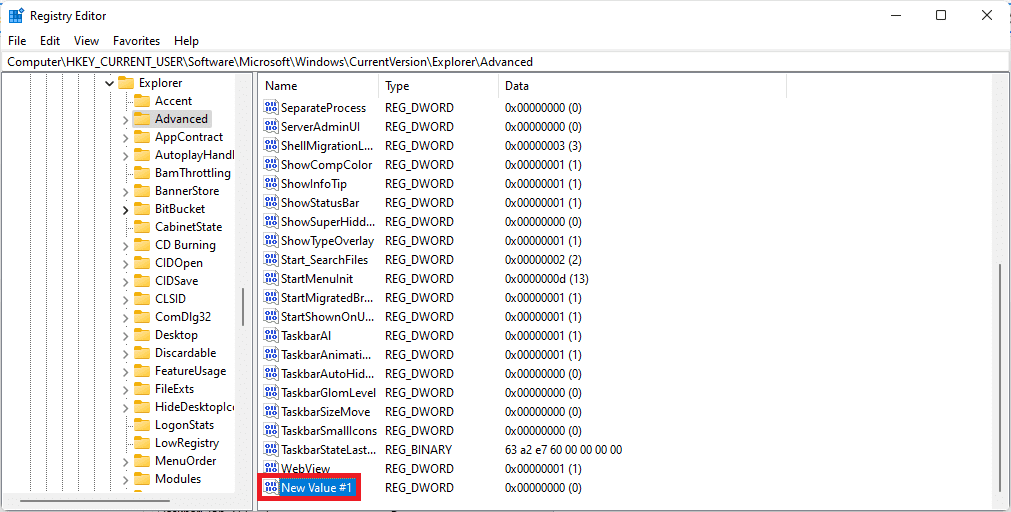
new value 1
Step 4) Renaming the newly created Registry key
After successfully creating the new registry key, the next step is to rename it to “Start_ShowClassicMode.” To do this, locate the registry key named “New Value #1,” then right-click on it and select the Rename option as indicated in the image below:
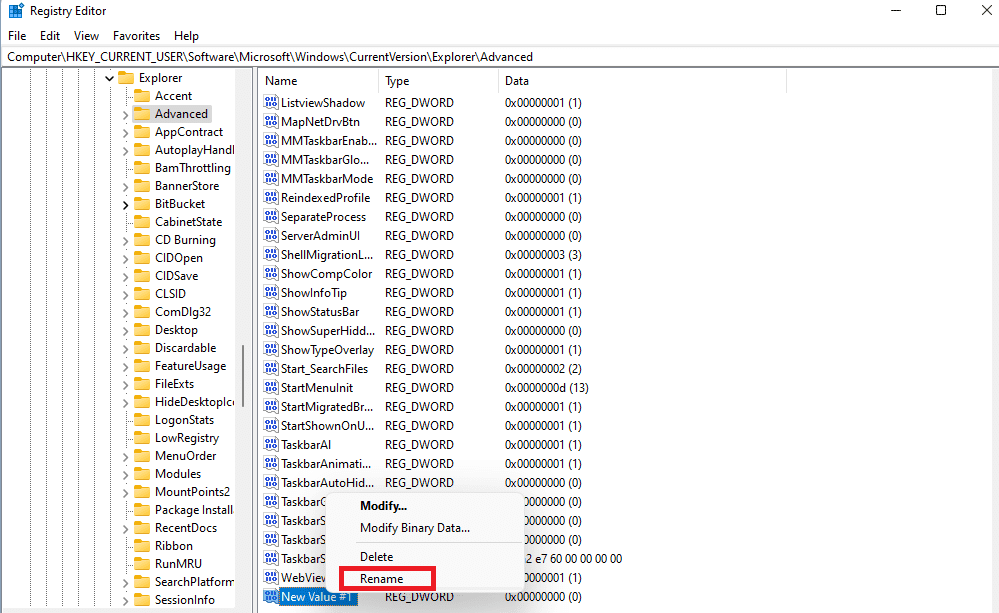
rename new value 1
Now type in “Start_ShowClassicMode” in the empty dialogue box.
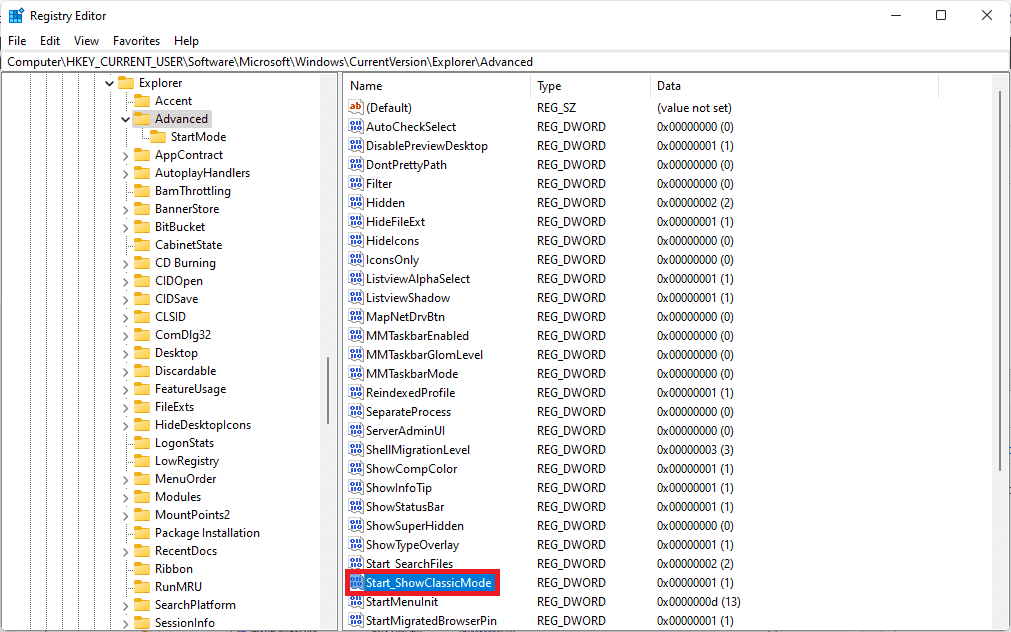
Start_ShowClassicMode
Step 5) Set the Value
After renaming the registry key, now set its value to 1. To do this, double-click on “Start_ShowClassicMode.” A new window to edit the DWORD (32-bit) value will pop up. Under Value data, type 1 in place of 0, then leave everything as it is, and press “OK” as shown below:
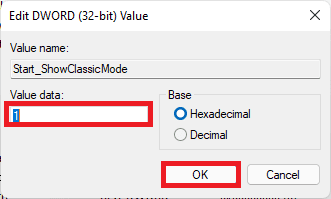
change registry key from 1 to 0
Step 6 Close the registry editor
Now that we have changed the registry key name and value, we shall exit the registry editor by clicking on the x button on the right-hand corner of the registry window.
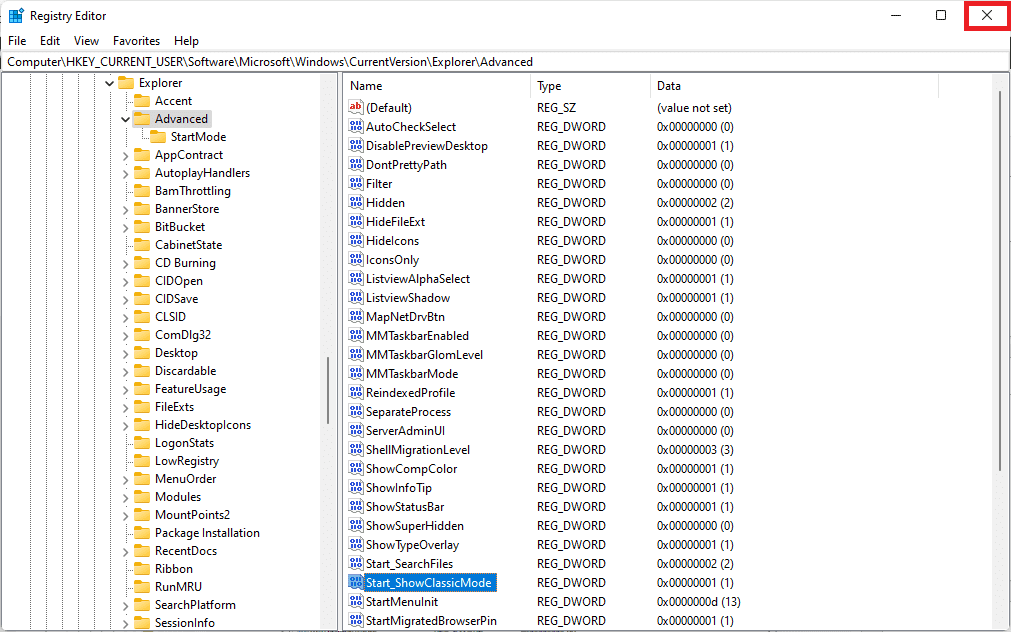
close registry editor
Note: The steps covered above only align the start menu and icons to the left. If you plan on leaving the start menu and icons in the center, then go ahead and reboot your PC for changes to take effect.
Step 7) Open Taskbar Settings
Navigate to the taskbar and right-click on a space, then select “Taskbar settings.”
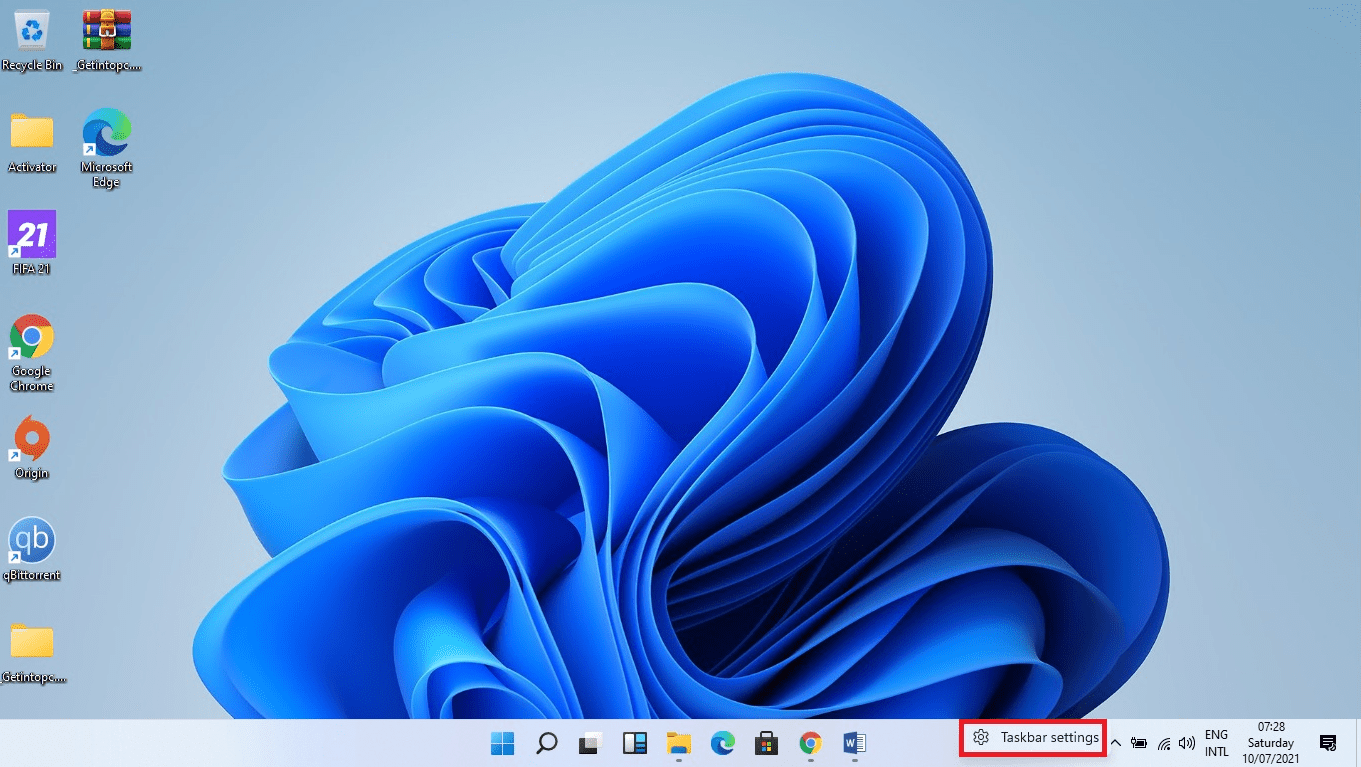
taskbar settings
Step 8) Change Taskbar Alignment
Once you open the “Taskbar settings,” the first option is “Taskbar alignment” select the dropdown menu and change the alignment from “Center” to “Left.”
Note: The taskbar settings differ on different devices. For instance, some Windows 11 taskbar settings contain Taskbar behavior, but some like those used in this tutorial do not.
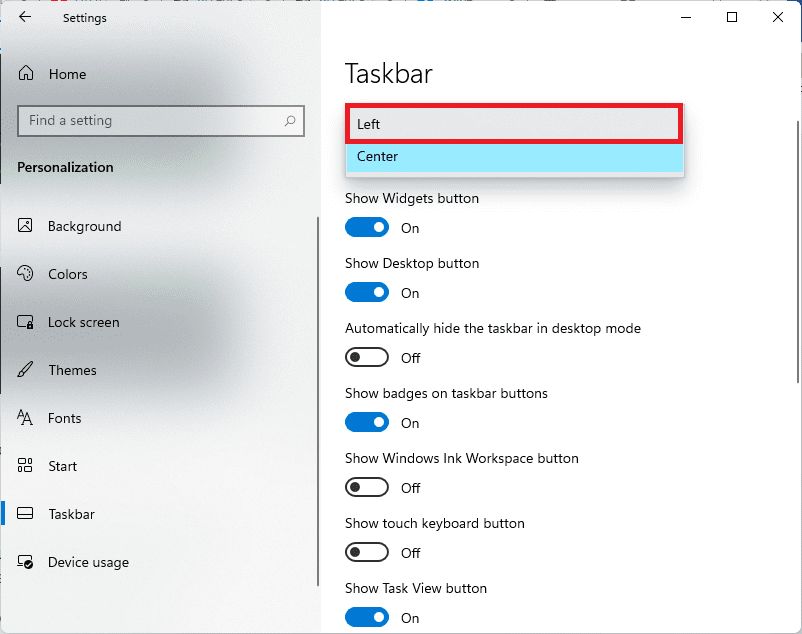
select left alignment
Your taskbar will now be similar to the one shown here:
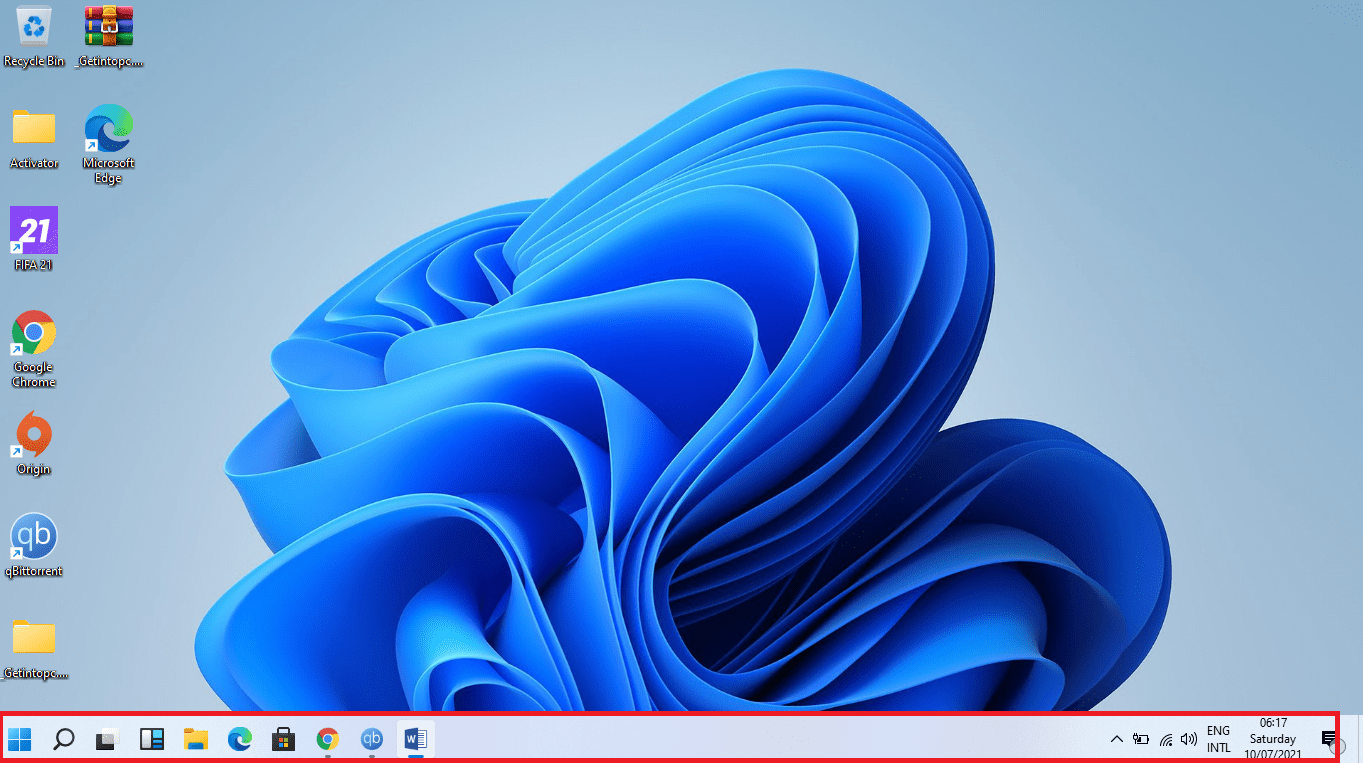
windows 11 desktop after changing taskbar alignment
Now the Icons have been aligned to the left, as shown in the desktop preview above. Close the settings menu
Step 10) Restart your computer.
This is the final step of getting the Windows 10 start menu in Windows 11.
Note: Rebooting or restarting your computer is vital since it enables all the changes made to take effect.
After restarting your computer, you will now be able to see the Windows 10 classic start menu. However, we do not guarantee our readers that this option will last for a long time since the final release of Windows 11 is not yet out.
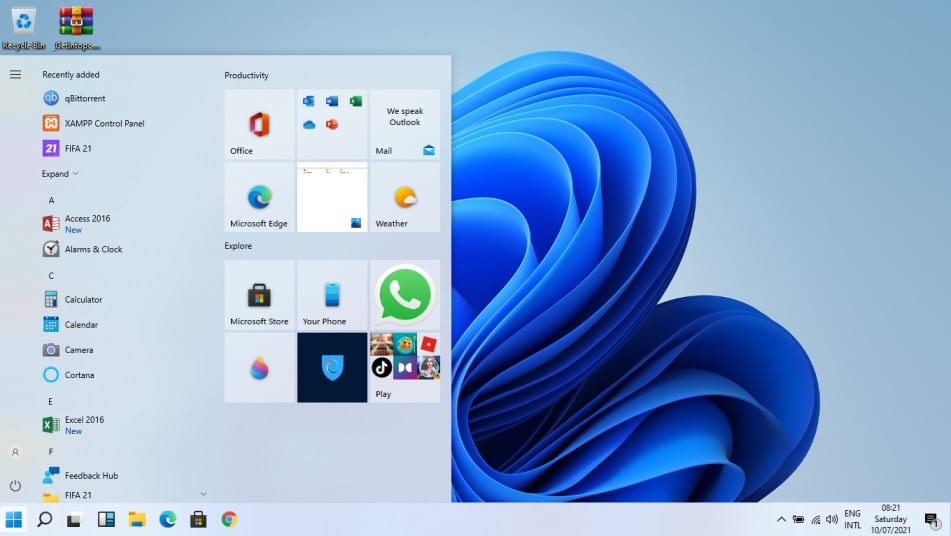
Windows 10 start menu on Windows 11
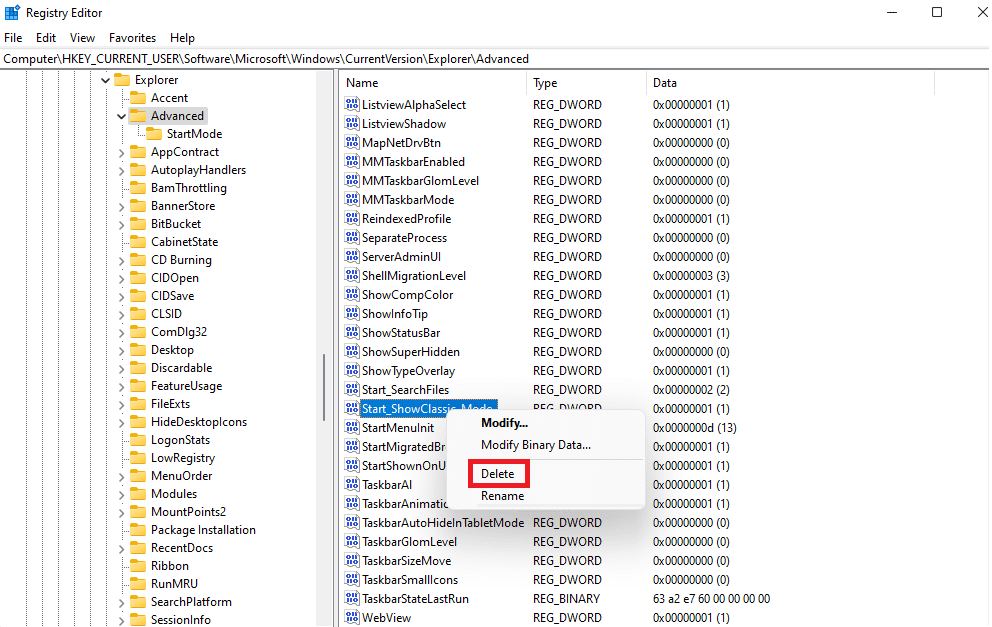
Reverting to Windows 11 start menu is so simple. All you have to do is follow Step 1 and Step 2 to get to the Start_ShowClassicMode that we created in this article. use any of the methods shown below to revert to the Windows 11 start menu:
- Delete the Start_ShowClassicMode registry key

delete start Start_ShowClassicMode
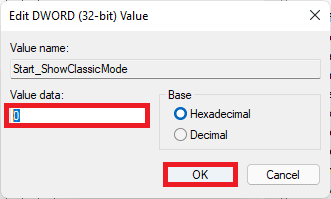
- Change the value of the Start_ShowClassicMode registry Key from 1 to 0 as shown below:

change registry key from 1 to 0
That’s all you need to revert to Windows 11 start menu.
Conclusion
Getting the Windows 10 start menu in Windows 11 is not much complex if you follow all the steps provided in this article. However, remember, the official final release of Windows 11 is not yet out. Therefore we cannot guarantee that this process will last forever. However, please do not freak out since we shall regularly update our articles and cover any changes that might surface in the future.

