Table of Contents
Windows 10 is a highly efficient operating system that consists of many complex components. Each Windows 10 laptop or computer uses particular hardware specifications that standardize them. There is a countless number of devices out there, each priced according to their level of specs. If you’re thinking of buying a new device or have already bought one and would like to know its specifications more in detail, it’s a good idea to check the hardware specs right away.
In situations such as these and many others, it can be quite useful to do this. For instance, you want to install another software on your computer, and you’re unaware if your PC meets the minimum requirements or not. Furthermore, it can also help in cases where your computer has slowed down, and you’d like to figure out which hardware component is falling short.
Now that Windows 11 is on the way, many people have been confused, wondering whether they would be able to upgrade to Microsoft’s next-gen operating system or not. While we covered everything about that in one of our articles here, we will focus on how to check your computer’s hardware specifications in Windows 10. Let’s start.
Checking hardware specifications in Windows 10
For your convenience, we have gathered two different ways to check your system specifications in Windows 10. We’ll go through both of them to help you understand the processes.
1. Using the system settings
The most simple and easy method to check your device’s hardware specifications is below.
- First, right-click on the Windows Start menu on the bottom left corner of your screen.
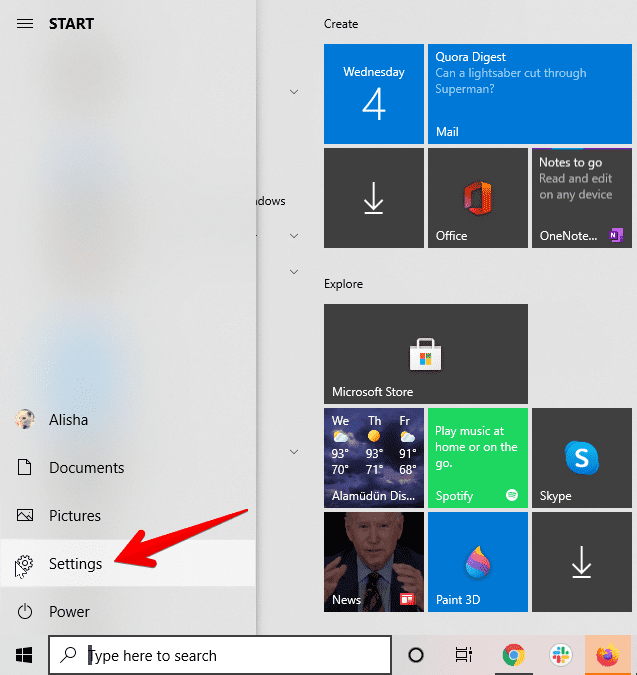
- Click on the option of “Settings” from the start menu.

Clicking on “Settings”
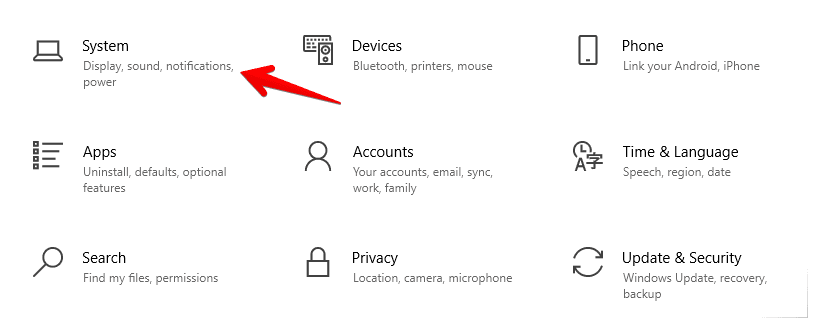
3) After that, click on “System.”

Choosing “System” settings
4) Lastly, you should scroll down and click on “About.” When you do that, you will promptly see your computer’s hardware specifications.

Device specifications
That’s about it for the first method. If you would like to expand your options, continue reading for a second method.
2. Using system information application
Another way to check your Windows 10 computer’s hardware specifications is by using a specific application called System Information. To launch it, follow the steps given below.
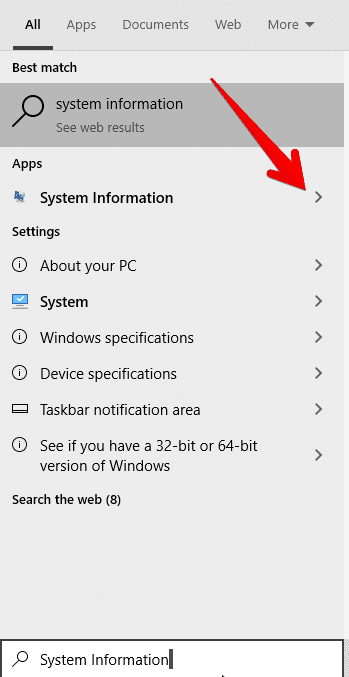
- Click on the Windows search bar in the bottom left corner of your screen and type “System Information.” An application should appear once you do that. Click on it to proceed further.

Clicking on the “System information” app
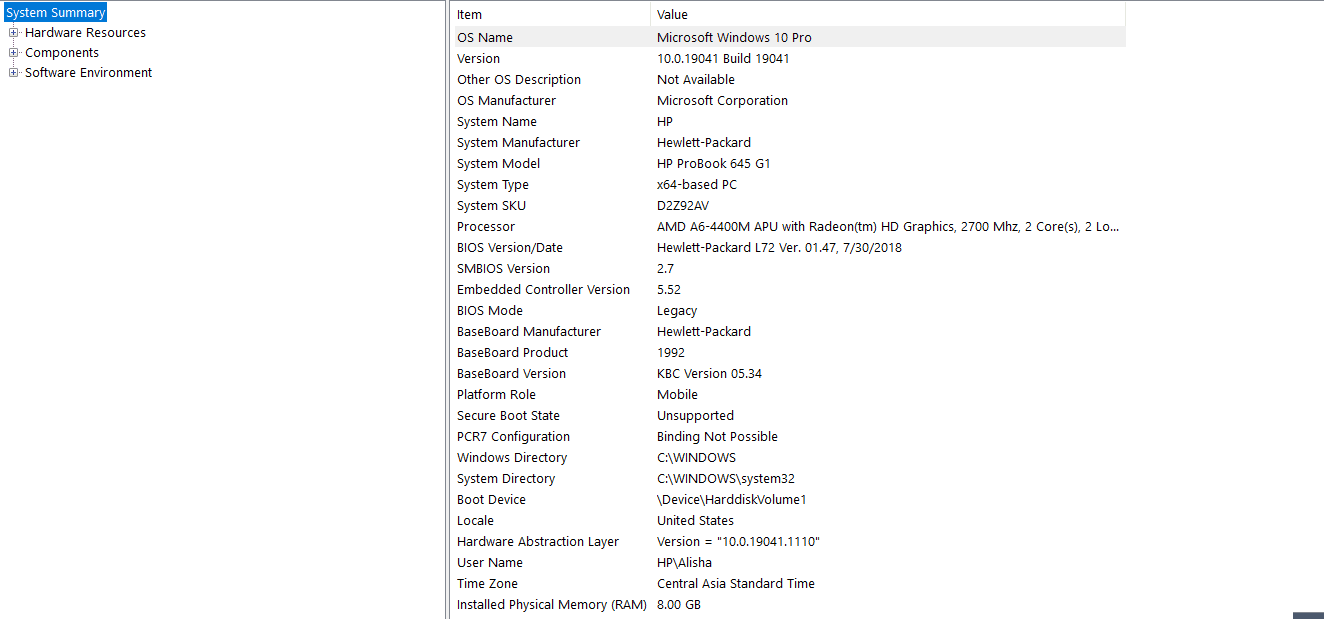
2. When you launch the application, you will see contents under the “System Summary” section. This is where you’ll get to check all of your system’s hardware.

System Information
That’s it for the second method! Now that you know two ways of checking your system’s hardware specifications, we presume you’re much better off with your PC now.
Conclusion
Every computer, laptop, or device has specifications for its interior build, including chipset, RAM, storage, and graphical processing unit. Therefore, having a basic knowledge of them is essential for every PC owner, as you never know when you might run into the need to know your system’s specifications. In this article, we’ve shown you two easy ways to do that. We hope that this article has been helpful.
