Table of Contents
The world is convoluted with video editing applications because the entertainment industry is at an all-time high presently. Video editing is a great skill that not many people master when they first start with this craft. However, if one has access to a reliable and easy-to-operate video editor, then the chances of learning the art of video editing are drastically increased. Speaking of such a video editor, we will talk about Shotcut today, which is a high-quality, yet free-to-use video editing tool taken up by millions of people all across the world.
It boasts an interactive user interface that does not scare beginners away. The elements are arranged categorically, and casual video editing users often find Shotcut video editor much more bearable than other video editing tools. One strong competitor of the Shotcut video editor is OpenShot, which we will advise you to look into. An excellent way to start is by reading our complete article on OpenShot video editor to find out what it’s all about.
Coming back to the topic in question, Shotcut is a fantastic video editor who reasonably gets the job done at the end of the day. In this article, we will talk about everything you need to know to get started with Shotcut. So without wasting any further time, let’s jump right away.
Minimum system requirements for Shotcut video editor
Before we get into using the Shotcut video editor on your Windows 10 running PC, let’s see if your system checks the minimum requirements needed to host this program or not. The following is what you should need for Shotcut.
- Operating System: 64-Bit Windows 7-10
- CPU: x86-64 Intel or AMD; at least one 2 GHz core for SD, four cores for HD, and eight cores for 4K
- GPU: OpenGL 2.0 or any compatible DirectX 9 or 11 drivers
- RAM: At least 4 GB for SD, 8 GB for HD, and 16 GB for 4K
These specifications have been taken from the official Shotcut forum, so if your Windows 10 computer exceeds the minimum requirements, you’re all good to go.
How to install Shotcut video editor on Windows 10
We will now talk about the installation steps of the Shotcut video editor so you can have an easy time getting it on your Windows PC. So let’s get into it.
1. Click on this direct link to get straight to the Shotcut video editor download page. When you’re there, hover over “Windows Installer” under the “Site 2 (GitHub)” section and click on it to begin downloading the setup of Shotcut.
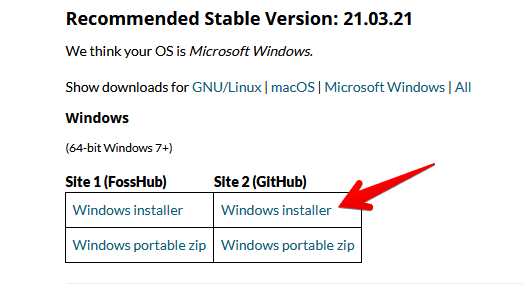
Downloading Shotcut video editor setup
2) When the downloading process has been finished, you will launch the setup and continue with the installation. Just follow the on-screen instructions, and you will be all set.
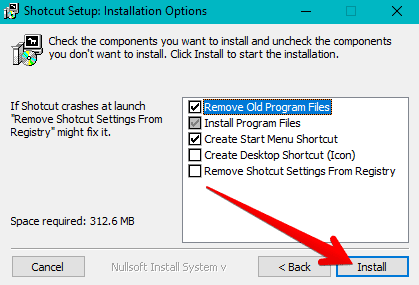
Installing Shotcut video editor
3) When you’re done with the setup of the Shotcut video editor, and the application has been installed on your Windows 10 device, go to your Windows Search area and type in Shotcut. This should make the app appear promptly.
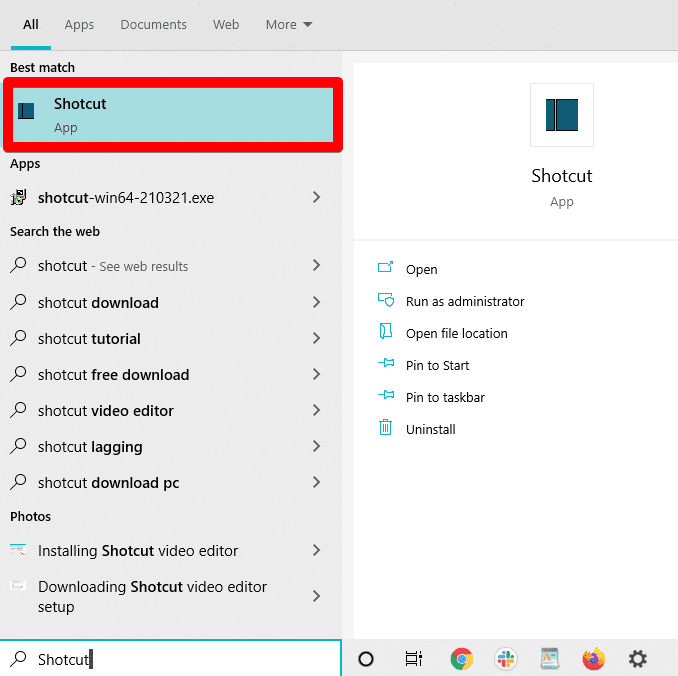
Shotcut video editor installed
That’s it regarding the installation of the Shotcut video editor on your PC. As an alternative method, you can also install the Shotcut application from the Microsoft Windows Store, but do note that you will have to pay about $9.79 there. This is because only the premium-end version of Shotcut is listed on the Windows Store. In contrast, the method above discusses the installation of the free-to-use version of the video editor.
Anyhow, click on the application and launch it to see how it works on your device. The following section will discuss the working of Shotcut in simple terms so that you can understand the basic functioning painlessly.
How to use Shotcut video editor
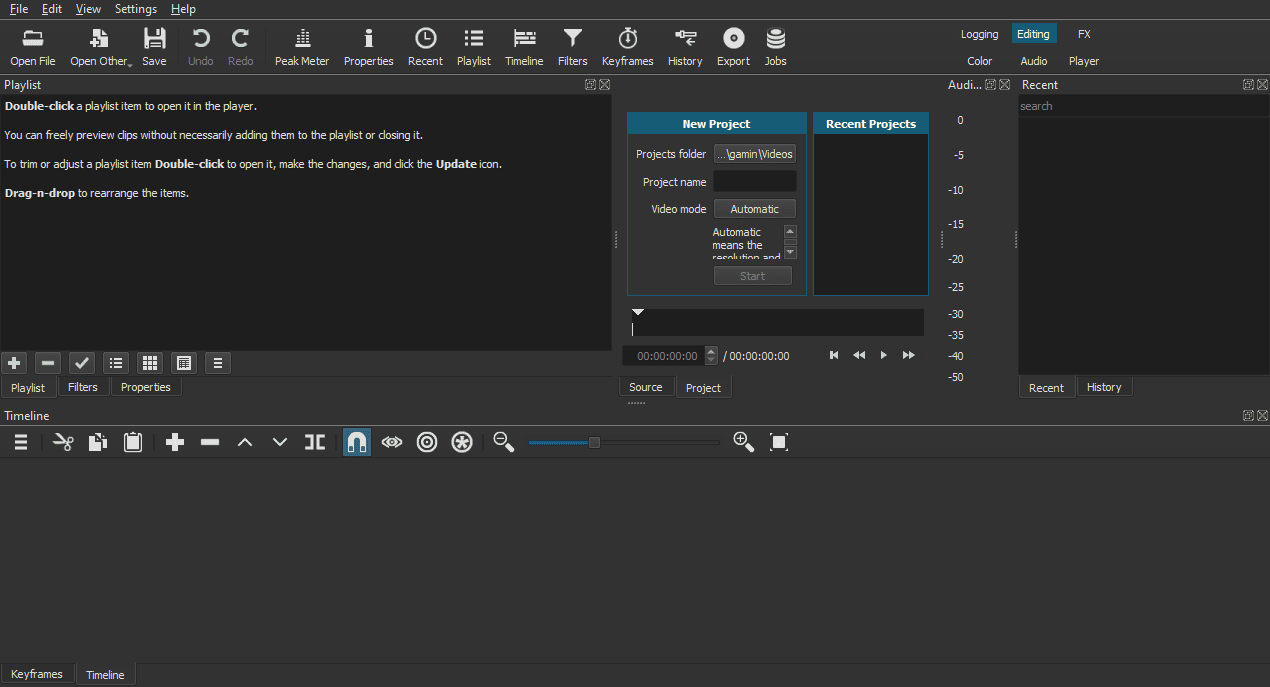
Shotcut video editor interface
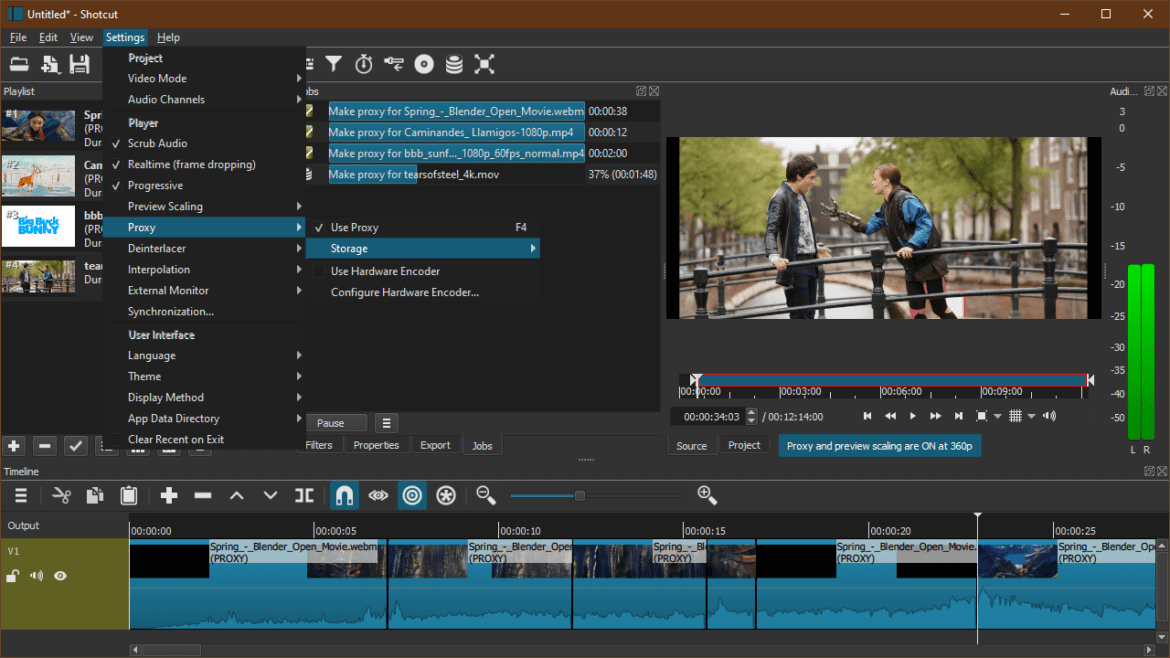
If you’ve used the OpenShot video editor, you’ll find Shotcut’s graphical user interface quite similar to the former. It uses the same all-black color scheme throughout the interface and is exempt from anything over the top. However, it’s worth noting that Shotcut boasts a lighter build than OpenShot and is easier to run on older PCs thanks to this trait.
Launching the application first, all the apparent tools and functions can seem a bit daunting. Still, once you’ve spent a bit of time with this high-performance video editor, you’ll understand that it isn’t as complex as you initially thought.
Let’s work our way up one by one by discussing Shotcut’s most essential features. Of course, after you’ve nailed the basics, you can always invest more time in learning how to use advanced tools and become a professional at this craft.
Importing your project in Shotcut
To get started with Shotcut, you first have to import a video into the video editor’s interface. To do that, click on the “Open File” icon present at the top-left of the screen and choose the file you want to import from your computer’s local storage.
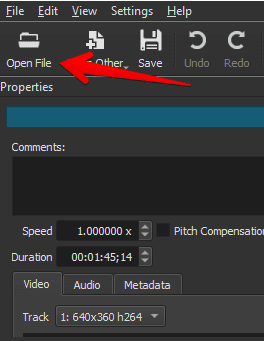
Importing a file in Shotcut
Sometimes when you’re uploading a video to Shotcut, the program will determine that the video isn’t in an edit-friendly form. It will then prompt you to convert the video into a preferable format to move ahead. When you’re done with your imports, check out the next step to move forward with Shotcut.
Playlist panel of Shotcut
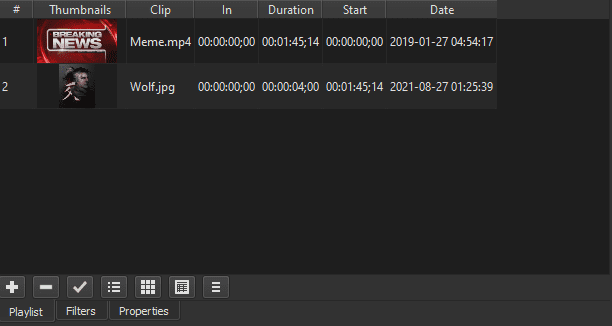
Shotcut video editor’s Playlist area
The Playlist panel of the Shotcut video editor is one of the essential features you should know about. All of your imported files, whether videos, photos, or sound clips, will appear here. Still, you will have to d Using this panel. You can drag and drop your file to the upcoming Timeline area of Shotcut strategically to edit your videos. For instance, if you want a specific photo to appear within a video, you will first place the said video in the Timeline area and then get the picture in there afterward.
The Playlist panel is where you’ll be able to add filters to your videos. For a free video editing application, Shotcut has quite a variety of options available for you in this regard. To bring up the assortment of filters for your video, you first have to click on the “Filters’ button situated at the bottom of the “Playlist” area and then click on the plus button nearby. Be sure that you’ve already selected a clip when attempting to bring up filters for your video. Once done, you will see the list of available filters appearing, where you can experiment around with different results to see what brings the best effect for your project.
Timeline

Shotcut video editor Timeline area
Similar to other video editors, Shotcut has the exact operation of the Timeline panel as its competitors do. It’s single-handedly the critical part of Shotcut where all the magic related to the craft of video editing takes place. Here, you can adjust clips and files to reshape your project following your requirements. You can add as many layers of projects as you want in Shotcut because there isn’t any limit to that.
Once you have your video dropped in the Timeline area from the Playlist panel, it’s time to go to work with it. Again, you can utilize the many tools of the Timeline panel to help you find your way with video editing. Some of the most helpful Timeline tools include Lift, Split at Playhead, Append, and Cut.
Exporting your project in Shotcut

The Export button in Shotcut
When you’re done with all the edits, and you think you’re ready to save your work and share it with people, you can click on the “Export” button within the interface of Shotcut to get your project backed up on your computer’s local storage. You’ll be surprised at the number of available formats in Shotcut. By default, your videos will be saved as an H.264/AAC MP4 file, which is adequate for general and casual users. Still, the file formats that Shotcut has to offer range from MJPEG and MPEG-2 to FFV1 and HuffYUV.
After exporting your video in the format of your choice, you’re free to share your video all across the internet with ease.
Conclusion
The internet is flooded with video editors in the times of today, but the ones that genuinely pack a decent amount of functionality and a good set of features are scarce. However, it’s safe to say that the Shotcut video editor is one of those anointed few that come at no cost but perform like they are a paid software. On the other hand, Shotcut is free to use, open-source, and chock-full of features to handle your basic requirements comfortably. We agree that it doesn’t have an extremely friendly user interface, but if you’re willing to give the editor some time, it’ll quickly become your go-to video editor solution for your projects. We hope that you’ve learned something constructive in this article and that the Shotcut video editor will have your requirements covered with its functioning.
