Table of Contents
Microsoft’s Windows 10 is an operating system that consists of many components. It’s a reasonably complex OS if you decide to venture into it deeply, but it’s also easy to use on the surface level. You’ll find that ever since you’ve gotten your new Windows PC or laptop, it has employed the same wallpaper on the desktop for ages, and now you’re starting to get bored of it. Apart from that, it’s a good idea to personalize your device and apply backgrounds to it in just the way you want.
In those cases, you can easily change the wallpaper on your Windows 10 PC in just a few steps. There are also two different ways of doing that, and both of them are pretty straightforward. Without wasting any further time then, let’s get right into this tutorial.
Changing the wallpaper on a Windows 10 PC
As we said before, it’s nowhere near difficult changing your Windows 10 PC’s background. All you have to do is follow the steps given below carefully, and you will be good to go.
Method 1
1. The first step is to click on your Windows Start menu and search for “Settings.” Then, click on the appearing app icon to get to the next step. Another method of doing the same thing is to click on the “Settings” icon after clicking on the Windows Start button.
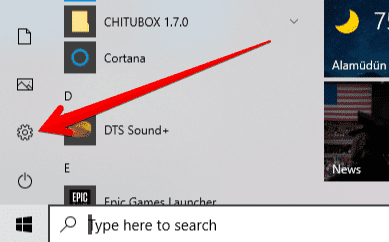
Clicking on “Settings”
2. This should bring up Windows 10’s “Settings” window for you. Your next aim is to click on “Personalization,” which is found on the right-most side of the top row.
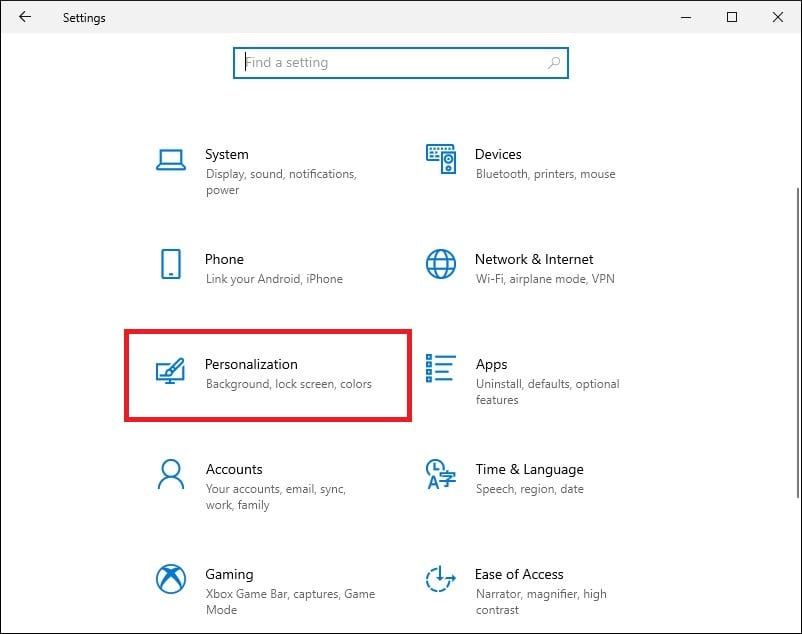
Clicking on Personalization
3. You will be taken to another page within the same window when you have done that. Here, you will be able to choose from a variety of wallpaper options for your Windows 10 desktop. The first box you want to check is to decide whether you want your PC’s wallpaper to be a picture, a solid color, or a slideshow of photos. We will go with the “Picture” option here because it lets you set a constant image of your choice from your wallpaper, but still, you can go with whatever you want. After that, click on “Browse,” and it should open up your computer’s local storage, where you can select the picture you want for the desktop.
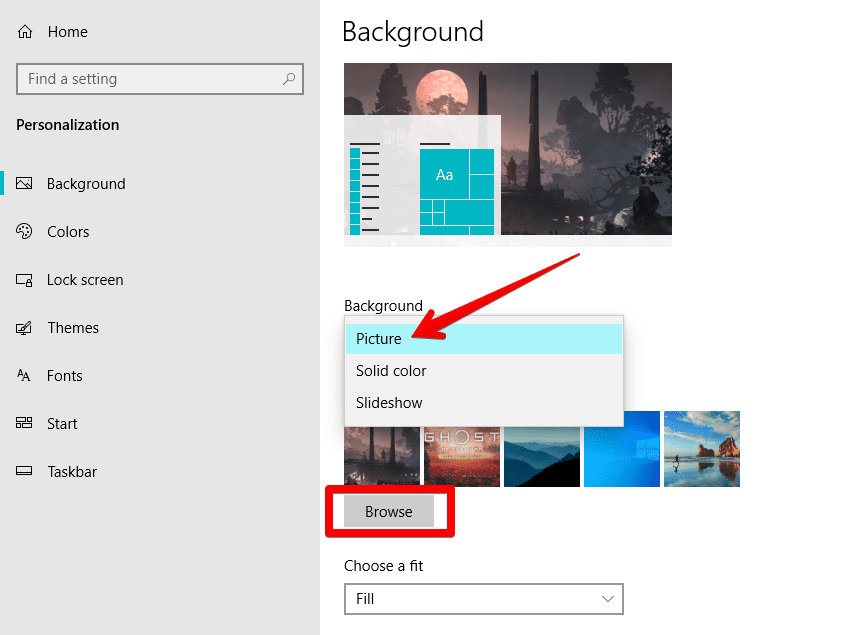
Setting a picture wallpaper on Windows 10
4. Lastly, choose what kind of fit that you want your desktop background to be. It can be Fill, Fit, Tile, Center, Stretch, Span. We recommend going with the “Fill” option because it tends to bring the best results.
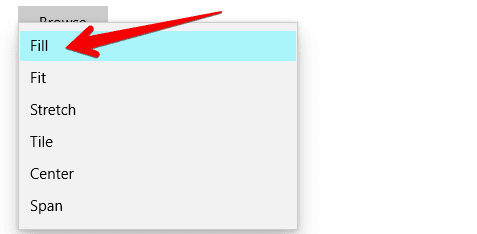
Choosing fit type
You are done! Congratulations on learning how to change your Windows 10’s wallpaper successfully. Let’s now get into the second method of doing the same thing, which is much faster.
Method 2
The second method of changing your desktop’s background is even easier than the first method. The following steps are going to detail the whole process.
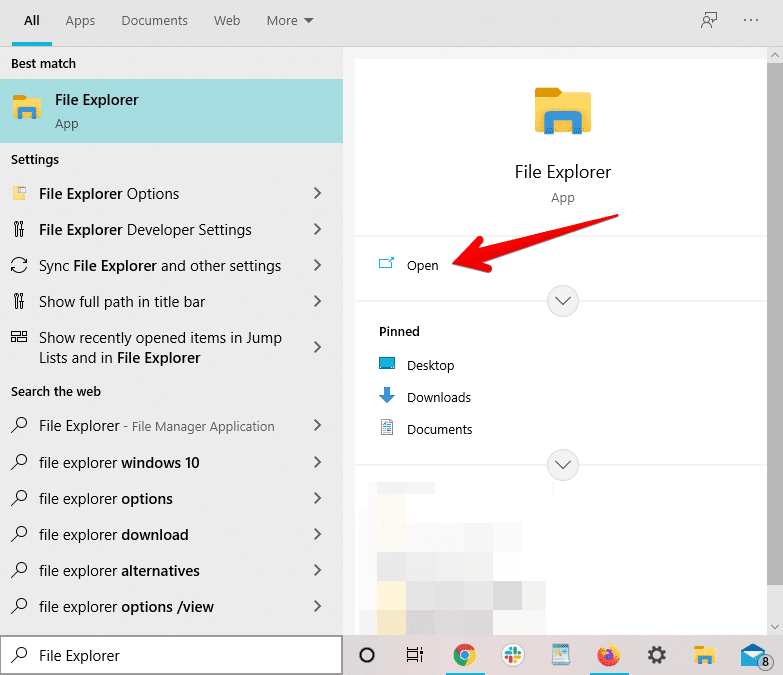
1. Go to your desktop’s “File Explorer” by either using the Windows Start menu or by clicking on the app icon on the interface’s Taskbar if you have it there.
2. Next, when all of your images are present before you, choose the one out of them that you wish to set as your desktop background. Once you’ve decided which one to go with, hover over it with your cursor, and double-tap on it to expand the options. This will allow an option called “Set as desktop background” to appear. Click on it to set the image as your background.
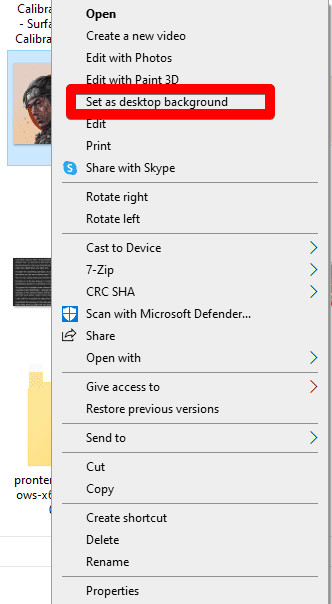
Setting image as a desktop background through File Explorer
After clicking on “Set as desktop background,” your selected photo will be applied as wallpaper to your Windows 10 device. Enjoy your new home screen now, as changing wallpaper on a Windows 10 PC was as simple as that.
Conclusion
Changing wallpapers can often ignite the artist inside you and help you make your computer’s desktop look as attractive as possible. In that case, you should know how to change your desktop background on a Windows 10 computer. In this article, we have shown you not only one but two different ways to do that and replace your old, worn-out wallpaper with a new, stylish one – whatever that you may please. Please follow Windows Pixel for more tutorials like this. We hope that this article will prove to be useful for you.
