Table of Contents
There are plenty of security-grade software in Microsoft Windows that comes with its own set of protocols and distinctive features. Some of these are paid while others are free, and all of them can be downloaded from the internet. One particular program has intrigued the attention of innumerable people across the globe, and it’s called OpenSSL.
Defining the functioning of this software is a little hard, especially if you’re not ingrained with programming and coding. However, one thing is crystal clear when it comes to the working effectiveness of OpenSSL. A website cannot thrive in the business world without an SSL certificate, where OpenSSL comes in.
In the following section, we will explain what OpenSSL is and how you can install it on your Windows PC with the help of a step-by-step guide. Without wasting any time, let’s get started right away.
What is OpenSSL on Windows
Apart from the rest of the major digital certificates, two necessary protocols are required by websites for their optimal working and ranking. Secure Sockets Layer (SSL) and Transport Layer Security (TLS). If we focus on the former here, SSL is integral for a website to rank on the Google search engine and gradually become successful.
If a certain website does not comprise SSL certification, it will be penalized by Google and labeled as an unprotected site. Website owners want that as ranking is the bread and butter of all the websites on the internet. Therefore, we need a solution here that can certify a site with SSL and fall in the good books of Google.
OpenSSL is the solution that we’re talking about. Being based on an Apache-style license, its primary purpose is to implement SSL in websites and make them secure and fast. The program consists of a full-blown cryptography library that allows users to employ various SSL-related tasks.
For instance, by downloading OpenSSL on your Windows PC, you can get yourself SSL certification for a particular website and even manage to go through advanced functionalities like Certificating Signing Requests. In addition, you can estimate the worth of OpenSSL from the fact that more than 66% of all the servers worldwide employ OpenSSL to work.
This started when Google made it compulsory for website owners to have digital certification. However, at first, Google only encouraged the project by providing good SEO for digitally certified websites, but the prospect soon became necessary. The “HTTPS Everywhere” project had drastic repercussions for sites that didn’t have an SSL certificate. Google Chrome, for one, marked such websites as unprotected.
We have now given you a fair idea of what it actually is OpenSSL and why you probably need it in 2022. The following section will walk you through the process of OpenSSL installation on Windows 10, so you can start getting those certificates effortlessly starting from today.
Installing OpenSSL on Windows
Installing OpenSSL on Windows isn’t very difficult. You have to follow the guidelines below, and you will be good to go.
1. The first step is to use this direct link and go straight to the official repository of OpenSSL download links. When you are there, scroll down until you find the 64-bit version of the OpenSSL software installer. Click on the “EXE” button to download the executable installer that we require.

Installing the 64-bit version of the OpenSSL installer
2. Wait for the installer to download on your Windows PC and then go to the Windows Explorer app to launch it when the file finishes downloading. Make sure to run the file as an administrator for the best results.
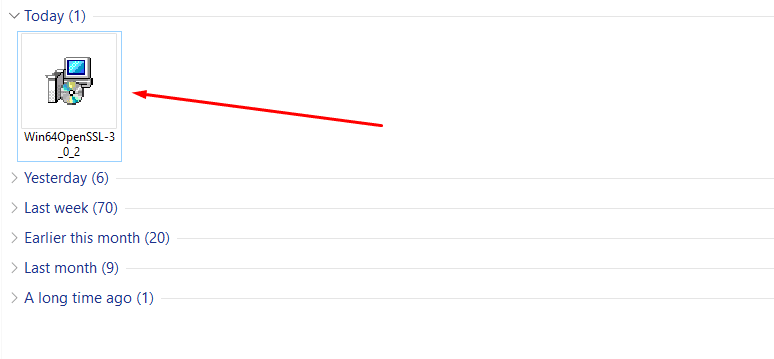
Running the 64-bit OpenSSL installer
3. The first step here is to agree to the terms and conditions of the company. Read through the document if you want, click on “I accept the agreement” and hit the “Next” button.
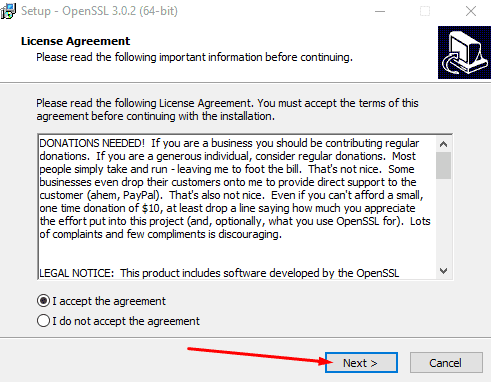
License agreement step
4. The next step is to specify the download location for OpenSSL. You can set this to anywhere on your Windows PC, as long as you’re comfortable doing so. The default file path works pretty well, too, so we will work with that. Click on “Next” after setting the destination location to continue.
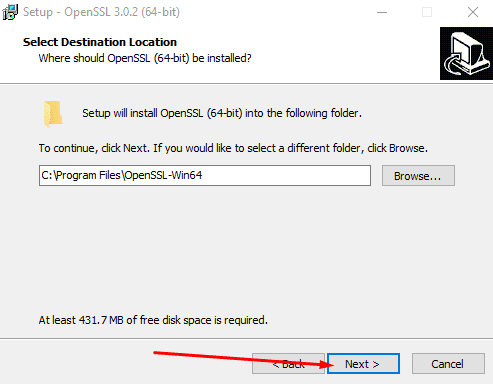
Specifying the download location of OpenSSL
5. You’ll need to set the location of the placement of OpenSSL’s shortcut file. By default, this option is determined for the Start Menu folder, optimal in our case. Still, if you’d like to adjust this to another destination, feel free to click on “Browse.” Click on “Next” to get to the next step.
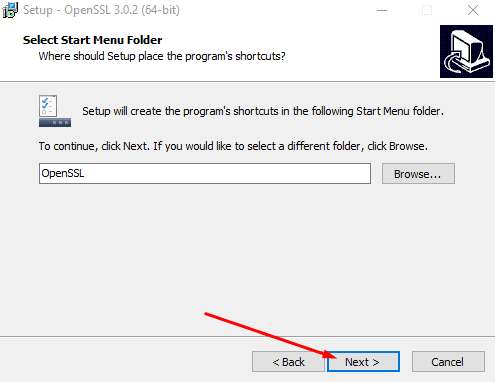
Selecting the Start Menu folder for the OpenSSL shortcut
6. In the next step, you will be required to determine the additional task you’d like to perform. We recommend going with “The OpenSSL binaries (/bin) directory.” Click on “Next” once you’ve selected this option.
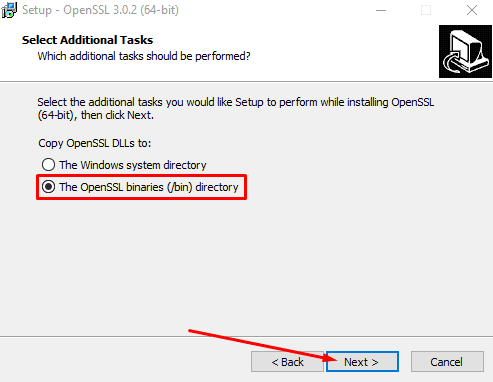
Setting the right additional task
7. You now have to confirm your selections up until now and review them for any mistakes. Click on “install” when you feel comfortable continuing.
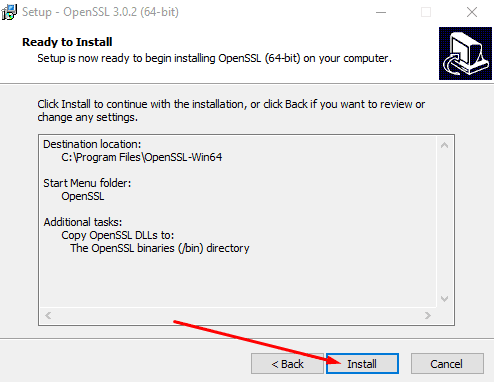
Confirming your selections
8. Wait a couple of minutes until you see the following screen. Here, you may also donate some funds to the developers if you wish to. Choose your option and click on “Finish” to finalize.
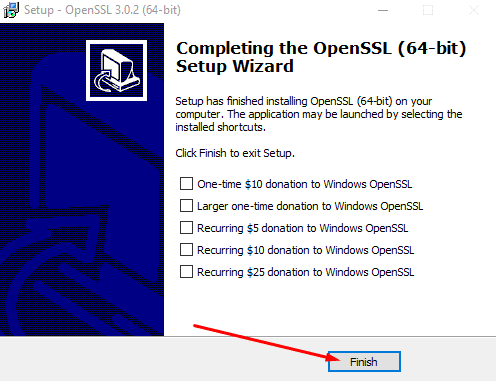
Installation finished
That’s about it! You have successfully learned how to install OpenSSL on Windows 10. After the installation, you can set up the relevant environment variables for the working of OpenSSL, and you’ll have the software up and running in no time.
Conclusion
OpenSSL is a cryptography library of different sets of tools that allows users to perform various functions. Primarily, it is used for allotting digital certificates to websites so they can be recognized duly by Google’s search engine and can thrive on different browsers. The SSL and TSL protocols are mandatory for sites to have in 2022, and there’s just no getting around them following Google’s “HTTPS Everywhere” policy.
This guide has talked about the installation instructions of OpenSSL on Windows 10 in a step-by-step manner. You can have the software up and running by carefully following the written guidelines. You have to grab the installer from the repository online and run it on your PC. Do let us know down in the comments section if any step along the process isn’t working for you.
