Table of Contents
PyGame is a cross-platform set of modules in the Python programming language which means you can install it on any operating system and are designed to write video games. These modules also include graphics and sound libraries that are used together with the Python programming language. PyGame depends on python, which means we have to install python first before installing PyGame.
In this blog, I’ll be showing you how to install Python and then PyGame.
Installing Python on Windows
Downloading
To install Python, visit their website and download the latest version of python 3. If you are using a 32-bit system, choose the “Windows x32 installer,” If you are using the 64-bit system, choose the Windows x64 installer. You should note that the latest version of python doesn’t work on Windows 7 or earlier. This means that you can only use Python 3 on Windows 8 or later versions.
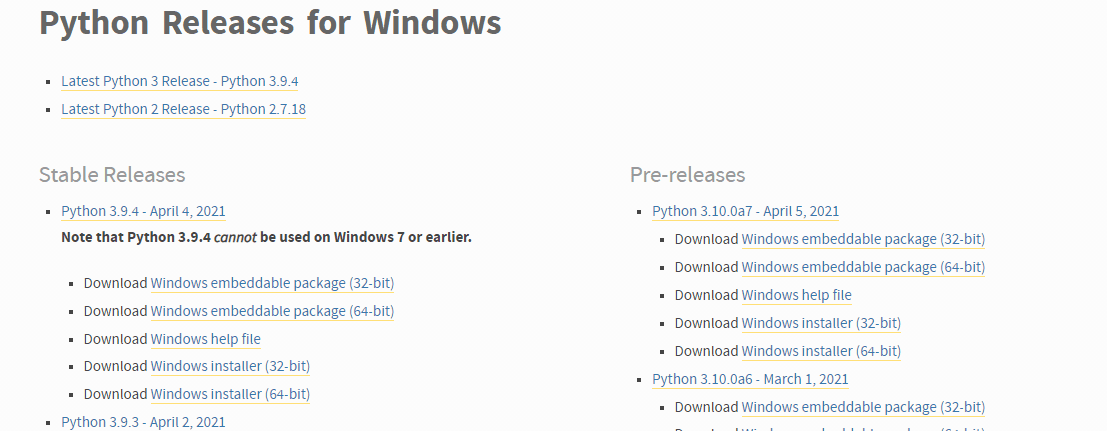
Python Releases
You should be able to download the executable installer. Once downloaded, run the Python installer.
Running the setup
When the installer opens, check the install launcher for all users(recommended) box and add python 3.7 to PATH(optional).
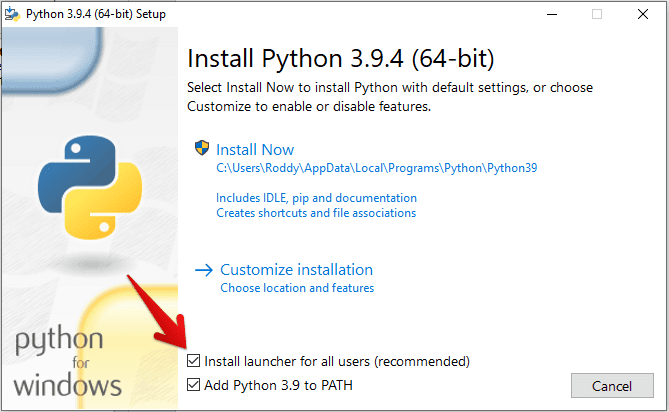
python install
Click on the customize installation and make sure the following boxes are checked.
- Documentation.
- Pip
- Tcl/tk and IDLE(to install tkinter and IDLE)
- Python test suite
- Py launcher
- For all users (requires elevation).
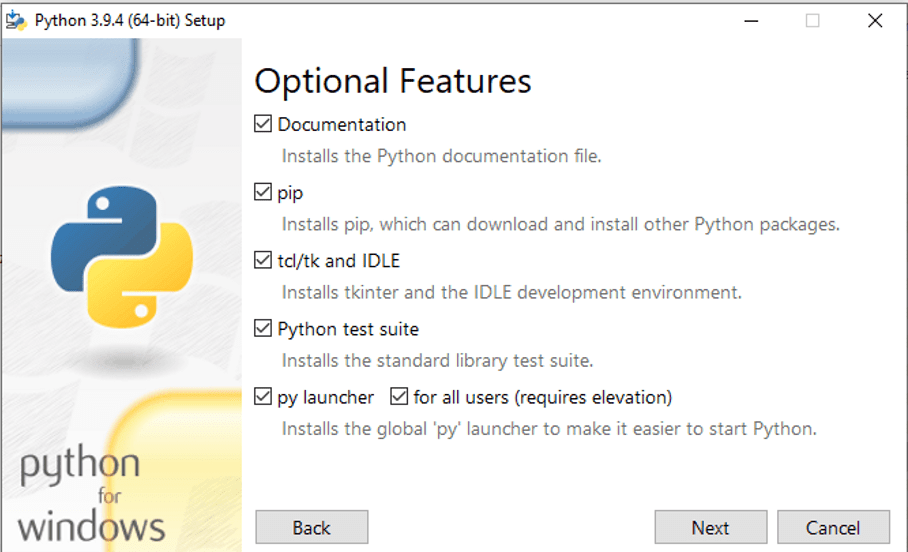
optional features
If you are satisfied with your check box choices, Click “next”.
You will be taken to the advanced options dialog, here you also have to check the following boxes:
- Install for all users.
- Add Python to environment variables (this can be done manually if you don’t check the box, but it will take more time. I recommend checking the box to save time).
Optional
- Associate files with Python (requires py launcher).
- Create shortcuts for installer applications.
You will realize that when you check the install for all users box, precompile standard library will automatically be checked. This is okay.
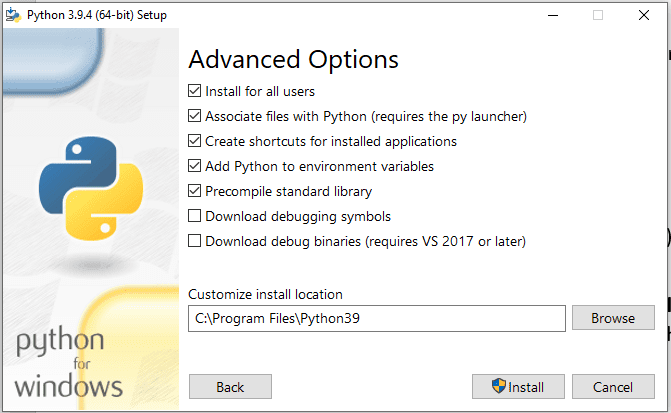
advanced options
Click “Install”.
The installation shouldn’t take very long, and you should see the setup was successful. You have completed your installation, and you can use Python.
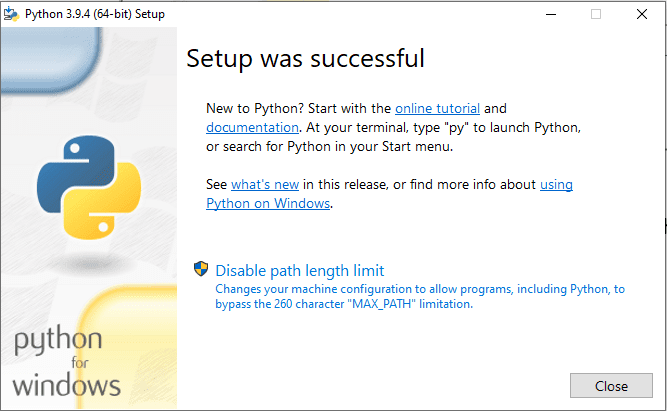
Setup successful
Click “Close”.
Now that we have the latest version of Python running on our computer let’s get to the business that brought us here, that is, installing PyGame on Windows 10.
Installing PyGame on Windows 10
Locating Python folder
Launch file explorer and locate the python folder in the primary disk of your computer. To do this, use the shortcut commands Win+E or open the start menu and search explorer. File explorer should be the first option at the top left of the screen. Click it or press “Enter” to open it.
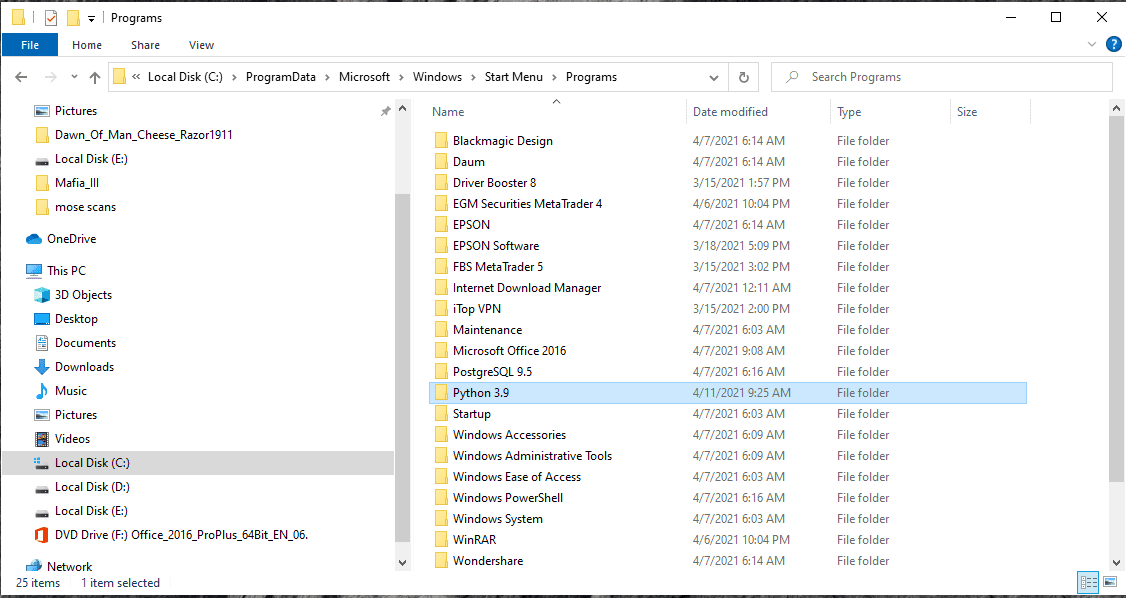
Python folder location
Copy the address of the Python folder. In my case it is:” C:\ProgramData\Microsoft\Windows\Start Menu\Programs\Python 3.9″
Note: If you did not change the installation on the advanced settings, your python would be installed on the default settings of python installation. Please make sure to change the installation path on the advanced settings as shown above.
Copying the path/address of the python folder
You copy this by right-clicking on the Python name at the top of the screen on file explorer and click “copy address”.
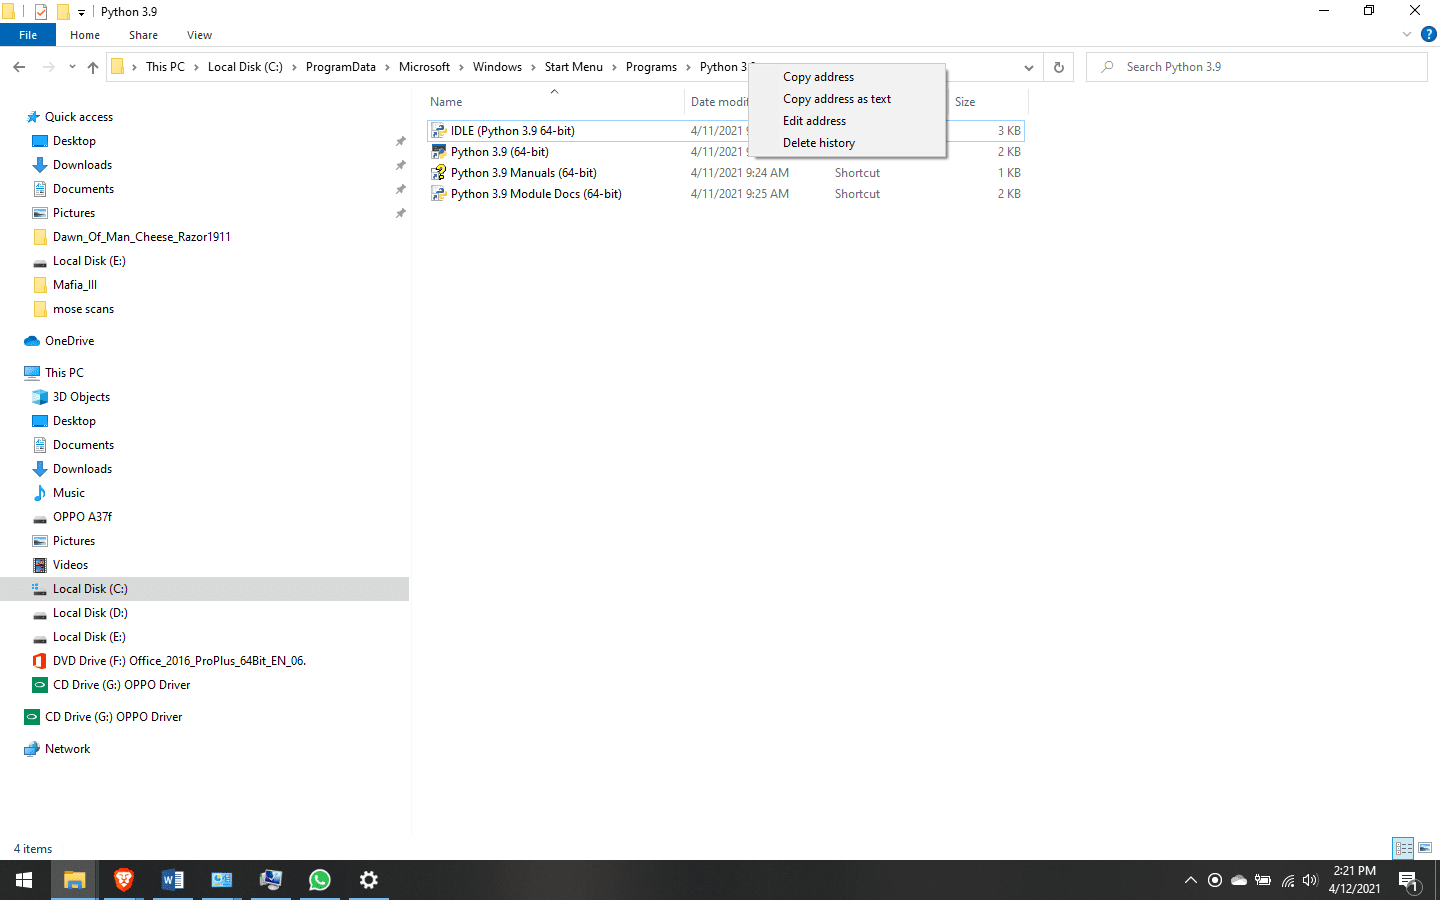
Python folder address
If you changed your installation path, then your location should be as short as this:” C:\Program Files\Python39 ”
Copy this address.
Creating the path
Now that you have your address copied, we want to create a path in the environment variables. So we open the Control Panel. Do this by opening the start menu and search for the Control Panel. The Control Panel should appear at the top left of the screen.
Now click on it or press “Enter” on your keyboard to open it, then click on the System and Security > then Advanced System Settings.
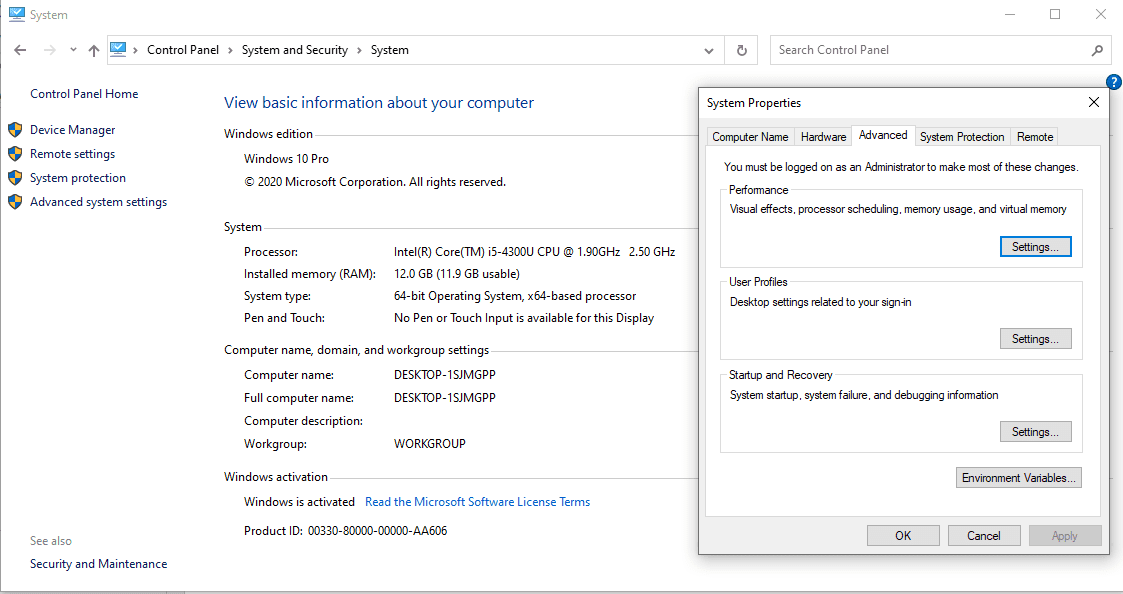
control panel
It would help if you had the above panel opened. Click on Environment Variables.
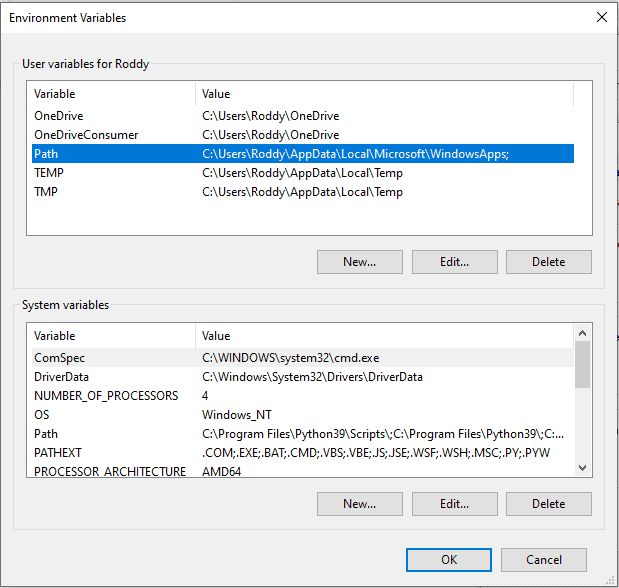
Environment variables
Click “New” and paste the path copied from file explorer into the empty textbox generated on the Environment variables panel like the one above. You can also add Scripts Variable and Click “OK” twice to save the changes.
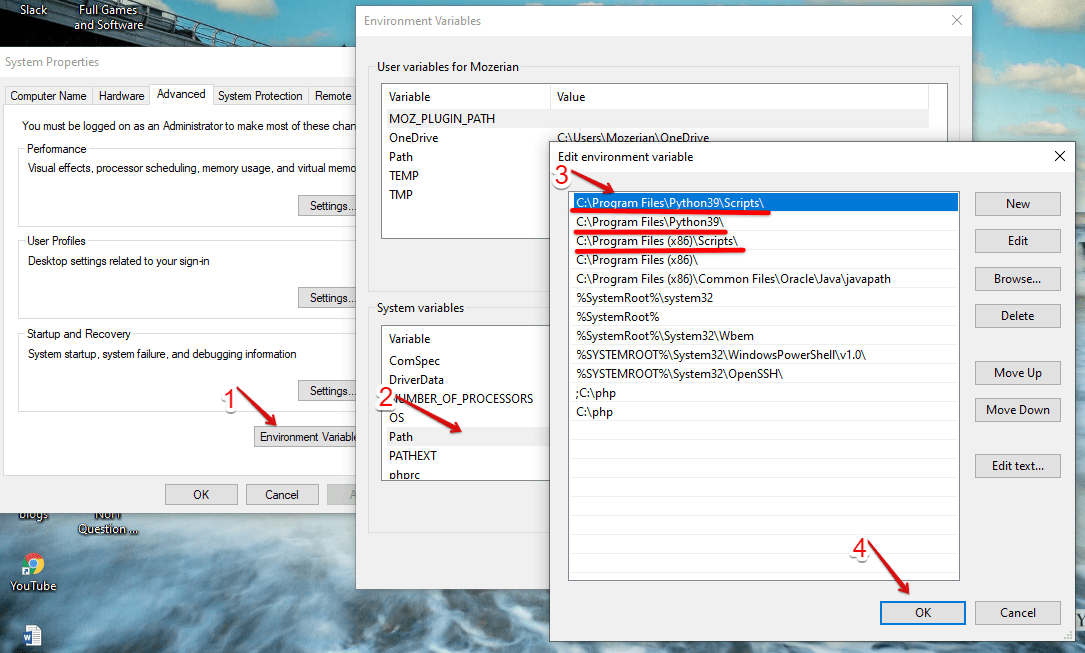
Python Variables
The two methods of installing Pygame
If all is now set, we can head into the last steps of installing PyGame. In this method, we can use the pip install or download the PyGame set up and install from the setup. The pip install gets PyGame from the internet and installs it on your machine during the setup.
Let’s start by using the setup method:
Head to this website Pygame Installer and download the appropriate installer version for your computer. Save the setup to downloads.
To ensure that we successfully installed Python, Open the command prompt as an administrator and run this command.
“python”
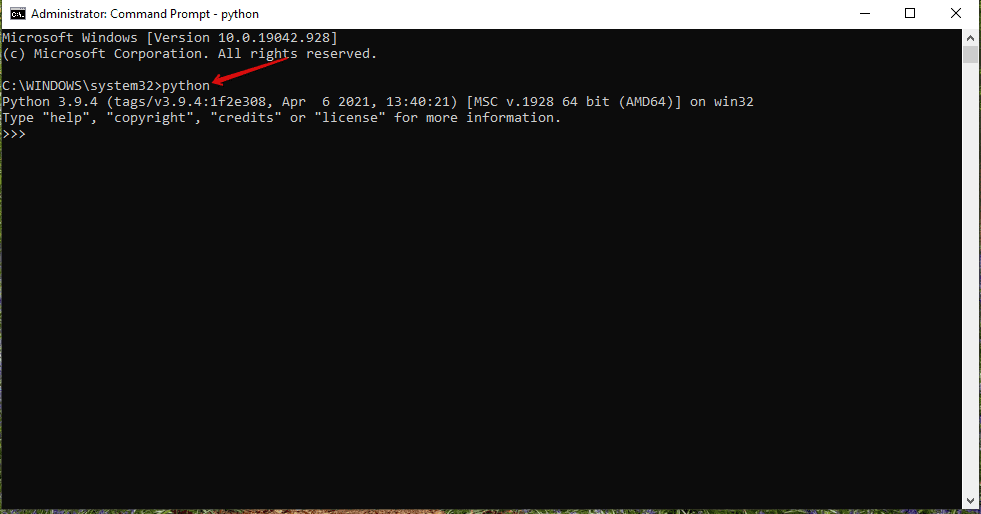
Python Version
This gives you your current installed python version, as shown above.
The next step is to navigate to the location of the downloaded PyGame. In our case:
C:\Users\name\> cd DownloadsThen type the command to install PyGame from the downloads folder as shown below:
C:\Users\name\Downloads> pip install pygame-1.9.1.win32-py2.7.msi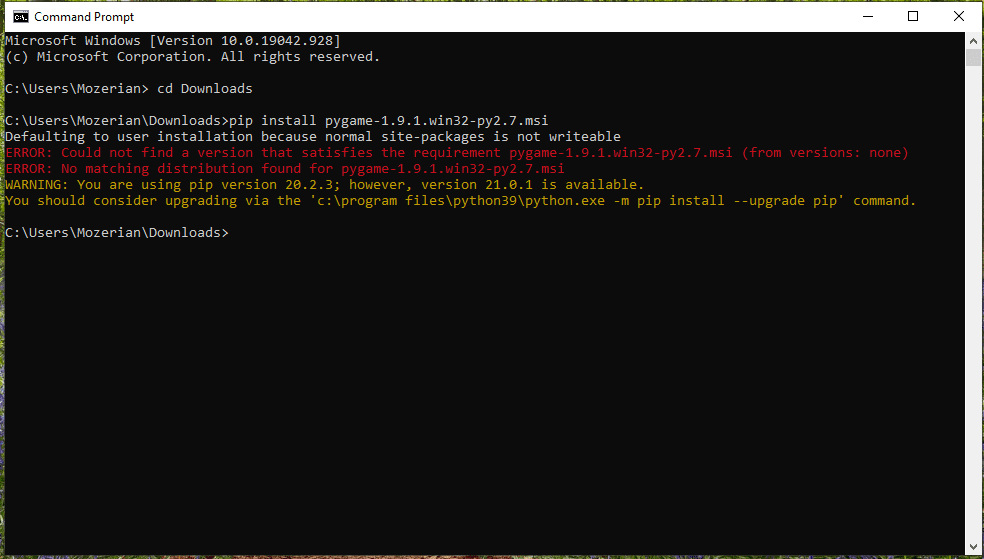
Pygame Install Error
In one way or another, you might encounter this error if your “pip” version is of low version than the current version; hence consider running the below commands to upgrade.
python.exe -m pip install –-upgrade pip

Pip Upgrade
Finally, run the command below to install PyGame from the downloads folder.
C:\Users\Mozerian\Downloads\Programs>pip install pygame-1.9.1.win32-py2.7.msi Let’s now look at the second. The first method can really give you some headaches since you will really do some debugging. I, therefore, recommend using this second option. To install PyGame from the command prompt:
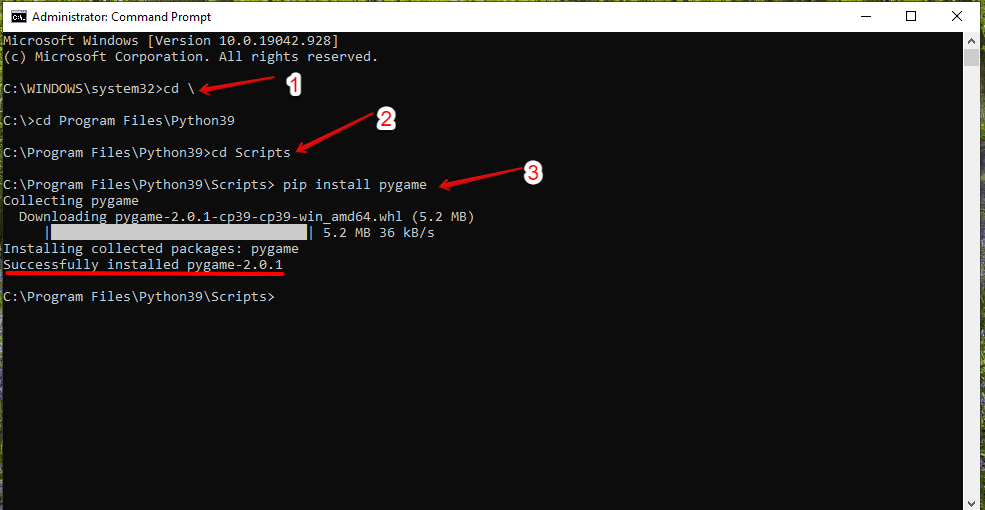
First, open Command Prompt as an Administrator and navigate to the python installation location:
C:\Program Files\Python39
Then cd to Scripts
C:\Program Files\Python39>cd Scripts
You can now install Pygame here: type in “pip install pygame”, and Pygame will be successfully installed.
Install Pygame
PyGame successfully installed. How about running a few commands to launch PyGame and see if it works?
Getting Started with the PyGame
To run Pygame, we must first import all the functions that “Pygame” and “Sys” modules have. Go back to the python location and start python. Write the below commands:
>>> import pygame, sys

Getting started with Pygame
The next step will be to import all PyGame functions. Instead of calling modulename.functionname(), we can do this to import all functions.
from pygame.locals import*We can then initialize Pygame by pygame.init(), and lastly, to display Pygame and run it, we need to set the window size. Type this command, and PyGame will launch.
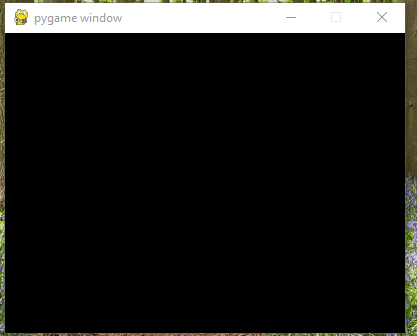
pygame.display.set_mode((400, 300))
Start Pygame
This will now launch the PyGame, on a window set to (400, 300).
PyGame
Conclusion
We have now successfully installed PyGame using the two methods. The only challenge you may overcome when doing this is the necessity to install python first. If you have no background in python, you do not have to worry since this tutorial guides you on a step-by-step basis. You can know to play around with PyGame, such as setting the Window title and any other thing you wish to. I hope this blog was helpful to you when it comes to installing PyGame on Windows 10.
