
Table of Contents
If you are a PC user, you might know Avast as the safest and most popular antivirus program available for Windows. However, with all its advantages, it can significantly slow down your computer, or worse, negatively impact other programs as well. This or any other reasons, for instance, if you would like to switch to another Antivirus and would like to start with a clean slate to avoid conflicts, we have the directions for you.
Well, there are many ways to delete this stubborn software from your Windows 10 PC. This article has listed the three easiest and reliable ways to get rid of Avast antivirus completely. So, let’s begin!
Uninstalling Avast Antivirus on Windows 10
Method 1 – Uninstall Avast from Avast Setting
- Open the Avast antivirus app and tap on “Menu”.
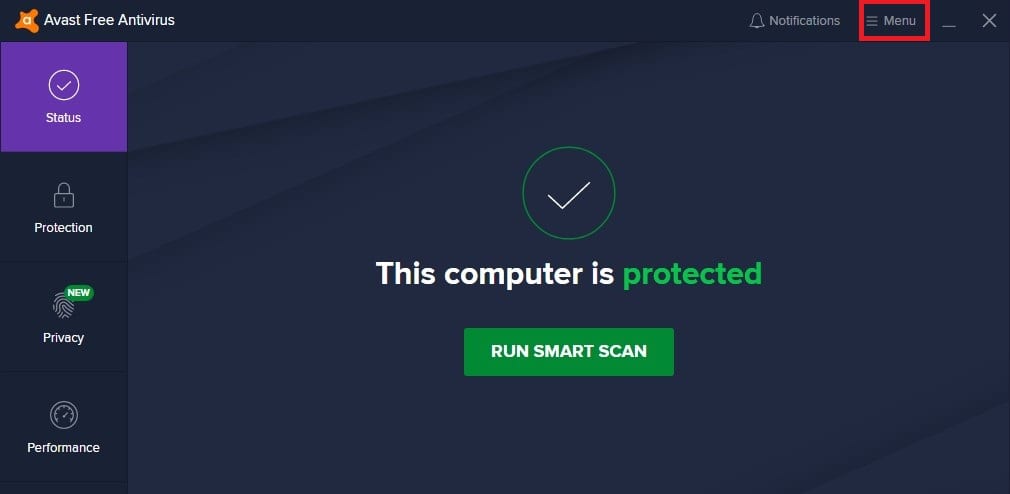
Tapping on Menu
- In the Menu dropdown, click on “Settings”.
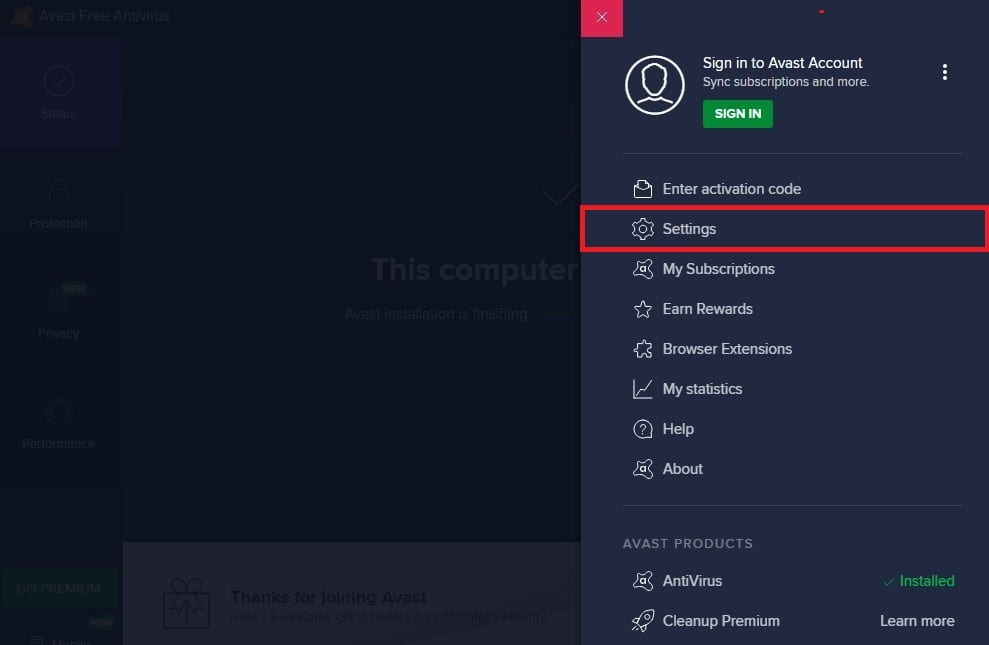
Accessing Settings from Menu
- Switch to the “Troubleshooting” tab and turn off “Self Defense”. Close the application.
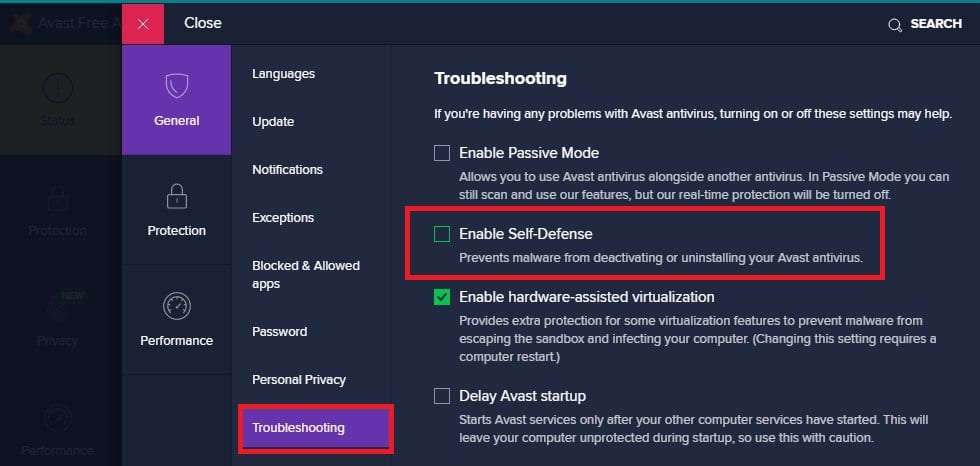
Turning off Self Defense Mode
- Now, press the Windows button on your keyboard and open “Control Panel”.

Opening Control Panel
- In the Control Panel, click on “Programs” and then on “Programs and Features”.
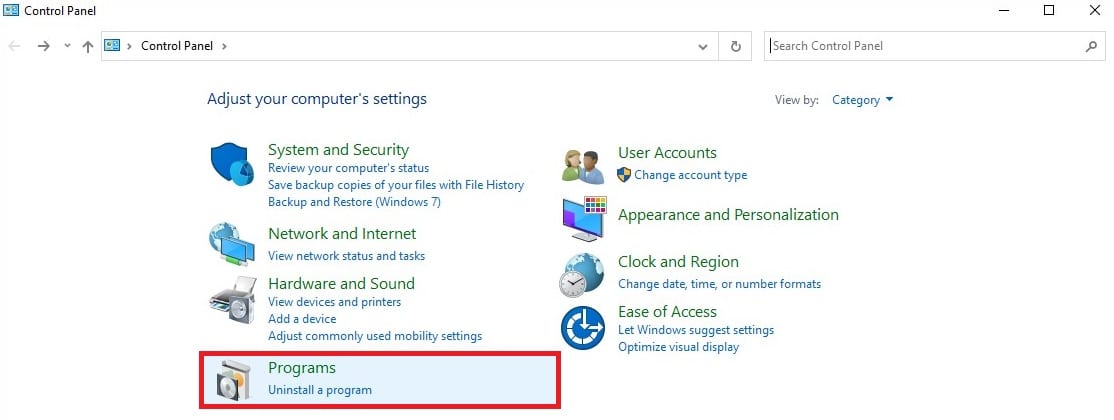
Clicking Programs from Control Panel
- Find and select the Avast antivirus app and later click on “Uninstall”.
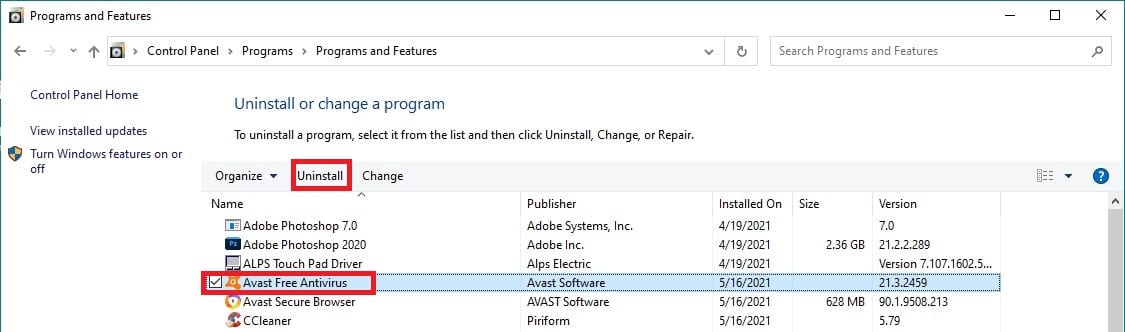
Uninstalling Avast AntiVirus
- Accept the UAC prompt, and the uninstalling process will begin automatically. Wait for few minutes until your system restarts and all the Avast files get deleted.
This is the most used method of removing the Avast software from your system. However, if this method looks complex, there are other straightforward methods of doing it. Below we have shown two more methods to delete this antivirus app from your computer safely.
Method 2 – Uninstall Avast With CCleaner
CCleaner is a popular software uninstaller that removes/ repairs your desired app completely. Here is how you can uninstall the Avast antivirus using CCleaner:
- First, open the CCleaner app and then click on the “Tools” tab.
- Choose Avast antivirus on the list and tap on “Uninstall”.

Choosing Avast antivirus and Clicking on Uninstall
- A configuration screen will show up on your computer screen. Click “Uninstall” to start the uninstallation. Once the process is completed, Avast will ask you to restart the PC.
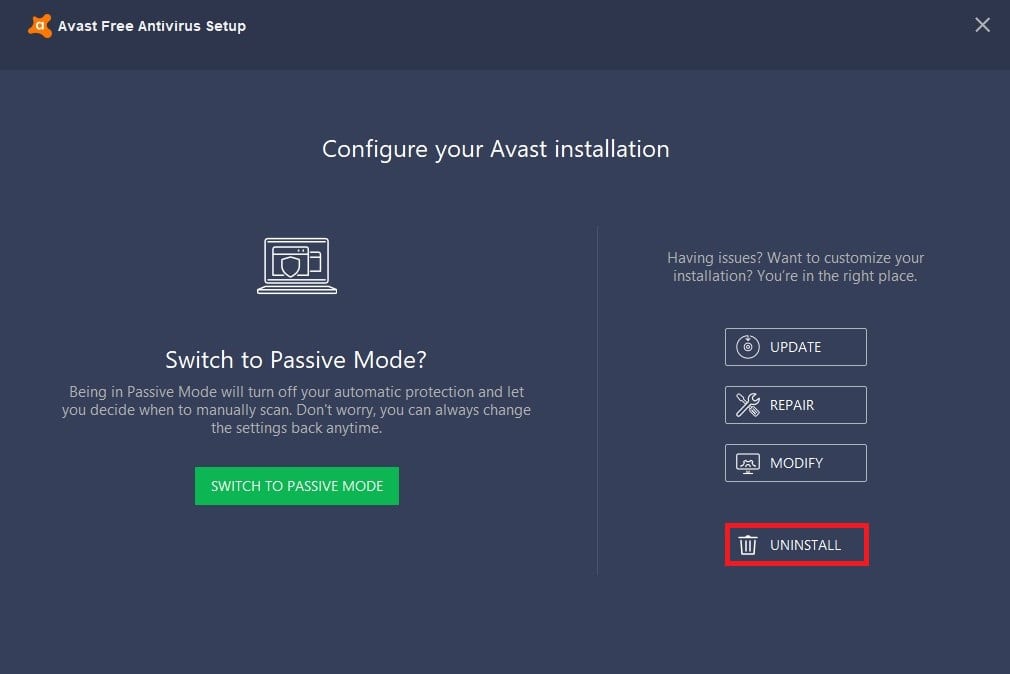
Configuring Avast Installation
- Launch CCleaner and this time go to the “Registry” tab and click on “Scan for Issues”.
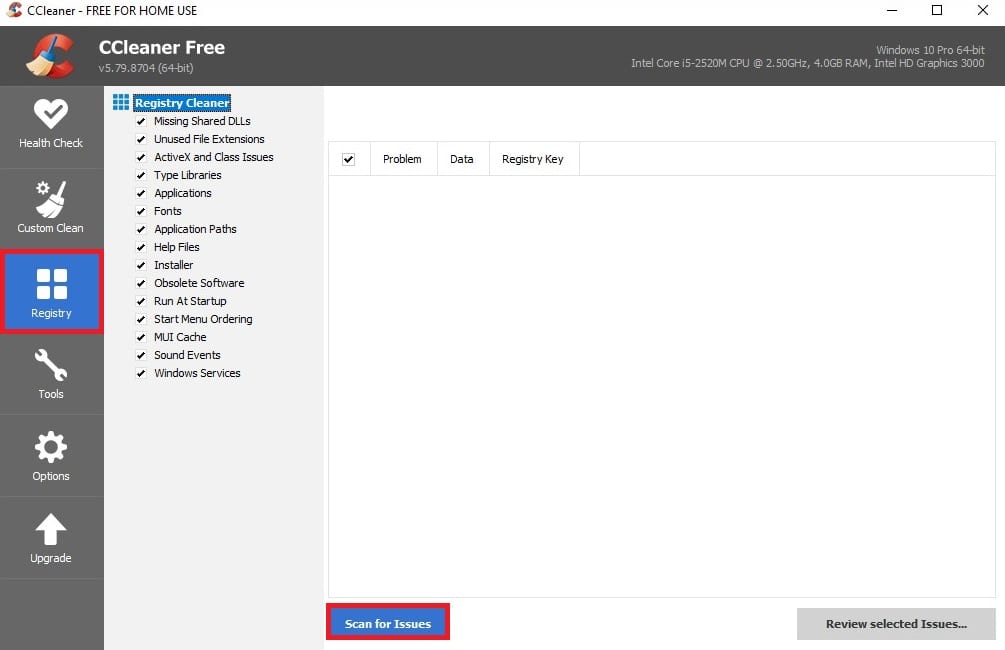
Going to the Registry tab
- Now, tap on “Review selected issues,” and a CCleaner prompt will appear asking you to backup the Registry Changes. Select “No” to this prompt, and all the Avast files will be permanently deleted from your Windows 10 system.
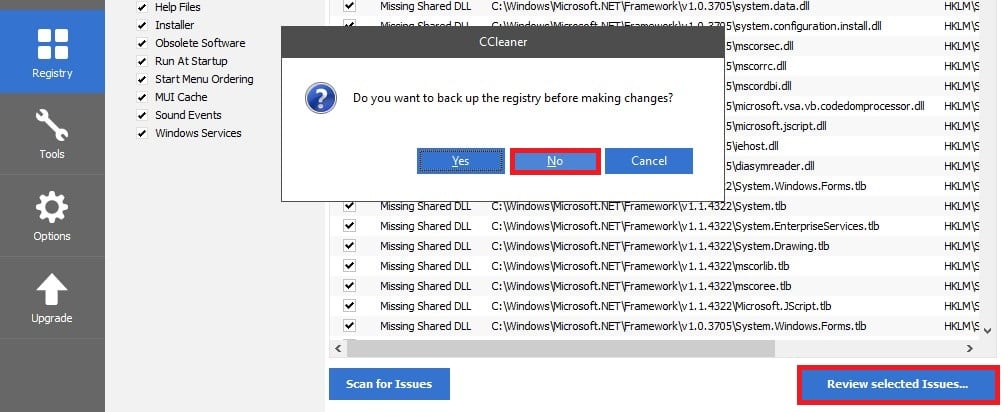
Reviewing or Fixing Selected Issues
Method 3- Use Avast Uninstall Utility
Avast, itself has made a special uninstall utility to make your system Avast-free. Follow these steps to uninstall Avast antivirus using the Uninstall utility:
- Visit avast.com and download avastclear.exe on your system.
- Launch the avastclear.exe app by clicking “Run as administrator”.
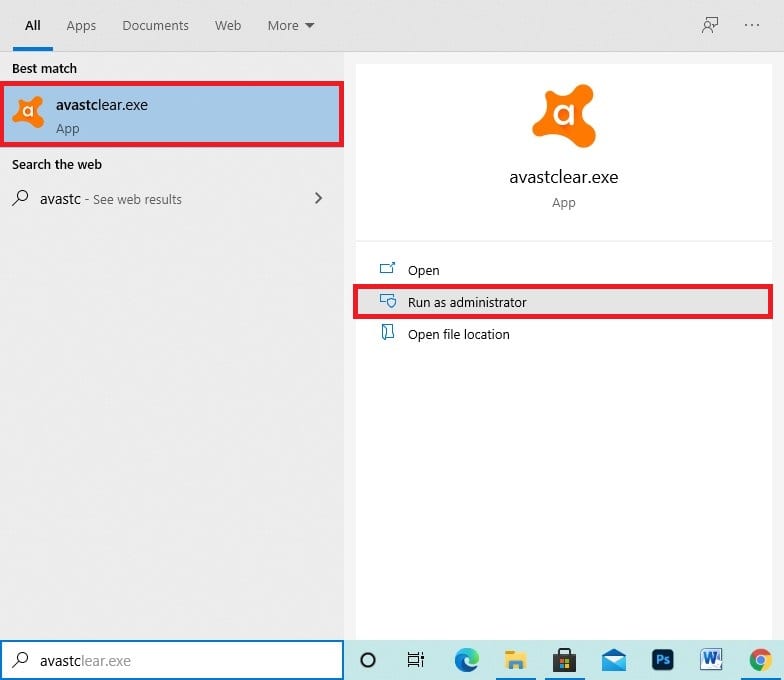
Launching the Avastclear Tool
- A prompt will appear asking you to restart Windows in Safe mode. Press “Yes” to reboot into safe mode.
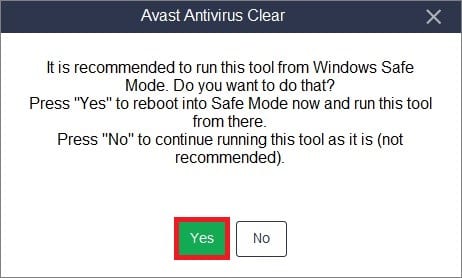
Saying Yes to Windows Safe Mode prompt
- Now, choose the version you have installed. You can leave the box as it is if you are unsure of the version you are using.

Choosing the Avast version and Clicking Uninstall
- Finally, click “Uninstall” and wait until the Avast antivirus gets uninstalled from your system.
Conclusion
You can easily uninstall the Avast antivirus by following any of the above methods. However, after uninstalling this antivirus, make sure to download a reliable Avast alternative to ensure complete malware protection to your system.