Table of Contents
The Windows Operating system uses drive letters to address or identify drive partitions or hard disk drives on a computer. Basically, a drive letter is an alphabet assigned to a particular drive partition to distinguish it from other disc drives. For example, the letter C: is given to the boot drive while other letters D: and E: are allotted to other disc drives. With that being said, you cannot allocate the same letter to two different drives.
Drive letters play a huge role in directing the computer where to search for a particular file. Technically, a file in the D: drive cannot be found in any other drive. Therefore, it makes the searching work a lot easier.
However, while they might seem permanent, the drive letters in Windows alter when some significant changes occur in the system. This initiates a plethora of issues and error messages and needs to be fixed as soon as possible. So, if you are also struggling to restore the system/boot drive letter in Windows 10, here is how you can do it.
What causes the boot drive letter to swap?
Before starting with the restoring process, it is essential to note the causes behind drive letter swapping so you can easily avoid them in the future.
The main reason that initiates drive letter alteration in Windows 10 is system restore. When you restore the computer to its original state, it somehow changes the drive letters without any prior warning.
Migrating Windows OS to SSDs or HDDs by cloning or any other means also results in letter swapping. In this way, the system drive letters alter and take a different letter to the one they previously had. Consequently, the migrating process is interrupted, and ambiguous error messages take up your computer screen.
However, if you are a Windows 10 user, you can eliminate the boot letter swapping risk by taking some precautions before the migrating process. The possible risk measure includes hiding the drive partitions from the Windows OS or clearing out the Window’s memory in settings.
Restoring the System/boot Drive Letter in Windows 10
Using the Registry Editor While you can easily avoid the letters from swapping, restoring the previous letters to the boot drive is a serious business. It will require you to edit the registry, and any incorrect change in the registry can be potentially risky. Therefore, make sure to back up your computer registry before modifying it.
1. Using Registry Editor
The following procedure will help you swap between drive letters C and D. This guide will show you two easy methods to restore the D drive letter (wrong) to the C drive letter (previous settings).
- Go to the Windows search bar and type “Reged32.exe” and Enter. Say yes to the UAC prompt.
- Type or paste the following registry key to locate the mounted devices. Here, you will see the list of all disk drives on your system.
HKEY_LOCAL_MACHINE\SYSTEM\MountedDevices
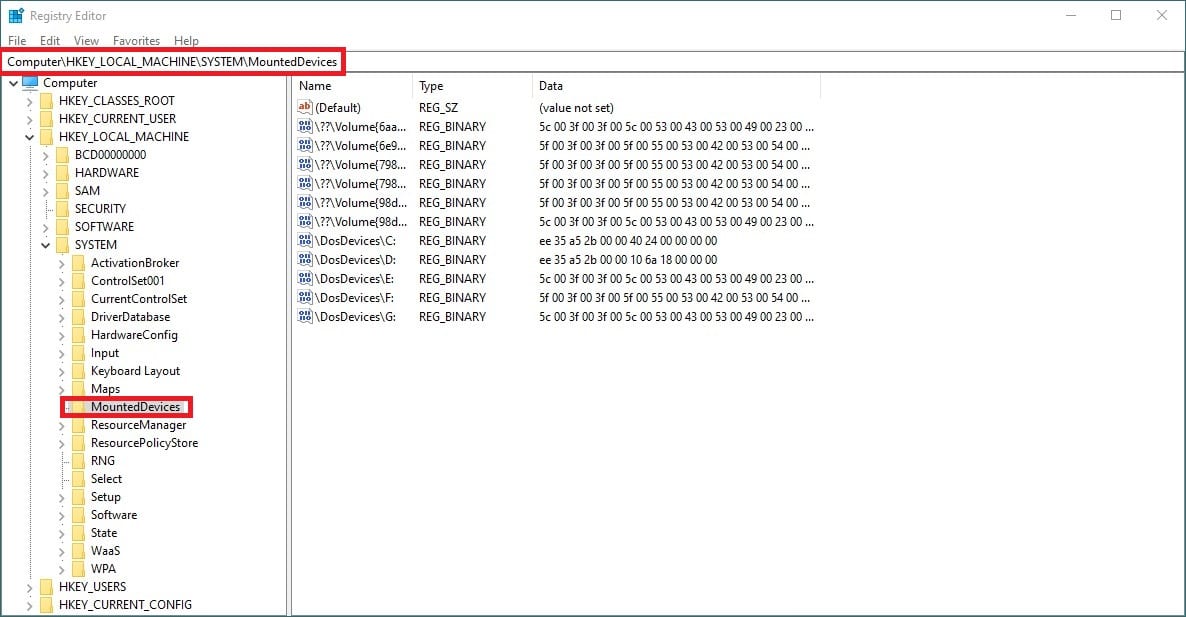
Locating the MountedDevices
- In the left pane, tap on “MountedDevices” and then “Permissions.”
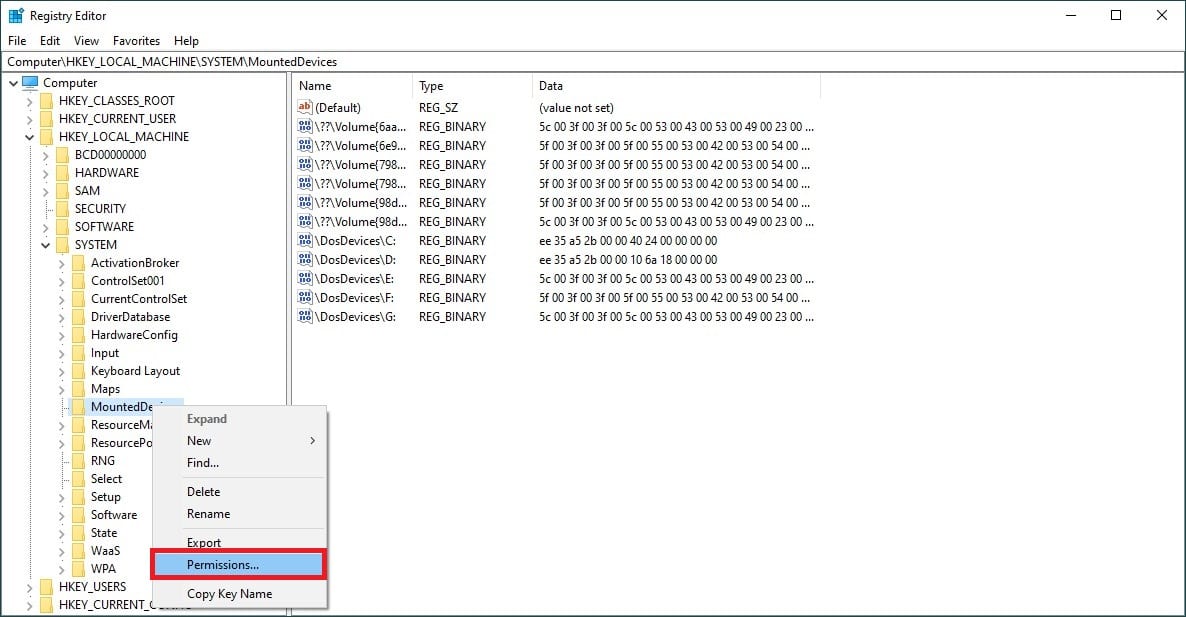
Tapping on Permissions
- In the Permission tab, check “Allow full control box” and click “OK.”
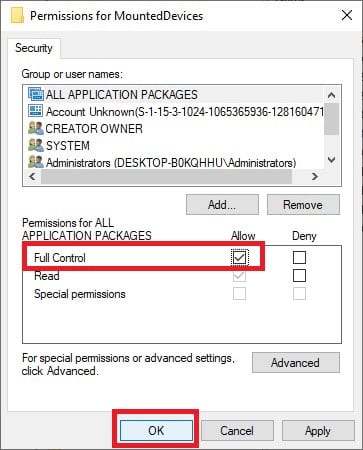
Changing Permissions
- Exit the Registry Editor Utility.
- Now, open the Registry Editor by typing “Regedit.exe” on the Windows search bar.
- Head to the mounted devices by typing or pasting the following command on the registry search bar.
HKEY_LOCAL_MACHINE\SYSTEM\MountedDevices
- Find the drive letter you want to restore, in this case: C. Right-click on it and tap on “Rename.”
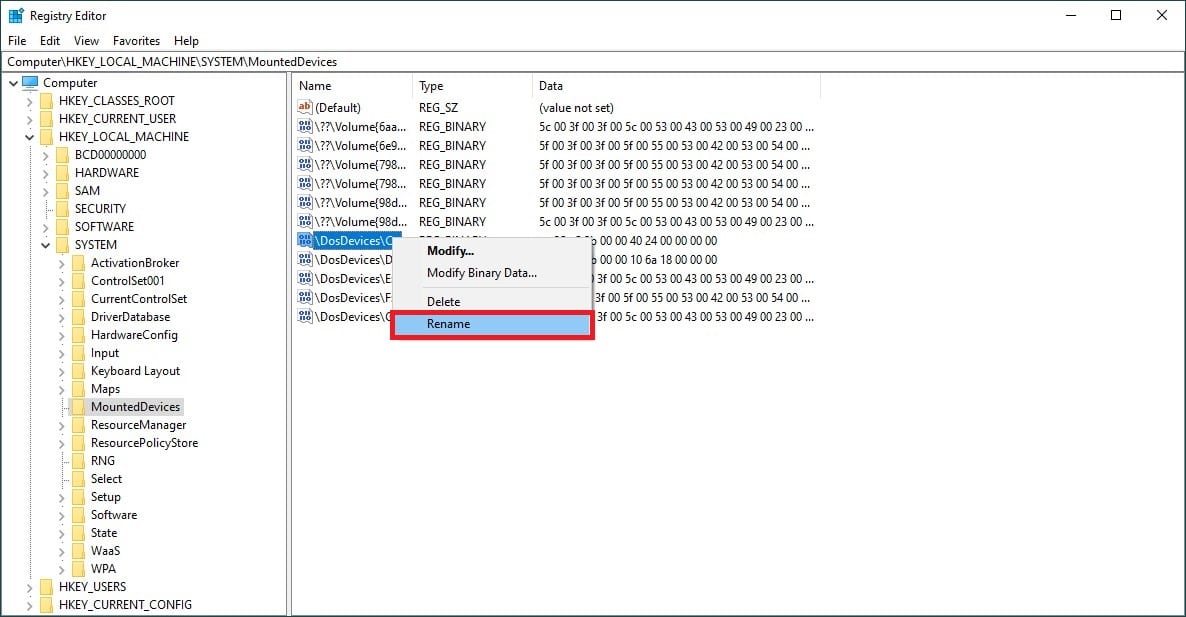
Clicking the Rename option
- Rename to any letter of your choice, but the letter should be new and unused. We have taken the letter X in this example.
- Next, find the drive that you want to restore the C letter to. In this case, it is device D.
- Right-click on the: D drive and click on “Rename.” Rename it to the previous device letter; in this case, we have renamed it to C.
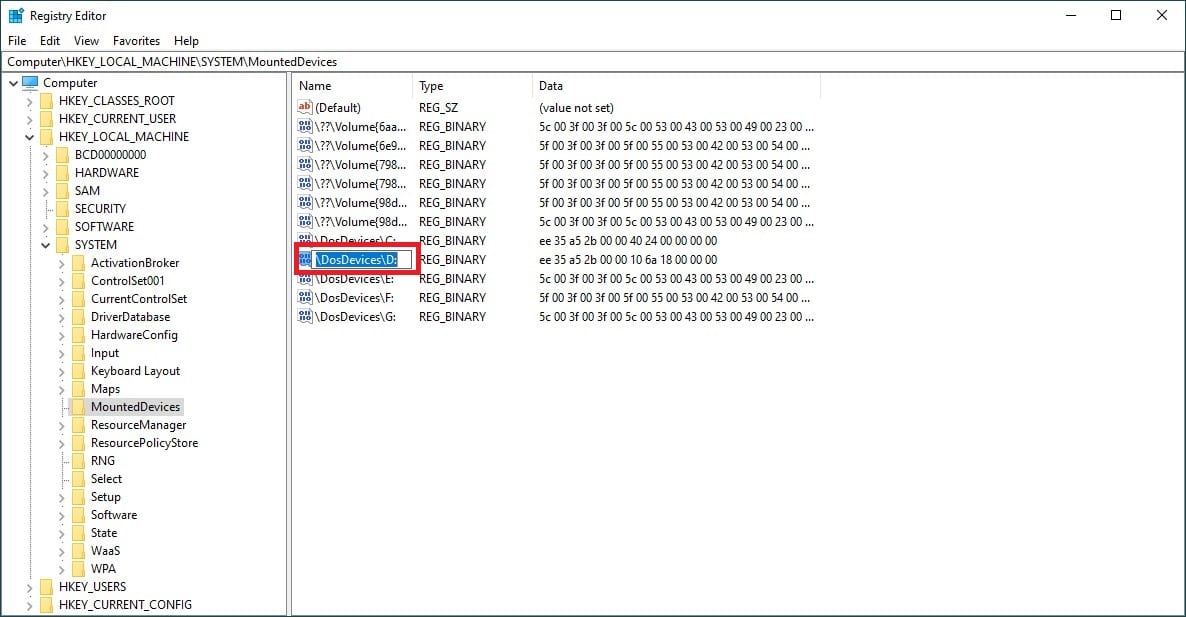
Renaming Drive D to C
- Now, again go to the X drive and rename it to D drive.
- Exit the Registry Editor and opening the Registry Editor Utility as explained in step#1.
- Again visit the “Permissions” tab and uncheck the Full control box and click “OK.”
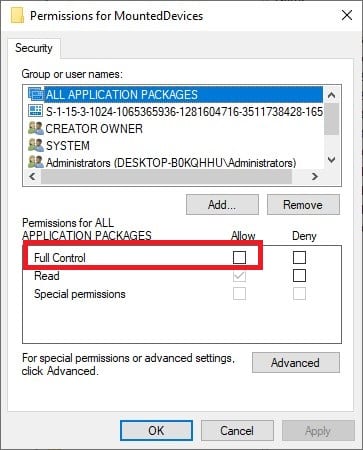
Changing MountedDevices Permissions Again
- Finally, restart the computer to save changes.
2. Using Disk Management
If you want to change the boot drive letter without modifying the registry, you can do so with the help of the Disk management system.
- To access disk management in Windows 10, right-click on the Windows icon on the taskbar and select “Disk Management.” You can also type diskmgmt.msc to access the tool. Just make sure to run the tool as an administrator.
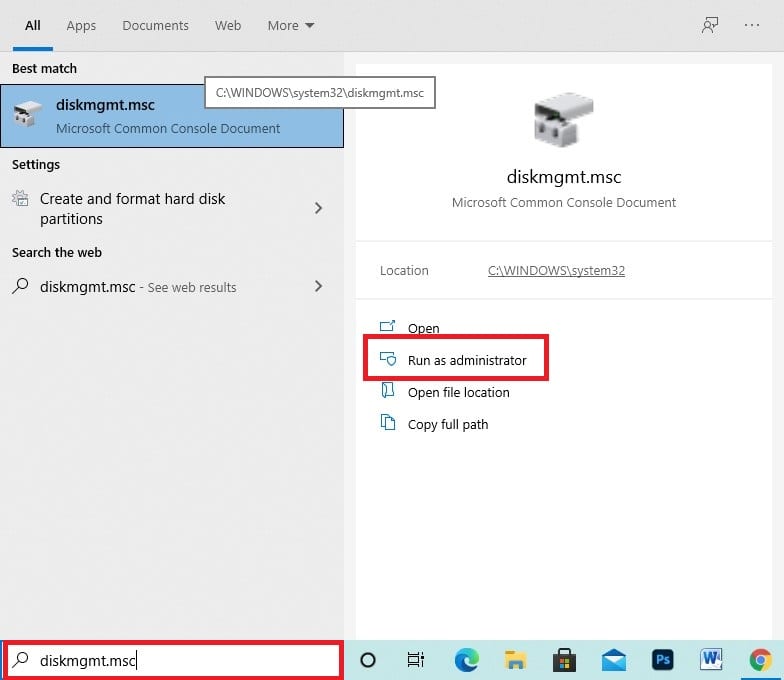
Accessing Disk Management
- Right-click on the volume you want to change and click on “Change Drive Letters and Paths.” Here, we have selected Drive (: D).
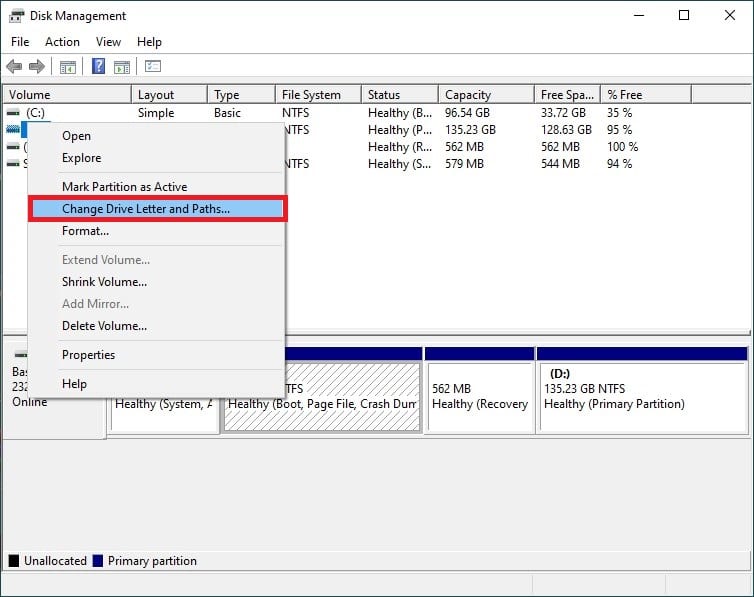
Selecting Change Drive Letters and Paths
- Tap on the “Change” button.
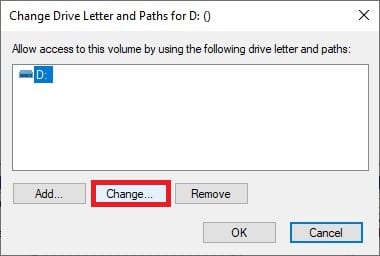
Tapping on the Change button
- Next, select the “Assign the following drive letter” box, and select any drive letter that you want to assign to drive D. In our case, we have chosen the letter G.
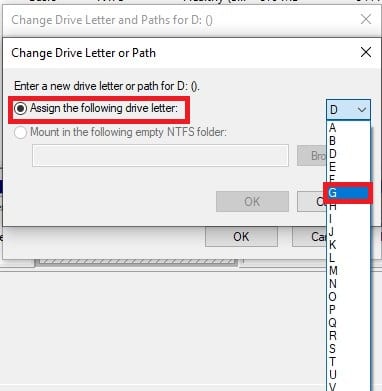
Assigning the Drive letter
- A prompt will open, read it and select “Yes” to it.
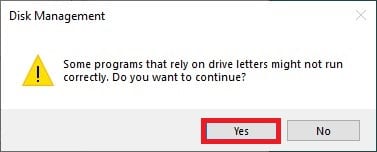
Clicking Yes to the Prompt
Conclusion
You can easily restore your system drive letter by following any of the above methods. Furthermore, you can utilize other commands and tools like PowerShell and diskpart command to restore the system/boot drive letter. However, whatever method you follow, you must be signed in as an administrator to make changes in the drive letters in Windows 10.
