Table of Contents
The GPU plays a crucial role in enhancing the system’s graphics and ensures that your Windows 10 system runs smoothly. Primarily designed for gaming, the GPU also plays its part in content creation and artificial intelligence. Therefore, monitoring your GPU is essential to evaluate its performance and detect any underlying issues in the system.
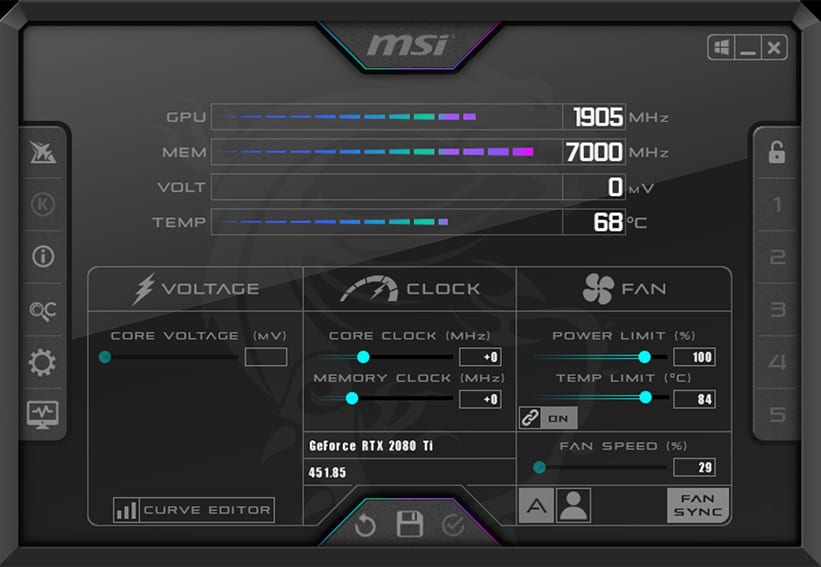
Although many real-time apps monitor your GPU performance, MSI Afterburner is one of the best GPU utilities available today. It allows you to check on all the crucial parameters of a GPU while gaming, like GPU temperature, clock speed, and memory. Furthermore, it also gives additional features like benchmarking, screen capture, and video recording.
All in all, MSI Afterburner is a great and highly recommended tool to measure your GPU performance in real-time. However, most people face a problem after installing Afterburner because they forget to launch the app before running the game. Hence, they don’t receive real-time updates of their GPU.
Thankfully, this problem can be easily fixed in the system’s setting by adding MSI Afterburner to Startup. In this way, you will not have to worry about starting the app every time you play on your PC because it’ll automatically start once you log in to your game.
Adding MSI Afterburner to Startup in Windows
Below we have explained the two easiest ways to add MSI Afterburner to startup in Windows 10.
Way 1 – Enable Startup Apps in Settings
The simplest way of adding an app to a startup is by enabling apps in the startup settings. You can do this by following these easy steps:
- Tap on the Windows button on your keyboard and open “Settings”.
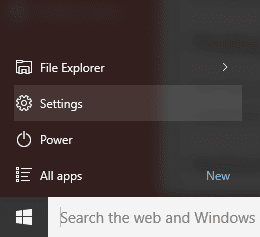
Opening Settings
- In Settings, click on “Apps”.
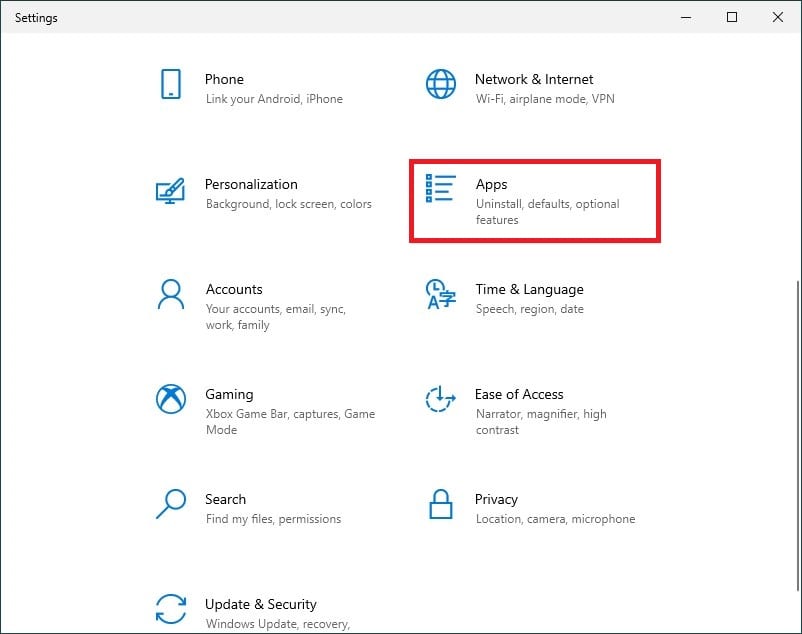
Clicking on Apps in Settings
- On the left pane, click on “Startup” and enable MSI Afterburner by turning on the button.
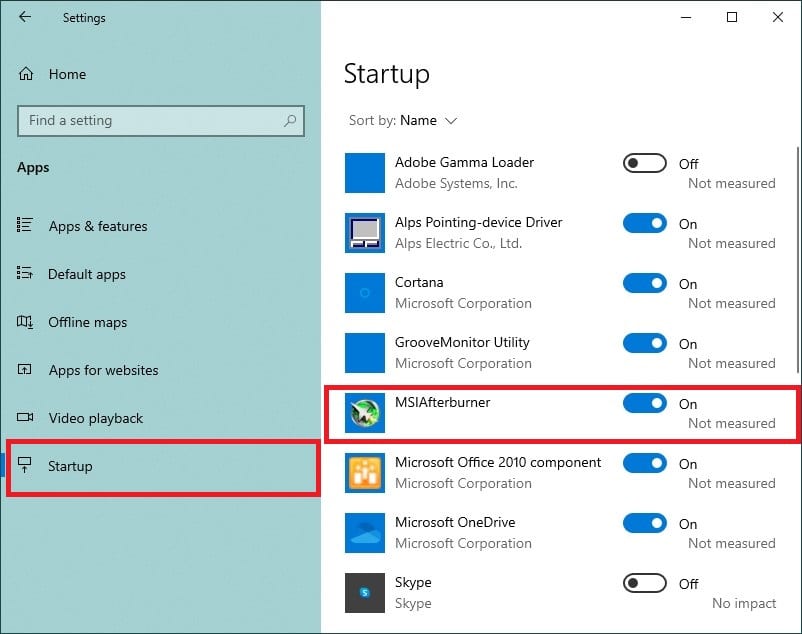
Enabling MSI Afterburner in Startup tab
In this way, the MSI Afterburner will automatically launch itself once you start your game. If this didn’t work for you, you could create a shortcut to run it at Startup in Windows 10.
Way 2 – Create Shortcut
- Press the Windows button on your keyboard and find the MSI Afterburner app from the windows menu. You can search it by typing MSI in the search bar.
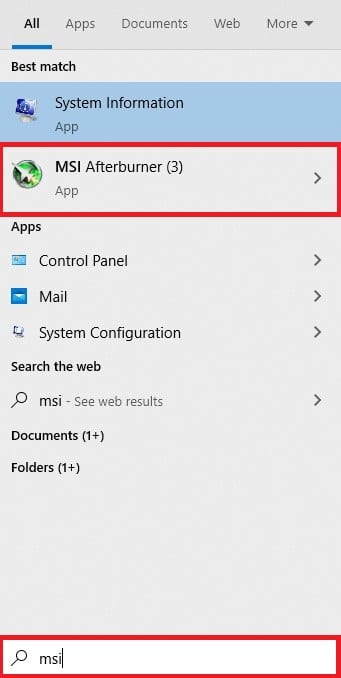
Accessing MSI Afterburner in Windows menu
- Right-click on the app and choose the “Open file location” option.
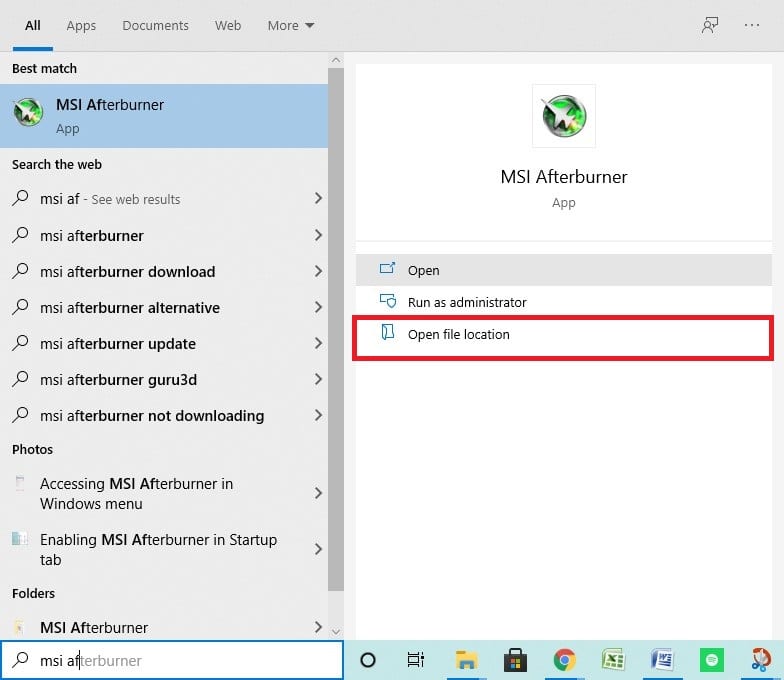
Choosing the Open file location option
- Once the file location has opened, press the Windows+ R keys on the keyboard to open the Run utility. Type “shell: startup” and hit “Ok”. The MSI Afterburner startup folder will appear on your screen.
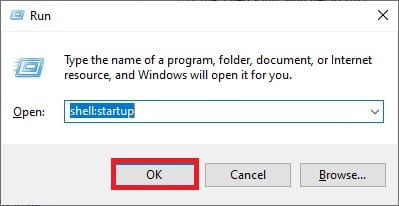
Run dialog box
- Finally, copy the file shortcut from the file location opened above and paste it to this “Startup” folder. This should add MSI Afterburner to Startup.

Pasting the MSI shortcut in the Startup folder
You can also apply the same methods on other apps that you want to add to startup in Windows 10.
Conclusion
Monitoring your GPU’s health is a great way to detect any possible problems in the system. Moreover, it also accelerates the clocking speed. Therefore, adding a good monitoring software like MSI Afterburner to Startup will maximize your system’s performance and save your precious gaming time.
