Table of Contents
Windows 10 is a flexible operating system that is best utilized when used with a Microsoft account. When you make your first Microsoft account, you realize that you must give your account a name to use it. In that scenario, you might have picked your username in a hurry, and you currently don’t like it anymore.
Luckily, there is a painless and quick way of getting a new username for yourself that will have the impression you wanted to have. All you have to do is follow a few simple steps, and you will be good to go.
Therefore, in this article, we will explain two different methods that you can use to change the current username of your Windows 10 account without any hassle. Let’s start.
Changing your username on Windows 10
Option #1:
The following steps will help explain the process in detail, so be sure to follow them carefully, and you will be done in no time.
- In the first step, you have to go to the Windows search bar and type in “Run,” and click on the relevant application on top of the list, as shown below.

opening the run application
2. A Window will appear on your screen where you will type “control userpasswords2” in the given type bar and then click on “OK” to move further.
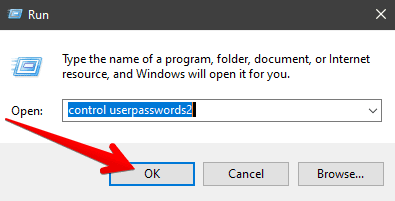
Entering the command in the Run application
3. After you do that, a window will appear where you can select your account whose username you wish to change. To continue, pick the account in question and click on “Properties.”
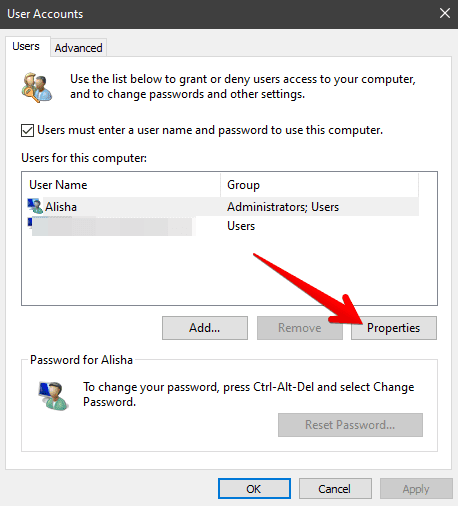
Selecting the user
4. As soon as you click there, you will see that another window has appeared on your screen. Fortunately, here you will be able to change your username easily. Write what you want to in place of the “Username” area and click on “OK” to finalize.
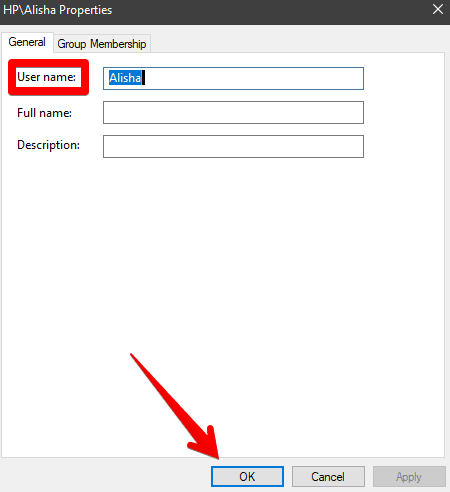
Changing the username of the account
So that’s how you change the username in Windows 10. However, we are not done yet because there is another way to change the username of your account. So let us check out what that is.
Option #2. Using the Control Panel method
One more method for changing your username in Windows 10 is definitely far simpler and uncomplicated, although quite similar to the previous one. So let’s get into it.
- In the first step, we will have to open the Control Panel of our Windows 10 device. This can be easily done by typing “control panel” in the Windows search bar.
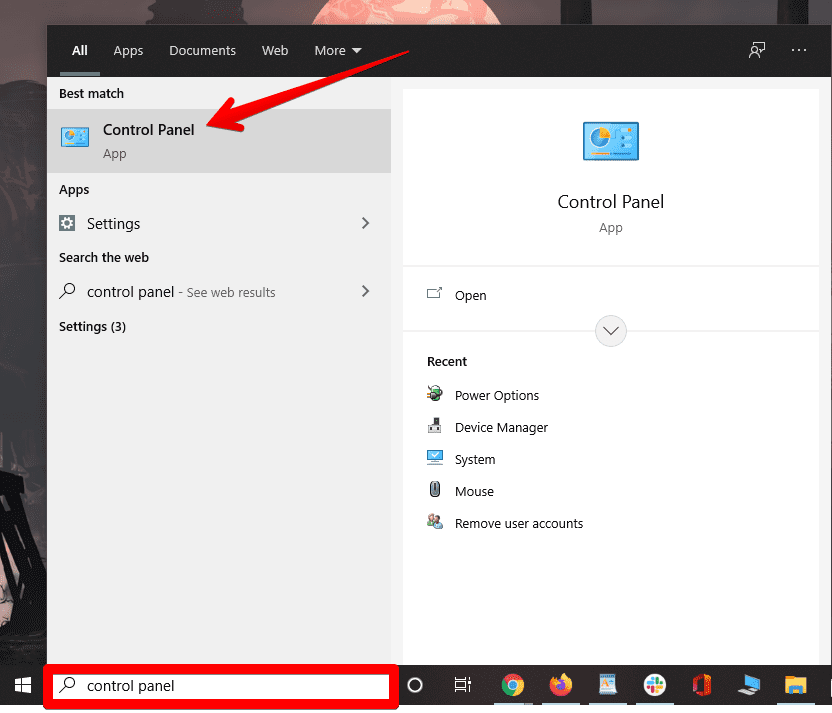
Searching and Opening Control Panel
2. When you have the control panel opened, the next step is to click on the “Change account type” option under the “User Accounts” section, as shown below.
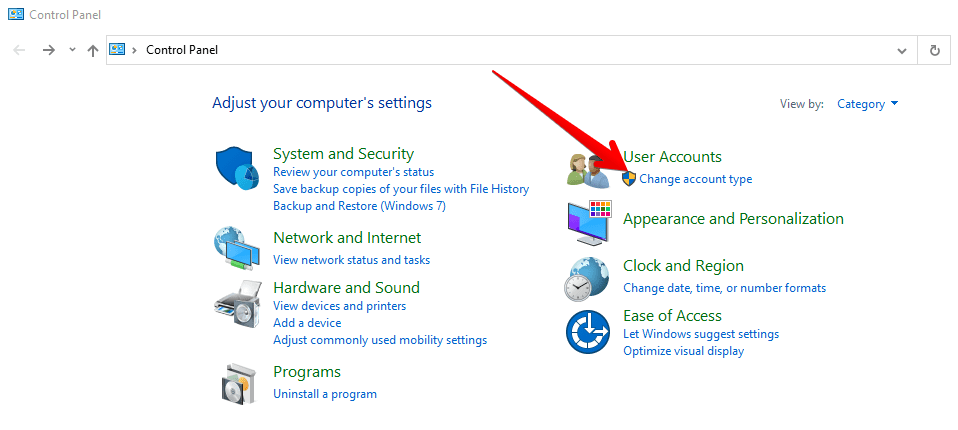
clicking on changing account type
3. After that, you will see your Windows 10 accounts from where you will choose the account in which you want to make changes. Therefore, click on the relevant account to get to the next step.
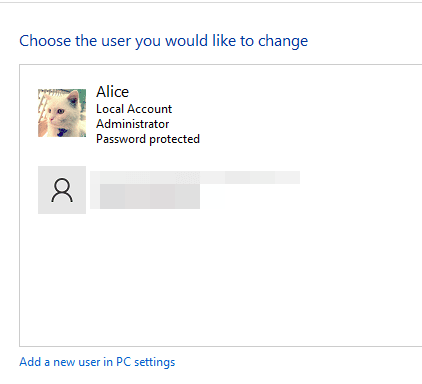
choosing the user account
4. Now, you will see a list of options under the Make Changes section, from where you will click on the first option named “change the account name” to move ahead.
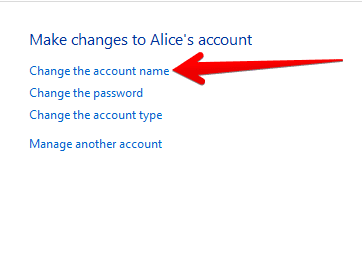
clicking on change the account name
5. In the last step, you will type in whatever name you wish to change your account name into in the given bar, and then finally, you will click on “Change name” to end the process.
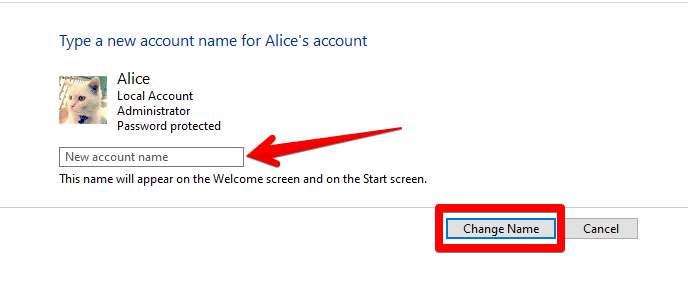
changing the username of the windows 10 account
That’s about it. You have successfully learned how to change your username in Windows 10 after following the steps above. Good job on completing the process.
Conclusion
Windows 10 runs optimally when you have your Microsoft account signed in. However, it’s equally easy to use the operating system with another account without signing in properly, even if you don’t do that. Many people use multiple accounts at once, and soon after they do that, they start noticing inappropriate usernames that they might have picked inadvertently. In this Windows Pixel article, we have shown you two easy methods that can be utilized to change your username without any hassles or to resort to the installation of third-party software. You can try both of these methods to replace your incorrect usernames with proper ones easily. We hope that you will find this article helpful.
