Table of Contents
Windows 11 has leaked just before the official Microsoft launch event on June 24th. Although we never recommend installing an unofficial version of any software or operating system, we tested the leaked Windows 11 build carefully on our test PC. We dug deeply into the build to let you know what’s coming up on the next version of Windows.
This new leaked build 21996 may be unstable, may contain bugs, may not be safe. Hence you may consider installing it on a secondary device if you want to, or let us do that tricky part and give you first impressions of Windows 11.
Creating Windows 11 USB Drive
Once you have downloaded Windows 11, go ahead and burn it into a USB drive using Rufus or PowerISO. I prefer using Rufus since it’s fast and allows you to choose the boot option partition scheme, either MBR or GPT depending on your hard drive partition scheme. MBR stands for Master Boot Record used in BIOS partition table. On the other hand, GPT stands for GUID Partition Table. GPT uses UEFI (Unified Extensible Firmware Interface).
How to check MBR or GPT partition scheme
The most benefit of GPT over MBR is that you can have more than four partitions on each disk. To check your disk partition scheme, we are going to use the Command prompt as an administrator. Open Command Prompt as an administrator by right-clicking on the start button and select ‘Command Prompt (Admin)’.
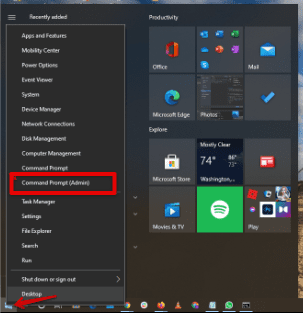
Command Prompt Admin
You will then type in ‘diskpart’, and press ‘Enter,’ this will display the Microsoft Diskpart version on your computer. Type in ‘list disk’ and press ‘Enter’ again to display the disk partition scheme.
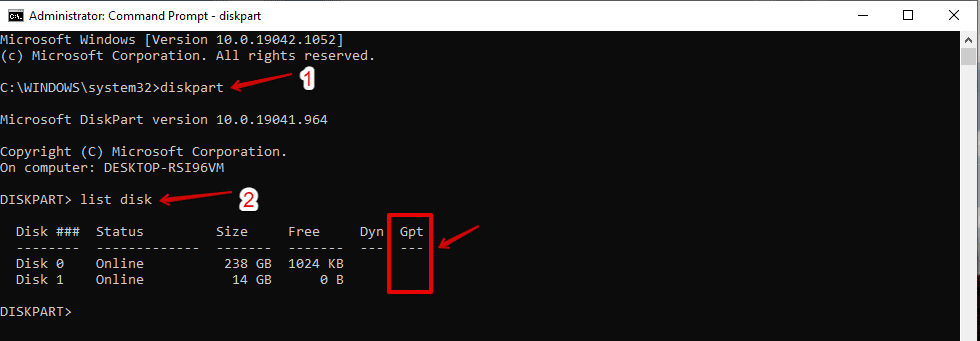
Showing Partition Scheme
Since we can now determine the partition scheme on our hard drive, let’s go ahead and make our USB drive bootable using Rufus.
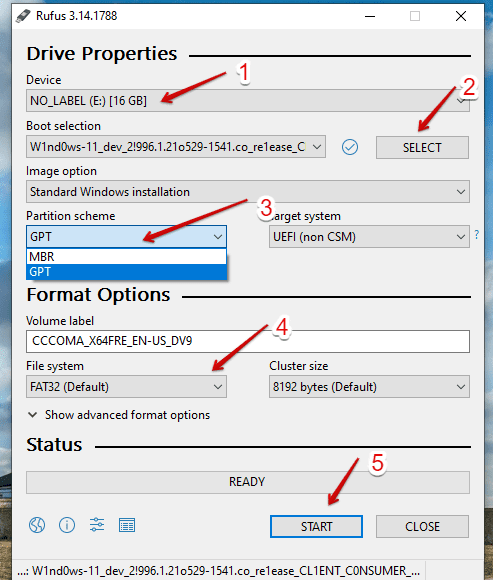
Rufus
From the image above, (1) represents the label of your USB drive. Once your USB drive is detected on your machine, it should appear in this section. (2) Allows you to select the location of your downloaded Windows 11 ISO file from your PC. (3) Depending on the partition scheme of your PC determined above, choose the correct partition scheme from here. (4) Allows you to choose the file system. It can either be FAT32 or NTFS. In this section, I prefer choosing FAT32 due to its compatibility with different operating systems. Lastly, (5) allows you to start the booting process. Click on start and allow the process to finish.
Once done making your USB drive bootable, go ahead and restart your PC and boot from the USB drive. Press either F9, F12, F10, or ESC to display the boot options depending on your computer brand (Dell uses F12 to display the boot options). A menu will appear, allowing you to select the mode to boot in. This menu may differ depending on the company that created your BIOS (Basic Input/Output System) version. Here, the GPT partition scheme goes best with the UEFI target system, while MBR goes with the legacy boot. Legacy boot means the process of booting your PC using the BIOS firmware. Most recent computers use EUFI since it provides more advanced capabilities such as a user-friendly graphical user interface than BIOS. It also allows controlling the interface using the mouse; wherein BIOS can only use the keyboard to select options.
Windows 11 installation will now begin.
Installing Windows 11
The installation is quite similar to Windows 10, though, with a few features added. The next window will prompt you to choose the Language to install, Time and currency format, and keyboard input method. Select these categories and click ‘Next.’
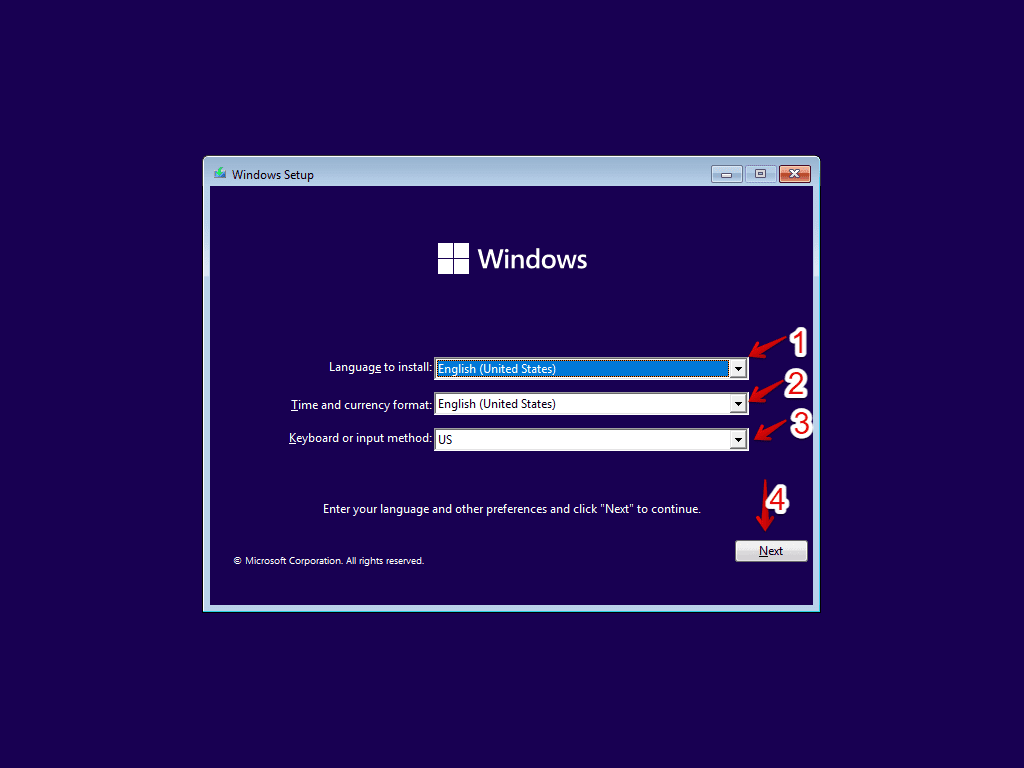
Selecting-language-time- format- and- keyboard-input
We do not want to repair Windows in the next window because we are doing a clean installation. The Repair option is for those who already have Windows 11 installed and would like to fix broken things. Click on the ‘Install now’ button to continue.
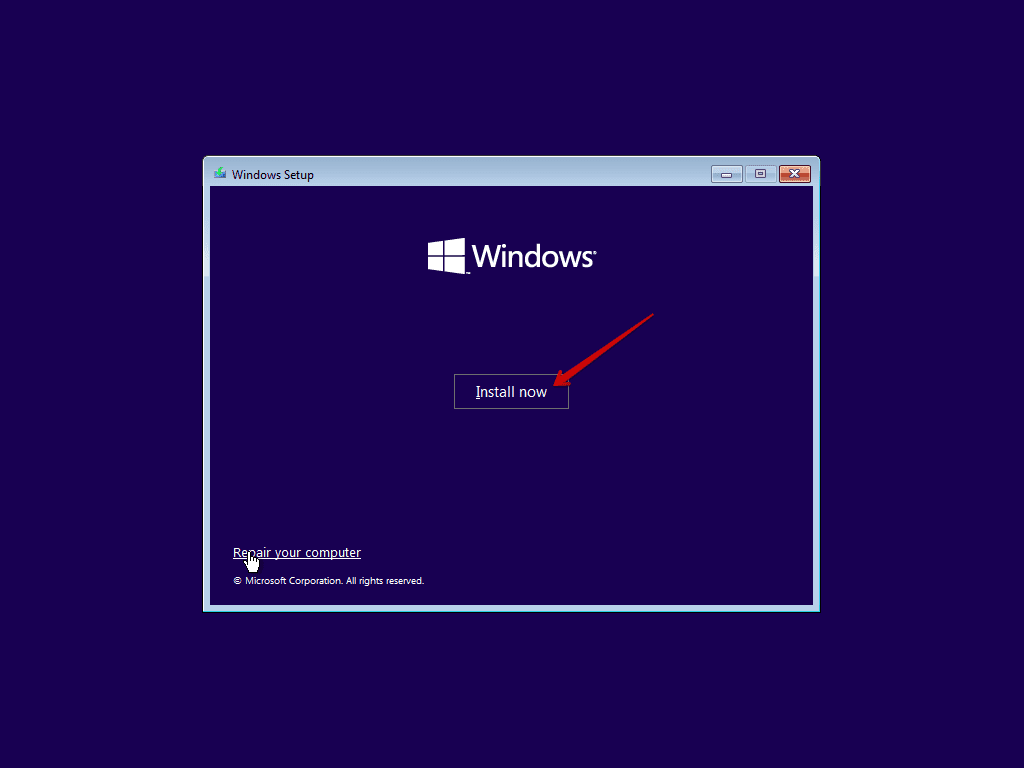
Clicking-on-Install-now
At this time, you may not have the product key since it’s a leaked version. Click on ‘I don’t have a product key’ and then click on ‘Next.’
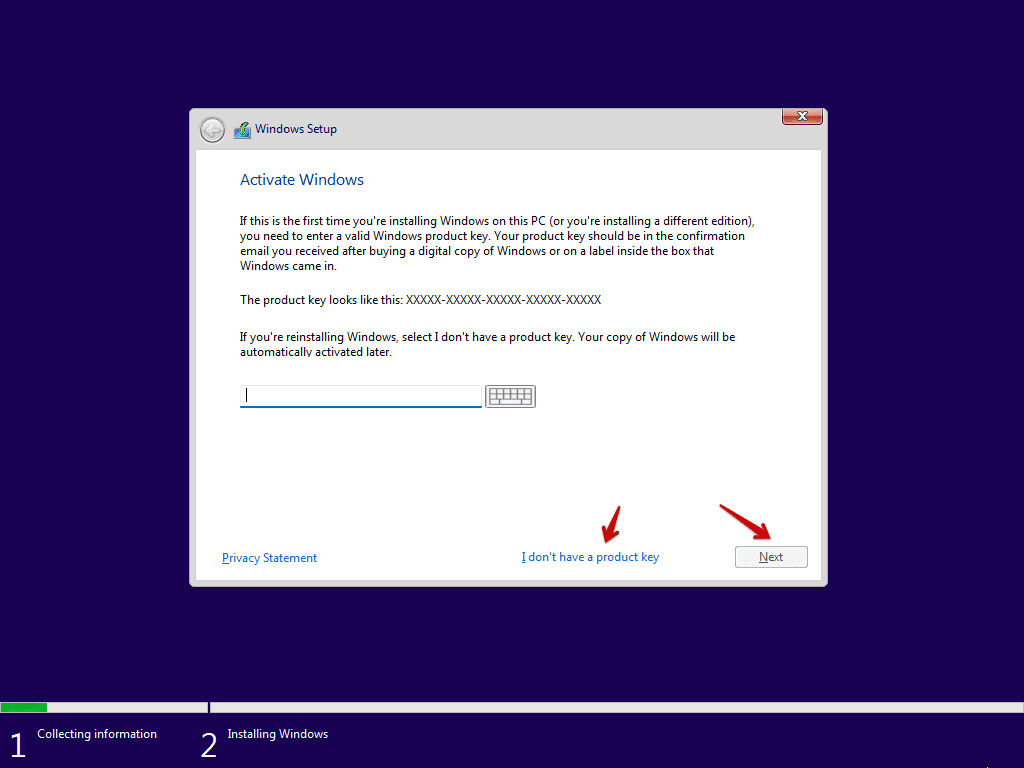
Clicking-on-I-don’t-have-product-key
The next window will display all versions of Windows 11 editions available for you to install. Scroll through the options and select the best fit operating system for you. In our case, let’s go with Windows 11 Pro. Select Windows 11 Pro and click on ‘Next.’
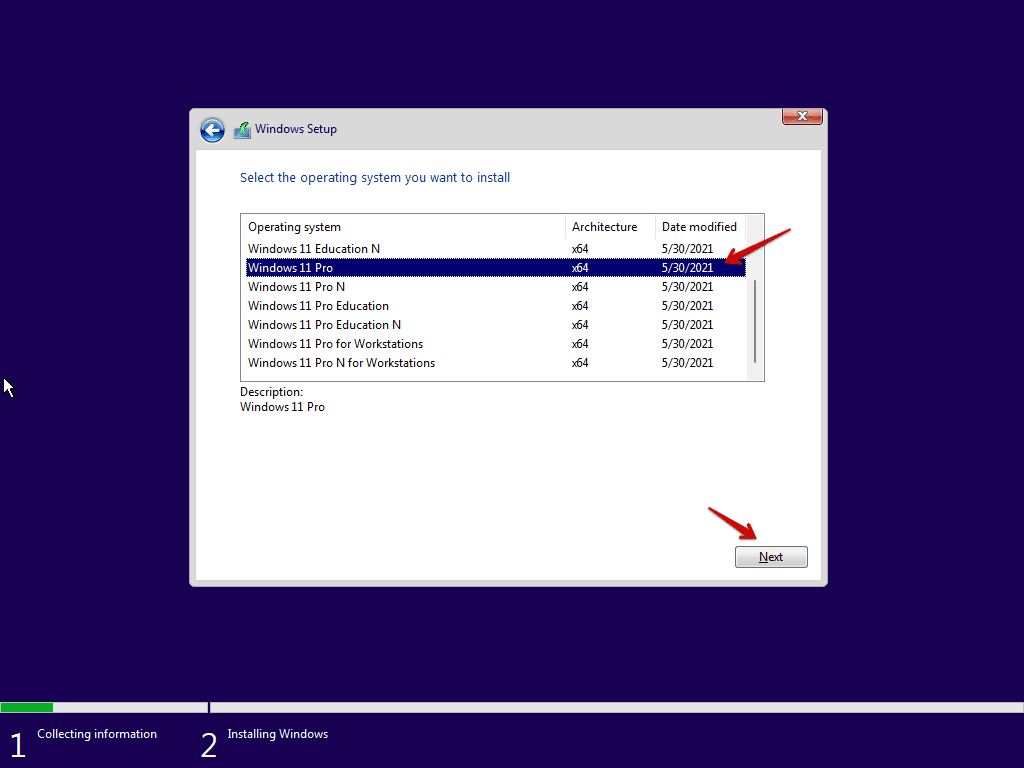
Windows 11 Editions
A number of us go ahead and accept the license terms and continue. It’s actually a good habit to read through these terms and understand what is entailed. Always check through these terms whenever installing any application, as you may be accountable for violating the license terms without your conscience. Click on ‘Next.’
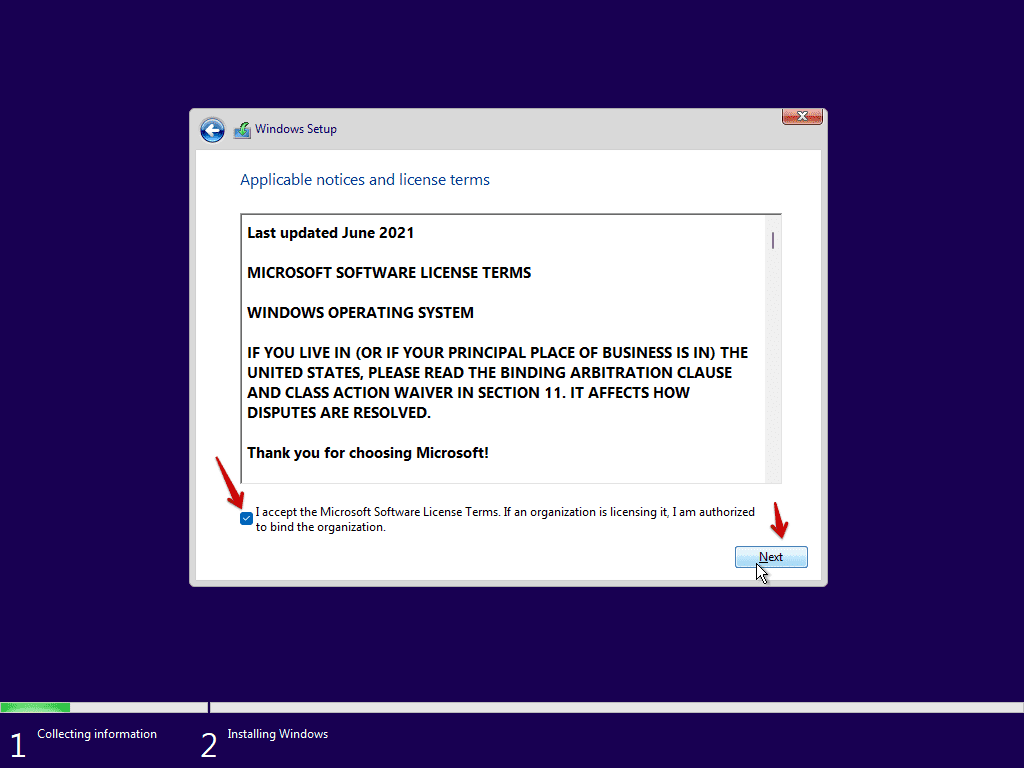
License Terms
In the next step, click on ‘Custom: Install Windows only (advanced).’ This option allows clean installation. The first option allows you to upgrade your operating system while keeping the files, settings, and applications from the previous Windows operating system.
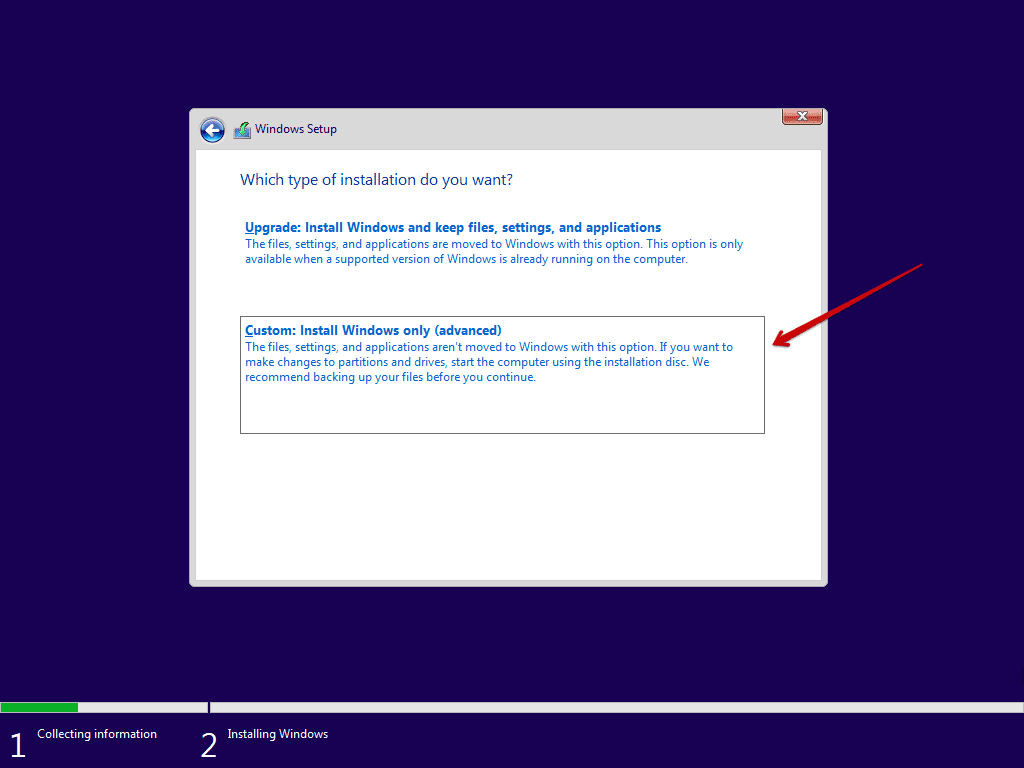
Custom Install
The next part is to manage your partitions. If you have more than one partition, select the partition you want to install Windows 11 on and click ‘Next.’ It’s at this stage that you can also partition your drive by clicking ‘New.’
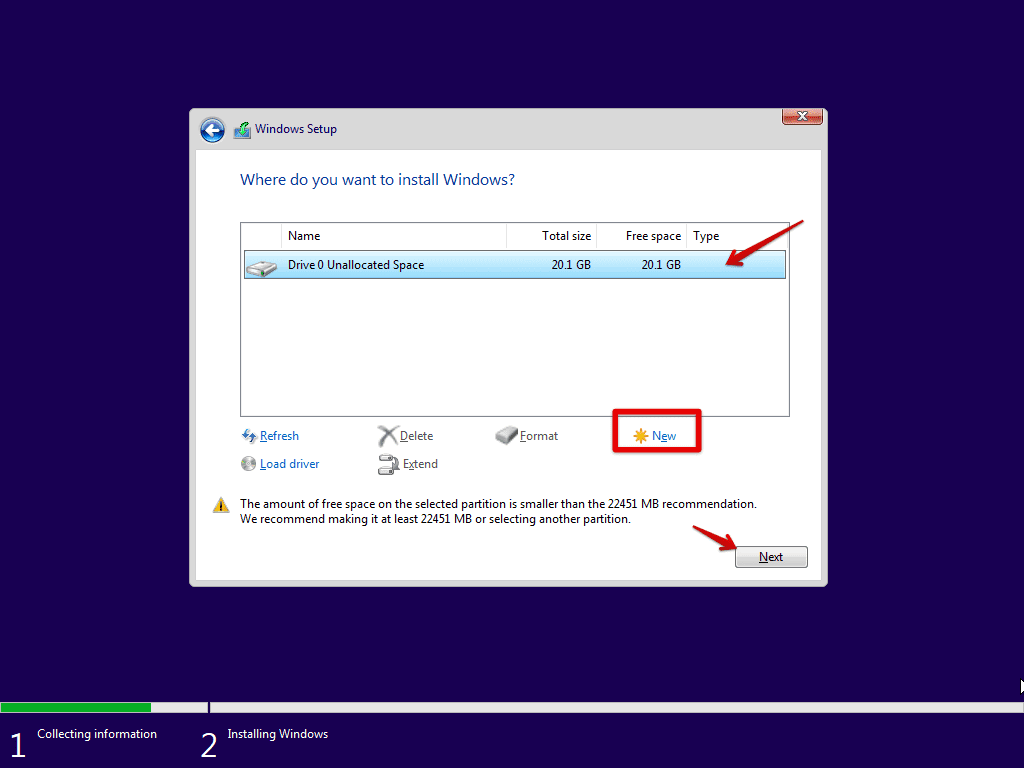
Partitions
So far, we are good. At this stage, you will require a little patience. Wait for the installation on the selected drive to install all features. Your PC will automatically restart after the installation. At this time, unplug your USB drive as it restarts.
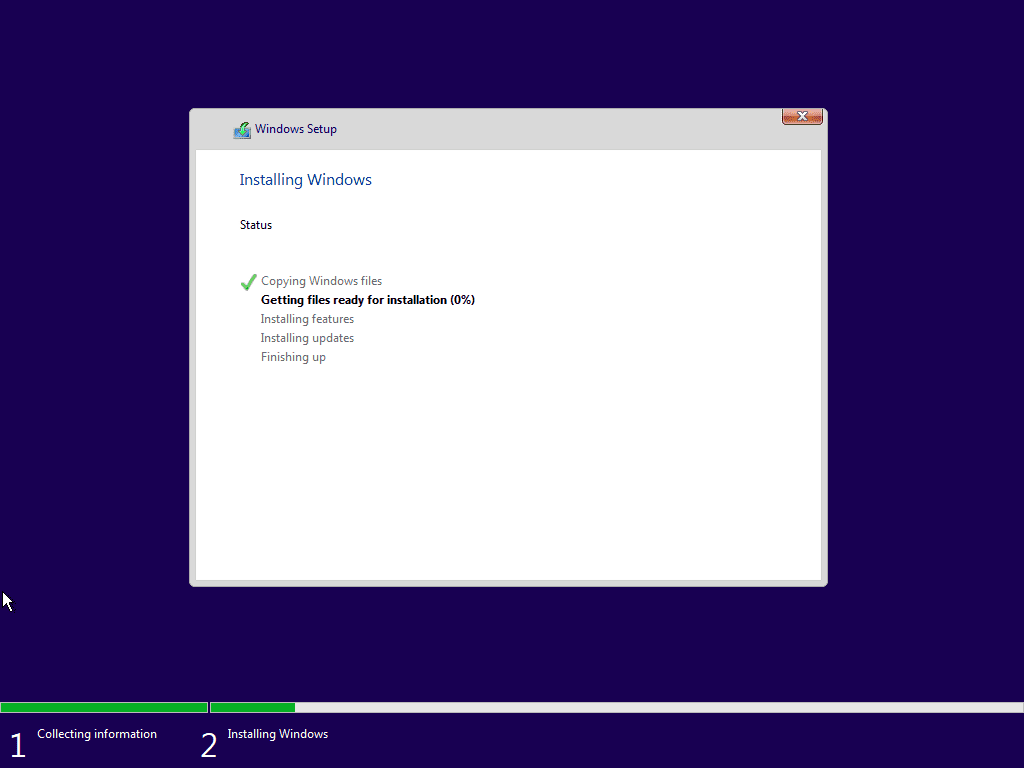
Installing Windows 11
So far, everything seems pretty the same as Windows 10. After the system completes and reboots, let’s now take a keen observation on the added features.
Windows 11’s new interface starting showing
The first thing you will notice is a new Windows icon at the center of the screen.
Start launch
The new pop windows allow you to select your country or region. You will note that this is quite different. It has new animation and also new icons as you will agree with me this more user-friendly and appealing to the eyes. It also has rounded corners. Select country and click ‘Yes’ to continue.
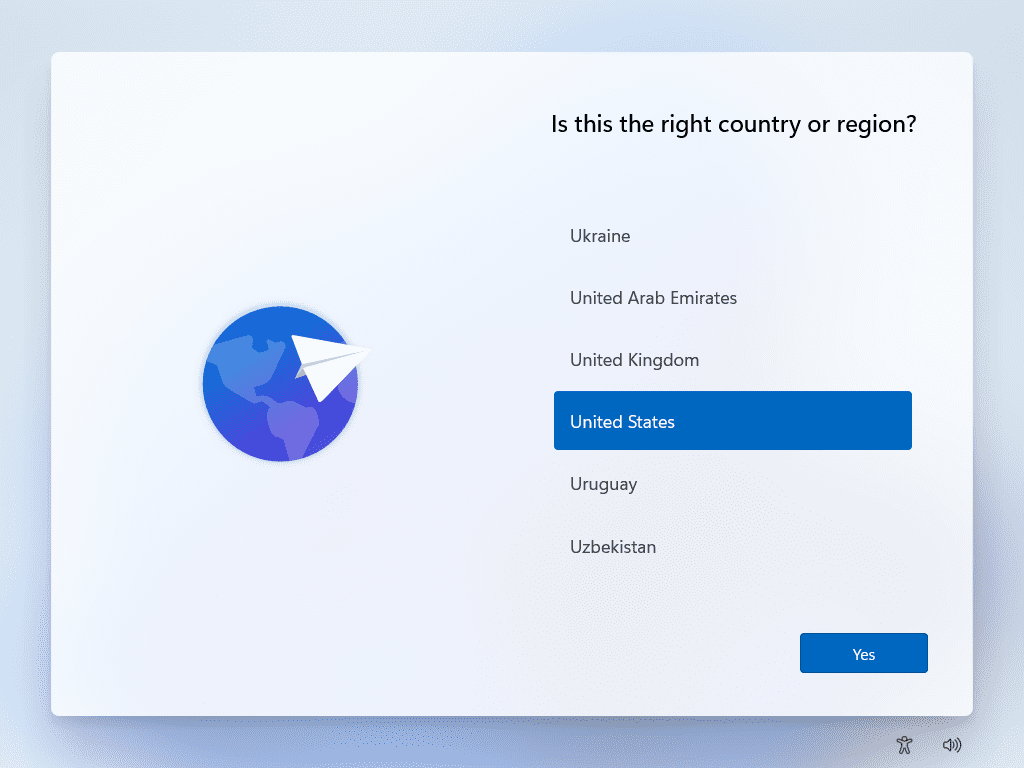
Selecting-your-region
The next stage is to select the keyboard layout. Also, this part has different animations, icons and more colorful. Select a keyboard layout and click ‘Yes’ to continue. At this point, we are going to skip adding a second keyboard layout.
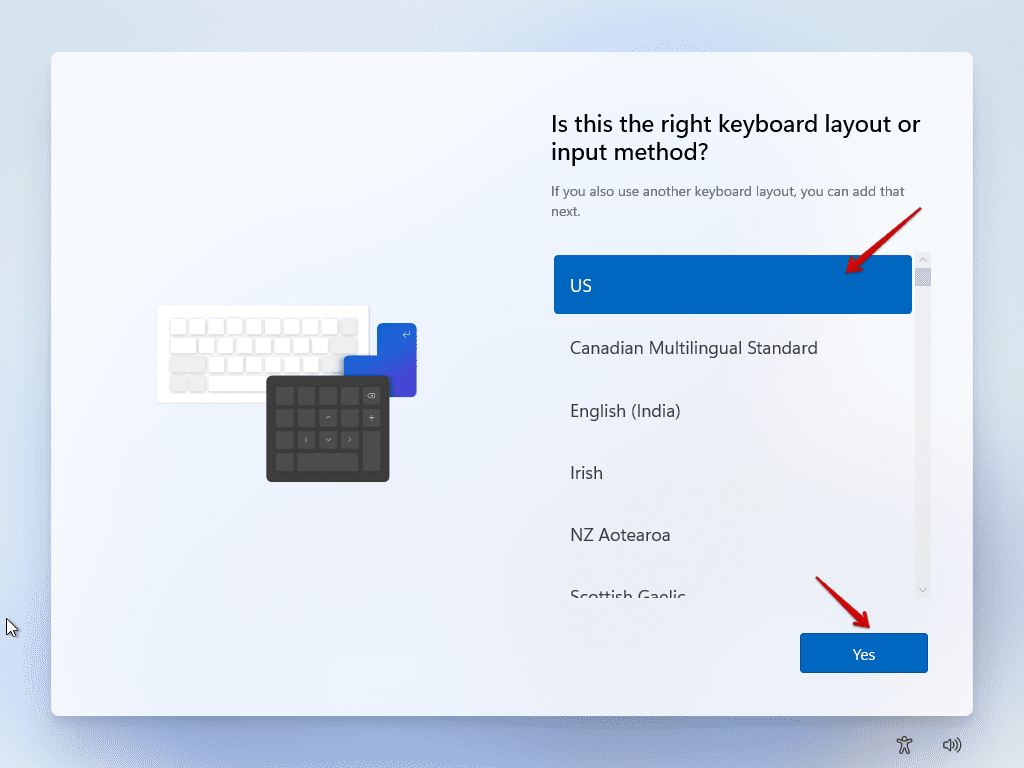
Keyboard Layout
The next stage is to set up your account. We have two options here. ‘Setup for personal use’ or ‘setup for work or school.’ Select the first option and click ‘Next’ to continue. You will note that the second option gives you access to your organization’s resources.
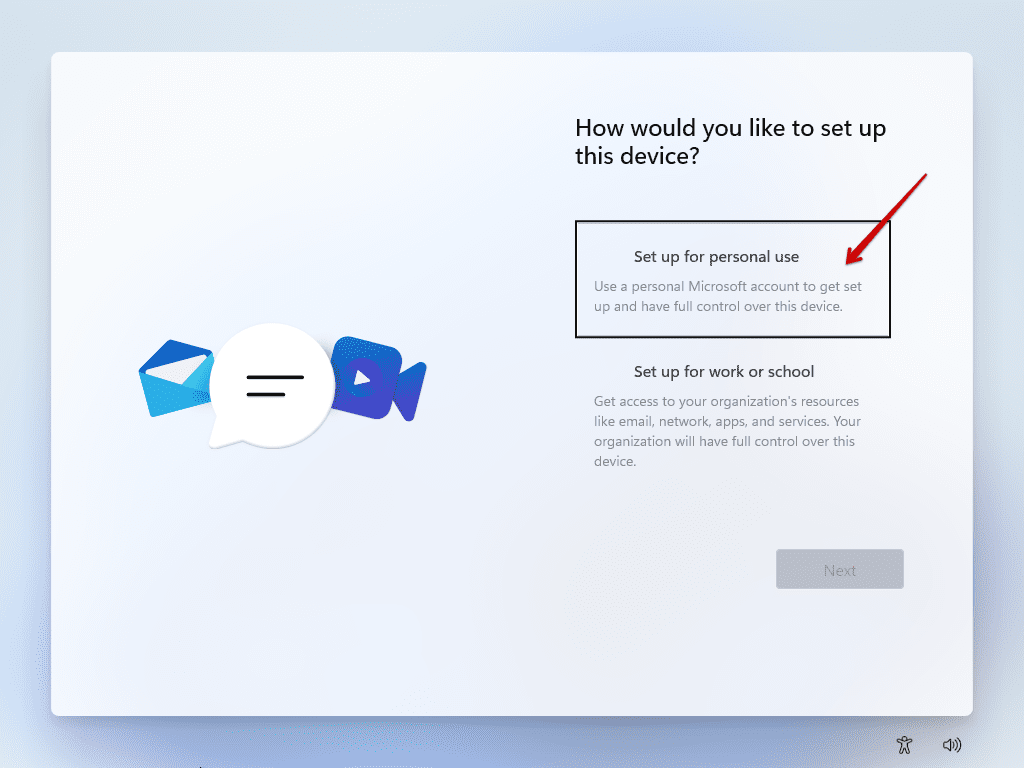
Setting up your device
In the next stage, you are prompted to add your account. The default option requests you to sign in with your Microsoft account. This is quite different from the other versions of Windows.
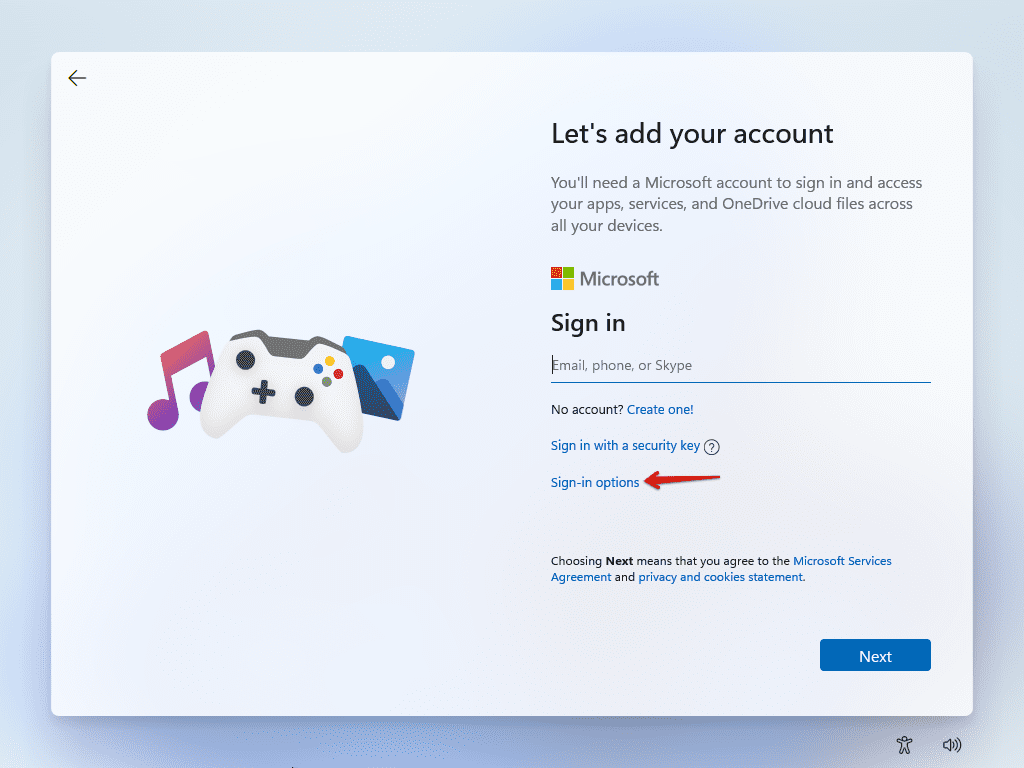
Sign-in-with-Microsoft
Offline Account
Click on sign options to view the different options available and select ‘offline account.’
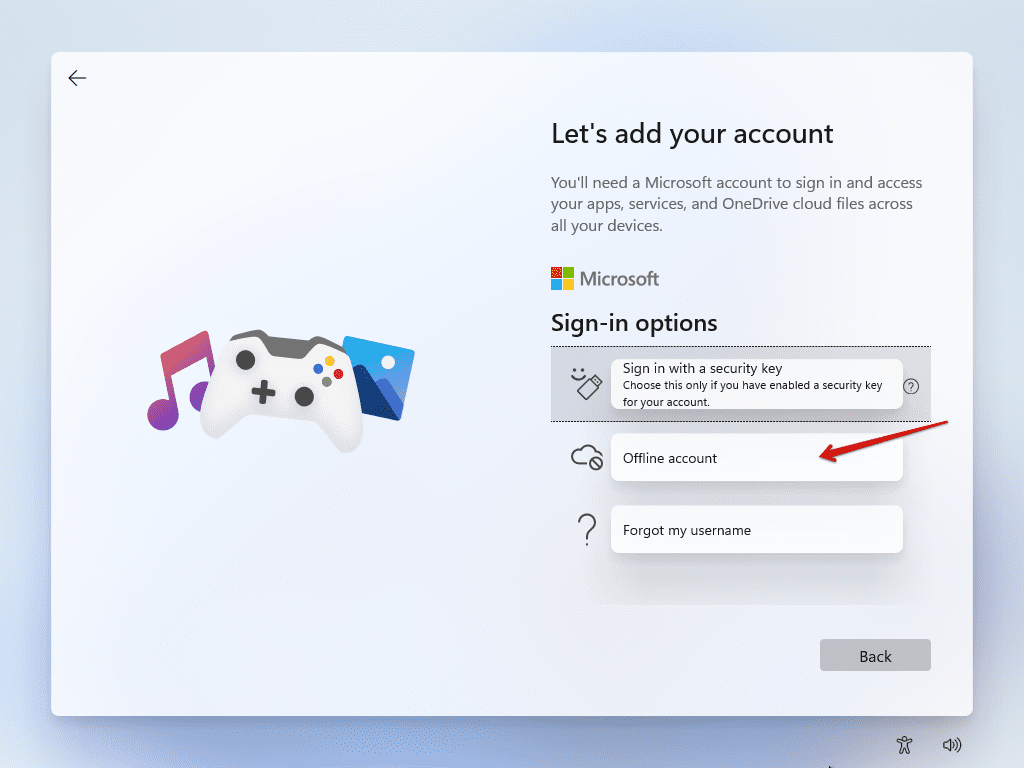
Clicking-on-sign-in-options
To personalize your account further, click on ‘limited experience. At this stage, you will note that if you click on ‘Next,’ it will take you back to sign in with your Microsoft account.
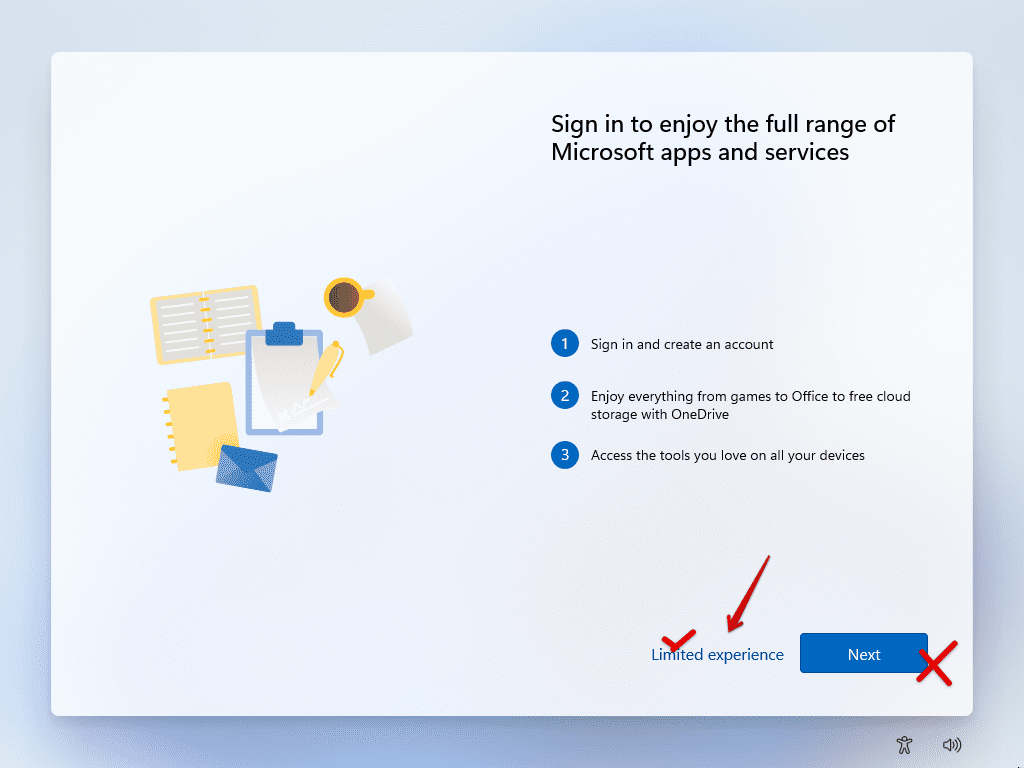
Clicking-on-limited-experience
The new interface makes everything simple and pretty cool. The next stage is to enter your computer name followed by the password and confirm your password. A bonus for programmers, if you intend on coding android on the Android Studio application, let your computer be a ‘one name’ as you may have problems when installing your SDK.
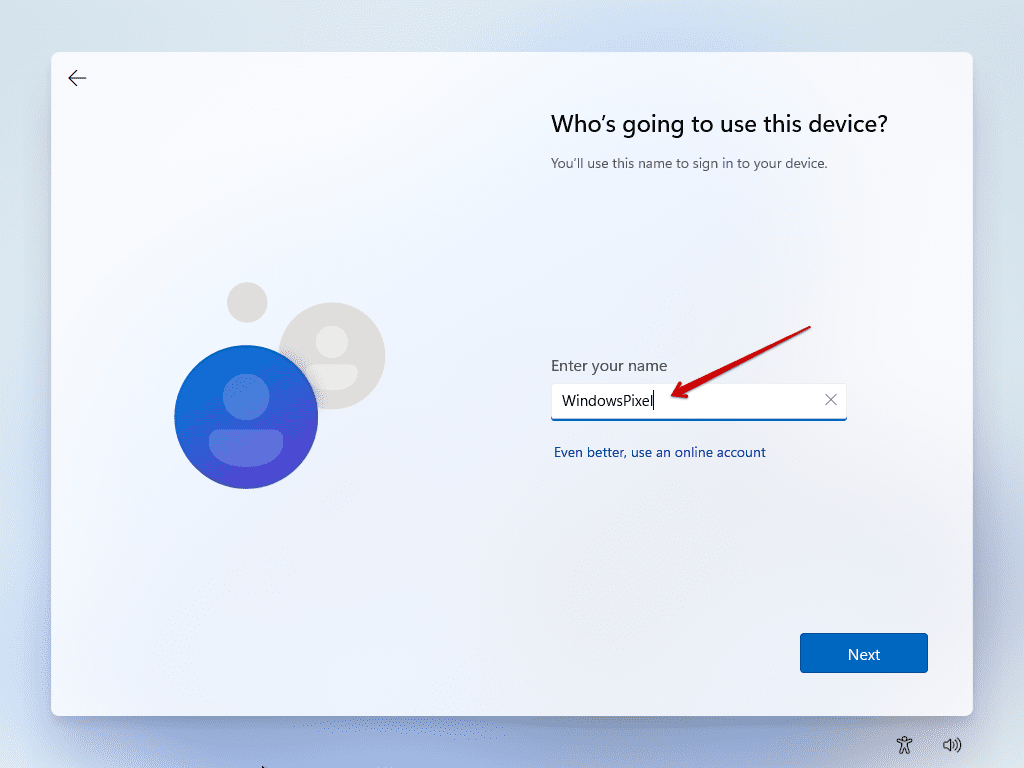
Typing-user-name
Although this feature is available on the latest Windows 10 version, this is an awesome feature since it allows you to change your password in case you have forgotten easily. Please take note of the answer to the three security questions as it’s of importance.
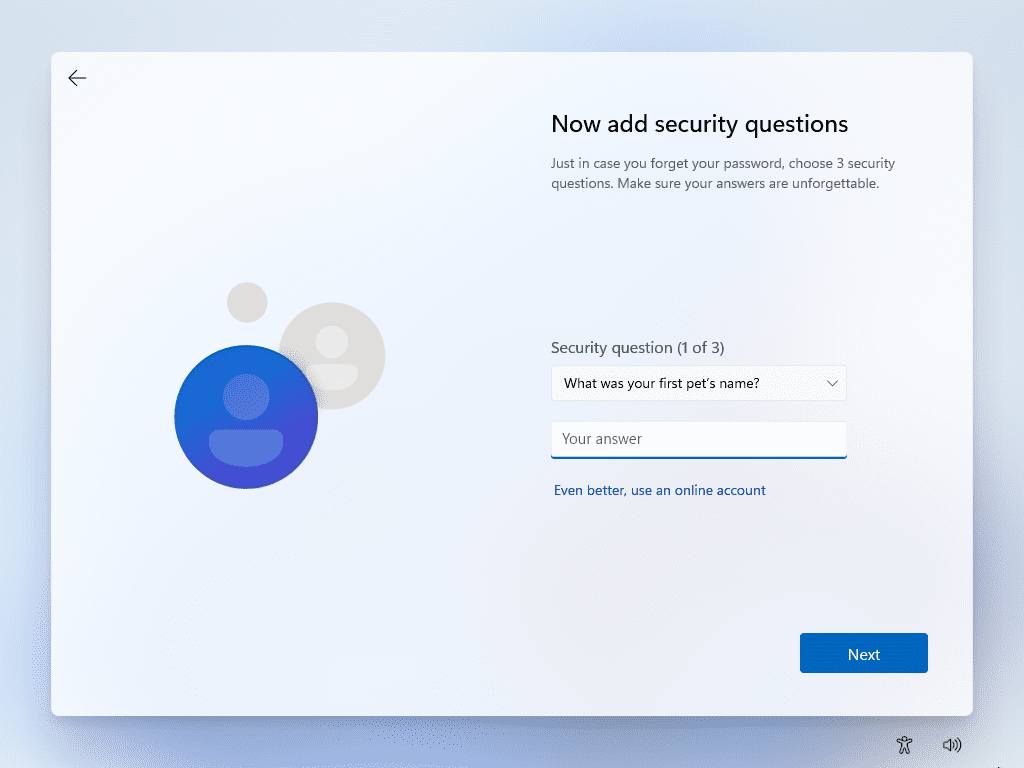
Answering-security-questions
The next step involves choosing your privacy settings. You have the capability to enable and disable those privacy settings as per your preferences. Click ‘Next’ to continue.
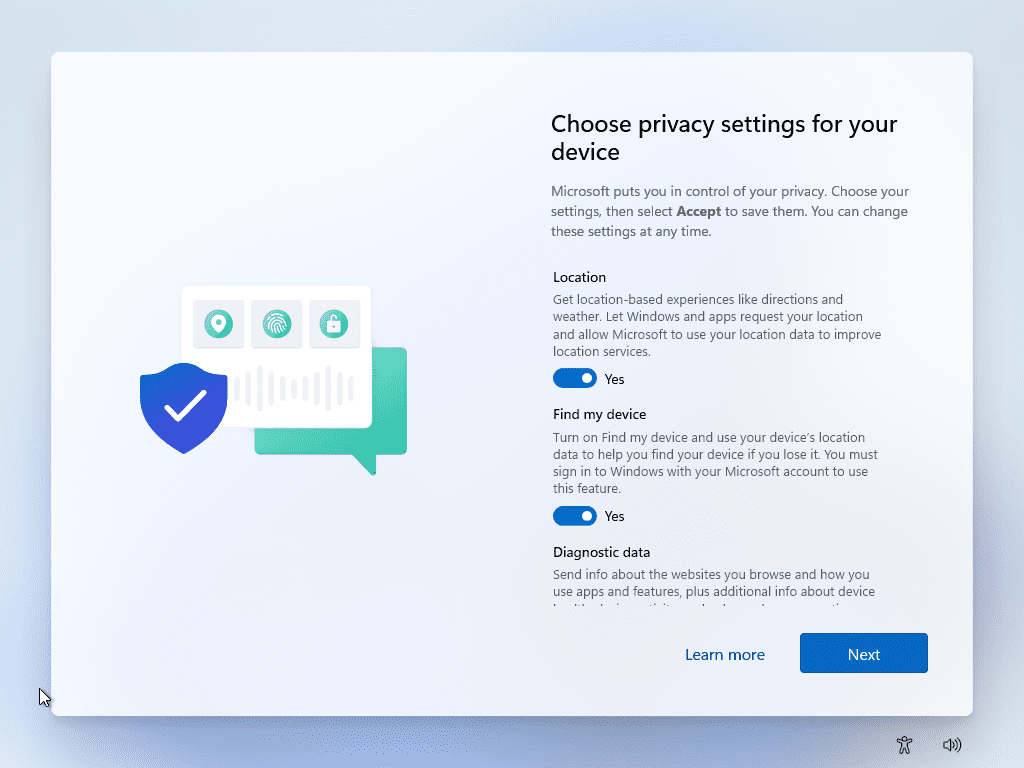
Choosing-privacy-settings
Online Account
However, these steps would take a different path if you had signed in with your Microsoft account. Let’s take a view of this path. After entering your Microsoft account email, you will be prompted to create a pin.
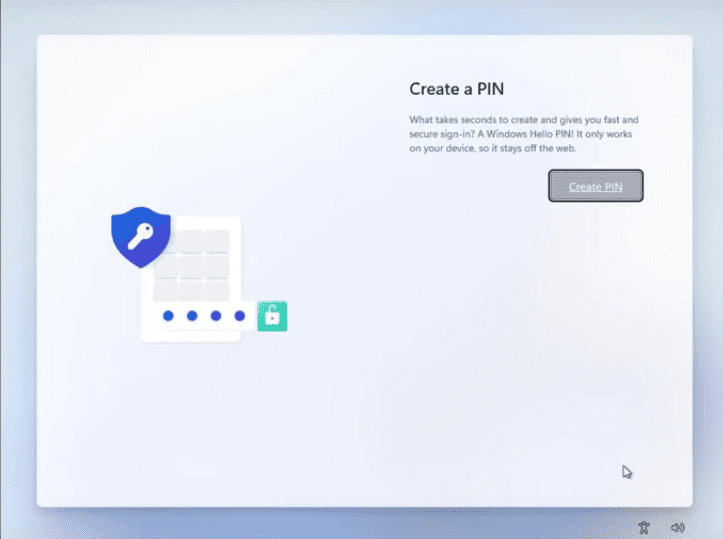
Create-Pin
Click on ‘Create a Pin,’ then on the next page, enter your new pin and confirm the pin. Click ‘OK to continue. Take note of the blue underline feature that was not there in other Windows versions.
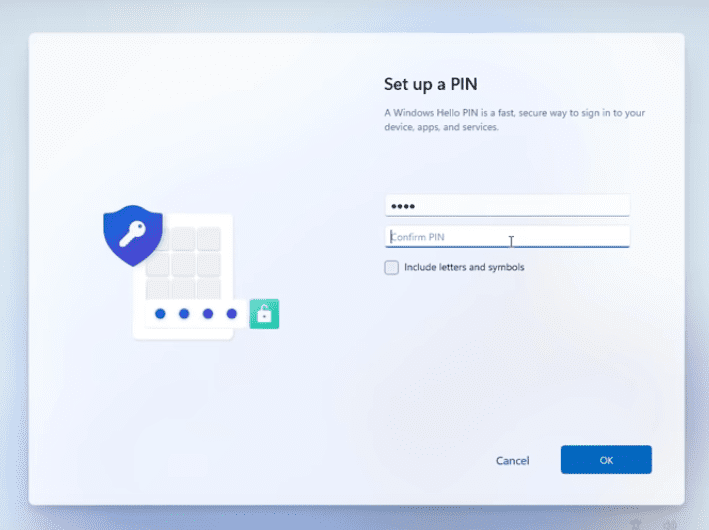
Creating-and-confirming-pin
Depending on how you will use this device, you can select these options to customize your experience, although you can skip this stage.
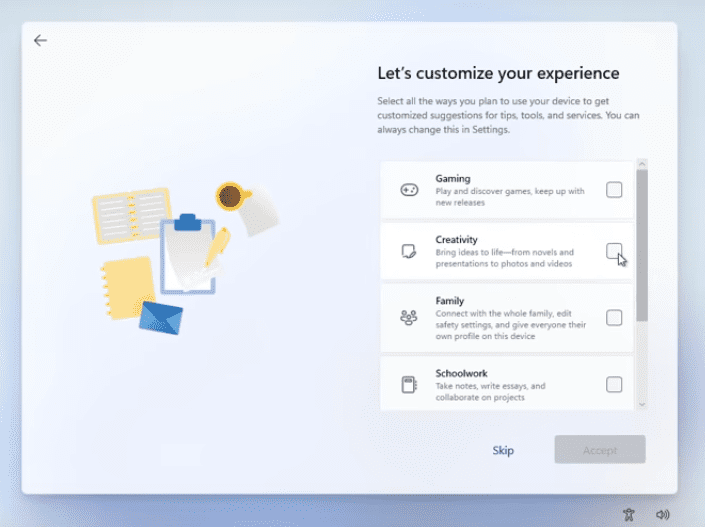
Customize your experience
The next stage will allow you to control the OneDrive setting by automatically storing files on OneDrive or storing only files on this device. We will select ‘only store files on this device,’ click ‘Next’ t continue.

Customizing-One Drive
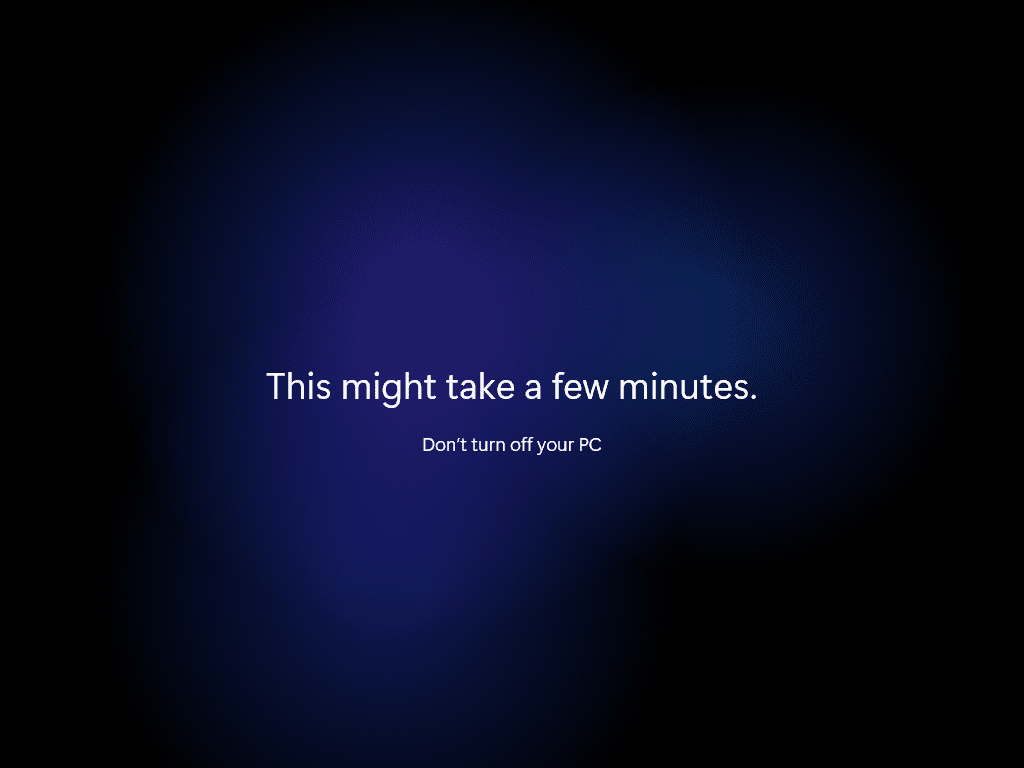
Lastly, the famous “Don’t turn off your PC” screen comes up.
Flashing-feature
Conclusion
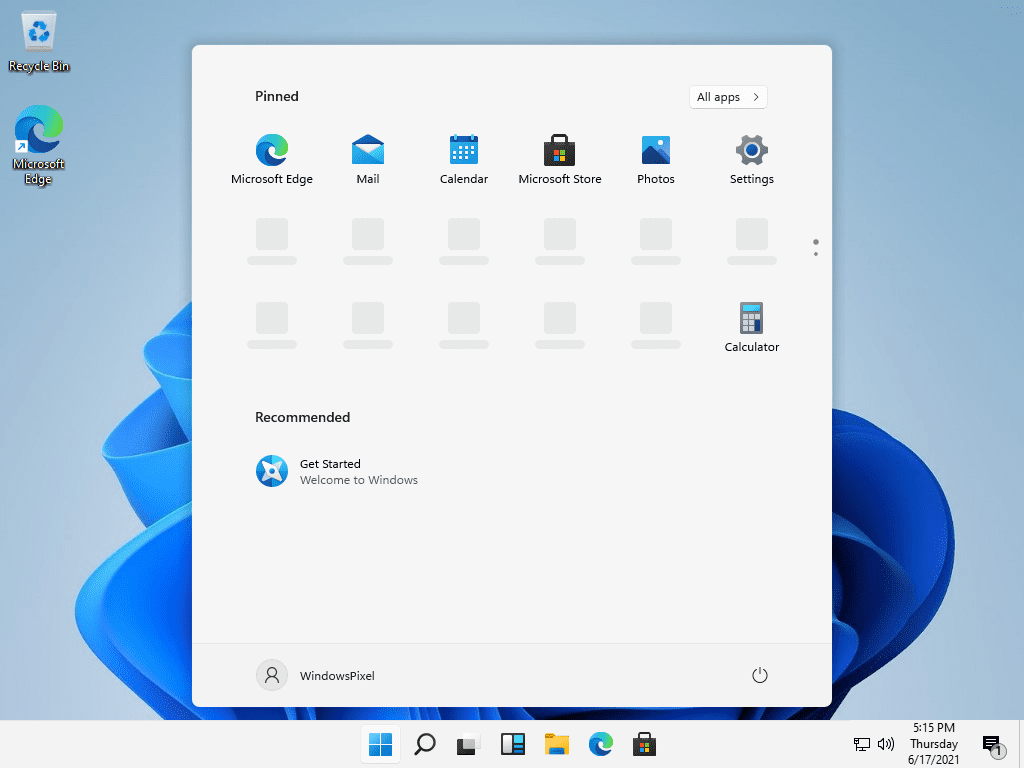
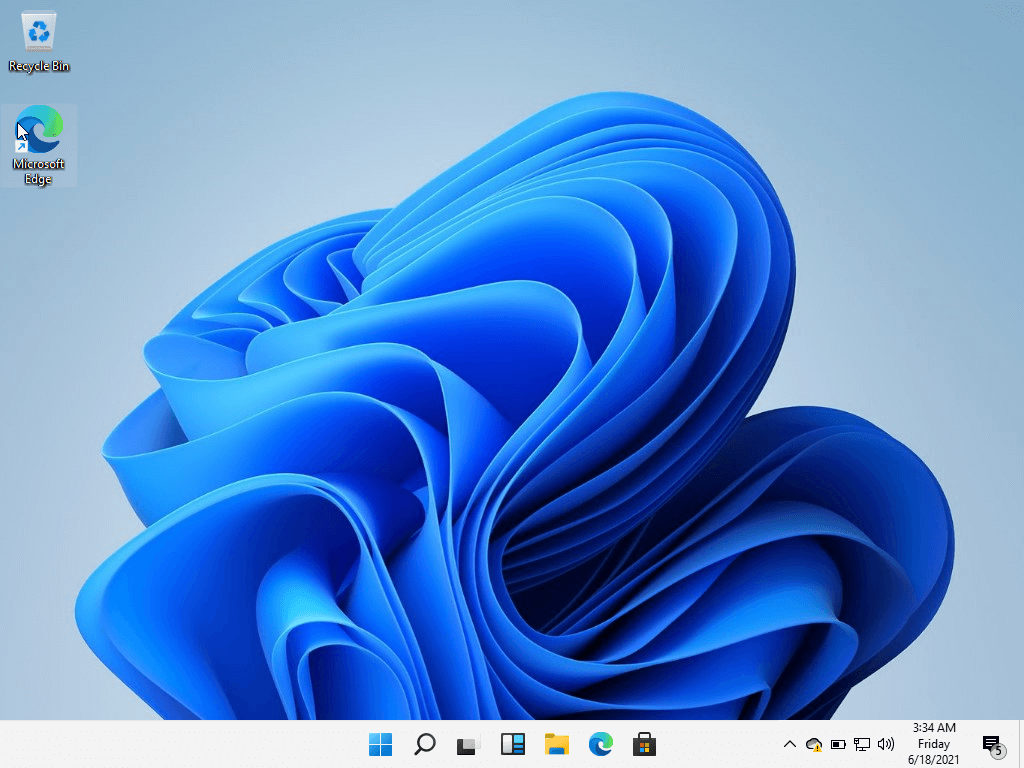
After a while, you should get booted into the brand-new Windows 11 desktop. Hurray! All done and set. You got Windows 11 on your PC.
Windows-11
Go ahead and take a tour, and remember not to use it for anything other than going through OS itself. We won’t recommend even launching a web browser in it to browse as it could leak your sensitive information as the build is finished yet, and there is a reason why Microsoft has not released it to the public.
2 comments
Amazing!! The windows is wow starting from installation up to configuring with other systems on a network
Amazing tutorial. The process of installation seems very simple and perfect. I can’t wait to get an official and genuine version of windows 11.