Table of Contents
A password recovery disk comes in handy whenever you forget your Windows 10 password. It is recommended that you create a password recovery disk when creating passwords to access your Windows. Occasionally the password reset disk is used on a local account since a Microsoft online tool is used to reset the password of a Microsoft account.
Forgetting passwords is one of the most frustrating things you would ever want to encounter. However, if you are unlucky to be a victim, don’t beat yourself up since we have a solution for your problem.
Password reset disk
A password reset disk is a USB stick that contains a file that can reset your password when plugged into your Windows PC. The most enthusiastic thing about a password reset disk is you only have to create it once, and no matter how many times it is used, you won’t need to re-create it.
Note: It is crucial to create a password reset disk while setting up your account. This will prevent the hustle of struggling to make a password reset disk when you are in dire need of it. This article will walk you through the steps you need to acquaint yourself with to create and use a password reset disk.
As already mentioned, this trick only works out on a local account. Therefore, if you have a Microsoft account, this won’t work for you. Stick to this article to learn how to create and use a password reset disk.
Now that you know what a password reset disk is, let us dive deep and learn how to create it on Windows 10.
Creating a password reset disk on Windows 10
Follow the steps provided herein to create a password reset disk:
Step 1: Insert your USB drive into your PC (We recommend using port USB 3.0 for faster speeds. Besides, if you don’t have a USB drive, you can plug your SD card into the PC SD card slot)
Step 2: Now press the Windows + S keys simultaneously on your keyboard to bring the search bar
Step 3: Type in “Control Panel” on the search bar
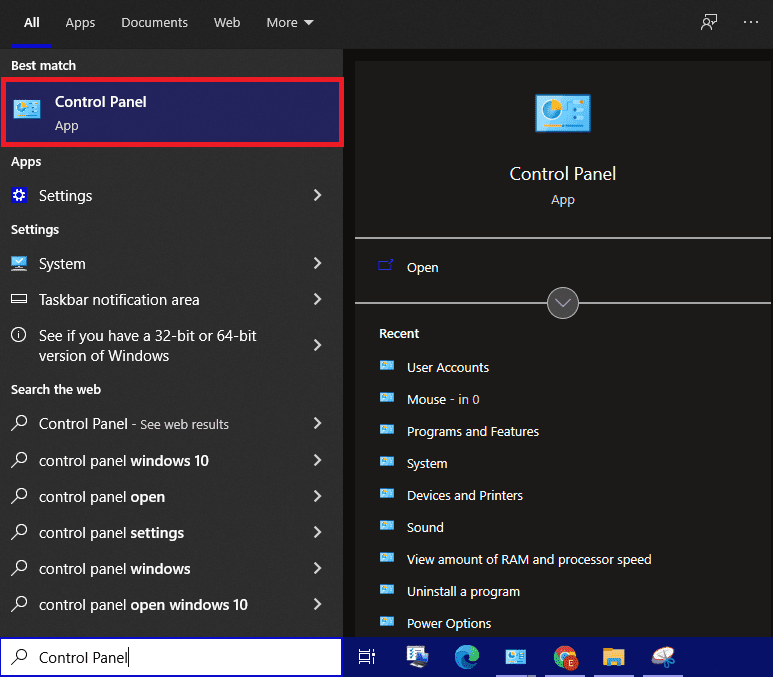
Select Control Panel
Step 4: Now click on the “User Accounts” as shown in the image below:
Note: To view a list of many items on the control panel, change the view by option from categories to small icons.
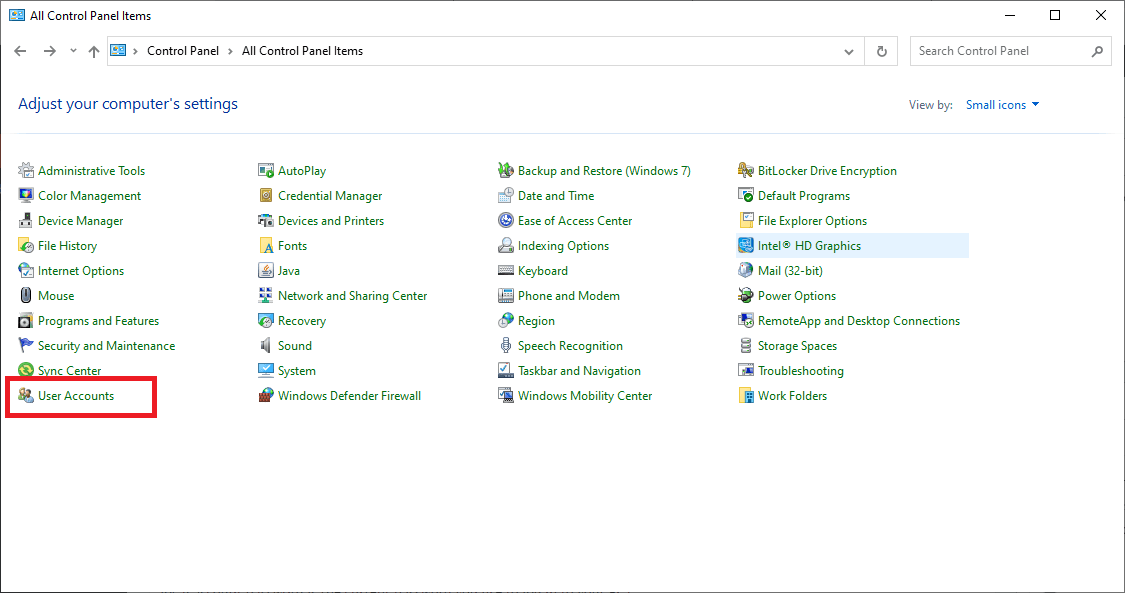
Select User Accounts
Step 5: Click on the “Create a password reset disk” option.
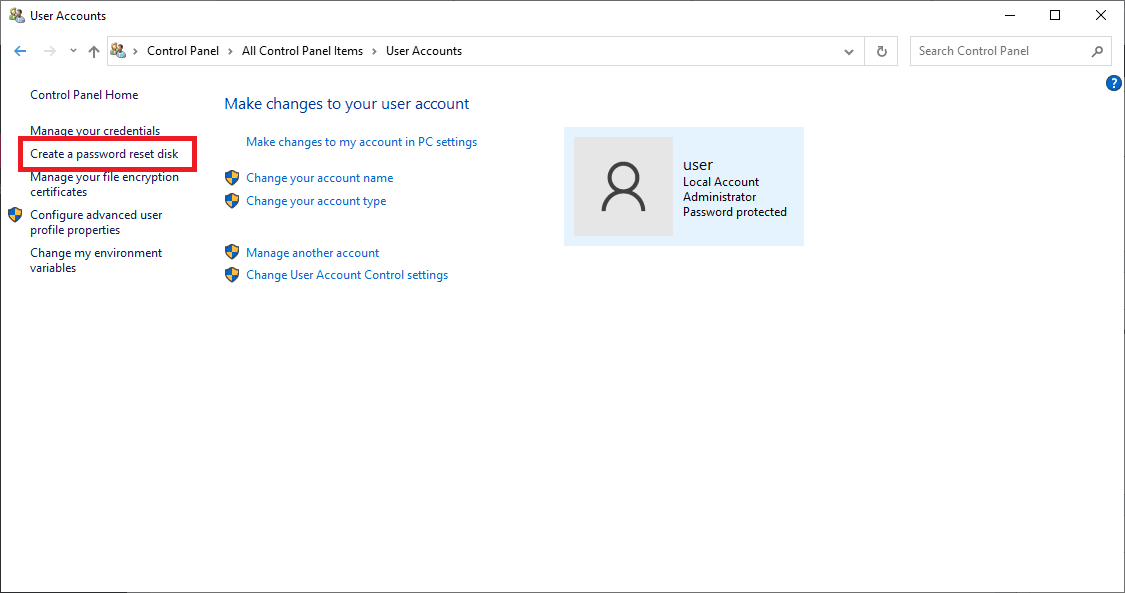
Select create a password reset disk option
Step 6: Click on the “Next” button.
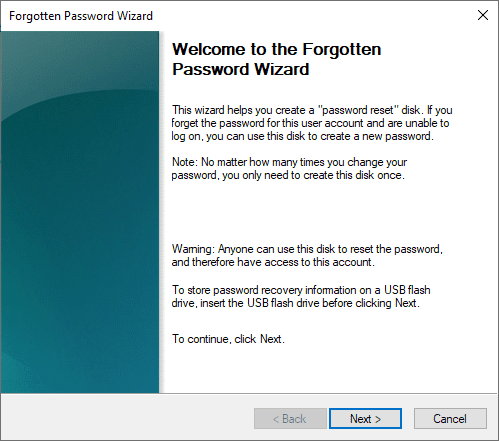
Click Next
Step 7: Under the “Crease a Password Reset Disk,” select the drop-down menu as shown below:
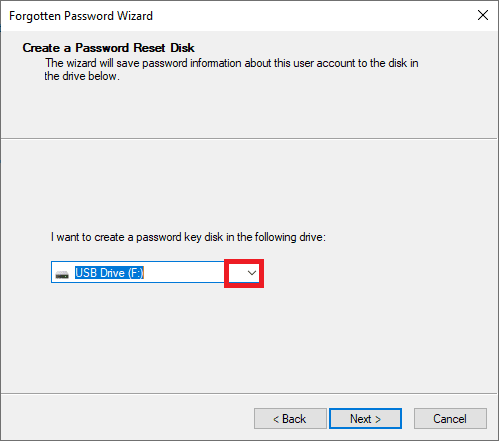
Click the drop-down list and select the USB drive
Step 8: Select the USB drive or SD card you had inserted earlier to create a password reset disk.
Step 9: Once you click the “Next” button on the previous step, continue and type in your local account password. (Your local account password is the current password you use to log in to your PC)
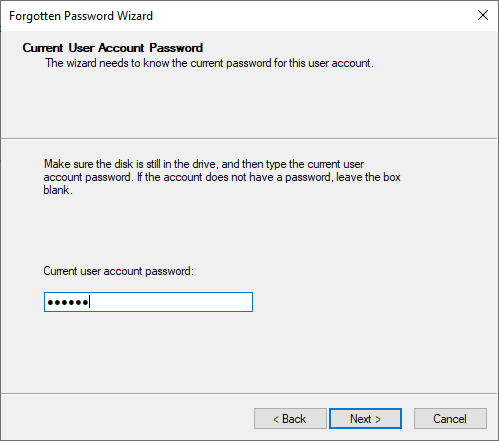
Type in current user password
Step 10: Click on the “Next” button
Be patient as the password wizard creates a password reset disk. Once the entire process is finished, press the “Finish” button.
That’s all. You have successfully created a password reset disk.
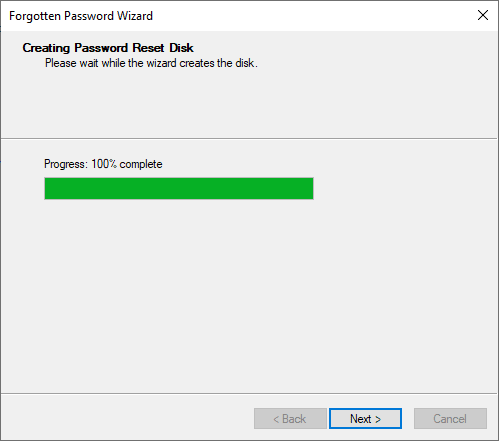
Successfully created disk
Note: It is vital to note that anyone who accesses that USB drive or SD card can access your account. Hence, you should treat it as confidential property and take great care of it.
Now that we have successfully created our password reset disk, let us learn how to use it to reset our forgotten password on Windows 10.
Using a password reset disk on Windows 10
Assuming you had forgotten your password and following all the steps mentioned herein, you have created a password reset disk. Let us now dive deep into how to use it to log in to your Windows 10 PC.
Before starting this process, always ensure that the USB we created is plugged into your Windows 10 operating system.
Now that our USB or SD card is plugged in, follow the steps below to use it log in to Windows 10.
Step 1: Switch on your Windows 10 PC.
Step 2: Give it time to boot. Once it has fully booted, it will ask for your Windows 10 password. Click on the “Reset password.”
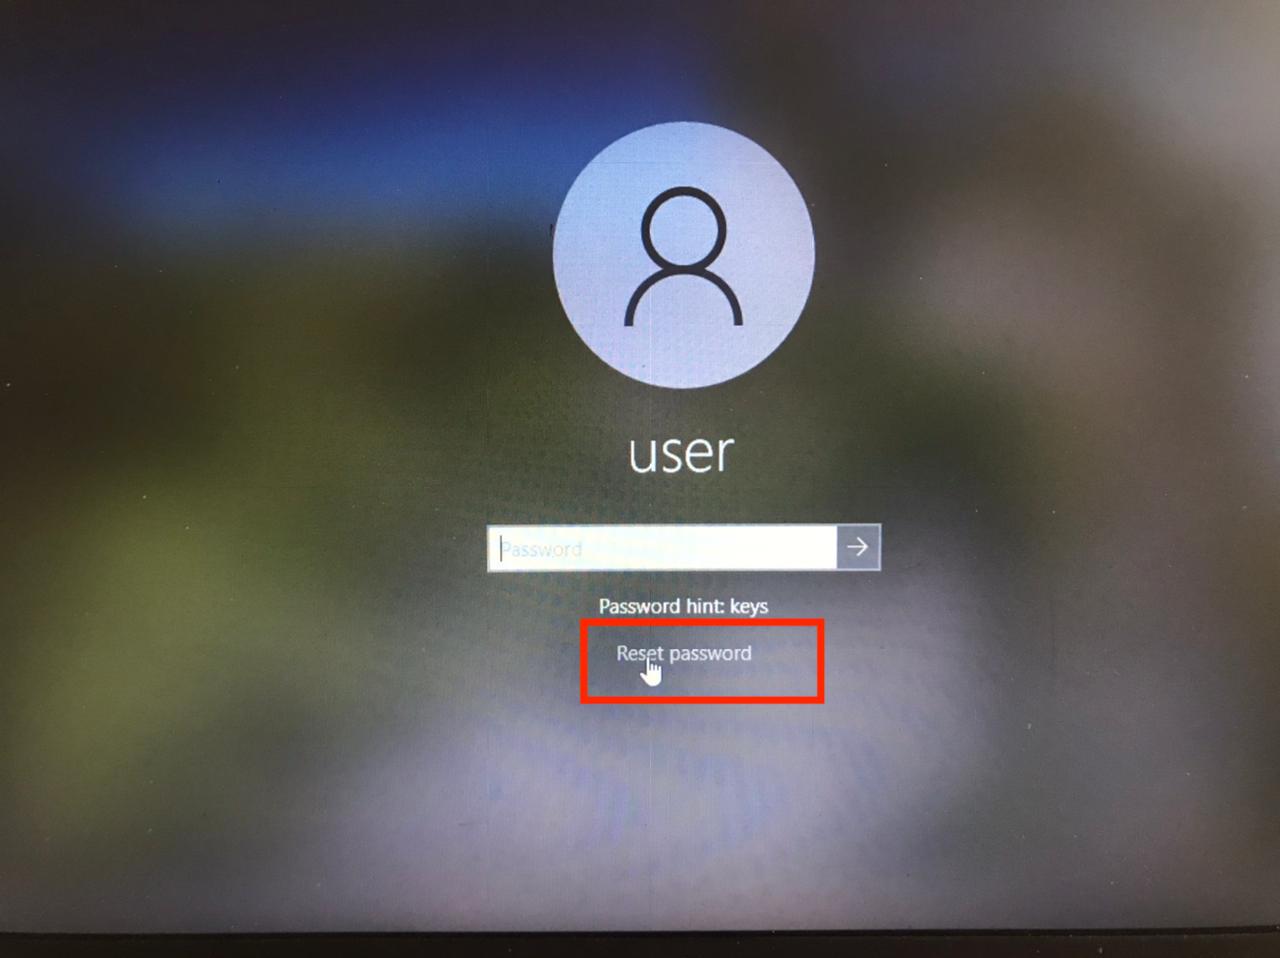
Click on Reset password.
Step 3: Click on the “Next” button on the password reset wizard screen.
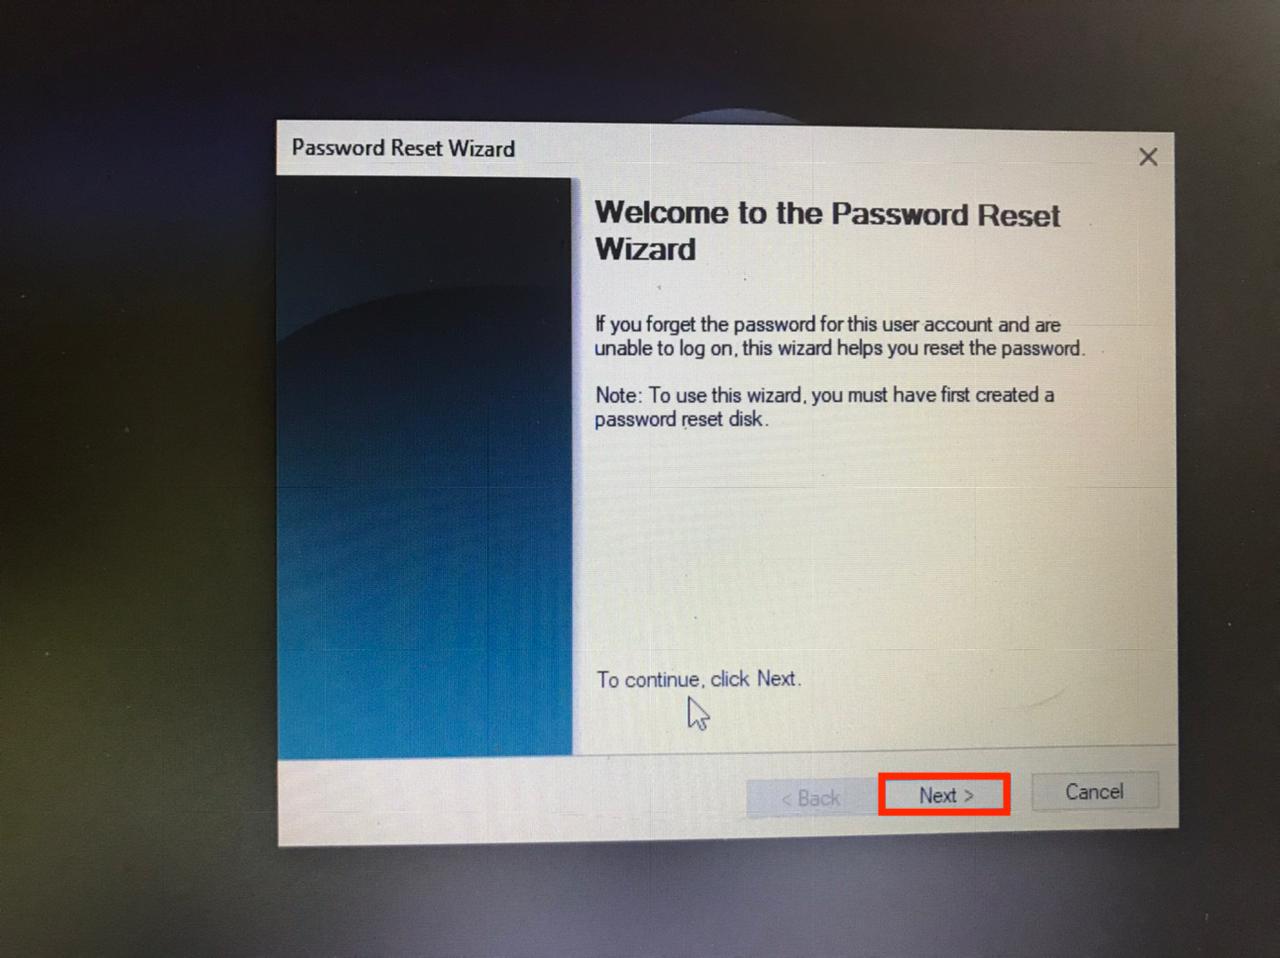
Click next to proceed.
Step 4: Click on the “drop-down” list on the “Insert the password reset disk” screen.
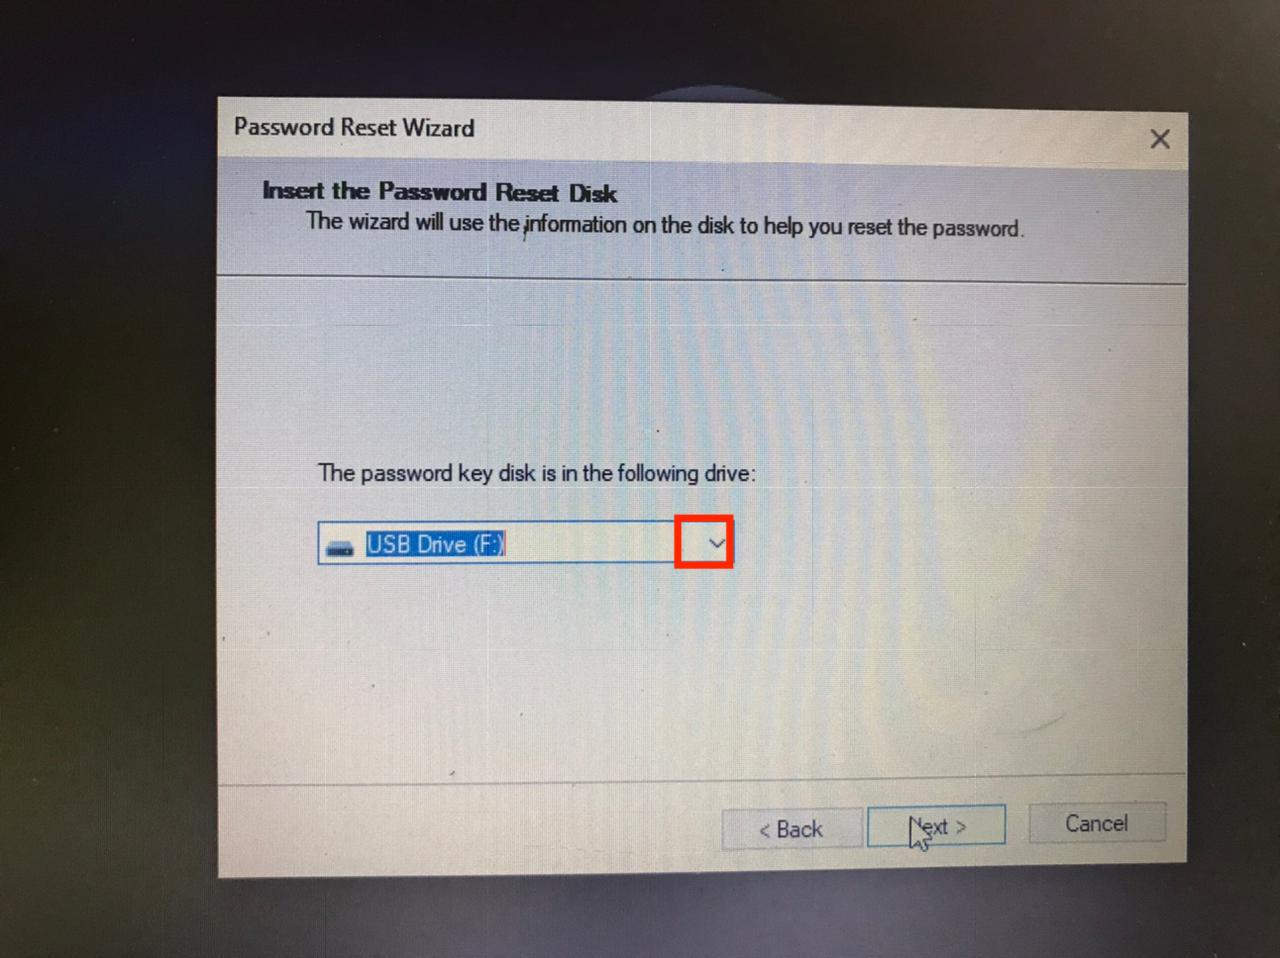
Select the password reset disk from the drop-down list.
Step 5: Select the device (USB or SD card) that contains the password reset disk
Step 6: Click on the “Next” button.
Step 7: Now type in a new password as shown below:
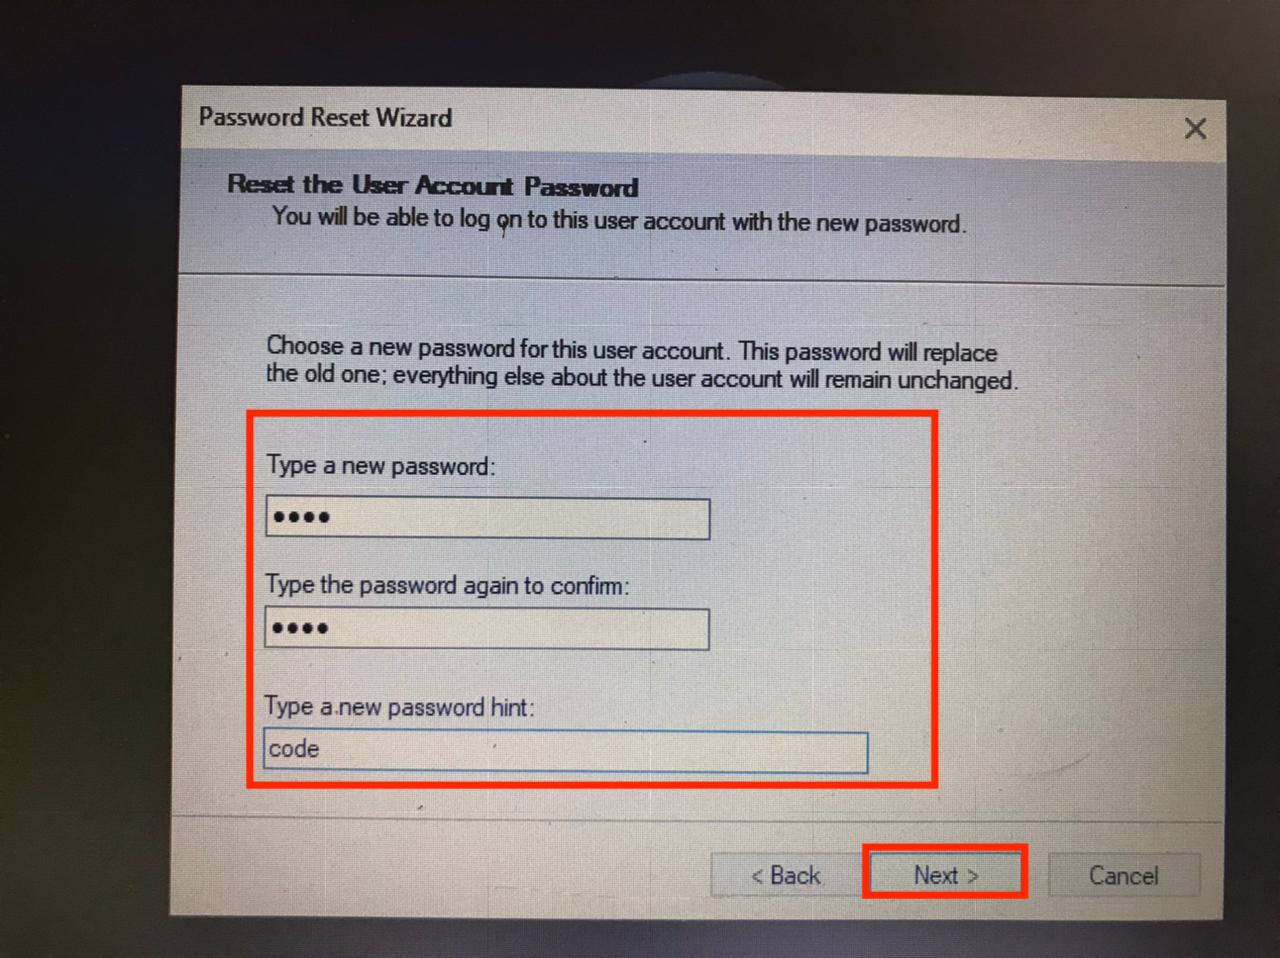
Input your new password, confirm it and type in the password hint
Step 8: Confirm by re-typing the password we typed in step 7.
Step 9: Now proceed and input the password hint after confirming the password.
Step 10: Click on the “Finish” button to complete the process.
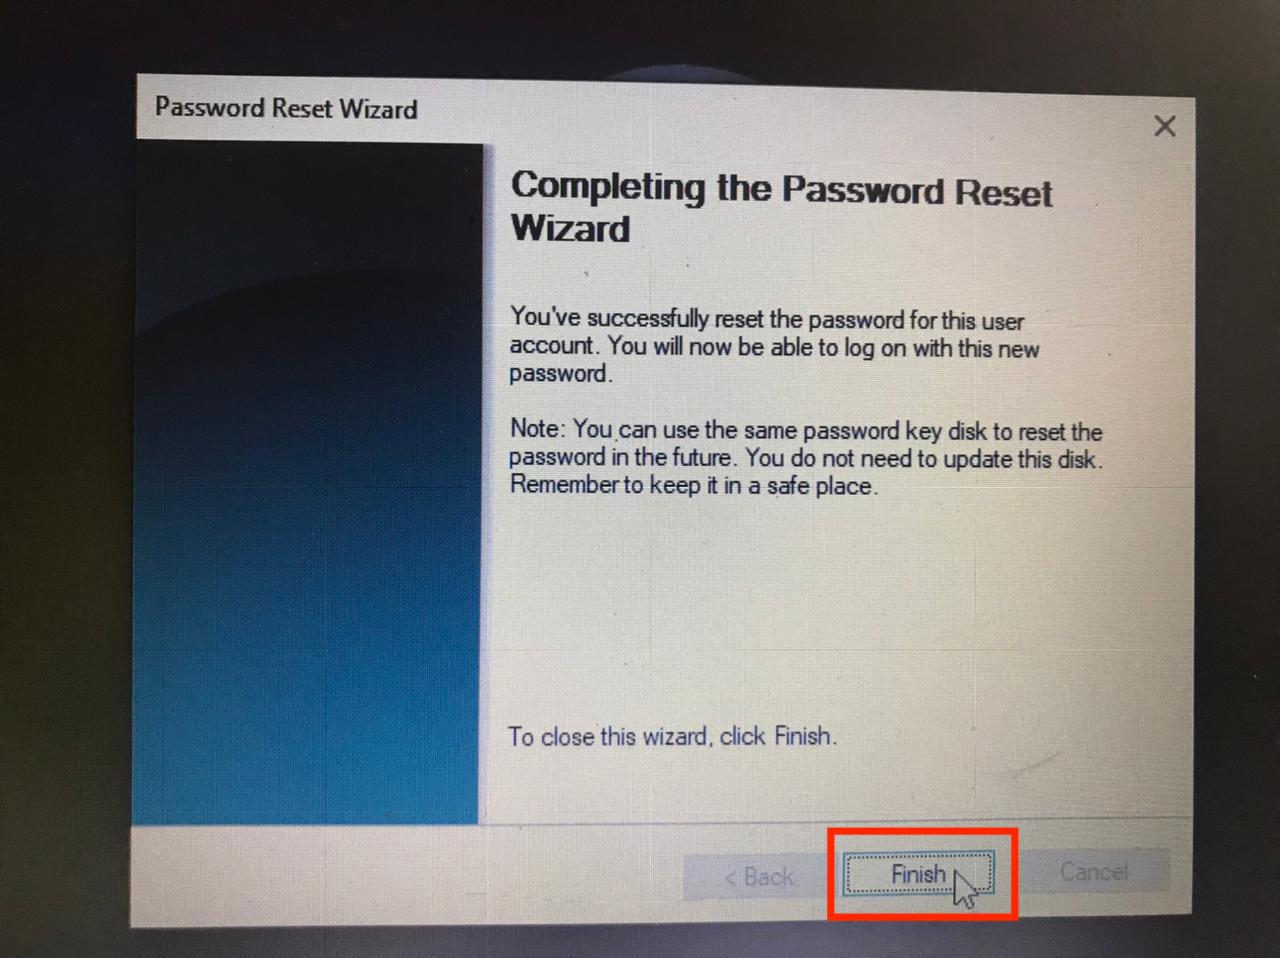
Input your new password, confirm it and type in the password hint
That’s all. You can now log in to your Windows 10 account using the password you just created.
Note: The password you input in steps 7 and 8 will be used to log in to your local account. Therefore, after clicking the finish button in step 10 above, input the password you created to log in. that’s all you have reset your forgotten password using a password recovery disk.
You can now use the password recovery disk next time you lose or forget your local account password.
Conclusion
Creating a password recovery disk is very easy. However, as you have seen, it takes a short time to create one. Therefore, if you have lost your local account password and want to recover it, the best solution is to use the password reset disk. We hope this article helped fix your local account problem. If yes, please leave a remark in the comment section. Besides, if you need our help, let us know, and we shall be happy to help.
