Table of Contents
Windows 10 is one of the most successful operating systems in the world, with its range of features, benefits, and other forms of functionalities. However, if you keep your Windows PC with you for some time, it’s bound to get pretty convoluted and filled up with all the different applications, programs, files, and other software you can download on the device.
While it’s possible to clear your cache in Windows, some data will be stored on the PC even if you can uninstall apps and clear your storage. This is where the Windows Debloater program comes in, offering an excellent solution for worried PC users to speed up their devices like never before. This guide will cover all you need about the phenomenon and discuss how to debloat Windows 10 with Windows Debloater.
Without wasting any further time, let’s get started right away.
What is Windows Debloater?
Windows Debloater isn’t anything you’d typically expect after hearing about it for the first time. It’s not an official Windows application or software that can be downloaded from the Microsoft Store. Instead, the utility is available to be grabbed from GitHub—the world’s largest repository of software, scripts, and applications.
Windows Debloater allows you to run a series of scripts and remove bloatware from your PC. In addition, it uninstalls unwanted pre-installed data from the operating system that you don’t need on your device. All this is done to speed up your Windows PC and make it work better than ever.
Debloater also prevents Cortana—Windows’ very own virtual assistant—from operating and, therefore, saves chunks of data from being used up if you don’t use her. It features a friendly user interface that even the most beginner of users can understand right from the get-go. Now that you know what we have at our disposal here let’s get on with the actual working part of the software.
Using Windows Debloater to speed up the Windows PC
An important note
Before we can start employing the functionality of Windows Debloater on your PC, it’s worth mentioning a little about System Restore first. This exclusive Windows feature lets you restore your Windows version to a previous version in time, thereby dismissing all the changes made to it after that. For instance, imagine you downloaded an update for Windows two weeks back, but ever since then, your device isn’t working right.
By using System Restore, you can go back to this previous state of your Windows, Restore Point, and negate all changes made to the operating system. Since Windows Debloater is risky because it could erase something from the PC that might be important to you, consider setting up a Restore Point before you begin. To find out how to do this, look at our how to use System Restore on Windows 10 article.
Let’s continue with the rest of this tutorial and talk about installing Windows Debloater on your Windows PC.
Installing Windows Debloater
Follow the steps to download the Windows Debloater utility on your device painlessly.
1. The first step is to use this direct link and get to the main Windows 10 Debloater page on GitHub. When you’re there, click on the “Code” button to reveal more options, and then finally choose “Download ZIP.”
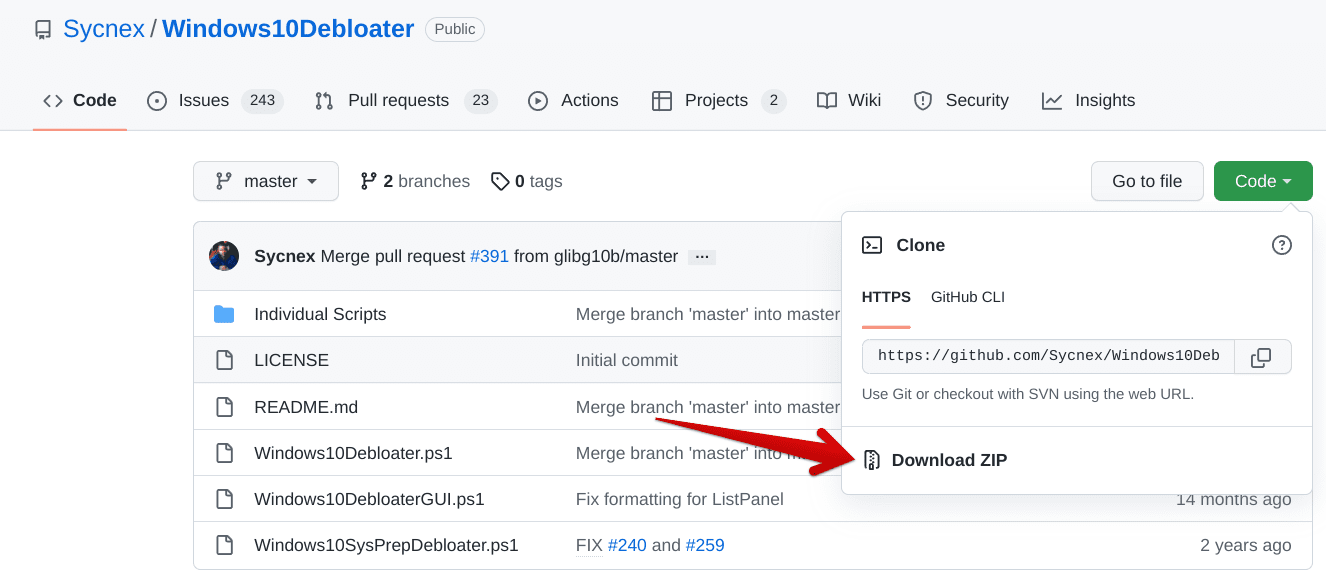
Downloading the ZIP file of Windows Debloater
2. After downloading the ZIP file of the software, proceed to the File Explorer system utility on your Windows PC and unzip the file. You can do this easily by double-clicking on the file and selecting 7ZIP, followed by choosing “Extract all.” You can also use other applications to unzip the downloaded file folder.
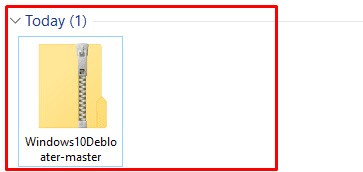
Extracting the relevant files
3. After unzipping the Windows 10 Debloater folder, enter the directory and find the “Windows10DebloaterGUI.ps1” file. Double-click on the file to reveal more options and select “Run with Powershell,” a command-line interface (CLI) capable of performing various tasks for your cause.
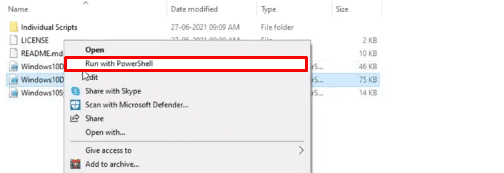
Running the relevant file with PowerShell
4. After you run the file mentioned above with the PowerShell command-line interface, a new window will appear to take you through the initial setup of the Windows 10 Debloater software. At the initial stage, the command-line interface will ask if you’d wish to implement any change in the execution policy of the software. Press the “N” key on the keyboard to get to the next step.

Going past the policy stage
5. After saying “No” to the command-line interface, PowerShell will take a moment or two and process your request. After a short while, the software’s main graphical user interface window will surface, making it possible to get started with debloating the Windows PC.
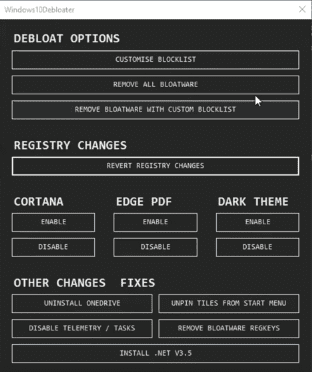
Windows 10 Debloater software
Now that you’ve correctly installed the script at hand, it’s now time to get into its functional capability.
Using Windows Debloater to debloat Windows 10
To get started with the working mechanism of the Windows Debloater software, you first have to decide the usage of your Windows PC. If it has been a couple of years since you bought the device and have been using it consistently, it’s probably best to select the “Customise Blocklist” option. That way, you will not be at any risk of losing important and personal stuff.
The total control of what kind of bloatware is removed from the PC will reside in your hands manually, so we recommend going for that route. If your PC is relatively new, you might as well choose the “Remove All Bloatware” option for the best results.

Removing all bloatware
After clicking on “Remove All Bloatware,” the process for deleting unnecessary Windows files will begin on its own, so you will not need to do anything on your end other than wait. You’ll also see that the PowerShell window will start forming all relevant commands to get some work done and effectively boost the PC’s performance.
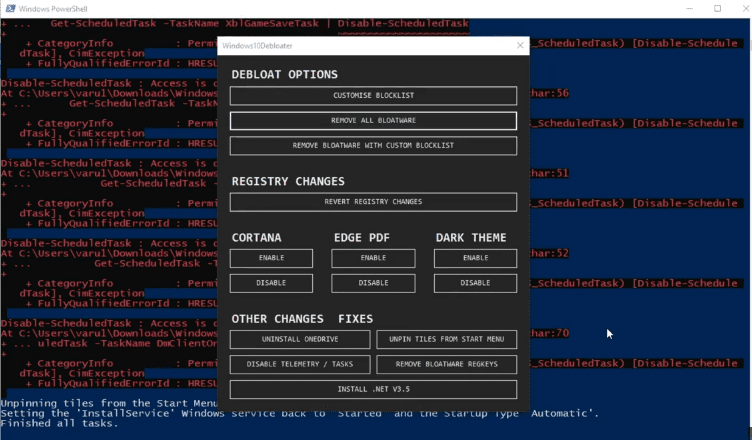
Operation completed
After the process completes, give your PC a fresh restart to make the applied changes manifest just the way you need. This was all the important stuff you should be caught up on regarding debloating your Windows PC. It is now time to conclude the article.
Conclusion
Windows 10 PCs are willing to run as effectively as you’d want them to, provided you occasionally take care of their internal components. Such is the purpose of the Windows Debloater software that we’ve gone over just now in this article. It’s a pretty effective tool that runs a series of scripts on the PC and clears unneeded data previously slowing down the PC.
Now that you’re well aware of the working mechanism of the software in question do let us know in the comments section whether you found the utility helpful for your cause or not. We suggest running Windows Debloater now and then to keep your PC clutter-free.
Windows Pixel would love to hear your feedback on this guide!
