Table of Contents
Avast is known to be one of the best antivirus programs out there. With over 400 million active users worldwide, it is fair to say that Avast falls in the big leagues when it comes to antivirus providers. Users are given two options to avail of the antivirus’ features. Either opt for the free version with limited features or buy a package and get the most out of what Avast has to offer you.
While those features are a topic for another day, today, we’re here to show you guys how you can disable Avast antivirus from your Windows 10 PC.
Why Would You Disable Avast Antivirus?
Now, this question may vary from user to user. Disabling an antivirus obviously does not mean uninstalling it, but why would one want to do it? The answer is simple, in situations where installation of other programs or software is necessary, your antivirus might be acting as a barrier between you and other applications.
Temporarily disabling it would do the trick, and you’ll be able to install new programs freely. Be it a third-party firewall or any other software. You can’t blame this one on your antivirus provider since this is just additional security coming from their side. So, disabling the antivirus would allow you to get things done easily. The procedure is pretty simple and straightforward.
Fully Disabling Avast Antivirus
Note that after you’re done with this procedure, your PC will have completely disabled the protection that comes from Avast antivirus. Unless your PC is not home to sensitive data, it’s best to re-enable the protection later on or install any other antivirus program.
- To disable the Avast antivirus, search for its icon displayed either on the taskbar or the desktop.
- Right-click on the Avast antivirus icon.
- Here you’ll find a list of options. Look for “Avast Shields Control” and hover over it.
- A drop-down menu will be displayed. From here, you can choose any of the given options as per your needs:
- Disable for 10 minutes
- Disable for 1 hour
- Disable until computer is restarted
- Disable permanently
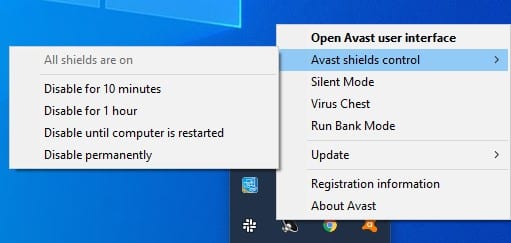
Disabling Avast with Shields Control
- Avast will display a confirmation message on which you have to choose “Yes.” After this, the antivirus protection will be lifted for the chosen time period.
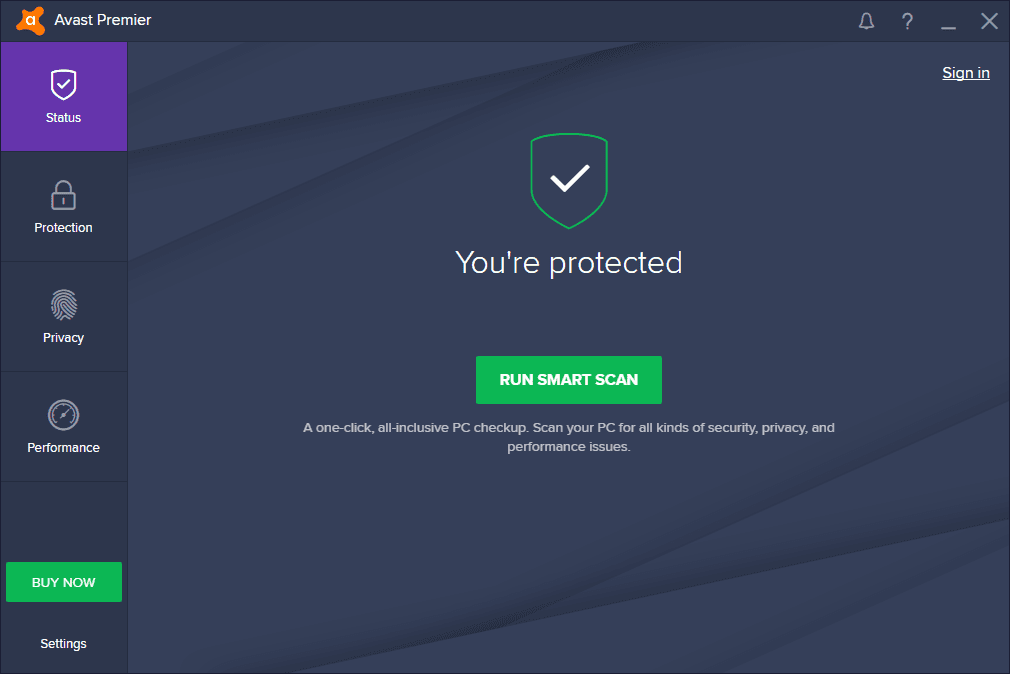
To check whether the disabling procedure worked or not, launch the Avast program. If the status says “All antivirus shields are off,” then that’s the confirmation you’re looking for. Furthermore, when it comes to re-enabling Avast’s protection, look for the “Resolve” button displayed in green on the main homepage of the program. Clicking it will re-enable all antivirus functions, and your PC will be once again under the protection of Avast.
Uninstalling Avast Antivirus
If disabling is not what you’re looking for and you want to get rid of Avast antivirus permanently, then you’ll have to uninstall it from your system. However, doing so will make your PC prone to potential viruses that may lead to loss of data, malfunctions, or more. Unless you’re planning to change your antivirus provider, be sure to give your PC the protection that it needs. As for uninstalling the Avast antivirus program, all you have to do is follow the simple steps given below:
- Firstly, disable the Self Defense feature of Avast that prevents it from being uninstalled. This can be done by launching Avast, accessing its settings, clicking on the Troubleshooting tab, and unchecking “Enable Self-Defence.”
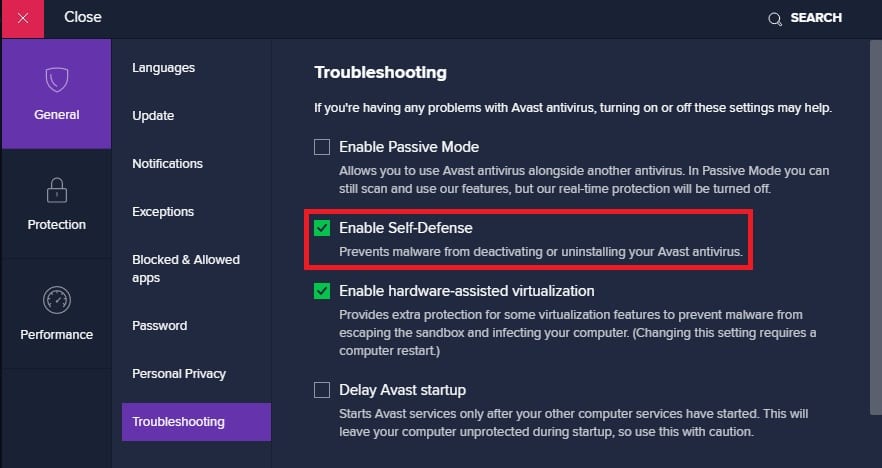
Disabling Avast Self Defense
- After you’re done disabling the Self Defense feature, head on down to your PC’s control panel. Open it by typing “control panel” after clicking the Start button.
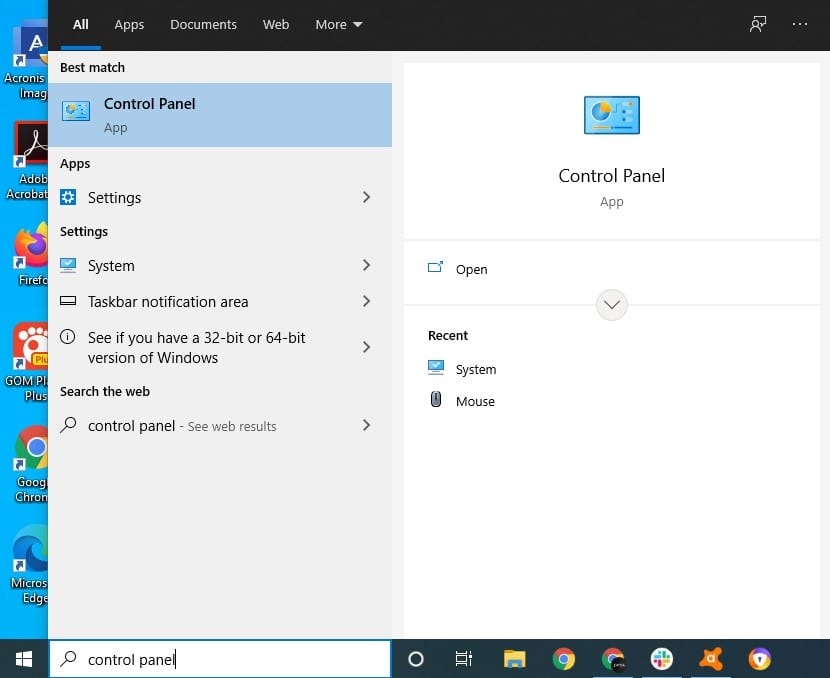
Opening Control Panel
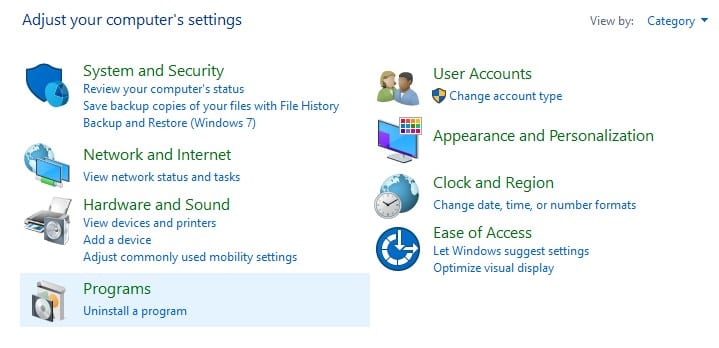
- Click on “Programs” then on “Uninstall a Program” below “Programs and Features.”
Uninstalling a Program
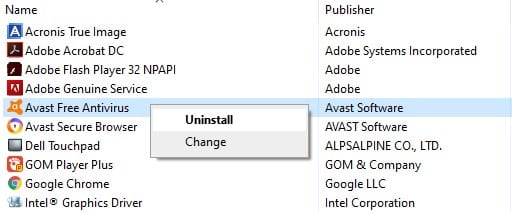
- Look for Avast antivirus in the list of programs and right-click to uninstall it.
Uninstalling Avast Antivirus
- Your PC will ask for administrator confirmation. Once you take care of that, your PC will restart. After it boots, you’ll find Avast antivirus to be absent from your system.
Is Avast Antivirus safe?
Avast antivirus is preferred by millions of users all over the world. There’s no doubt that the antivirus program is safe to use and protects your PC from malicious viruses. However, Avast has been caught selling the personal information of its users to third parties in the past.
Not only has this raised doubts among its loyal users, but it has also put a rough stain on the program’s image. Although this drawback from Avast’s side cannot be justified, the antivirus provider’s services remain unchallenged due to their efficiency in protection.
Conclusion
To conclude, we would say that the choice of going for Avast is up to you. There’s no denying the fact that Avast brings a lot of notable security features to the table. As for disabling/uninstalling the antivirus program, we believe our guide has got you covered with that.