Table of Contents
Windows 10 is arguably the world’s most popular operating system that comprises a ton of user-oriented functions for seamless computing and networking. For instance, some of the best features that Windows 10 users can typically perform include the Windows Startup Repair Tool, Xbox Game Bar, and Windows Hello.
The list goes on and on regarding this software’s open-ended capability. Still, sometimes, some types of functionalities can often be more detrimental to the overall user experience than having an elevating effect.
A glaring example of this scenario is the SmartScreen filter in Windows 10. This is a unique operating system with its own fantastic set of functions, but many users would rather have it disabled than turned ON on several occasions. This guide will explore the SmartScreen filter, its role in Windows 10, and how you can disable it. Be sure to follow the instructions carefully for the best results.
- On a side note, we also recommend checking out the relatively similar Superfetch or SysMain service in Windows 10 and how it can be toggled off.
Let’s dive right into this guide without wasting any further time.
What is the SmartScreen filter in Windows 10?
The SmartScreen filter in Windows 10 is also known as the Windows Defender SmartScreen. Its primary purpose is to serve as a layer of protection against malware, viruses, trojans, or any other form of malicious content that threatens your privacy and security.
While surfing the internet with Microsoft Edge, the Windows 10 SmartScreen filter will become active and scan each URL address you try to visit. In this case, the SmartScreen feature will operate using a particular mechanism. First off, it will comprise a list of your most-visited URLs and websites through Microsoft’s servers. The list will also contain some famous web addresses that will be pulled from the internet on their own.
If the site you’re trying to visit has been cross-checked with the list mentioned above of the SmartScreen filter, you will be allowed to go through effortlessly. If not, the address of this website will be sent to a portal, where it will be gauged for its authenticity. If the reports look bad and the website is shady, you will be shown a warning alert on the screen that will impede you from going any further without confirming it yourself. That’s how the SmartScreen filter works on Microsoft Edge.
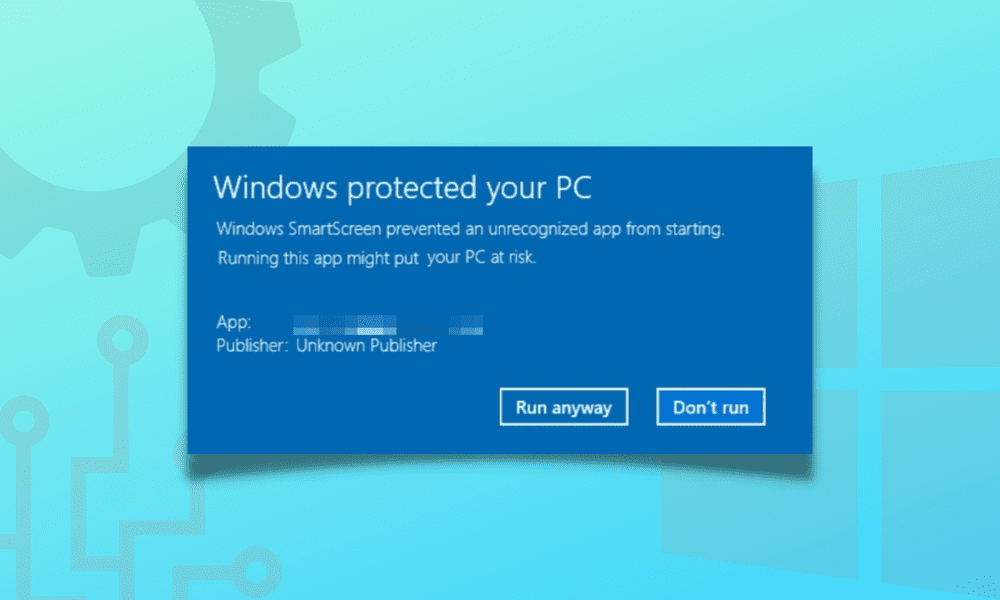
As for the rest of the operating system, the SmartScreen filter is a security feature, so whatever application, program, or any other software that you download will once be scanned by it. If it is detected to be ridden with malware or something similarly dangerous, you won’t be able to access the data. Moreover, the SmartScreen filter also kicks in whenever you try running an application that hasn’t been launched on your Windows PC before.
It has a special policy for unrecognized applications, too, even for trustworthy ones that you know you can bide your confidence in. If the Windows Defender SmartScreen filter has stopped a program from launching, you will be given an option to look into it and run the blocked app anyway. We recommend doing this only if you fully trust this application. You should prioritize safety above everything else.
Why would you want to disable the Windows 10 SmartScreen filter?
The Windows 10 SmartScreen filter is a properly working feature that protects PCs from potential danger. However, the main problem that most users have with this functionality is that it’s not needed. It’s not known to cause performance issues, crashing, high CPU usage, or anything similar, unlike the Windows Shell Experience Host, but many people think that it is just an extra and unnecessary perk that doesn’t provide any much-needed value.
There are already robust protection systems installed onto Windows PCs called Windows Security and Microsoft Windows Defender. Both of these programs do their level best in preventing malware attacks from happening. Another downside to the feature in question is the time it can take to go through the necessary verification checks before launching unrecognized apps.
For instance, you’ve just downloaded an app from the Microsoft Store. The publisher of the software is official and authentic, so you already know there isn’t going to be a problem running it on your PC. However, since you’ve got it on the device for the first time, the Windows SmartScreen filter will try scanning it and show a warning message on the screen.
This is unnecessary from an end-user point of view, so people would prefer to disable the feature altogether and rely on their installed antivirus software and Google Chrome’s high-quality security features. Now that you are all caught up on the SmartScreen filter let’s talk about how to get it off your system in the section below.
How to disable the SmartScreen filter in Windows 10
Disabling the SmartScreen filter in Windows 10 is a reasonably straightforward process. However, to better understand this whole procedure, we will break it down into two different sections. The first part will disable the SmartScreen filter in the Microsoft Edge internet browser, while the other section will focus on Windows 10’s native settings.
Rest assured because, by the time you’re done reading the instructions ahead, you’ll be fully capable of replicating the process on your end. The following subsections are going to take it from here.
Part 1. Disabling the SmartScreen filter in Microsoft Edge
We highly recommend keeping this security feature enabled on Edge. It can often distinguish between getting scammed and missing out on any mishap, so it’s worth having the SmartScreen filter around when browsing the wide, vast stretches of the interweb. However, if you have your reasons and have already reached a firm conclusion, keep reading to discover how to disable Microsft Edge’s SmartScreen filter.
1. The first step is to launch the Microsoft Edge internet browser on your Windows PC.
2. Click on the “Settings and more” icon in the top-right corner of the Microsoft Edge user interface. Alternatively, it’s also possible to use the “Alt + F” shortcut key combination to complete this step automatically.
Clicking on the “Settings and more” icon
3. You will have to click on “Settings.” The following screenshot shows you where to click.
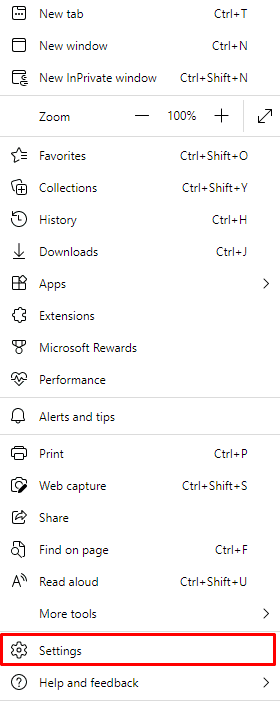
Clicking on “Settings”
4. The next step is to focus your attention on the sidebar on this page and click on “Privacy and security.” Doing so will lead you to disable the SmartScreen filter.
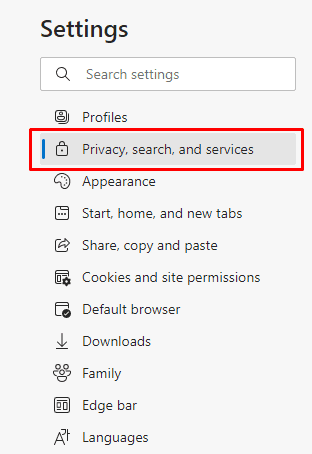
Clicking on “Privacy, search, and services”
5. The next step is to scroll down and find the “Microsoft Defender SmartScreen” option. It’ll be right under the “Security” area. Click on the toggle beside it to finalize the process.
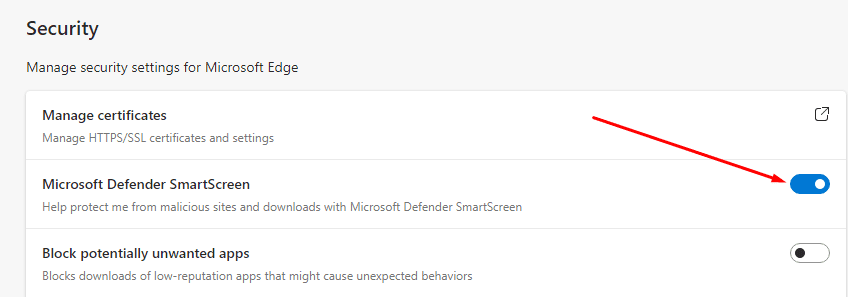
Disabling Microsoft Defender SmartScreen on Edge
Great going so far! You’ve successfully learned how to disable the SmartScreen filter on your Microsoft Edge browser. Let’s further the tutorial and carry on to the next part.
Part 2. Disabling the SmartScreen filter from Windows Security
Your Windows 10 operating system is loaded to the brim with features, and one of them includes the Microsoft SmartScreen filter. In contrast to the Microsoft Defender SmartScreen on Microsoft Edge, this other variant of the feature has its functionality revolving around protecting the operating system. The SmartScreen filter will monitor the applications, software, or other programs that you install, including Microsoft Store apps.
Therefore, it will take several extra steps to convince the feature that you’re trying to run a legitimate application. Let’s get on with the steps below to show you how to disable the SmartScreen filter.
1. The first step is to click on the Windows Search bar in the bottom-left corner of the Windows 10 interface and type in “Windows Security.” Once the option appears, select “Open” to launch the system app.
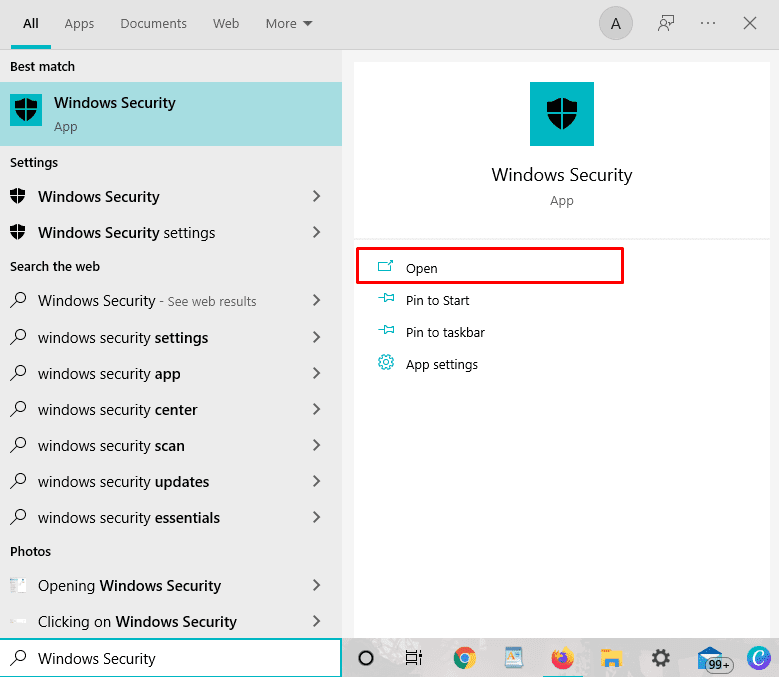
Opening “Windows Security”
2. To continue disabling the SmartScreen filter process, click on the “App and browser control” tile.
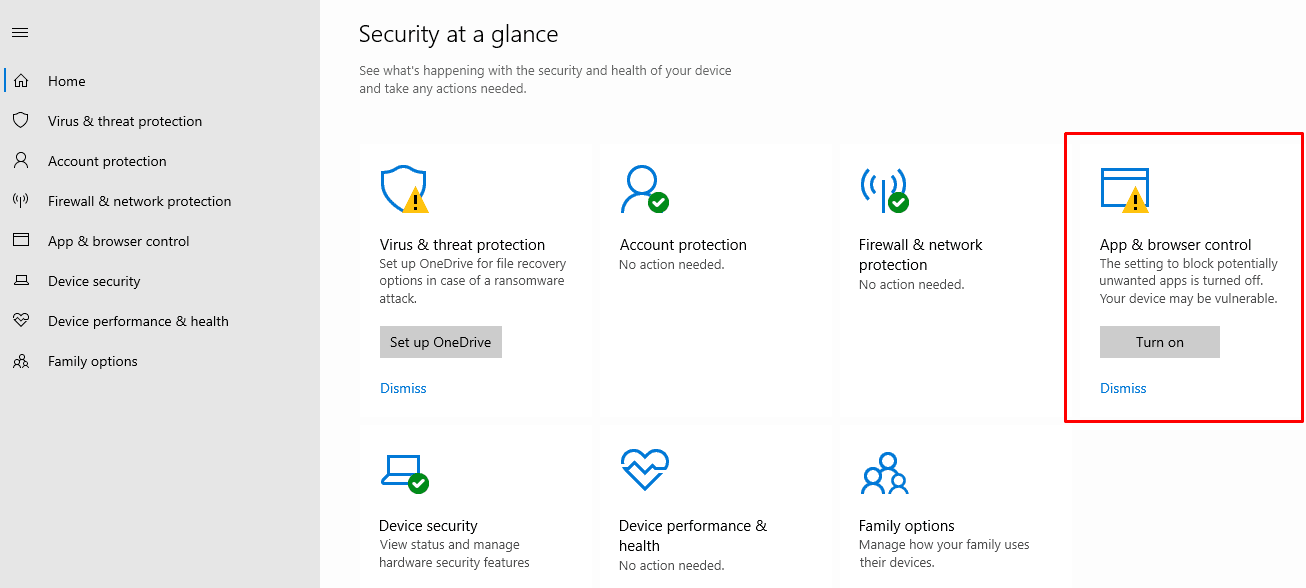
Clicking on “App and browser control”
3. Click on “Reputation-based protection settings,” which will be right under the designated section.
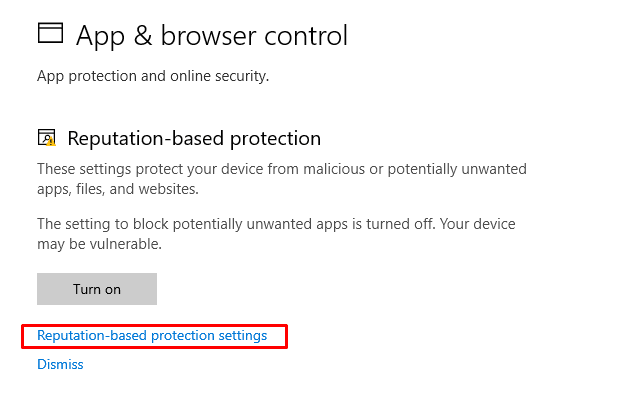
Clicking on Reputation-based protection settings”
4. It will be easy to disable the SmartScreen filter from here. First off, you have to click on the toggle underneath the “Check apps and files” section. This will remove the functionality for your downloaded files and applications from the internet. However, we still have the Microsoft Store part of the feature left attending to. Let’s cover that in the next step.
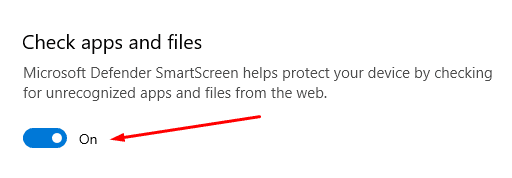
Disabling the SmartScreen filter on Windows 10
5. scroll down in this final step of the whole procedure to find the “SmartScreen for Microsoft Store apps” region. Click on the apparent toggle to disable the SmartScreen filter on Windows 10 wholly.

Disabling the SmartScreen filter for Microsoft apps
Great job! You have completed the whole operation on your own. It’s time to conclude the article.
Conclusion
Windows 10 is an exceptional operating system riddled with functionality from top to bottom. However, sometimes, its strong selling points might come in the way of users and prohibit them from using the operating system in their way. One such example of this scene is the Windows SmartScreen filter, otherwise a security feature of Windows 10.
Therefore, in this article, we have talked about how to disable the SmartScreen filter in Windows 10 to have a tailored user experience on par with your preferences. If it isn’t posing too great of a problem for you, we encourage not switching it off to maximize your PC’s security.
