Table of Contents
In this tutorial, we’ll go through the process of finding and editing the Windows host file. Different users may need to make changes in their host file for various reasons, and we are here to help you get done whatever it is you need to do! Before we get into the technicalities of the matter, let’s explore the basics a bit. What really is the Windows host file, and why would someone want to edit it?
A host file is essentially just a regular text file that serves to map hostnames to particular IP addresses. The file is part of Windows’ IP implementation and refers to long numeric IP addresses easily by giving them user-friendly hostnames.
Users may need to edit the host file for several purposes, such as blocking some unwanted websites on the network, setting up shortcuts, sorting out any malware trouble that may have altered the file’s contents, etc.
If you’re here due to any of those reasons or even just general curiosity, gear up because we’re going to take a comprehensive ride through finding and editing the Windows host file!
Finding the Host File
You will open the host file in Notepad, and since it is a system file, you have to run it as an Administrator. So, go to your search bar and type in Notepad, then click on Run as Administrator. (If you don’t see an option to Run as Administrator, click on the downwards arrow to find it in the dropdown menu.)
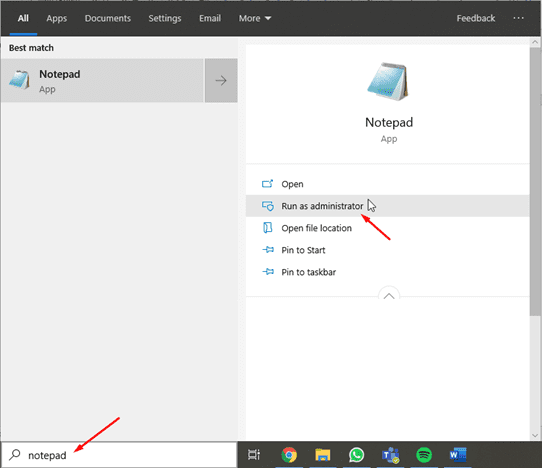
Running Notepad as Admin
To open your host file, you need to go to “Files” in Notepad, click “Open,” and go to the following directory.
C:\Windows\System32\drivers\etc
You’ll find this directory to be empty, but that’s because none of the files are in .txt format, which is the default format Notepad looks for. However, you can click on the bottom right dropdown menu above the “Open” button and select “All Files.” This will make all the files in the folder appear, and you can open your host file.
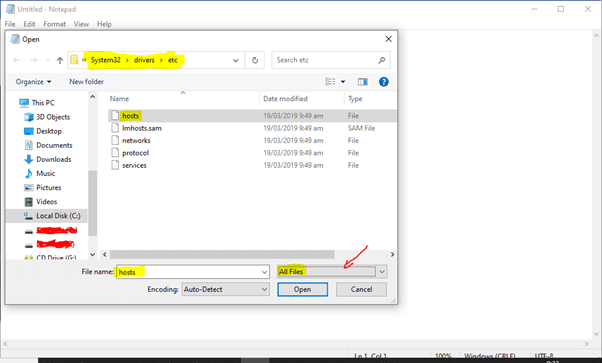
Opening the Host File
Having opened your host file, you should see something like this:
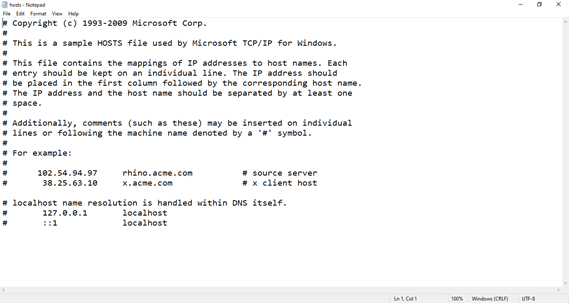
Default Windows Host File
This is the default Windows 10 host file. It contains some instructions for the user, and as you can tell, everything is prefixed with a “#” sign. This means that they are comments and not really lines of code that are being executed.
This is done so because modern operating systems such as Windows 10 use another DNS system already put in place.
Editing the Host File
Now that we have learned how to find and access the Windows host file, we’re going to look into some things we can do with it.
1. Blocking certain websites on your computer
One of the most common reasons for editing one’s host file is to block some websites on the computer. You can stop your friends or family from goofing around on undesirable websites on your PC by setting up restrictions using the host file.
The easiest way to go about blocking a website is to redirect it to 127.0.0.1 or localhost. This can be done as shown in the screenshot below:
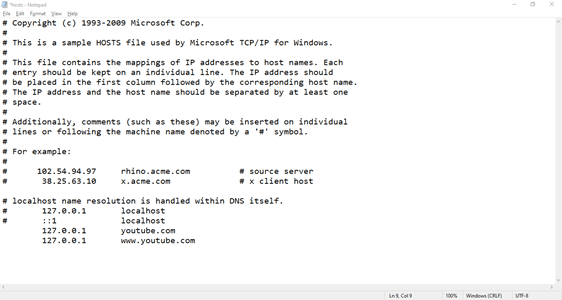
Blocking a Website Using Host File
Note that we basically just followed the same syntax as the examples shown in the file. Also, we did not put a “#” before our lines of code blocking YouTube. This is because we wouldn’t want to put into comments something that we want to execute. One last thing to note is that www.youtube.com is not the same as youtube.com.
Having completed this process of blocking some websites on your PC, the final step is to restart your PC. This will allow the computer to implement the modifications made in the new host file.
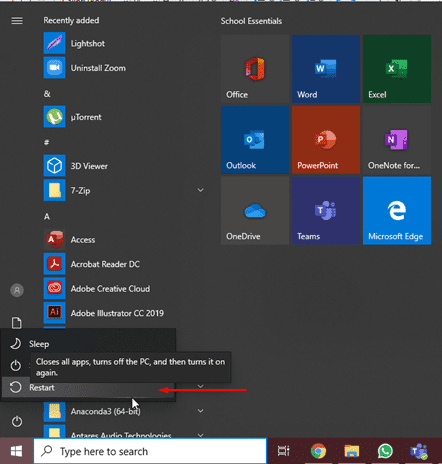
Restarting
Instead of restarting, you can also flush your computer’s DNS cache manually. Click the Windows button and search “Command Prompt.” Next, you enter the following command in the terminal:
Ipconfig /flushdns
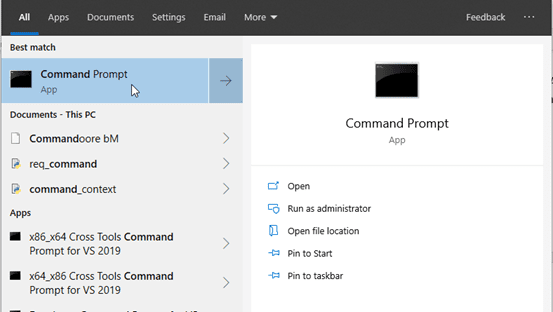
Opening Command Prompt

Flushing DNS Cache
After having restarted the PC, you can try visiting YouTube in your browser. If you’ve done everything correctly, you should see something like this:

Website Blocked
This shows that you indeed have successfully blocked YouTube on your computer, and to undo it, you are going to have to re-edit the host file back.
2. Setting up convenient shortcuts
Despite having gone out of date, the host file still finds its applications in making the user’s life easier. If you find yourself adjusting your network and router settings quite often or just dealing with IPs a lot, you will know how much of a pain typing long IP addresses can be. This is where the host file comes into play.
You can edit the host file and map different IPs to convenient hostnames so that they will serve as shortcuts the next time you want to visit the address.
For example, if you want to set a helpful shortcut to your router, you can add the following simple line of code in your host file and map it to a convenient name.
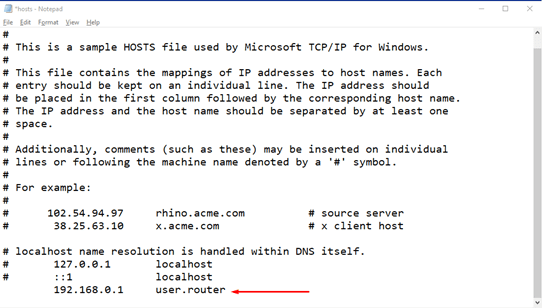
Mapping Router to Hostname
Now, if you want to visit your router, you can do so within a snap of a finger. Just type in user.router in your browser, and it will take you to your router.
One thing to note is that, for the first time, you may have to visit https://user.router. This is because your browser might fail to see .router as what’s known as a “Top Level Domain” or TLD for short.
Lastly, this method has one disadvantage: it only implements these changes in your host file for the device you are currently using. To introduce these changes to other users or devices, you would have to create these shortcuts separately.
An Easier Way to Edit the Host File
We went over finding and editing the host file manually, but that method might be too complicated and/or cumbersome for some users. Worry not, because we plan to show you another way of doing things which is a lot easier and more convenient.
You can use many applications to edit your host file; I would recommend “Host File Editor” by the gracious developer Scott Lerch. The app is totally free, easy to use, and compact in size. You can download the tiny 1MB installer from here.
After having downloaded it, go ahead and run the installer. You should see something like this:
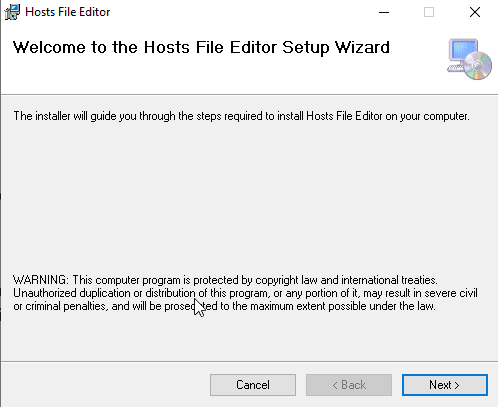
Installing Editor App
Click ‘Next,’ and you’ll see a License Agreement window. Select “I agree” on it. (After having dutifully read the agreement like all of us do, of course.)
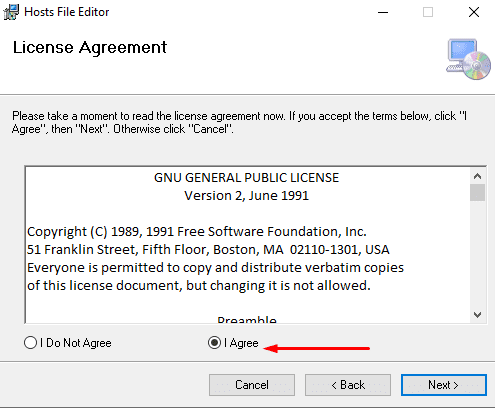
Installing Editor App
Next, you’ll see a window showing you the settings for the app. You can select “Just Me” or “Everyone” depending upon whether you only want your personal user to be able to use the app or everyone.
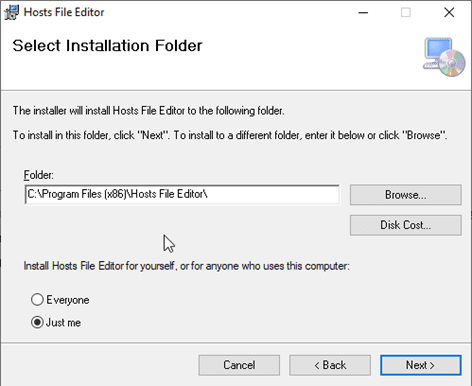
Installing Editor App
Click “Next,” and the installation should start. Please close the window after it is finished installing.
Now go ahead and search for host file editor from your search bar and run it as Administrator.
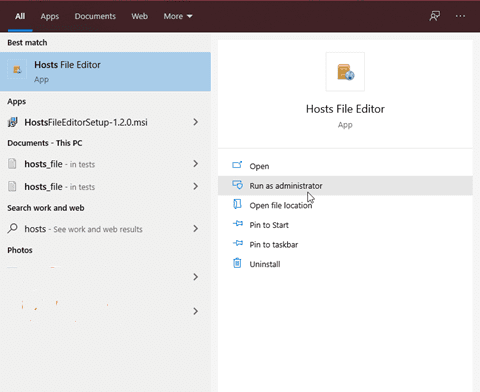
Running Host File Editor
After having opened it, you should see something like this.
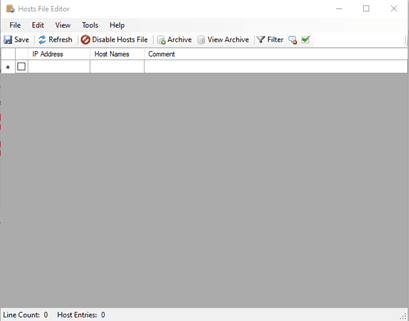
Using Host File Editor
Everything is easy from this point on, and you can add whatever IP addresses you wish in the “IP Address” column, assign it a hostname and add comments.
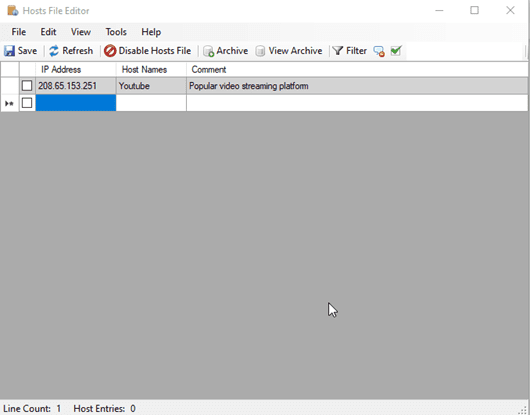
Adding Addresses
To block a website using this application, all you have to do is enter its details as we did for YouTube in the picture above, check the box right next to it and click the Save button. That’s all, and YouTube is now blocked on your network, and all access is prevented.
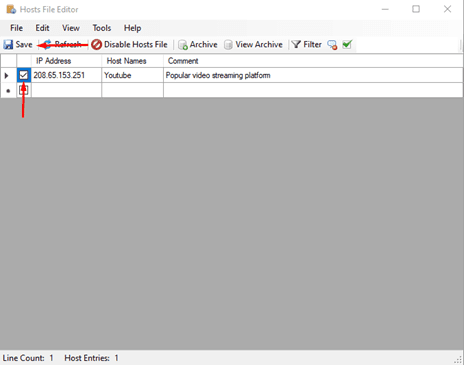
Blocking Website in Editor
You can also make quick edits or disable the host file by right-clicking it from your taskbar and select what you need.
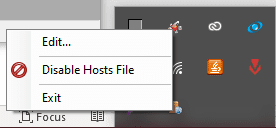
Accessing Editor from Taskbar
And, with that done, you should be able to easily block websites on your system using the host file editor app.
We have seen that this application is much easier to use and makes the whole process a lot less tedious. It’s got a nice, clean, and user-friendly interface and works like a charm. I definitely recommend it to serious and non-serious users alike.
Conclusion
We have covered how to find and edit the Windows host file quite comprehensively in this article. It’s quite an easy task, and the file itself being handy and unchallenging to manipulate helps as well. Hopefully, you will now be able to map together IP addresses and hostnames or blocking websites or setting up shortcuts using the host file.
