
Table of Contents
Windows 10 features a wealth of different processes that all come together to provide an optimal user experience. Some of these processes function in the background and are potentially harmless. In addition, you can see these using the Task Manager. Some, however, appear to be safe initially but soon become hazardous for the overall system resources on a Windows PC. In cases like these, you will see a major decrease in the device’s performance, ultimately leading you to seek out a solution.
One of these troublesome processes is Vmmem. At first, this utility feels like a bug as it causes excessive memory usage. This is an abnormal scenario, and you have to deal with the issue to restore your device’s optimal performance. This guide will cover how to fix Vmmem high memory usage in Windows 10, so keep reading for multiple solutions to this issue.
What is Vmmem in Windows 10?
Vmemm high memory usage in Windows 10
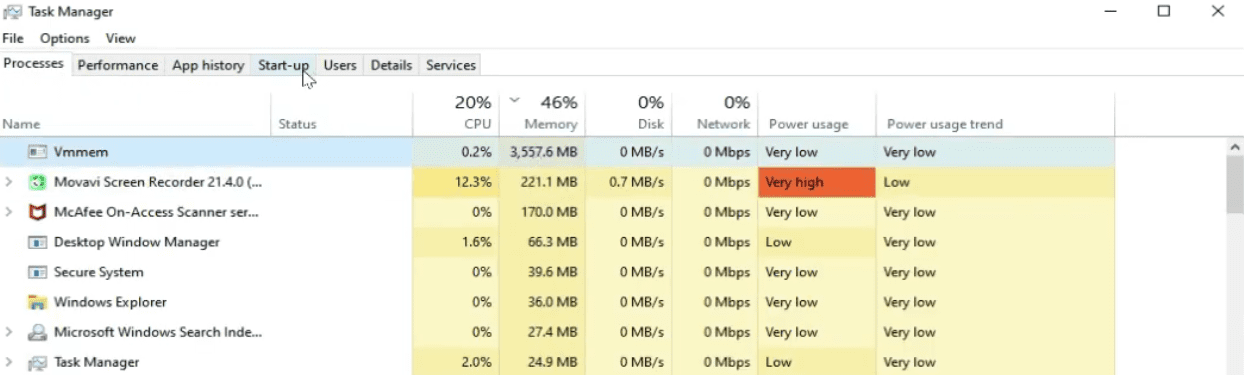
“Vmmem” in Windows 10 appears as a process, similar to how other services have their place in the Windows 10 Task Manager. Whenever it pops up and doesn’t appear to be using many system resources, you might as well ignore it since it’s pretty much harmless at that stage.
However, if the process is measuring up to consume a lot of memory on your end, say about 90%-100% of the total RAM available on the device, that is where trouble will spring up, making it necessary to take a closer look at the process at hand. Upon more careful inspection, it turns out that Vmemm relates to all the virtual machines running on your Windows PC.
It is a system-created process that surfaces to describe to the user how much resources are being utilized by virtual machines on the device. When you don’t have any virtual machine operating, you’re less likely to see the Task Manager’s Vmmem process rise.
However, if you’d like to know how virtual memory works on a Windows PC, check out our guide on everything you need to know about virtual memory. With that being said, let us get right into the best methods that have proved to fix the Vmmem high memory usage in Windows 10.
Fixing the Vmmem high CPU and memory usage issue in Windows 10
We have compiled the best ways people have employed to fix the Vmmem high memory usage issue in Windows 10. Follow the listed guidelines and try replicating them on your end carefully.
Restart the PC
Let us start this whole scenario with an easy-to-follow solution. Although this one is quite the oldest ones in the book, many people cannot deny the effectiveness of a simple reboot. It often helps PCs get a fresh restart, quite literally, and absorb some breathing room. Moreover, restarting your device automatically kills unwanted background processes, so you’re automatically freeing up many system resources.
In addition, the Vmmem high memory usage issue can result from a temporary spike in virtual machine utilization. Therefore, it is undoubtedly worth restarting your PC before jumping into the more complicated and time-consuming end of the fixes.
Adjust the allotted memory for running virtual machines on your Windows PC
One common mistake that most people commit is inadvertently allowing a high amount of RAM for their virtual machines running on the device. Now, this is the most straightforward cause of Vmmem’s high memory usage issue since you’re the one actually at fault here. In this case, all you have to do is readjust the virtual machine that you’re currently executing, so it doesn’t eat away a ton of system resources.
If you’re using software like Virtualbox on Windows, we can help you configure your virtual machine optimally. Check out this specialized guide for more information. You need to optimize the amount of allotted memory to your virtual machines, so they can utilize a stable level of RAM and not go overboard.
Try going through this potential fix to see if it brings any favorable results. If you’re still unable to get Vmmem back to a normal level, the issue might be more deep-rooted. Let’s get into the next fix.
Shut down WSL
WSL is short for Windows Subsystem for Linux. It is an integral component of Windows 10 and Windows 11 as well. This utility’s main purpose is to offer a virtualization solution for Windows users. It makes it possible to execute Linux binaries with the help of a virtual machine.
This process is one of the most essential services in Microsoft Windows that plays a crucial role in virtualization. You can even use WSL to run Linux apps on Windows 10 and Windows 11. If you want to find out how to do that exactly, check out this guide.
Now, WSL doesn’t always run smoothly. Sometimes, it is the main cause behind the Vmmem high memory usage issue. Therefore, in this potential solution, we will try fixing the problem by temporarily shutting down WSL to see if Vmmem starts reverting to a normal resource utilization level.
The following steps are going to explain how to do that.
1. The first step is to open the Command Prompt on your Windows PC. Please make sure that you run the application as an administrator to avoid any future mishaps.
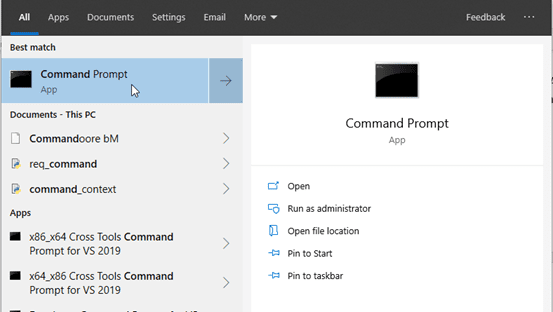
Opening Command Prompt
2. After opening the Command Prompt, you will have to enter the following command into the operational tool that we have running. Following the input, this specific command will do the trick for us.
wsl --shutdown

Rebooting the WSL service
3. After inputting the last step, the Terminal will return you with your username, affirming that the command above was a success. However, you are not quite done yet. It’s necessary to restart your PC at this stage to continue the process. Do that from your Windows Start menu and move forward.
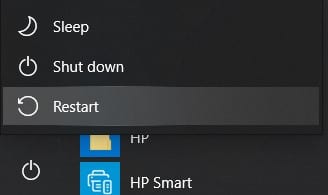
Restarting the PC
4. After restarting your PC, check your Task Manager to see if Vmmem is still consuming an undesirable amount of RAM or other system resources. If the problem seems to be fixed now, it’s worth rebooting the WSL service again in case you ever want to employ the functionality of Linux again on your Windows PC.
Otherwise, if you leave WSL shut down, forget about being able to use Linux. Therefore, open Windows Powershell to continue from here on out. Search for it in the Windows Start menu, and don’t forget to run the app as an administrator to avoid future issues.
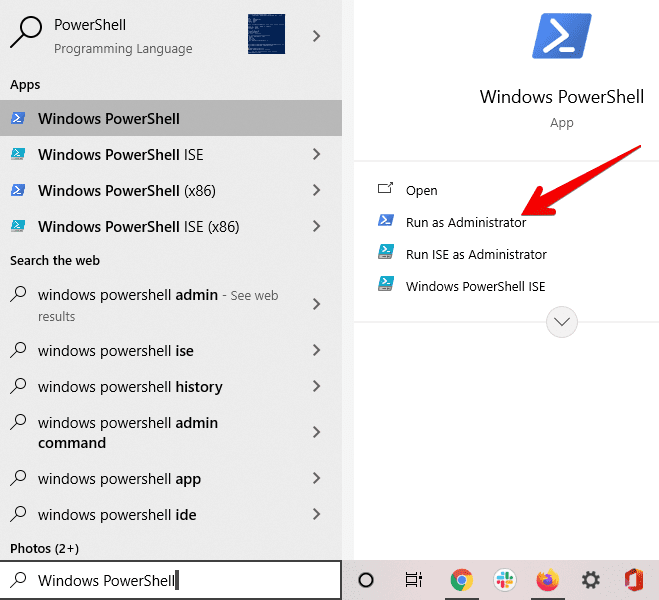
Running Windows Powershell as an administrator
5. After Windows Powershell launches, type in the following command to kickstart the WSL service again. Press the “Enter” key when you are done.
Restart-Service LxssManager
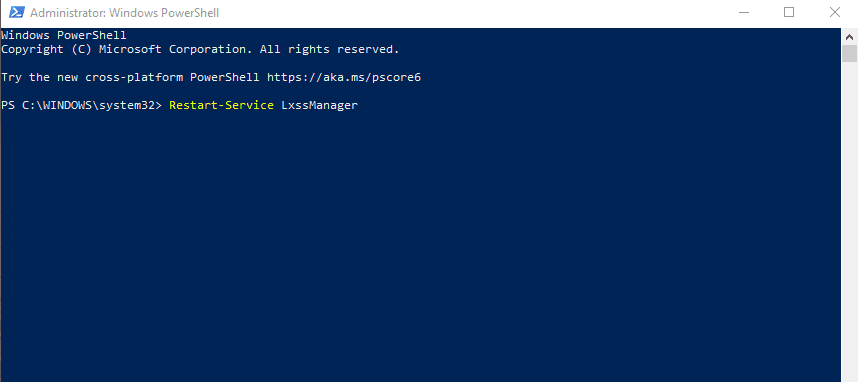
Restoring the functionality of WLS
That’s about it for this fix! If you’ve managed to fix the Vmmem high memory usage issue on your end, congratulation! However, if nothing has worked so far, you need to try out the final solution that we have coming up next in this guide.
Terminate the running virtual machines
If no other solution has proved fruitful for you so far, you have no other option but to opt for the through-and-through of all running virtual machines on your Windows PC. Again, we will be paying attention to the ever-convenient Windows Powershell command-line interface to finalize this process. To get started, open Powershell first as an administrator. That will allow you to enter the forthcoming commands successfully.
After opening Powershell on the device, you will have to get started by entering a command. This command will allow you to enlist a list of all the different virtual machines running on Windows 10 concurrently. Check out the following and use it in your Command Prompt to continue.
wsl -l -v

Running the initial WSL command
After using that last command, Windows Powershell will return you with a list of different virtual machines running in the background. From here, we will have to check the status of each opened virtual machine and confirm which ones are functioning. If 2-3 processes actively show the status “Running,” we recommend you close all of them to check if the Vmmem high memory usage issue is fixed.
To close the virtual machine, you need to use the name of the process running. For instance, if Kali-Linux is being used, you can effortlessly employ the following command in Windows Powershell.
wsl -t kali-linux
The “-t” part stands for “terminate.” You should understand that you will enter the name of the process that’s specific to your PC. It may or may not be Kali-Linux, so don’t think the command above is set in stone and valid for all cases. For instance, you could have Ubuntu running on the desktop. In that case, the following command will be used.
wsl -t Ubuntu
In prevalent cases, that’s all there is to share about the Vvem high memory usage issue! Whenever you’re faced with a problem like this, make sure you know how to deal with it.
Conclusion
Windows 10 and Windows 11 are exceptionally regulated operating systems that comprise various processes. In most scenarios, these options grant the possibility of using a Windows PC optimally, making all possible things clearer to perceive. However, sometimes, these processes don’t work well for users and start springing more trouble than resolutions.
Worry not, however, because, in this guide, we have talked about some of the most effective ways to fix Vmmem’s high memory usage in Windows 10. You can start with a simple restart with a reasonable likelihood of getting the issue fixed and continue onto more involved fixes when things do not look to improve.
1 comment
It seems worth mentioning also a couple of variations on what you’d shared. First, the amount of memory used by wsl vms can be configured with wslconfig file settings. See https://docs.microsoft.com/en-us/windows/wsl/wsl-config
Second, if one uses Docker Desktop for Windows, the high use of memory by the vmmem process can be down to just needing stop some unused containers, or if using the kubernetes feature stopping some pods. There are even diagnostic features of both that could help identify high resource containers or pods. I’ll leave it for others to explore all this further on their own (as to whether, why, and how to manage containers/pods), if they’re using Docker Desktop. Finally, one could also just stop or restart either docker desktop itself of the kubernetes engine within it. The status tray icon for the tool offers options for both.
I bring up these ideas for those using docker desktop to consider, as I have frequently seen it be the cause of high mem/cpu by vmmem, but like the rest of the article conveys, it may not be obvious to connect these dots.