Table of Contents
Windows Modules Installer Worker is one of the most integral parts of any Windows PC. In this error-fix guide, we will go over all the different ways you can fix this system component when hoarding many CPU resources, so sit tight and keep on reading for the best results. Let’s dive right in without wasting any further time.
What is the Windows Modules Installer Worker?
Before we get into the part this discusses the issue of high CPU usage, let us first get a firm grip on the concept of the Windows Modules Installer Worker. As we mentioned before, this is an essential system component that plays a vital role in your operating system. So, what does it exactly do? Well, the Windows Modules Installer Worker is responsible for installing, uninstalling, and managing your device’s updates.
With this feature inactive, there is a likely chance that you will no longer be able to update your operating system properly and encounter tons of issues while doing so. Look for this process in your Windows PC’s “Services” system application. You’ll find that its description says, “Enables, installation, modification, and removal of Windows updates and optional components. If this service is disabled, installing or uninstalling Windows updates might fail for this computer.”
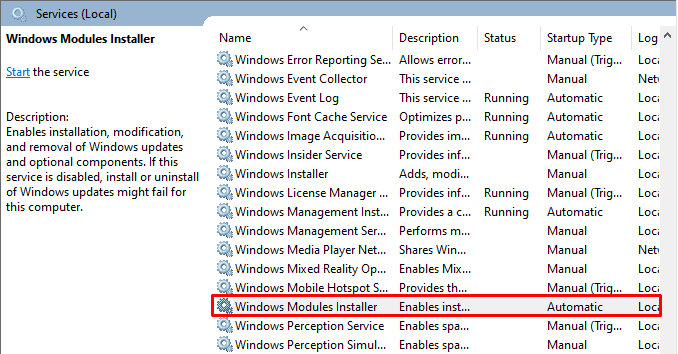
Windows Modules Installer service
You don’t want to trouble yourself with faulty Windows updates. Doing so can potentially disrupt the whole operating system and make it impossible for you to use the device to a decent extent. The Windows Modules Installer Worker is also concerned with backing up the data of old Windows updates in a safe reserve that can be accessed if the users have to. In addition, it is also worth knowing that Windows Modules Installer Worker is a background process.
It can be observed in the Task Manager, especially if your device is concurrently downloading or installing an update. If you can’t find Windows Modules Installer Worker in the Task Manager, try searching the latter for the “TiWorker.exe” name. This is because this service also goes by the latter and even WMIW. However, these names all mean the same thing and are just the Windows Modules Installer Worker.
No need to worry, though. We’ll go over the fixes you need to perform step-by-step and resolve the Windows Modules Installer Worker high CPU usage. Now that you know what this background process is, what it does, and why it can cause the issue in question, let’s get right down to the best ways to fix the issue.
Best ways to fix the Windows Modules Installer Worker high CPU usage
We’ve gathered a host of potential solutions that can eventually help you get down to the bottom of this all and resolve the Windows Modules Installer Worker high CPU usage. Please follow the instructions within each subsection for favorable results.
Wait it out
In some cases, you may not need to perform a fix or anything like that at all. Suppose you’ve noticed that the Windows Modules Installer worker service uses about 80-100% of your CPU. In that case, it’s very likely that the feature is currently undergoing a heavy load of updates for your operating system and is in the process of either installing or modifying them. Suppose that turns out to be the case for you, no need to worry. Give the device some time, somewhere around an hour or two.
See what that brings on your end. If the issue is resolved and your major system resources are back to normal after everything is said and done, that’s excellent news. If you’ve double-checked that the problem is genuine, you need to employ a series of fixes that start with a simple restart and end up with something far more involved. Let’s get to them right away.
Restart the PC
This section won’t be too expansive as we already know how to restart a PC and have probably done it thousands of times. It’s a generic fix that can often work for most problems, including the 100% disk usage issue on Windows 10. To restart a PC, you need to click on the Windows Start button, click on the “Power” key, and select “Restart.” That should do the trick.
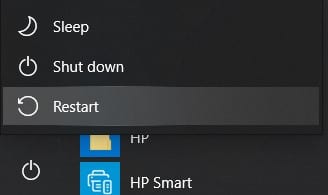
Restarting the PC
Once your PC boots back on, check whether the Windows Modules Installer Worker is still causing an abnormally high CPU usage. You will have to wait 10-15 minutes to verify this. If the problem persists after giving your device a reasonable amount of time to come to its senses, continue reading for more potential fixes.
Run the Windows Update Troubleshoot program
1. The first step is to open your device’s “Settings” system application. That can be done quickly through the Windows Start menu or from the Taskbar if you have the application pinned there.
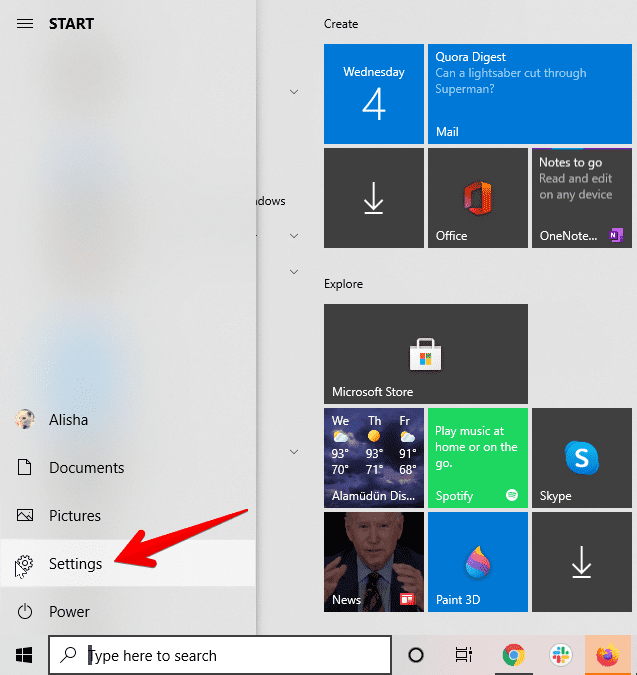
Clicking on “Settings”
2. The next step is to click on the “Update and Security” section of your “Settings” app.
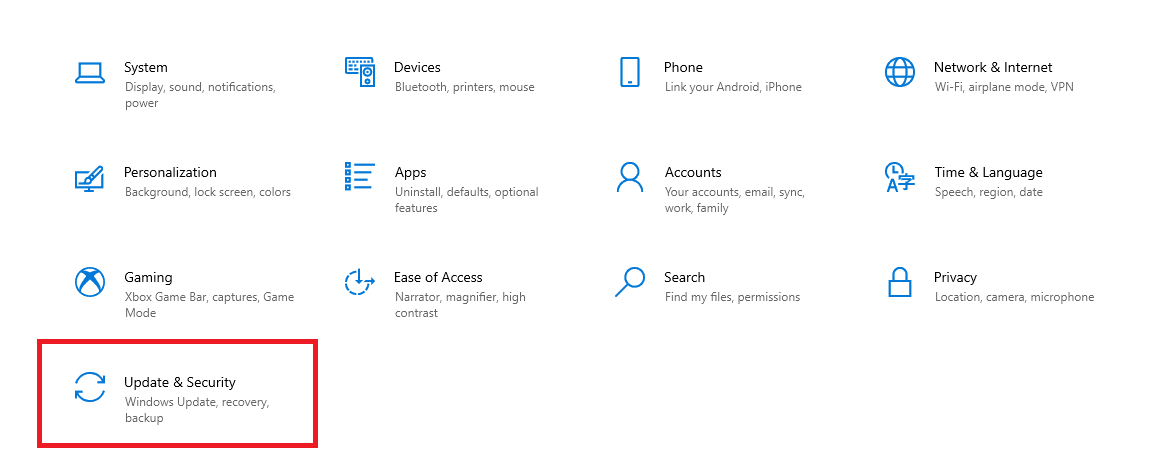
Clicking on “Update and Security”
3. Please focus your attention on the column to the left of the screen and click on “Troubleshoot.” That should safely take you to the next step.
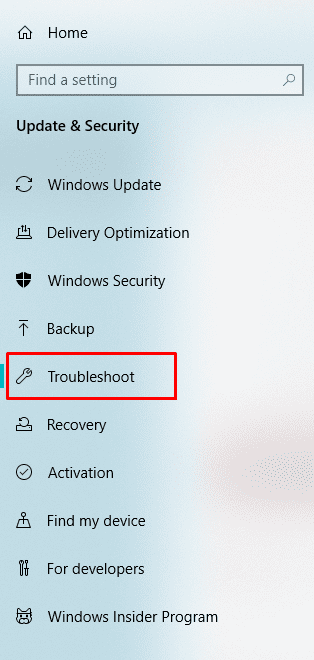
Clicking on “Troubleshoot”
4. You now have to click on “Additional troubleshooters” to get to the next step. It’s worth noting that you should keep this set to “Run troubleshoots automatically, then notify me” for the best results.
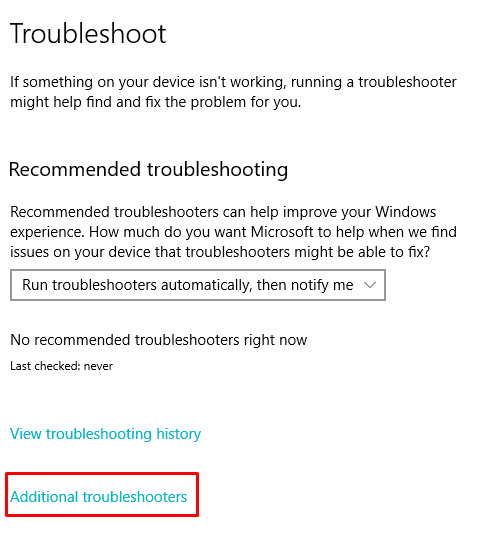
Viewing additional troubleshooters
5. Here, it will be possible for you to click on any of them and run their relevant troubleshooter to resolve specific issues. We are in this section for the Windows Modules Installer Work high CPU usage issue, which directly concerns Windows Updates. Therefore, click on the latter to make the option of “Run the troubleshooter” appear. Select this option to get to the next step.
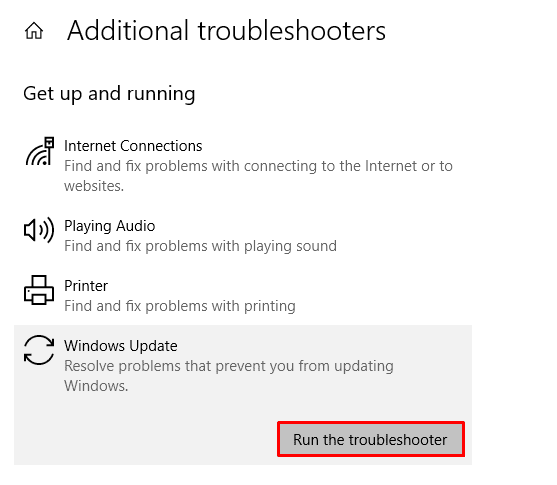
Running the Windows Update troubleshooter.
6. This will continue for a good two to three minutes, and the results will be shown to you momentarily.
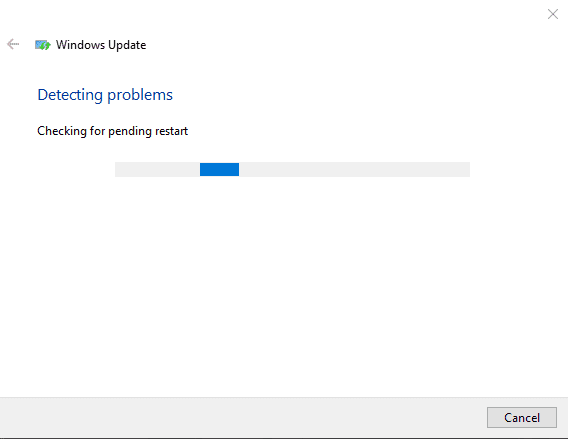
Windows Update troubleshooter detecting problems
7. After it’s done detecting problems, as shown in the last step, it will resolve the recognized issues on its own. Soon afterward, the page will state, “Troubleshooting has completed.” The window will also enlist the problem(s) you had with Windows Update. Hopefully, the Windows Modules Installer Worker High CPU usage issue will be resolved with the Windows Update troubleshooter now. Click on “Close” to finalize the process and exit the window.
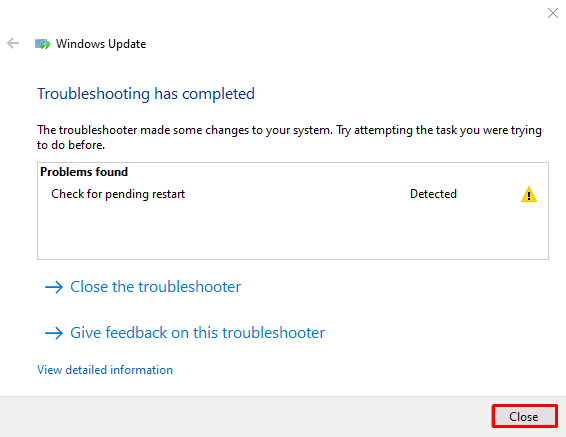
Troubleshooting complete
This definite fix has worked for many people with the Windows Modules Installer Worker high CPU usage. However, if this potential solution doesn’t work for you, continue with the other measures we have in this guide.
Get rid of a specific system folder to resolve high CPU usage
Often when you want to downgrade and install an older version of Windows on your PC, the SoftwareDistribution folder comes in handy. However, it can often be the culprit that causes the Windows Modules Worker Installer high CPU usage. Therefore, we will have to delete the folder and see if it brings us any luck.
Don’t worry, though. Deletion doesn’t cause anything harmful. This generic system folder will find its way back when you download and install any further Windows update. For now, follow the steps given below and learn how to get rid of the “SoftwareDistribution” file.
1. The first step is to go to File Explorer or Windows Explorer on your Windows PC. This can be done quickly through the Windows Start menu or from the Taskbar if you have it there already.
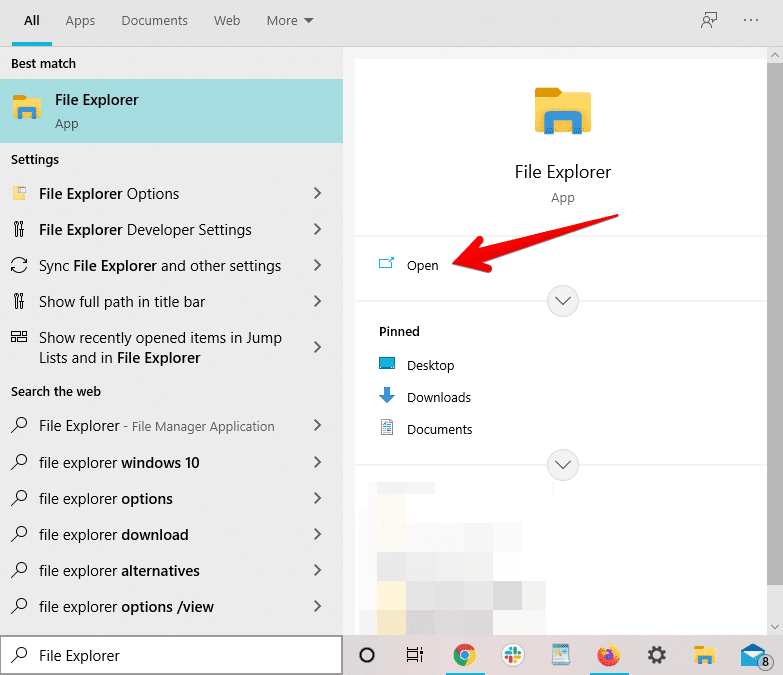
Opening the “File Explorer” app
2. You now have to copy the following file destination and paste it into the address bar of the File Explorer application. Doing so will take you straight where we need to go. Once you are in the correct directory, please scroll down to find “SoftwareDistribution.” Then, perform a right-click and delete it right there and then.
C:\Windows
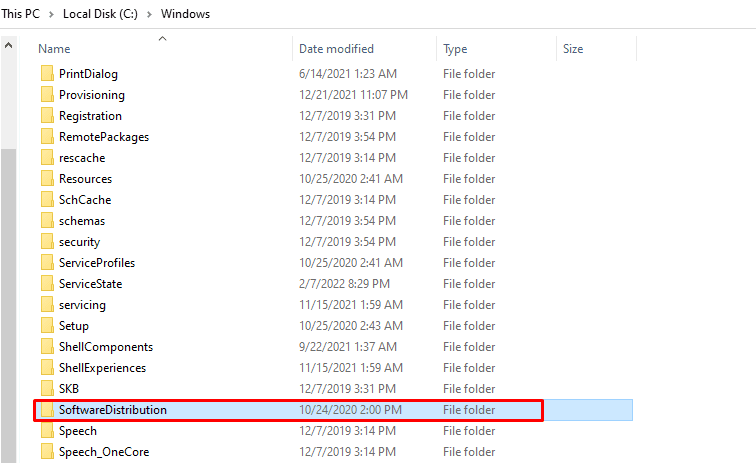
Deleting the “SoftwareDistribution” folder
That’s about it for this simple enough potential fix. Once your device boots back on, check if the issue persists. Follow the solution given next if the problem hasn’t gone away just yet.
Use the System File Checker (SFC) scan
Another noteworthy thing to try is the System File Checker (SFC) feature in Windows PCs. This utility helps the users of Windows 10 to scan the operating system and check for any corruptions within the databases.
1. The first step is to launch the “Command Prompt” on your computer by using the Windows Search bar. Ensure that you’re using it with administrator privileges, so any permission-related restrictions do not hinder you.
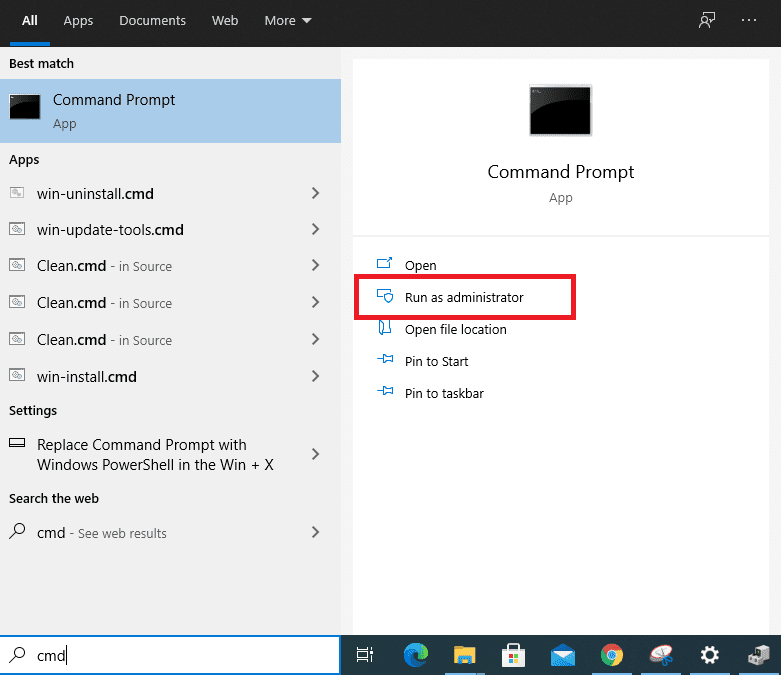
Open Command Prompt as Administrator
2. Copy and paste the following command into your command prompt window and press the “Enter” key.
sfc /scannow

Running the SFC command
3. You will have to wait until the scan is complete.

Scanning process underway
That’s about it for this potential fix of the problem in question. After the scan has finished, you will see the issue pop up on the Command Prompt, and it will be easy to fix it from there immediately. However, if the System File Checker scan does not return with anything helpful, let’s continue to the following method.
Disable automatic updates for Windows
Disabling automatic updates will make it impossible for you to get the latest security patches, bug fixes effortlessly, and just about everything else that a Windows PC gets updated with. Unfortunately, this is something that only automatic updates allow you to have, so if you disable this feature somehow, you will have to be extremely careful to check your Windows operating system for updates in a systematic manner.
Therefore, the following steps will explain disable automatic updates on your Windows 10 PC.
1. The first step is to open the “Settings” app on your device.

Clicking on “Settings”
2. The next step is to click on the “Update and Security” section of your “Settings” app.

Clicking on “Update and Security”
3. Once done, scroll down a little and find “Advanced options.” Click on this area to get to the next step.
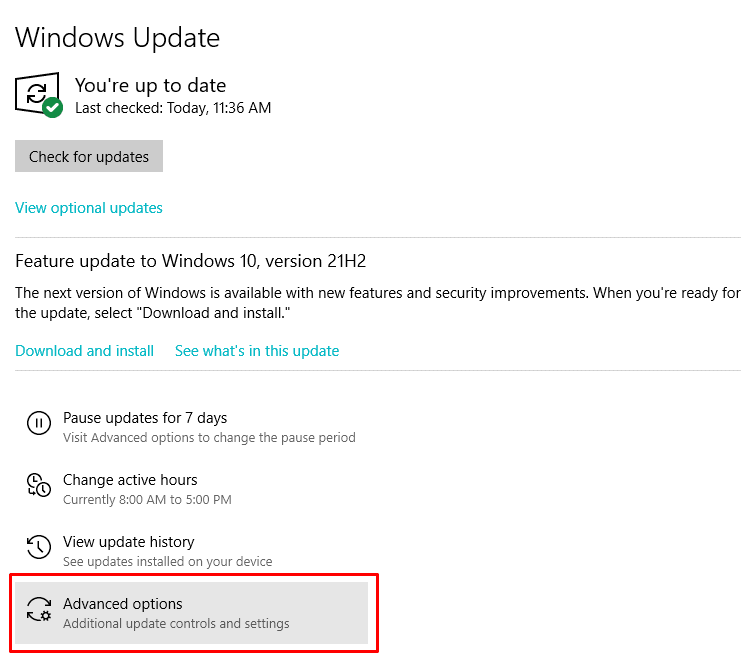
Clicking on “Advanced options”
4. Clicking on “Advanced options” will lead you to a completely different page. Here, you will easily click on “Select date” under the “Pause updates” section. What we are trying to do here basically is to pause automatic updates. Whenever it has been about 6 to 7 days, you will go back to the “Update and Security” section and manually check for updates after this step. For now, click on “Select date” and choose the farthest option down the list by scrolling down. As soon as you do that, you will have successfully disabled automatic updates on Windows 10.

Pausing automatic updates
Reboot your device and check if the problem is resolved.
Conclusion
As we have laid out the guidelines in this descriptive article, you have many ways to resolve the Windows Modules Worker Installer high CPU usage problem. We’ve gone over all the possible fixes, including running the System File Checker scan and deleting a system-specific folder that potentially causes the issue in question. We’re sure that by the time you’re done reading this article and have implemented the fixes carefully, you will no longer have to put with this update-oriented background process eating your CPU and Disk resource away.
