Table of Contents
Windows Resource Protection (WRP) blocks replacing essential system files, registry keys, and folders installed as part of the operating system. It was first introduced on Windows server 2008 and Windows Vista. Authorization for the complete access to modify WRP-protected resources can only be altered using the Supported Resource Replacement Mechanisms with the Windows Modules Installer Service. The main purpose for safeguarding these resources is to prevent application and operating systems from frequent failures.
Applications should not modify WRP-protected resources since Windows operating systems, and some other applications use them. However, in case an attempt to modify a WRP-protected resource is made, either of the following could occur:
- Applications that write data into protected registry keys, files, or folders could fail to work.
- Application installers that try to modify, replace or erase crucial Windows files or registry keys might fail to install the application, hence the error message’s emergence indicating that access to the resource was not accepted.
- Applications that try to erase or add sub-keys or in any way change the values of protected registry keys might fail and get a message of an error stating that entry to the resource was not granted.
WRP was initially known as Windows File Protection (WFP). Its sole aim was to protect folders and registry keys plus the essential system files.
The System File Checker (SFC) is easy to use, and it aids in understanding if there are any corrupt system files in your Windows operating system. However, if this service fails to work, you might get a “Windows resource allocation could not perform the requested operation.” error message.
Why does this error occur?
If an issue occurs on your computer system and a Windows application fails, freezes, or by any chance, it crashes, the typical recommendation is to run the SFC Scannow Command tool, also referred to as the System File Checker. This command scans your Windows system files to check whether there are damage, corruption, or inconsistencies.
Once the problem is located, the SFC tool will resolve the files and fix the issue. Therefore, this should be the first remedy as it has been proven to fix corrupt file system errors. However, there are circumstances in which the SFC scan tool fails to fix the problem. If such occurs to you, you will get an error message.
Once you get the error message mentioned above, several reasons could be behind the occurrence of the error, as highlighted below:
- The Windows server contains an error, and it needs fixing
- The SFC Scannow Command tool has malfunctioned
- Something is preventing or conflicting with the SFC scan.
If an SFC scan fails, there is something wrong with the SFC utility tool, or there could be a problem within the disk causing the scan not to occur. Hence, to fix the errors, refer to the solutions provided in this article.
Solutions to fix the “Windows Resource Allocation Could Not Perform The Requested Operation”
If you have attempted to run your SFC Scannow Command tool several times and you keep on getting the above error message, below are some of the solutions you could give a try:
1. Run a CHKDSK on your hard drive
First and foremost, you should check the condition of your hard drive by running a chkdsk scan on your hard drive. This is necessary because you will tell if your disk has corrupted system files or is damaged. Once you find out whether the disk is okay or not, you can easily tell why the error message. Follow the steps below to guide you on how to run a chkdsk on Windows 10.
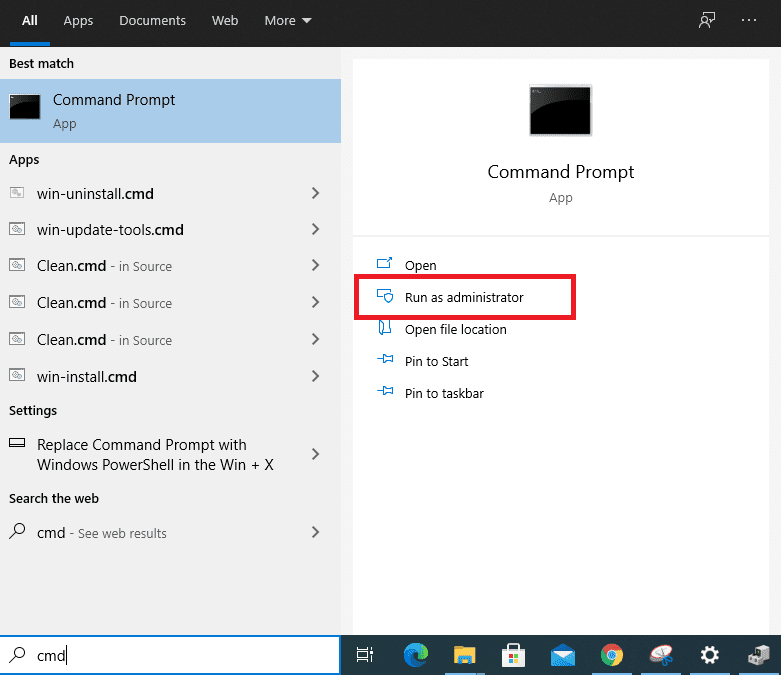
- In the search bar of your computer, key in Command Prompt.
- Please right-click on the command prompt tool and then run it as an administrator.

Open Command Prompt as Administrator
- In Command Prompt, key in the command below:
chkdsk C: /r
Note: Replace “C” with the drive letter that contains your Windows system files. If the chkdsk is successful, it will resolve all the errors by fixing the issues found. Your SFC scan should start working correctly. If the steps mentioned do not fix your error, continue with the solutions below:
- Select Enter.
- Click Y to confirm that you want the chkdsk to run on restart.

Press Y to initiate the checkup once your computer restarts
- Restart your PC to permit chkdsk to run its scan once it restarts.
2. Run the SFC Scannow in Safe Mode.
If the chkdsk run fails or it cannot repair any damages or corruption present for some reason. You still get the error. Then you could try running the SFC scan in Safe Mode (if you don’t know how to start your windows 10 in safe mode, you can refer to “How to start Windows 10 in Safe Mode.
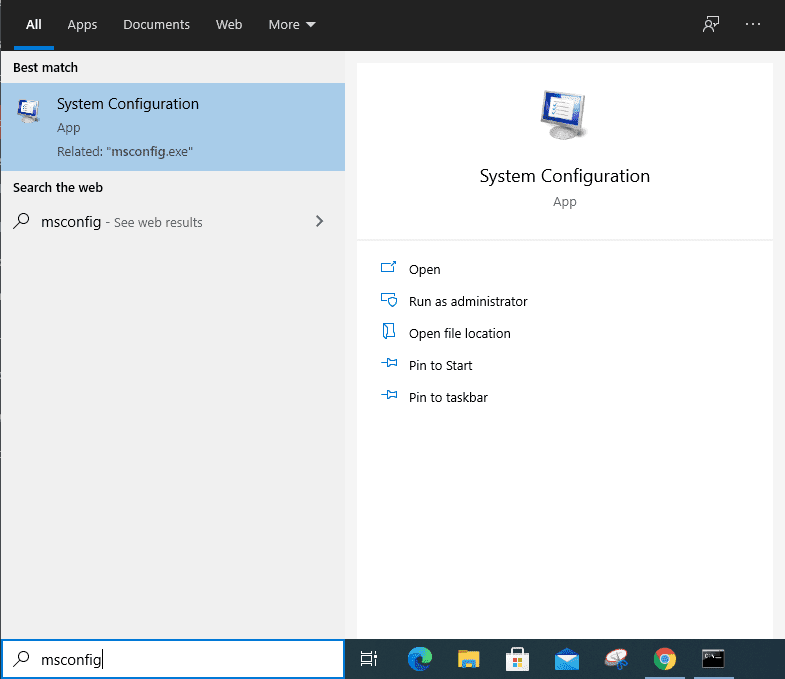
- Key in msconfig in your PC’s search bar. On your keyboard, click enter and then wait for the system configuration Window to pop up.

msconfig
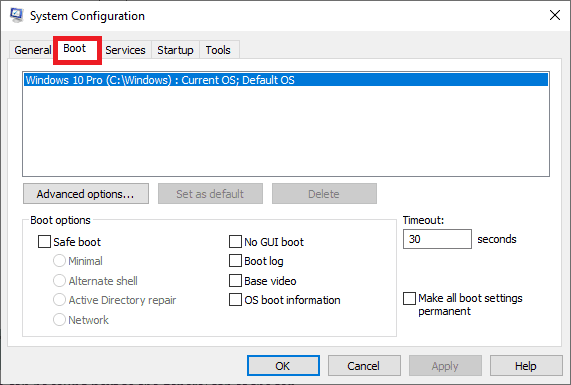
- Click on the boot tab, which can be found next to the general tab at the top.

Boot tab
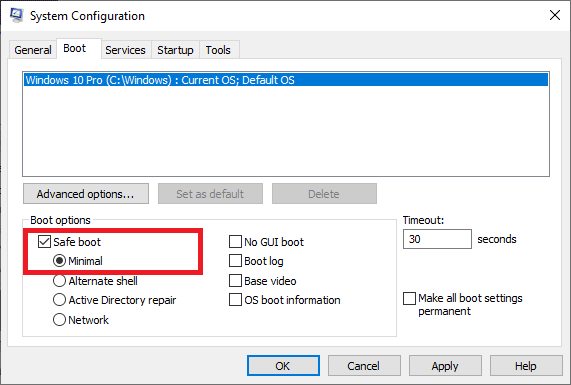
- Look over the box for “safe boot,” which is under the boot options.
- Ensure that “minimal” is check-marked and then click okay and apply.

Safe mode and minimal checked
- You can now restart your PC to reboot.
Given that you are now in safe mode rerun the SFC scan. For this to occur, search for the Command Prompt tool, right-click to run as an administrator, and open. Key in the command below and press “Enter.”
SFC/scannow

SFC scannow utility running
If the issue fails to be resolved, go to the next solution as given below.
3. Modify Security Descriptors in WinSXS Folder
Most of your Windows system updates and system files are housed in the WinSXS folder. Failure of the SFC utility tool to access this folder leads to an error message. To sort out this issue, you can modify the security descriptors of the folder.
- In the search bar of your computer, input Command Prompt.
- Right-click on the Command Prompt tool and run as an administrator.
- In Command Prompt, Key in the command below and then press “Enter” on your keyboard to execute the command:
ICACLS C:\Windows\winsxs
- For the description change to take effect, reboot your computer.
- You can now try to rerun the SFC scan.
4. Enable Windows Module Installer.
SFC scan is unlikely to work if you have disabled the Windows Module Installer on your computer. This is the tool that checks and automatically installs all Windows updates to your PC. If it is disabled, there might be bugs in your system that may be causing the SFC scan to malfunction. Below are the steps to take in case you want to enable your Windows module installer:
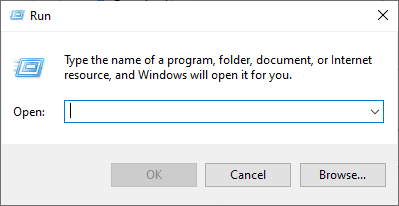
- Click on the Windows key + R to open the run dialogue box.

Run Command Dialogue box
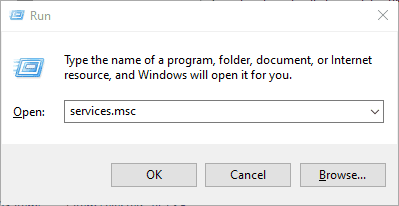
- Key in services.msc into the Run dialogue box and click okay.

Services.msc
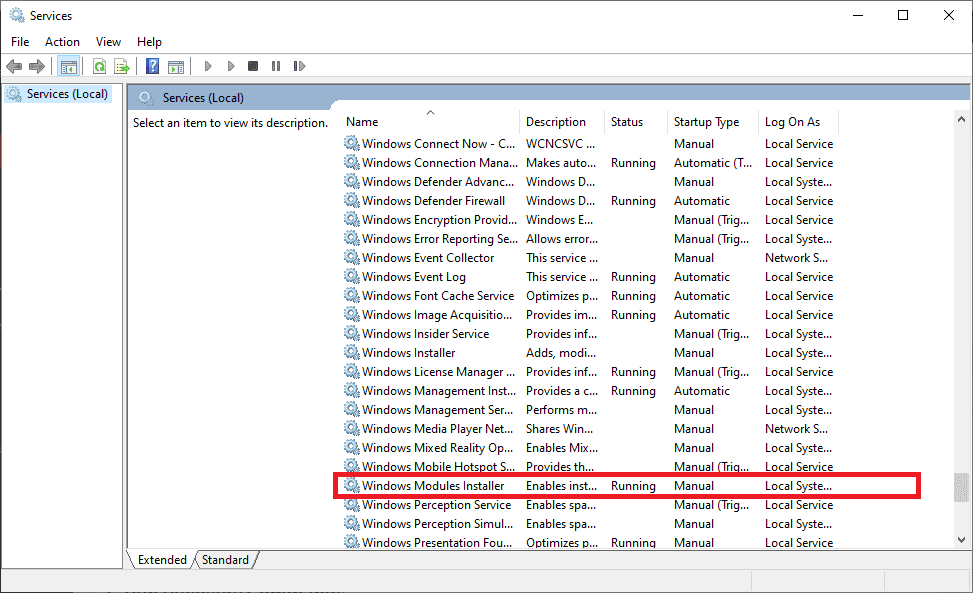
- Locate the Windows Module Installer in the list and right-click on it.

Windows Modules Installer
- Select to start it from the list.
At this point, try running the SFC Scannow Command tool and check whether you get the same error. If yes, proceed to the next solution.
5. Run Recovery Commands.
At this point, if you still encounter the error and your present boot version of Windows is updated, you can boot into recovery mode and attempt to solve the problem in this way by enabling the SFC scan utility through the command prompt. Below are the steps to do this.
- Using the power options, restart your computer (That is if your computer is turned on)
- When the computer starts to boot, click F11 to enter recovery mode, or you can use a USB drive that can be booted.
- When you are in recovery mode, use the Command Prompt from the set of tools and select run.
- As soon as Command Prompt is all set up and running, key in the following command, then execute it by clicking “Enter” on your keyboard:
sfc/SCANNOW /OFFBOOTDIR=c:\ /OFFWINDIR=c:\windows
Once the Command above has been entered and well-executed, Leave the recovery mode and normal boot to your Windows desktop. Now from your computer’s search, open up the command prompt and run it as an administrator. From here on, run the SFC scan to check whether the problem has been solved. we hope this solved your problem if not the slide to the next solution
Still, getting the error message? Then, run an Automatic Repair or perform a new install of Windows.
Suppose you are still getting the SFC error message after trying out all the above-mentioned solutions. In that case, the recommendation is that you run an automatic repair. Below are steps on how to run an automatic repair on Windows 10.
- First off, ensure you have a Windows 10 bootable installation disk or create a Microsoft Media Creation Tool on an empty disk or an empty USB flash drive.
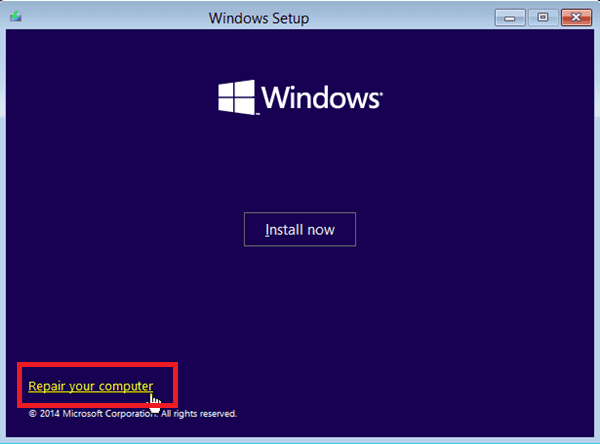
- Launch the media installation disk but do not opt to install Windows and instead select the “Repair your computer” option that shows up in the bottom left-hand corner of the Windows Setup window.

Repair your computer
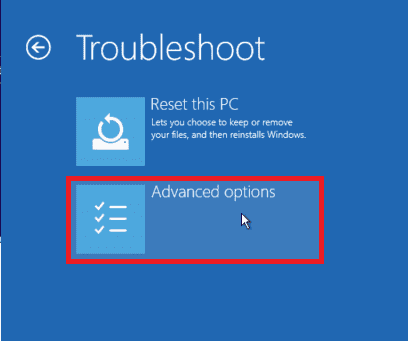
- Click on the troubleshoot option and then select advanced options.

Select Troubleshoot, then Advanced options.
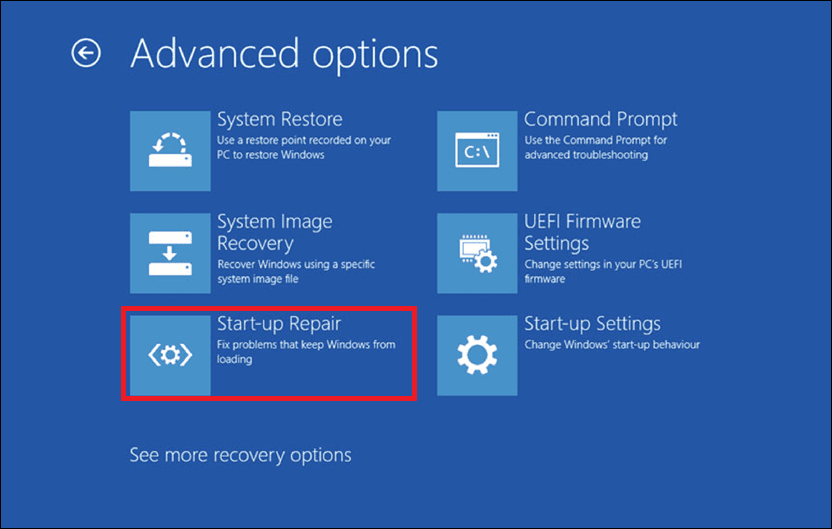
- Run the startup repair from the advanced options screen and hold on for a moment while the process finishes.

Startup repair
After the repair is done, restart your computer and check whether the error has been resolved.
In brief, if running an automatic repair does not eliminate the error, and none of the above solutions could work, the last resort is to carry out a fresh install of Windows. As much as this could be a little disappointing, it will enable you to get back up and running without any errors.
Conclusion
In conclusion, by following any of the recommended steps provided in this article, you will be able to overcome the “Windows resource protection could not perform the requested operation” error. In addition, we have given a list of all the possible scenarios and how to fix them, plus alternate solutions if one option fails. Also, we have further explained the reasons why you could be a victim of this error and the possible remedies.
