
Table of Contents
Windows Services is a feature in Windows that controls how services run on your computer. It is also known as services.msc. Among the services controlled by it is Windows Update. Windows Update utilizes a lot of the CPU to check for updates online from time to time and inform you when an update is available. It does this for many programs on your computer, which is why it uses a lot of CPU.
The word ‘Wuauserv‘ is another name for Windows Update, which is our topic today. As much as this service is critical, you can actually do without it. You can choose to disable it when you don’t need it and enable it only when you want to update some of the programs on your computer or the operating system entirely.
Wuauserv high CPU usage has many causes, including corrupted or missing system files, conflicts with the update client, and a stalled update process. Upon checking on your task manager, you may notice that some of the svchost.exe processes consume many RAM and 100% CPU usage resources. We want to solve that problem today.
Fixing Wuauserv causing high CPU usage issue
There are many ways to solve this problem, and we will look at each individually and in detail, giving step by step guide on how to do them.
- Run Windows Update troubleshooter.
- Uninstall recent Windows Updates.
- Updating Windows.
- Delete the SoftwareDistribution folder.
- Stop the Wuauserv service.
Run Windows Update troubleshooter
Although this method doesn’t solve all the problems, it is a good place to start. Open the setting by clicking the ‘start button’ then select Setting at the bottom of the opened window.
Clicking-on-settings-icon
You can then search ‘troubleshoot’ and choose ‘troubleshoot settings.’
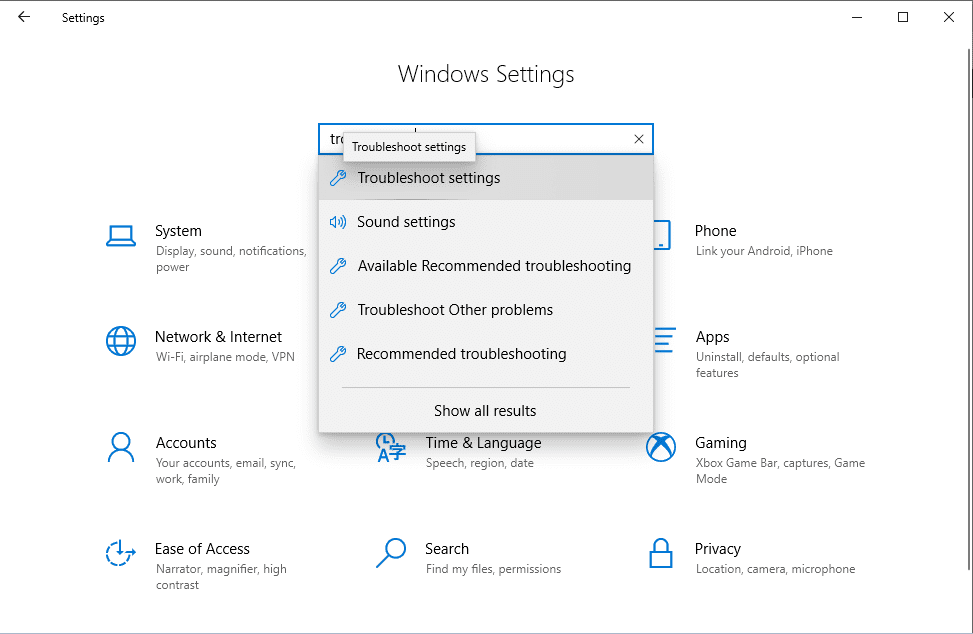
Searching-troubleshoot-settings
Near the bottom of the screen, there is the button for ‘additional troubleshooters,’ click on it.
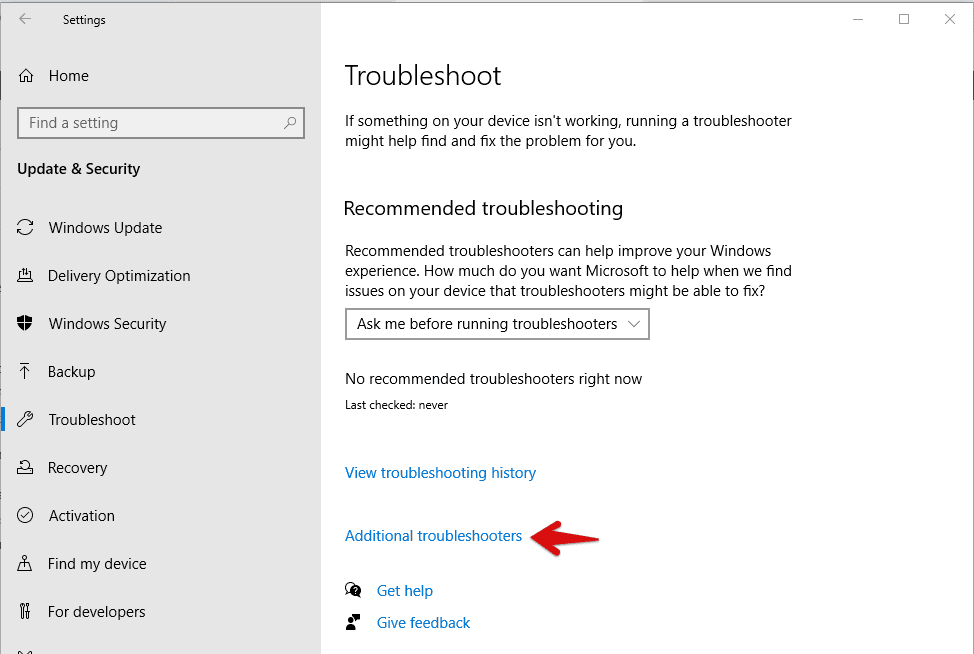
Clicking-additional-troubleshooters
Click on ‘Windows Update’ > ‘Run the troubleshoot’.
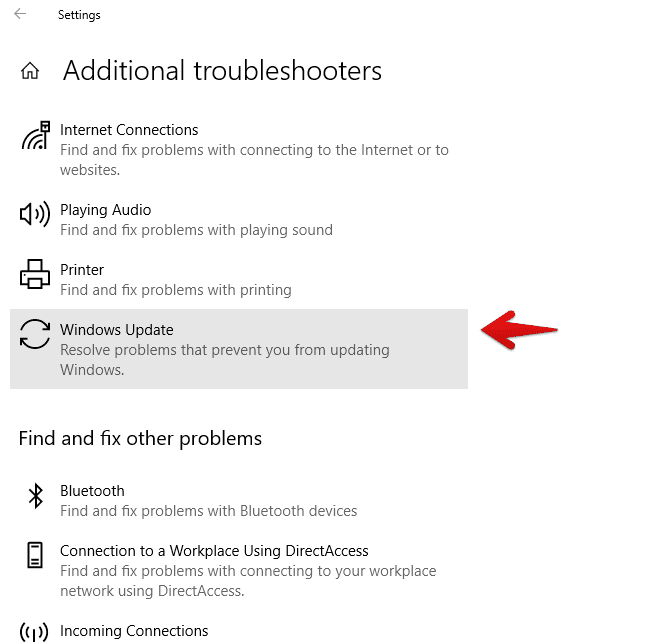
Clicking-on-Windows-update
Follow the steps and see if the problem is solved. If there is no change, please proceed to try the other methods below.
Uninstall recent Windows Updates
Some of the reasons this feature uses more CPU could be because of the updates made on Windows. So you should try and remove the updates to see if it solves this problem. To do this, open the control panel by clicking ‘start’ and search control panel’ then press ‘Enter.’
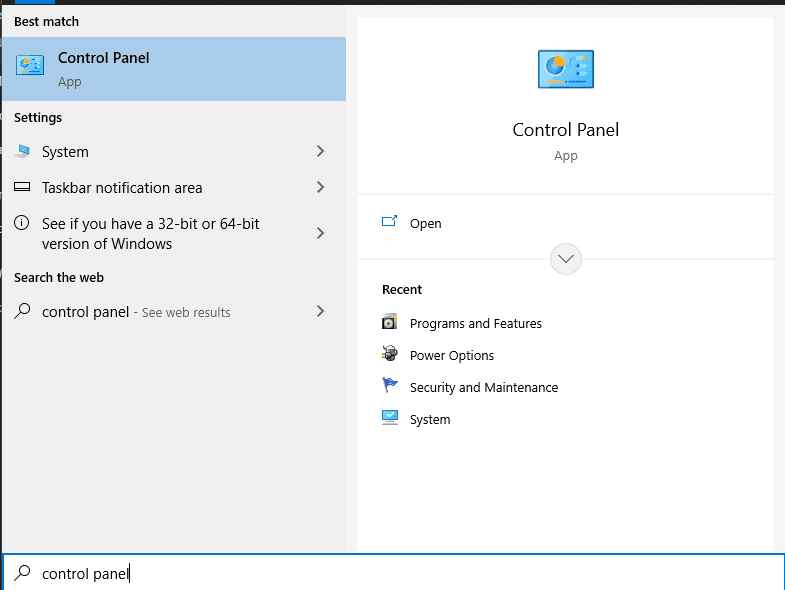
Searching-and-opening-control-panel
Click on ‘Programs.’
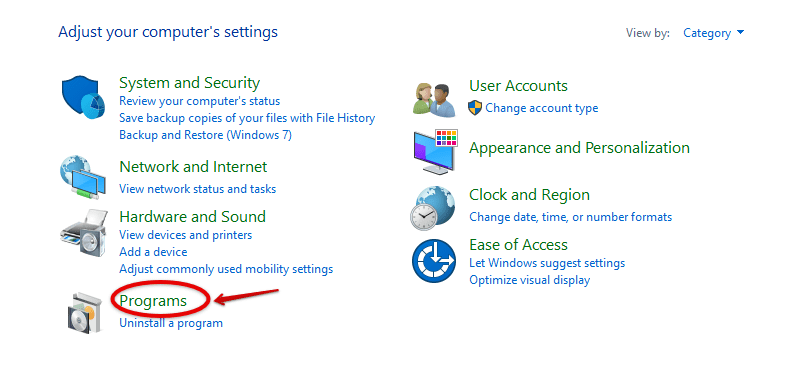
Clicking-on-programs
Click on ‘Programs and Features.’ > ‘view installed ‘updates’ on the next window.
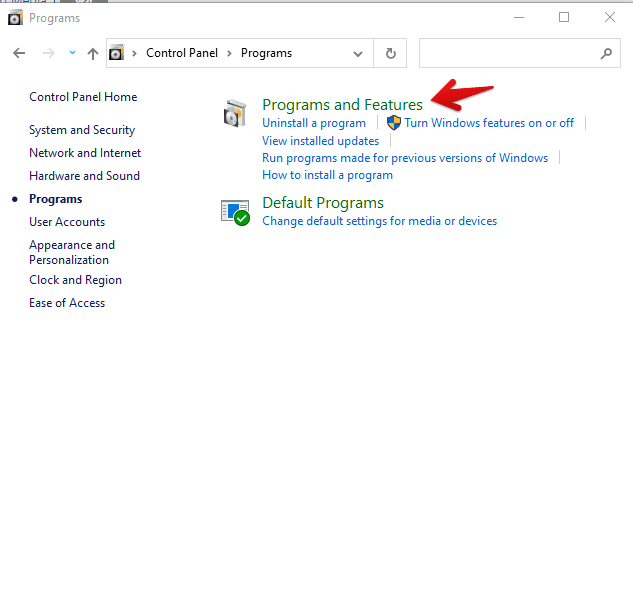
Clicking-on-programs-and-features
You should see a list of all the updates made on your Windows with the latest on top of the list. The dates should be on the far right. Please right-click on the latest and choose to uninstall to remove them.
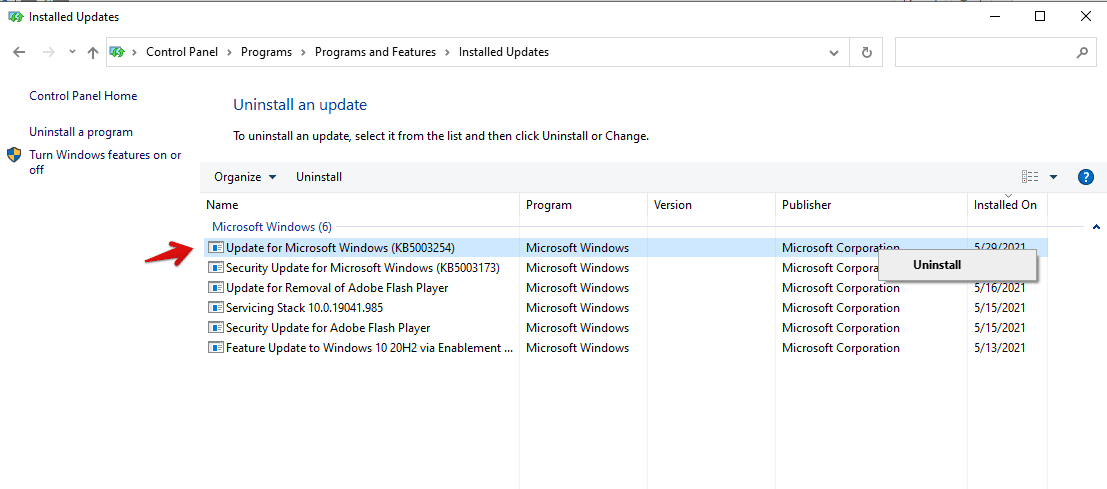
Uninstalling-Microsoft-Windows-update
Wait for the process to complete, then restart your computer. Proceed to open the task manager to see if the problem has been solved. If this persists, proceed to the next step. You may also check the guide to Windows 10 Update Assistance.
Updating Windows
Sometimes the latest update could be the solution to this problem. Although this method contradicts the first one, we are doing it because the update we removed in the previous could not have been the latest. So let’s try the most updated Windows and see if it works. It could be the drivers that need updates that are slowing your computer. To update Windows, press the start button, type “update” you, and click on the “check for update.”
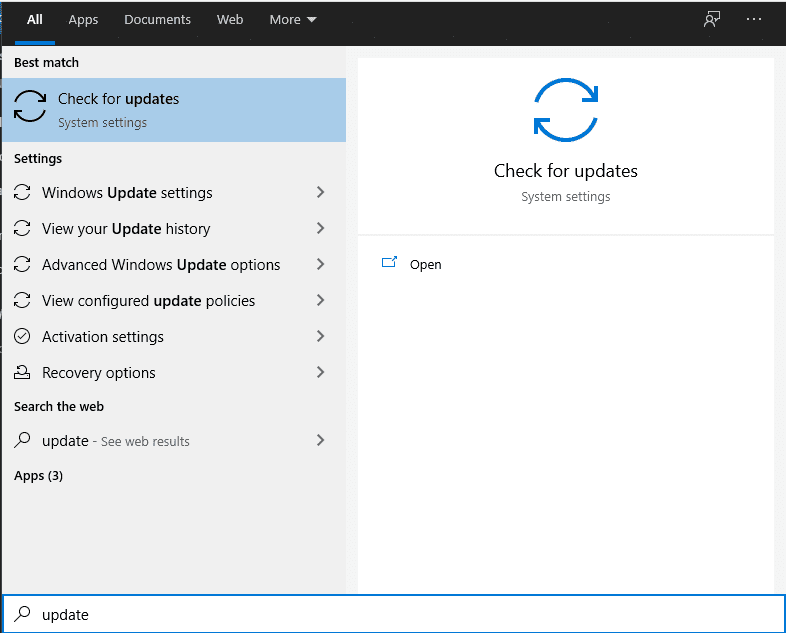
searching-Windows-updates
You will be taken to another window where you should be able to see if your Windows operating system is updated or not. If you are connected to the internet, the computer will automatically check for updates when you open this window. Therefore, you will have the current state of your windows update information displayed at the top whether you need to update or not. At times you may be connected to the internet but still experience unidentified network problems. No worries about this. You can learn how to fix Unidentified network problems.

Downloading-Windows-updates
To do this, click ‘check for updates while connected to the internet, and you will see your update status. In my case, it is up to date, so I can only refresh to confirm the information displayed. In a case where you have not updated your Windows, you will have the option of downloading them. As you can see in the image above, you have to initiate the process manually by clicking on the ‘download’ button. The updates will begin to download, and you will be notified when to restart your computer for the updates to be installed. You may also check how to install Windows 10 updates here.
Delete the SoftwareDistribution folder
The SoftwareDistribution folder stores all the temporary files related to the Windows updates. To delete the contents of this folder, first, we have to stop the Wuauserv service so that we don’t cause errors. To do this, open the command prompt with administrator privileges. Therefore, click the ‘Start’ button and search ‘command prompt.’ Right-click on it and click on the ‘run as administrator.’
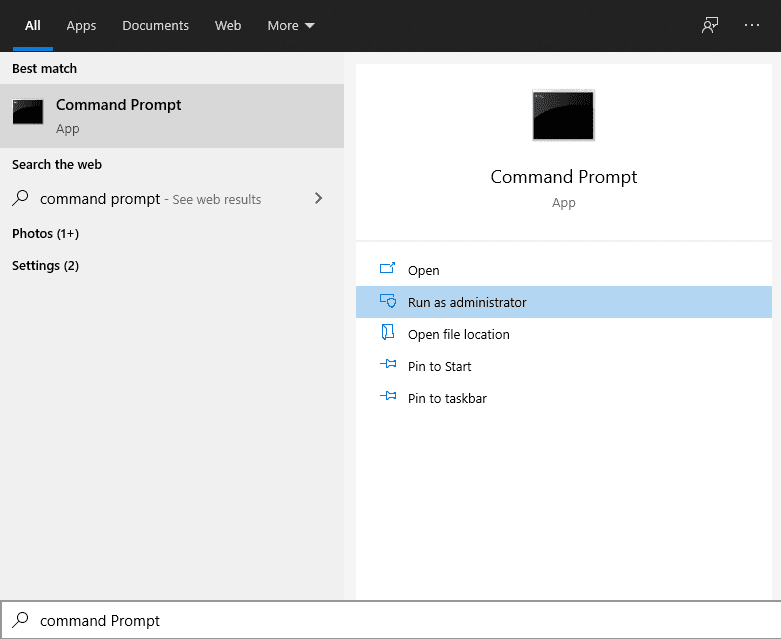
Running-command-prompt-as administrator
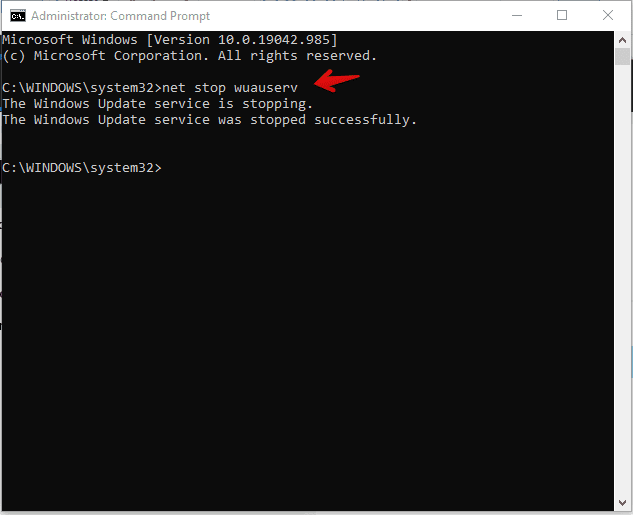
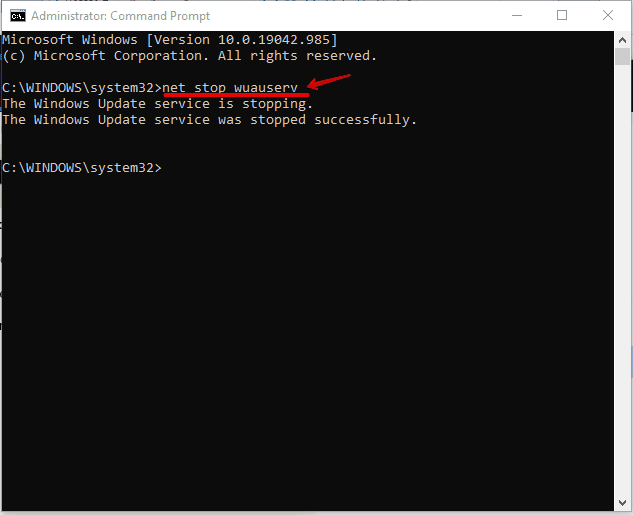
When the command prompt opens, type ‘net stop Wuauserv’ and press Enter. Wait for the process to finish.
Typing-net-stop wuauserv-command
Now again, type ‘net stop bits’ and press Enter.

Typing-net-stop-bits-command
When the process finishes, locate the SoftwareDistribution folder in File Explorer and delete it.
To find this folder press, the Windows key+ E. Open the Primary disk, the disk where Windows is installed, and click on the ‘Windows’ folder. The SoftwareDistribution folder should be on the list. Right-click on it and click delete.
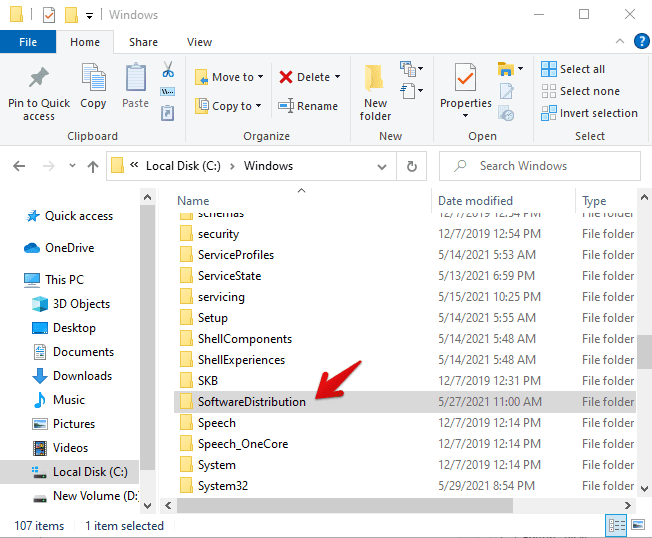
SoftwareDistribution-folder
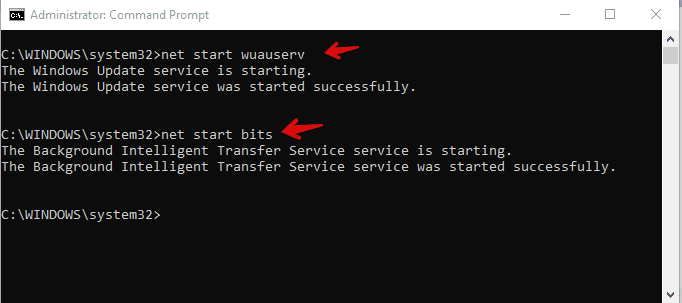
Go back to the command prompt and restart the services we stopped before. For the first service, type ‘net start Wuauserv’ and wait for the process to finish, then type ‘net start bits’ and press Enter.
Starting-wuaserv-and-bits
Now restart your computer and when it boots back, check whether the problem is solved.
Stop the Wuauserv service
Like I mentioned above, even though the Windows Update feature is critical, you do not have to have run it all the time. You can stop it when you have no plans of updating your Windows and start only when you want to. This method is similar to the method above, only that you do not include most of the last steps. So the first thing is to open the command prompt with administrator privileges. So click the start button and search ‘command prompt’, right-click on it, and select ‘Run as administrator.’ When the command prompt opens, type net stop ‘wuauserv’ and press Enter.
Stopping wuauserv
Wait for the process to finish and type ‘net stop bits’, and press Enter once more.

Stopping-bits
You will notice the similarity with the above method, only that you stop here.
You can also stop it by:
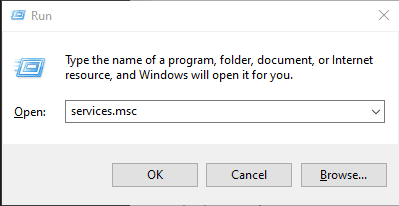
- Press Windows logo key + R to launch the Run application.
- Type in ‘services.msc’ and then press Enter. A list of all the services running on your computer will open.
Searching-for-running-services
3. Locate Windows Update and double click on it to open its properties.
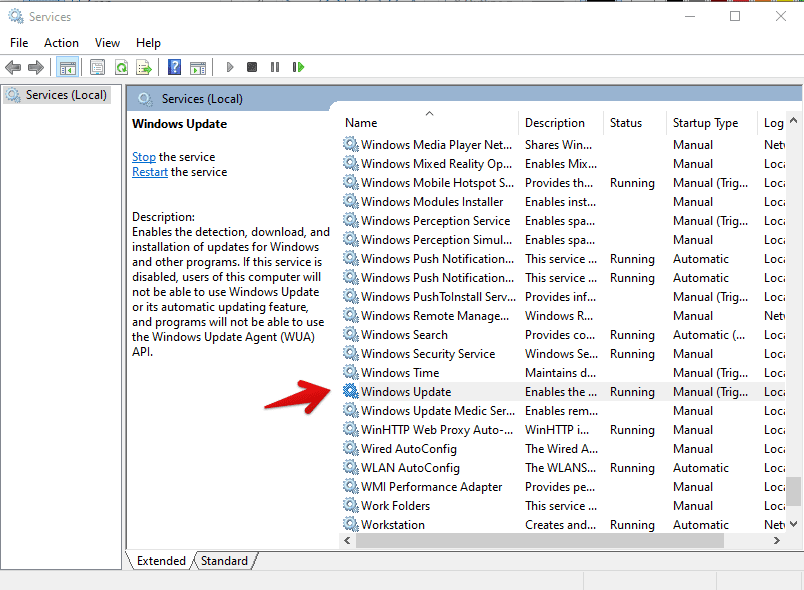
Opening-Windows-Update-services

Clicking-on-stop-wuauserv
Click on ‘stop’ and wait for the process to finish. It should take only seconds. You can then close the window.
Check in the Task Manager to see if the problem is solved. Using this last method makes updating your Windows manual. That means you will always have to check for updates manually and initiate the process of downloading and installing them. This is because the last step stops the entire feature of Windows Update.
Conclusion
Sometimes, Windows update service will take a lot of the CPU to run its services, and subsequently, this will make your computer lag in its operation. Try some if not all of the methods above, and you should surely get a solution for your problem. The simplest solution is to update your Windows system. However, the update could have caused the problem, so try by fast removing the current update before going for the latest update to avoid repeating the same process.