
Windows 10 is an operating system that might comprise all the necessary punching power in functionality and features. However, it still needs a host device or machine to flaunt its purpose. This is where Windows laptops and personal computers come in, making it possible to run this operating system efficiently. With that put into due consideration, laptops aren’t made always to function forever.
They are battery-powered, and the world hasn’t advanced to a level of technology where batteries never run out of charge. Therefore, it is not uncommon for laptop batteries to degrade over time. A person who has owned a laptop for 5 years is certain to notice a significant decrease in battery timing compared to when he first bought their laptop.
Therefore, if you own a Windows laptop and have noticed sluggish battery timings lately, it is a great reason to check your laptop’s battery health on Windows 10, especially if you know you use an outdated Windows laptop. In this article, we will be going through the simple and easy steps of checking your battery health. So let us now start the article without any further delay.
Checking battery health on Windows 10
The following steps will guide you to check the battery health on your Windows 10 device easily.
- In our first step, we will type “Windows PowerShell” in the search menu, and then numerous options will appear on the screen from which we will click on the arrow in front of our first option. After that, you will have to click on the option named “Run as administrator” to run Windows PowerShell as admin. Next, a pop-up will appear asking for your permission to make changes on your device, where you will select “Yes” to move further.
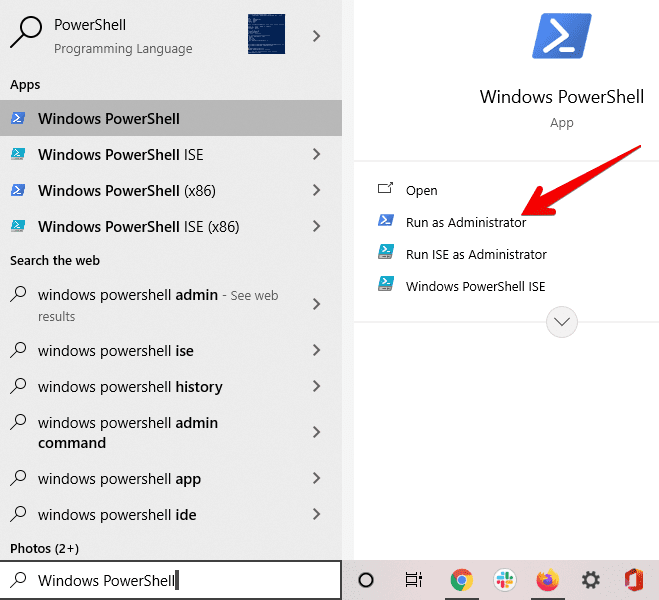
Run Windows PowerShell as administrator
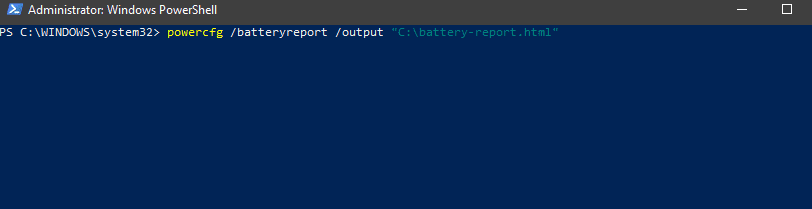
2. A blue Windows PowerShell will appear on your Windows 10 screen where you will enter the following command:
powercfg /batteryreport /output "C:\battery-report.html
After entering the command, you will press enter key to move ahead.
Entering the command in Windows PowerShell
3. Once you have entered the command, drafting the battery health report will begin. After a couple of moments, the process will conclude, and you will be notified that the battery health report has been saved to somewhere on local disk C, as shown below.

Windows 10 battery health report saved
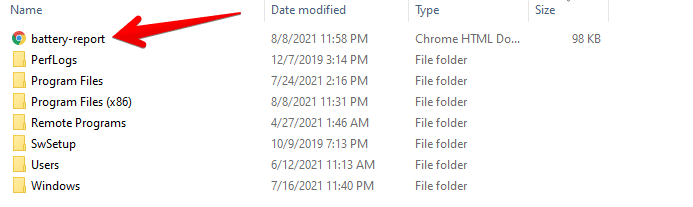
4. Now, therefore, you will go to your File Explorer application and find the battery health report saved there in the form of a Chrome HTML document. After finding it, click on the file to continue.
viewing the windows 10 battery report
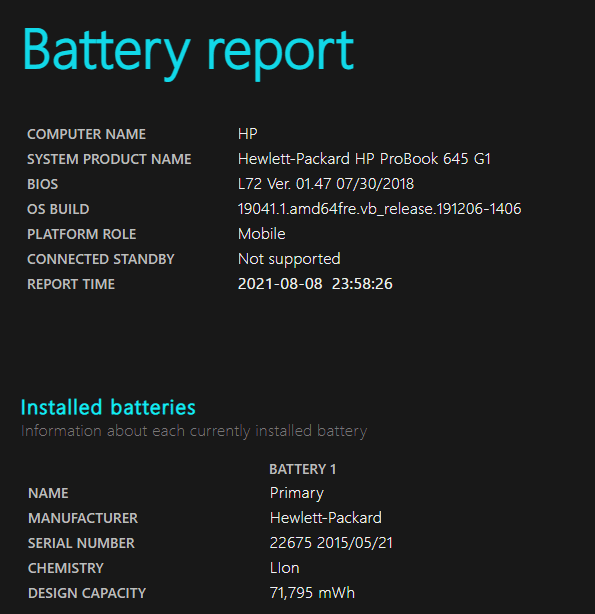
5. After clicking on the battery health report, the system will ask you to confirm your preferred browser choice. You can choose anyone, as long as it gets the job done. After loading the Chrome HTML document, you will see a highly detailed battery report that will include all the information needed. The results will also show you statistics relating to when you first bought the laptop versus its current battery condition.
battery report
6. All you have to do now is scroll down to the bottom area, where you can see the “Battery capacity history” section. In that area, you will see two columns: Design Capacity and Full Charge Capacity. Design Capacity is the level of your battery when you first bought the computer. On the other hand, Full Charge Capacity is how much your battery can be charged now about the Design Capacity. As you scroll down and get to more recent dates, you’ll find that the Design Capacity and the Full Charge Capacity both decrease, but to what extent that has happened is entirely up to your laptop.
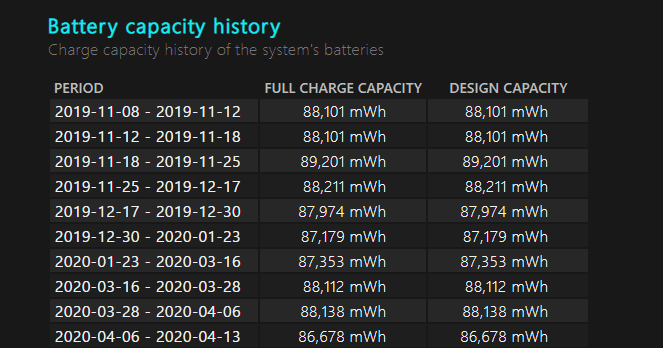
Battery capacity history
Conclusion
Your Windows 10 laptop does not run on a renewable energy resource that will last forever and beyond. Instead, it uses batteries that will give out at a later period but not anytime soon. Therefore, it is a good idea to keep your battery health in check on an occasional basis, so you never have to run into a battery-induced problem immediately and see every potential headache coming from a mile away. Therefore, we have written this article to guide you with an easy way to check the battery health of your Windows 10.