Table of Contents
Oracle 19c is not compatible with all versions of the Windows operating system. Therefore, before you continue with the installation, you may consider checking the version and type of your operating system. To do this, click on the Windows button and search for settings.
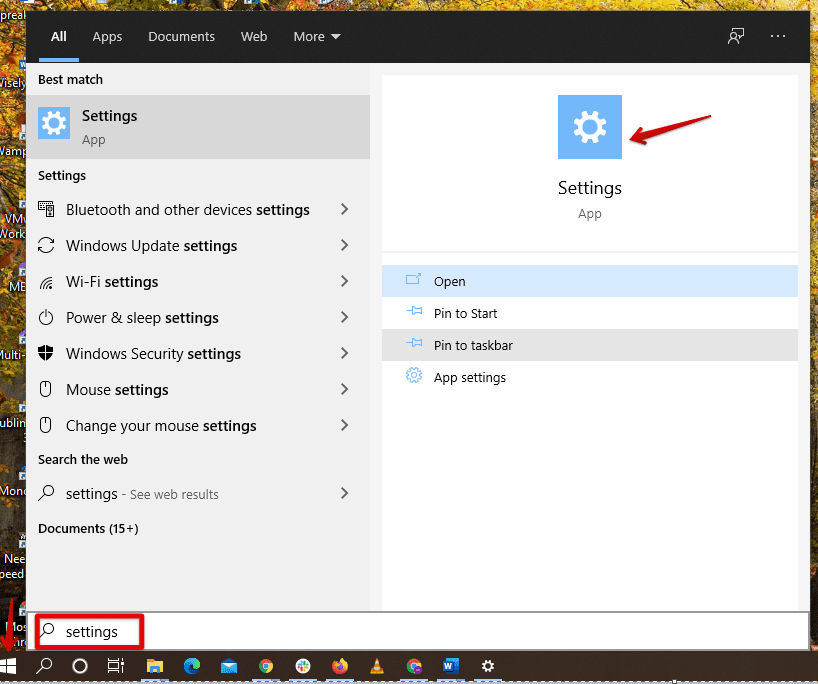
Clicking on Settings
On the pop windows that appear, type in ‘about’ and select About your PC.
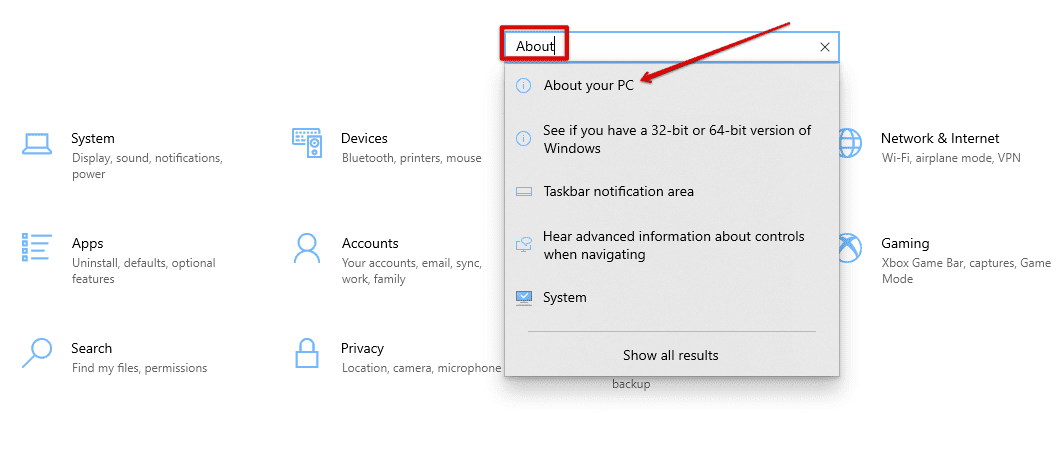
Searching About your PC
Check on the type of your Windows operating system under Windows Specifications.
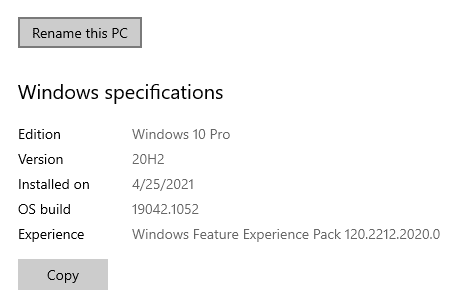
Viewing Windows Specifications
If your operating system is among the ones listed below, we can continue to the next stage. Otherwise, you may need to upgrade to the supported Windows versions.
- Windows 8.1 x64 – Pro and Enterprise editions
- Windows 10 x64 – Pro, Enterprise, and Education editions
- Windows Server 2012 R2 x64 – Standard, Datacenter, Essentials, and Foundation editions
- Windows Server 2016 x64 – Standard, Datacenter, and Essentials editions
- Windows Server 2019 x64 – Standard, Datacenter, and Essentials editions
Hardware requirements
For smooth installation and running, please ensure your PC meets the below requirements. You can check this by looking into your device specifications. Click on the Windows button and search “Settings”. On the pop window, search ‘about’ and click on About this PC”. Check the specifications under Device specifications.
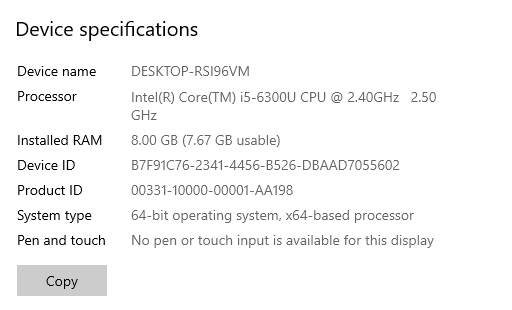
Device Specifications
- Minimum 2GB free RAM (The free RAM means at least 2GB of the installed RAM is available for Oracle 19c).
- A processor-based on either Intel or AMD64 architecture.
- Display card with a minimum resolution of 1024×768 pixels.
- 16 GB SWAP (virtual memory) space if RAM is more than 16 GB.
- 13GB free storage space on your hard drive.
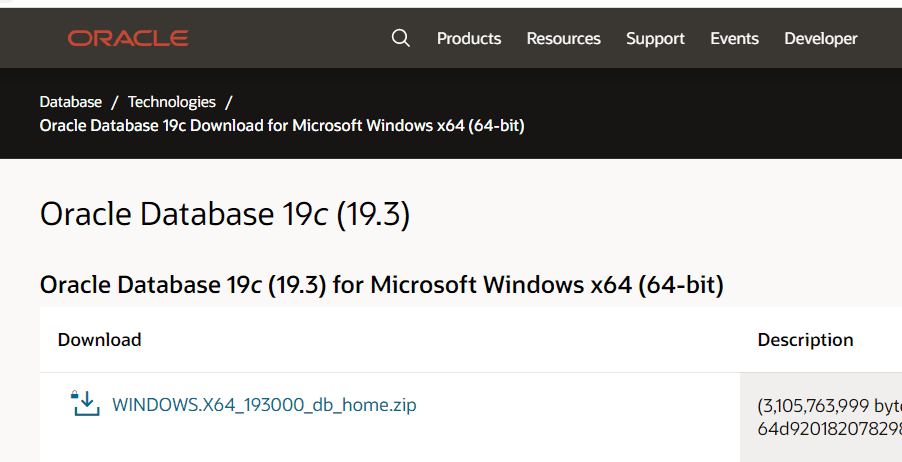
Downloading Oracle Database 19c for Windows
Visit Oracle Database downloads official page. On this page, you will find various packages. However, we will focus on Oracle Database 19c(19.3) for Microsoft Windows x64 (64-bit).
Visit-Oracle-website
Downloading this software is free, but it will also require an Oracle account. Input your login credentials if you already have one or signup for one.

Login-sign-up page
Once your account is verified, the download will start automatically.
Installing Oracle 19c on Windows
File extraction and Location
The installation of Oracle 19c is different from the earlier versions. Oracle has introduced a new method called image-based installation. Once the download is complete, unzip the package using WinRAR and copy it in your root directory. Then, create a new folder and give it a name such as ‘db_home’.
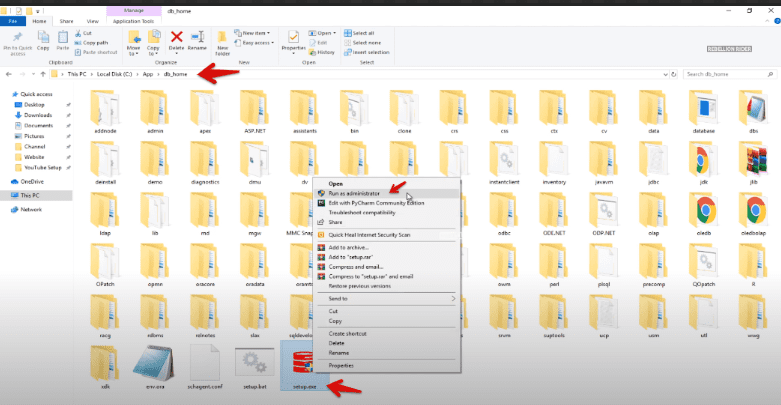
Clicking-on-setup
Right-click on the setup.exe and click on ‘Run as administrator. This will launch the installation process.
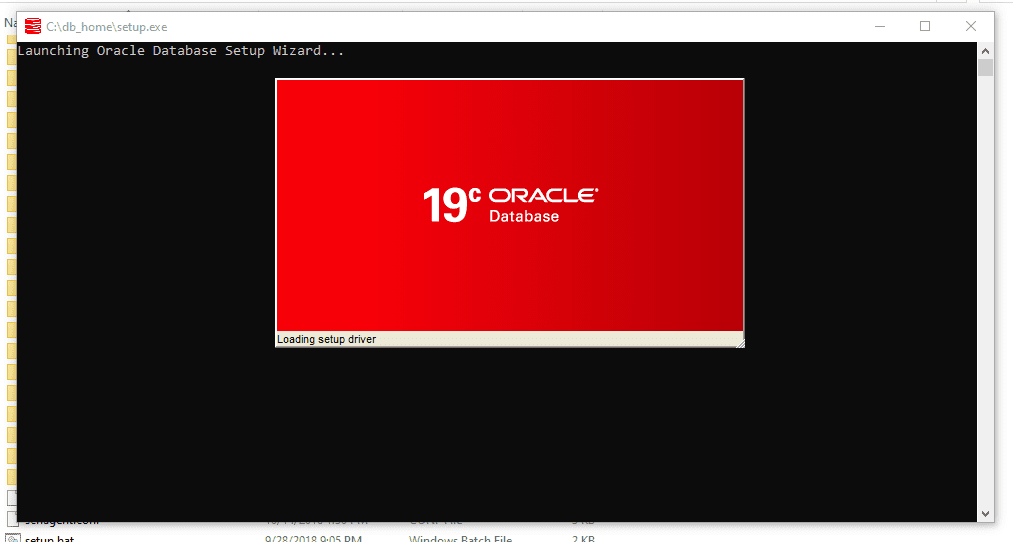
Running the setup
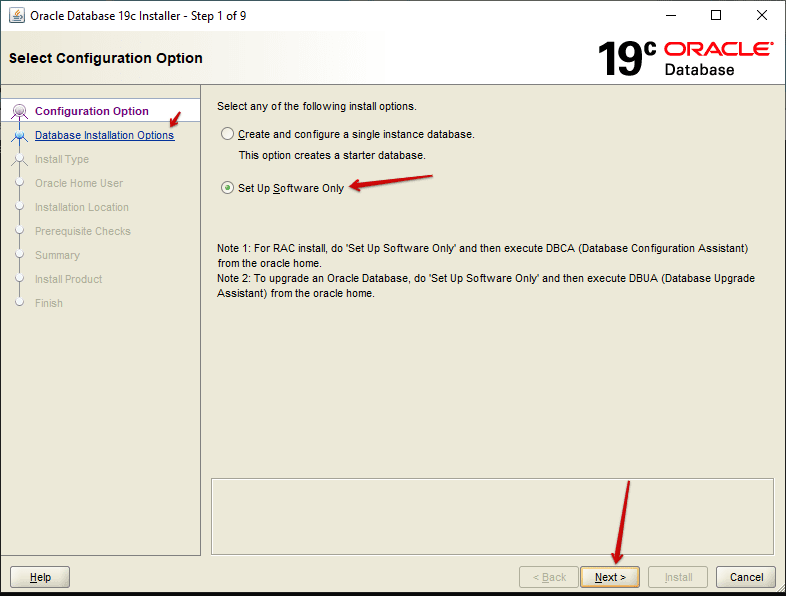
Configuration option
In this stage, it will give you an option to choose your installation configuration. This step is very core. (Create and configure a single instance database), this option allows you to install the Oracle software and create a database at the same time. Our main target is to install Oracle 19c; hence we will select the second option (Setup the software only). This option will enable us to install all essential components for administering a database. By selecting this version, it will allow you to upgrade.
Database installation option
Database installation option
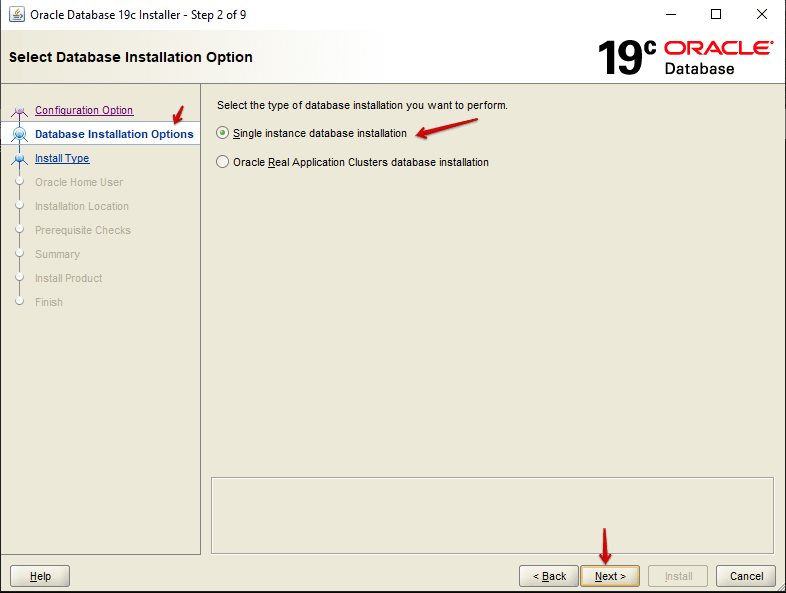
Next will be for you to choose the database installation you want to perform. Single instance database installation will allow you to install a single instance database on your server. However, Oracle Real Application will allow multiple instances to run on different servers. This means that you can have different servers sharing the same storage in the same physical database. In our case, select the first option and click next.
Select database installation option
Database edition
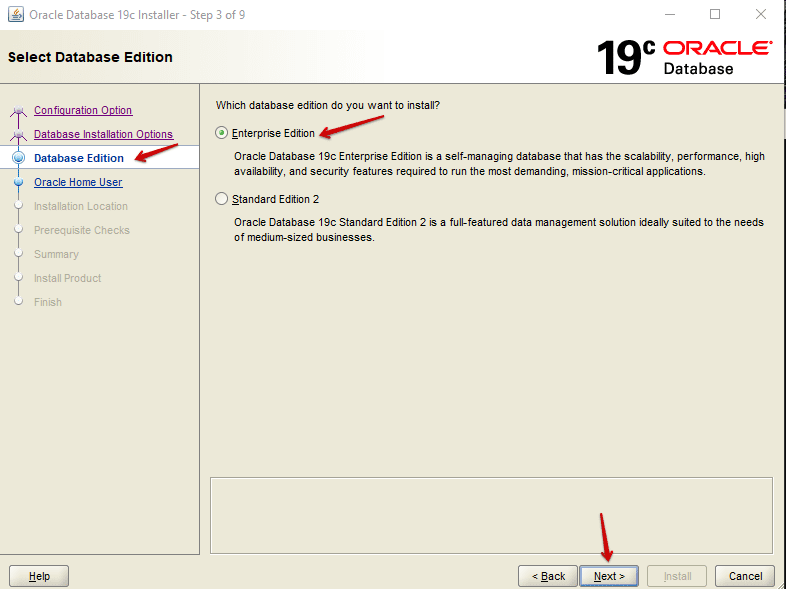
This stage will allow you to choose either the enterprise edition or the standard edition. The standard edition is full-featured and ideally suited for medium-sized businesses. In our case, we will select the enterprise edition for the self-managing database.
Choosing database edition
Oracle home user
This option gives you the mandate to choose where you need to install your Oracle: ‘Use Virtual Account.’ You can choose this option if you do not need to install Oracle on your local machine. ‘Use Existing Window User’ will allow you to use an existing account from your local machine. You must be logged in to your administrator user on your computer for this option.’Create New Windows User’ this will allow you to create a new Windows user account.
Likewise, for this option, you need to create the account from the administrator user account. ‘Use Windows Built-in Account.’ This account has access to all privileges. Oracle recommends you specifying a Windows account user with limited privileges; hence we will not go with this option.
Let’s create a dedicated user for our Oracle by providing the username, password and confirming the password. Click next to continue.

Oracle home user
Installation location
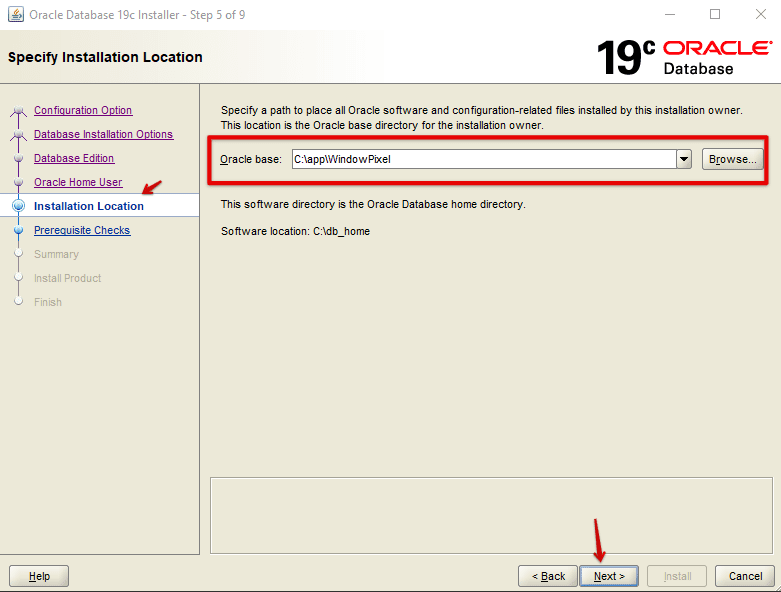
This is where you specify the path to place all Oracle software and configuration-related files. By default, the Oracle directory will start with the drive letter, app, and username.”Drive_Letter:\app\username. The username is the new user account we just created in the previous stage. Leave this to default and click next to continue.
Installation location
Performance prerequisite checks
The performance prerequisite check checks if your computer meets the hardware requirements to run Oracle. This will count up to 100%.
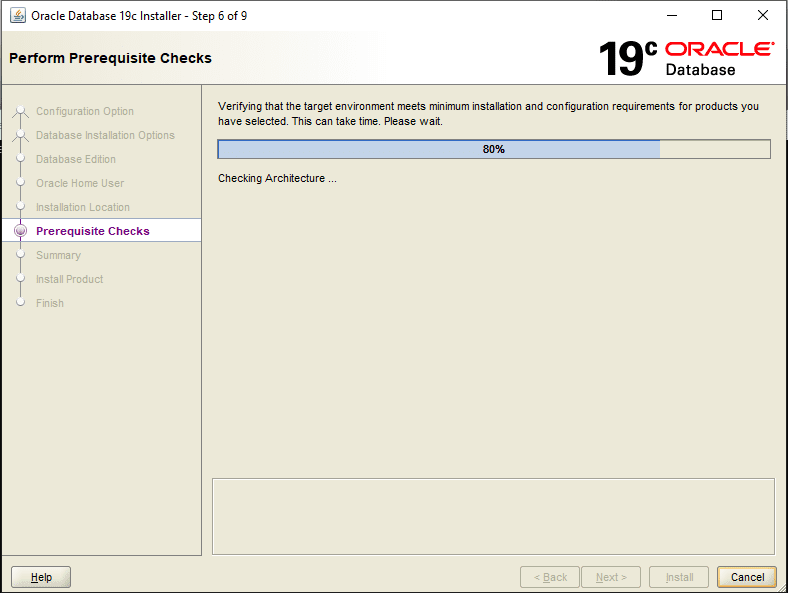
Performance prerequisite checks
Summary
This is an overview of the prerequisite check. It also states any error that may prevent you from installing Oracle. If no error, click on install to continue.
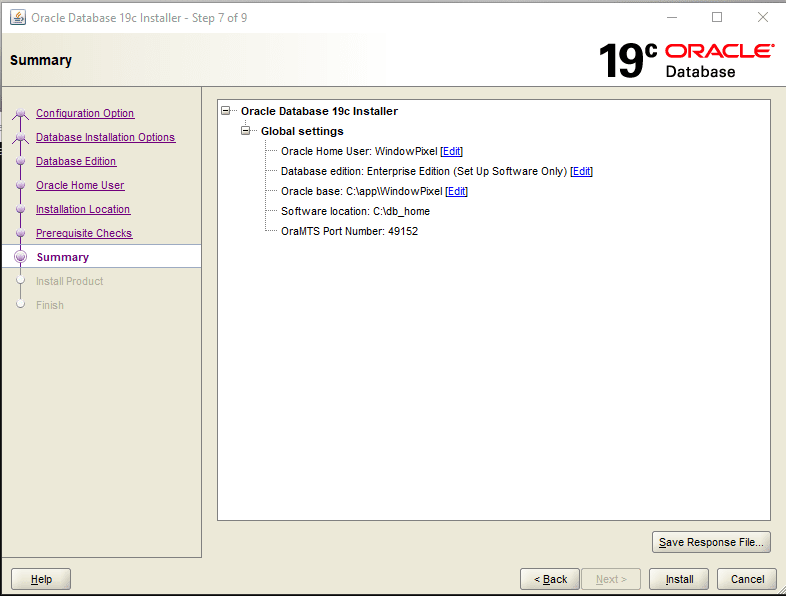
summary
Install product
After clicking on the install button, the installation process will begin. This might take some time.
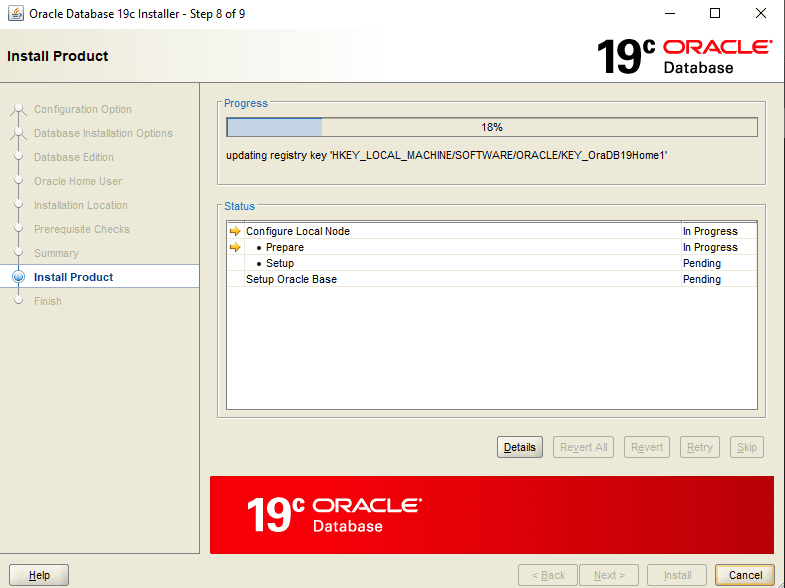
Installation
We have successfully installed Oracle 19c on your machine.
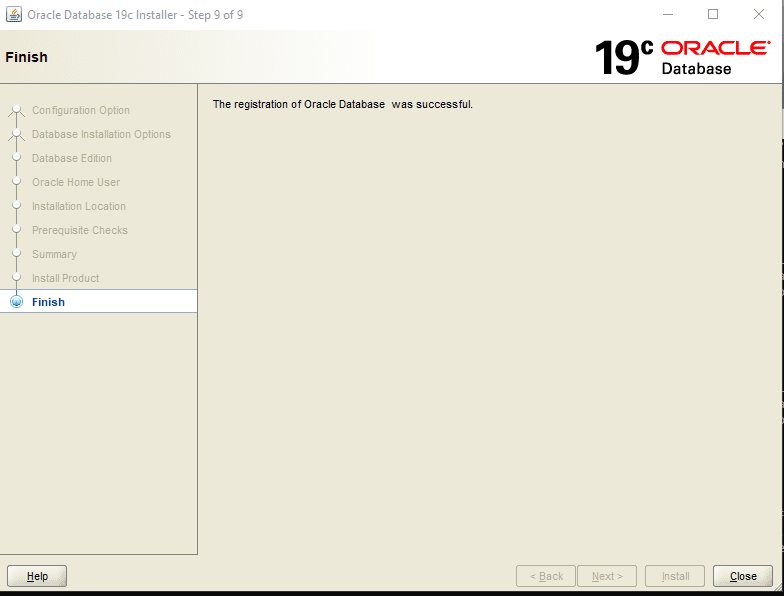
Completing installation
Uninstalling Oracle 19c
We are going to categorize this into 6 stages.
- Stop Oracle services
- Delete the Environment variables.
- Delete the registries.
- Restart your computer.
- Delete Oracle home users and groups.
- Delete Oracle 19c.
Stop Oracle services
The first stage is to stop all the services that are currently running related to Oracle. To do this, press on the Windows key and type services.
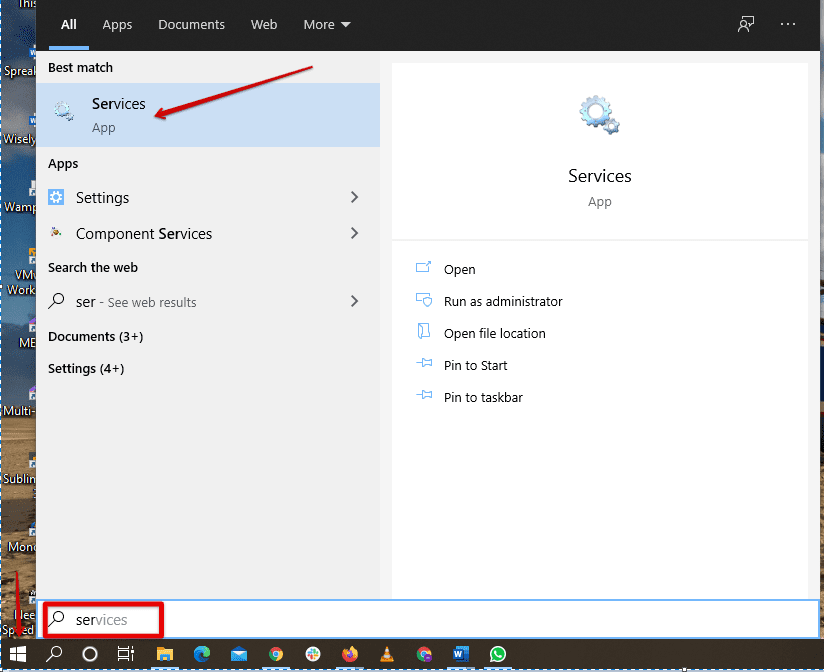
Finding oracle services
To stop the Oracle from running services, right-click and select stop.

Oracle running services
Delete the Environment Variables
Deleting the environment variables allows you to keep away from getting any errors if you reinstall Oracle again in the future. If you do not delete the environment variable, you will face the ‘Environment Variable Path Is Too Long’ error.
To delete the Environment Variables, search ‘Environment Variables’ in the start menu and click on it.
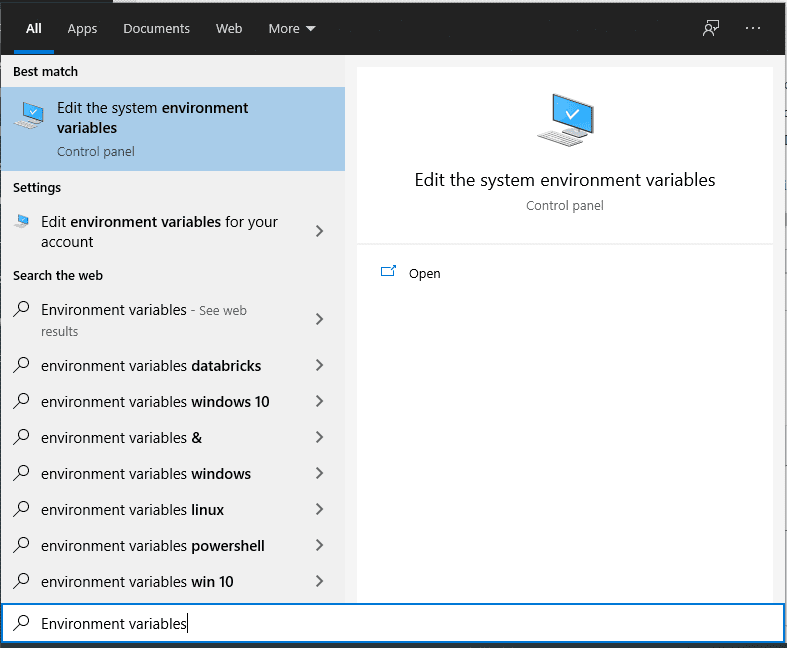
Searching-for-Environment-variables.
A new window will pop up. Click on ‘Environment Variables.’
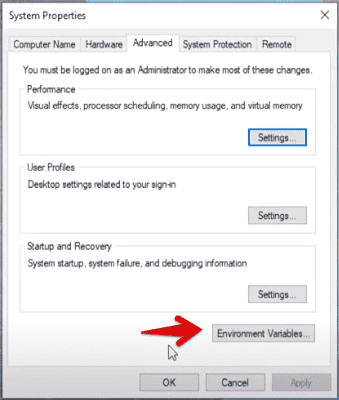
Clicking-on-Environment-Variables
Another window pops up, locate the system variable ‘Path’ and click on it to open.
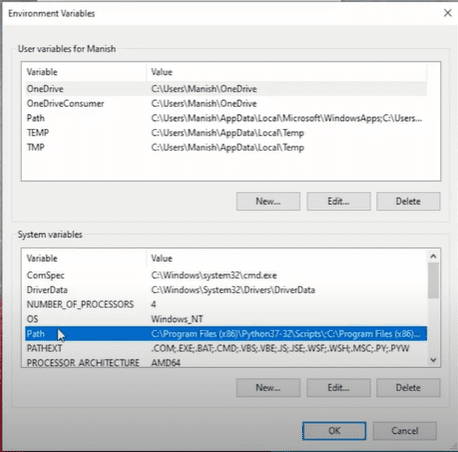
Locating-the-path
In the new windows that pop up, select the path and click on delete. ‘C:\db_home\bin’.
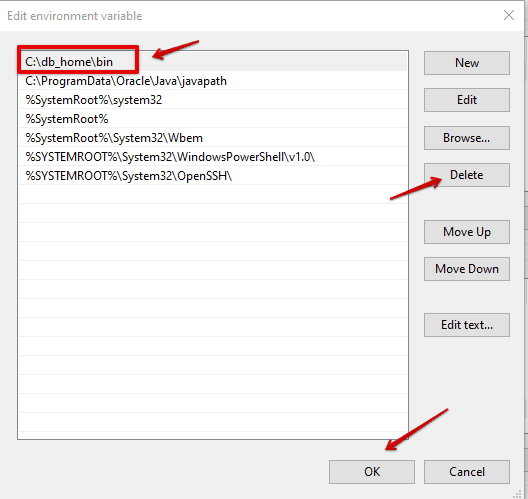
deleting environment variables
When the file is deleted, click on ‘Ok’ to exit.
Delete the registries
This step is significant and crucial. Any mistake here will cause your computer to crash, be very careful. If you have any other software from the Oracle company installed on your computer, please consult your admin first.
Search for ‘Registry editor’ by clicking on the windows key.
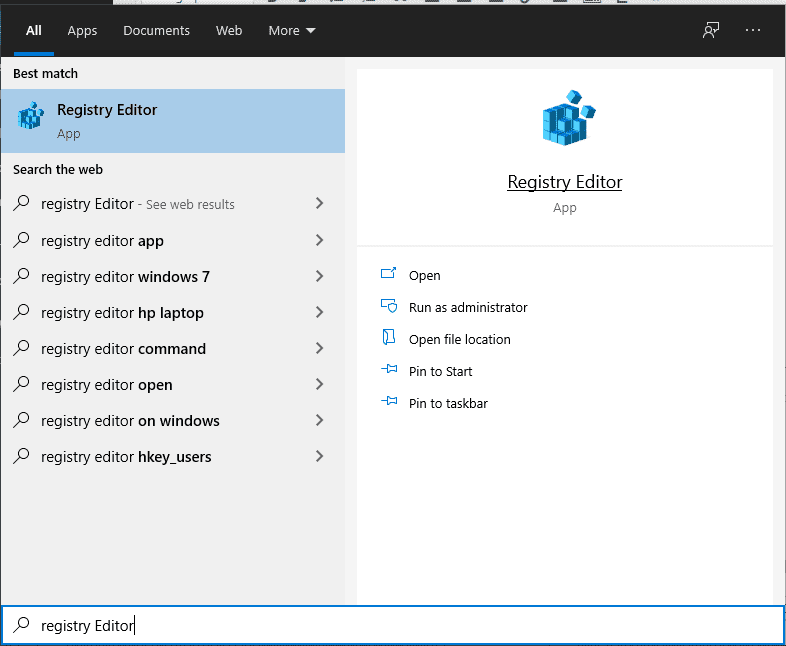
Searching-for-Registry Editor
In the registry, HKEY_LOCAL_MACHINE/SOFTWARE/Oracle. Delete the following files if they exist.
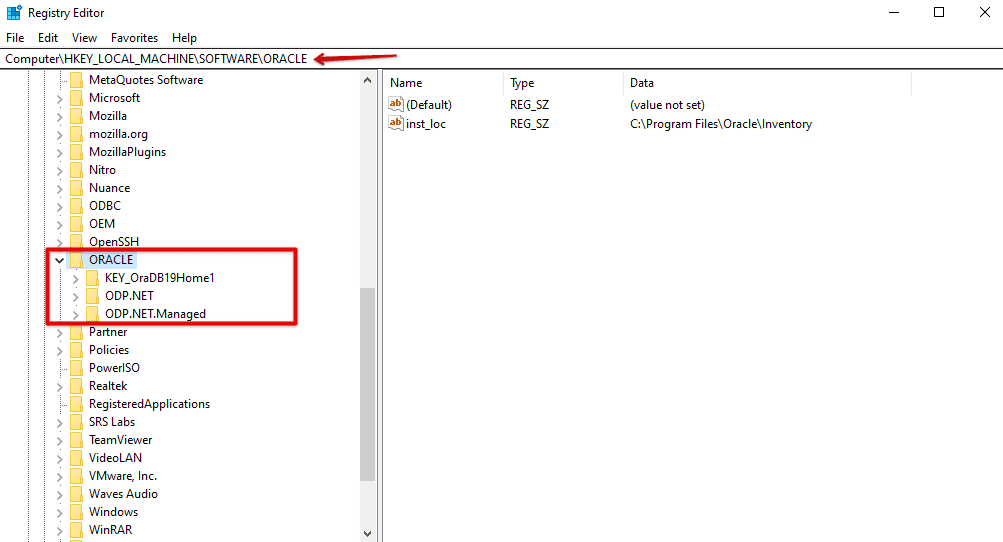
Deleting registries
To make this change come to effect, please restart your computer.
Delete Oracle home users and groups
We installed Oracle 19c on a new user account. We will then head to delete this user. Press Windows + R simultaneously and type in ‘lusrmgr.msc’. Press ‘Enter.’
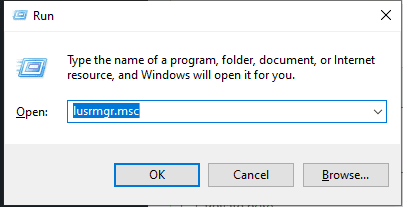
Opening-Groups and Users
On the window that opens, click on ‘Groups,’ and you should have a list of all the groups created in your Windows. In the list, locate files with ‘ORA_’ at the beginning of their names and delete them.
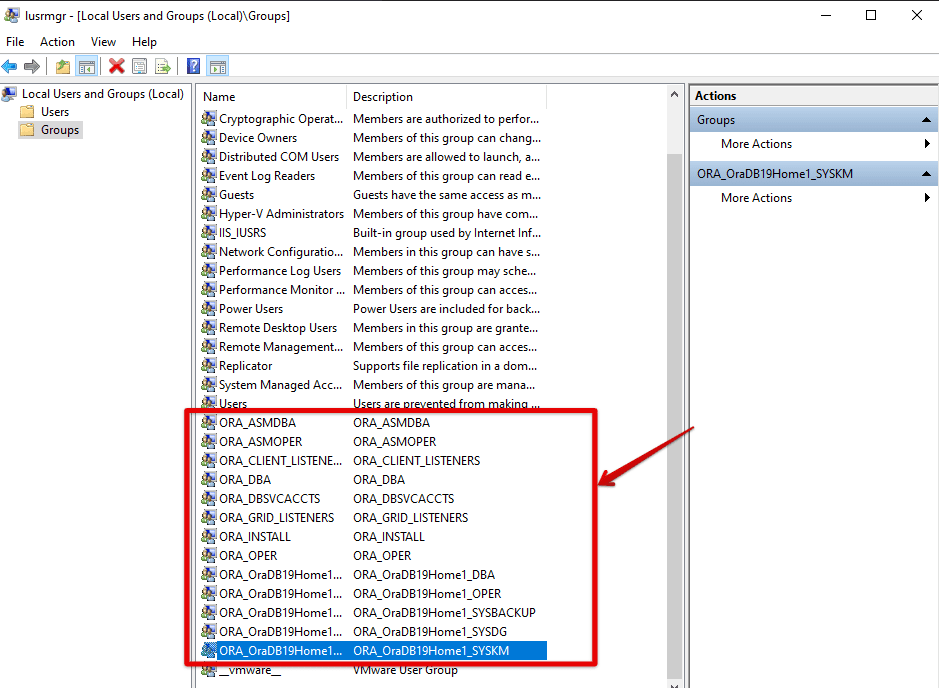
Deleting groups
Go ahead to the user’s folder and delete the new user created.
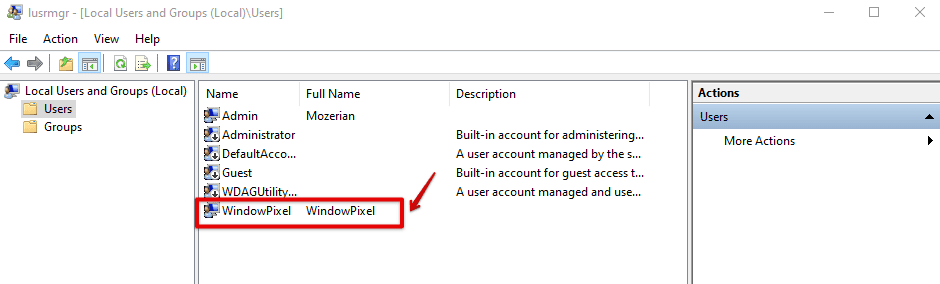
deleting user
Delete Oracle 19c folder and the program files.
Delete the Oracle installation path folder ‘C:\db_home’ .Delete the program files inside C:\Program Files\Oracle and this folder. Finally, delete the Oracle program data folder in C:\ProgramData\Oracle. With that, you have successfully uninstalled Oracle 19c
Conclusion
Installing Oracle software is not always an easy operation. The Oracle documentation contains 190 pages, and you may be lost quickly. In this tutorial, we have simplified these into simple processes. We have also gone ahead and looked at how to uninstall Oracle 19c in a few steps. Be careful on the uninstallation process since we are making changes to the operating system. A slight mistake in deleting the wrong file may cause your whole Windows operating system to crash. Good luck!