Table of Contents
If you want one of the best music player apps on Windows for everyday use, you must know how to install and update the VLC media player. This is one of the most exemplary programs out there for multimedia playback, offering widespread support and a high-quality user interface for people to experience. No Windows users out there have forsaken the multi-faceted service of VLC, and you should be no exception.
Windows 10 is a feature-rich operating system that has been making way for Windows 11 in relatively recent times now. Although the latter works like a charm for millions of individuals worldwide, Windows 10 hasn’t grown tired just yet. It still lets users have all the basic functionality, such as downloading and installing different tools and apps like the best online video editors.
This guide will talk about installing the VLC media player in simple-to-understand terms so that you can easily replicate the guidelines on your end. We will also shed some light on the software’s update mechanism, so you can always stay up to speed with the latest patches and bug fixes for the world-renowned media player. Let’s get started right away.
What is VLC media player?
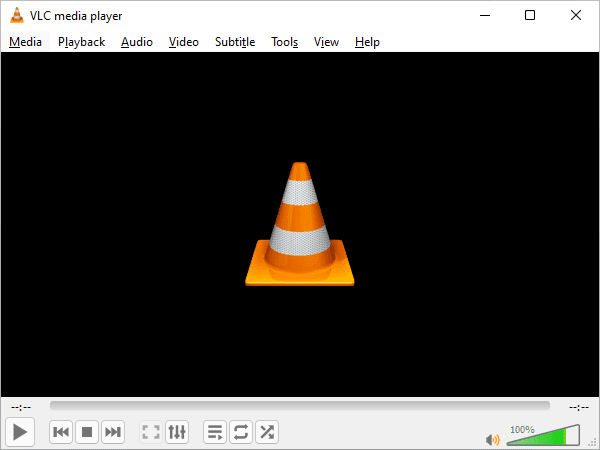
VLC media player
VLC media player is just what its name tells you it is. The sole purpose of this utility is to act as a platform for all the multimedia requirements of a typical Window user, whether those needs revolve around video, audio, or simply a photo. It makes it possible for a user to experience every multimedia format on their Windows PC without having to download any other third-party option for the matter at hand.
The program makes life easier by offering you a one-stop shop level of functionality. Furthermore, not many are aware of it, but VLC even features some secret features unknown to the masses. For instance, it can also function as an unrevealed YouTube video downloader, not to mention being able to convert videos to the format of choice.
To help you understand some of its most prominent features, take a look at the bullet point list that we have curated for you below:
- Features every popular file format for smooth back-and-forth conversions.
- Does not involve any ads, spyware, or anything similar.
- Users can enjoy fast hardware decoding with minimal burden on the GPU.
- Fully-featured user interface that comprises easy-to-understand controls.
- Available on a wide variety of platforms.
- It can be downloaded in a few easy steps.
- Requires no initial setup.
Now that we are well aware of some of the best features of the VLC media player let us further the article and talk about two of its major facets: Installation and update process. We will begin with the installation half first.
How to install VLC media player on Windows
Installing VLC on your Windows PC is nothing but a straightforward process. The program is open-source and free to use, but the developers accept donations if you feel generous. To get the ball rolling with the download, follow the steps we have curated for you.
1. The initial step is to get to the download page of the VLC media player on the official VideoLAN website. You’ll automatically be redirected to the Windows version of the software as soon as you are there. Click on the “Download VLC” button to commence the download.

Downloading VLC media player for Windows
2. After clicking on the “Download VLC” button, the setup file for the media player will begin to download. Once it finishes, click on the setup file within your browser to run it and proceed toward the installation. After clicking on the VLC setup, the first prompt will ask you to set the desired language. On a side note, VLC is compatible with many languages, so there is an added plus.
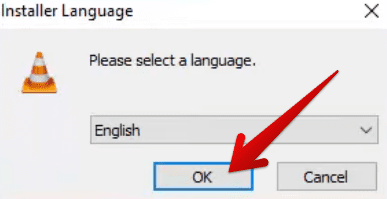
Selecting the language for the VLC player’s installation
3. Right after that, the primary installer window of the VLC media player will pop up on your screen, allowing you to click on the “Next” button to take things forward.
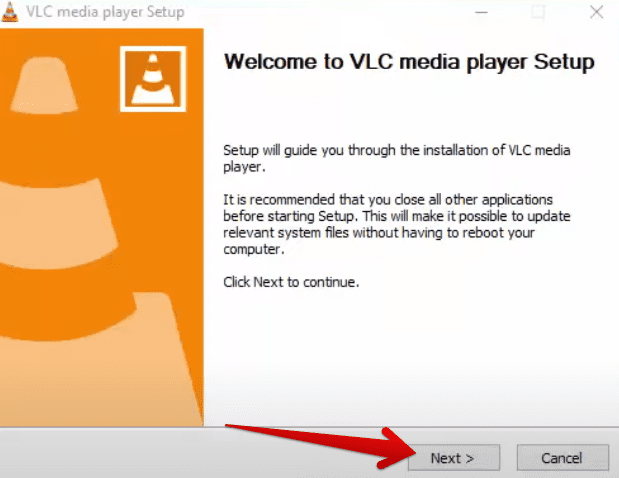
Furthering the setup
4. After clicking on “Next,” you will be shown the terms and conditions page within the installer. Feel free to read through the agreement and click on the “Next” button to proceed.
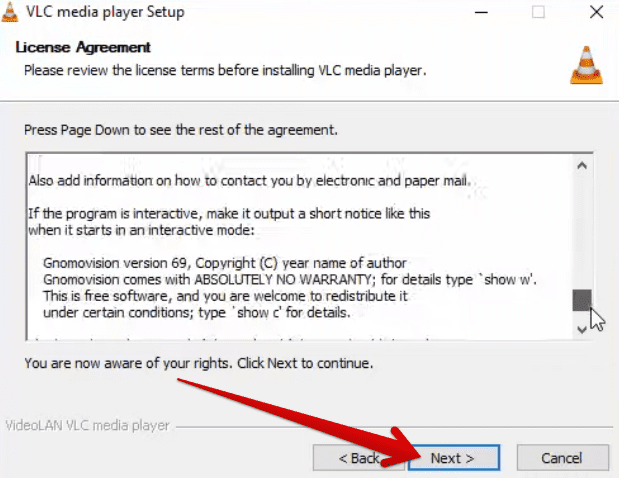
Agreeing to the terms and conditions
5. After agreeing to the license policy of VLC, the next step will be to choose the components needed to install alongside the VLC media player. Feel free to sift through your options and tap on the checkbox beside the enlisted entry. When you’re done here, click on “Next” to proceed.
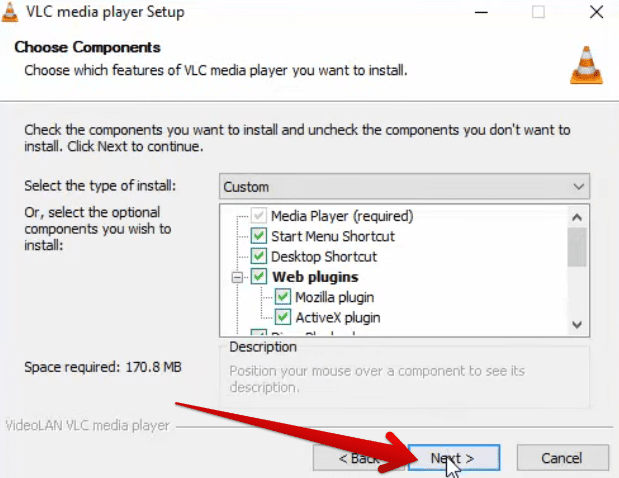
Choosing the components and plugins
6. The final step asks you to choose the destination folder for VLC’s installation. If you disagree with the default option, click the “Browse” button to change that. If everything is already tip-top for you, click the “Install” button to begin the installation. The procedure will take no more than a couple of minutes at best.
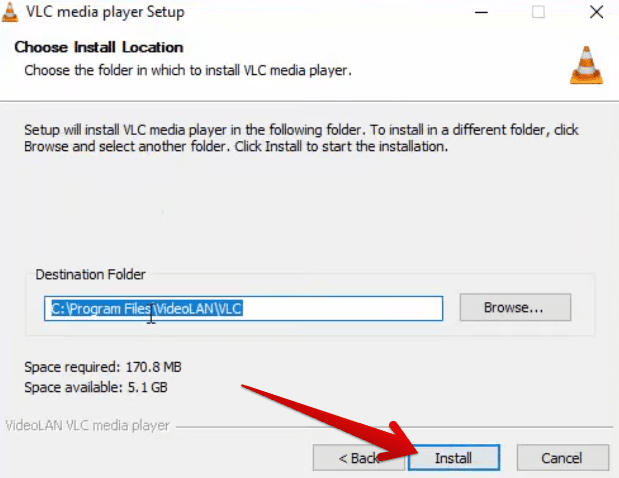
Choosing the installation folder
7. Good job! You have successfully finished installing the VLC media player. You may also click on the “Run VLC media player” checkbox and finalize by clicking on the “Finish” button. That’s going to do it for the installation of the program.
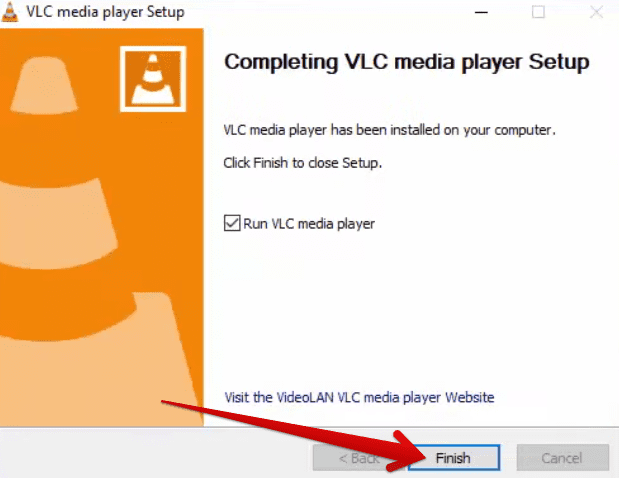
VLC media player installed
VLC media player will pop right up on your screen when you’re done clicking on “Finish.” However, this is a two-part article. We’ve already covered the installation part, and it’s high time to discuss the software update mechanism. Let’s get into all that in the following section.
How to update the VLC media player on Windows
Updating the VLC media player to the latest version is relatively simple. Before we get into that, though, let’s cast a lens on the procedure itself and whether it’s worth the hassle from time to time. We would say it’s your job to update the VLC player whenever possible to keep having the best possible experience with the program.
Otherwise, you are vulnerable to security breaches, bugs, and other persistent issues that can harm your operating system. Besides, keeping the VLC player updated to the latest version always ensures you’re receiving all the best features whenever they’re pushed out from the developer’s side.
This is another great reason you shouldn’t think twice about updating the famous multimedia-running program. So, let us now get down to the big question: How can you update the VLC media player app? The following steps are going to take it from here.
1. To get started, click the “Help” button on the player’s toolbar within its user interface. If you do not see the toolbar in the first place, perform a double-click anywhere in the player, hover over “View,” and check the “Minimal user interface” feature. An alternative measure is to press the “Ctrl” and “H” keys together. You will need to disable this functionality to visualize the toolbar.
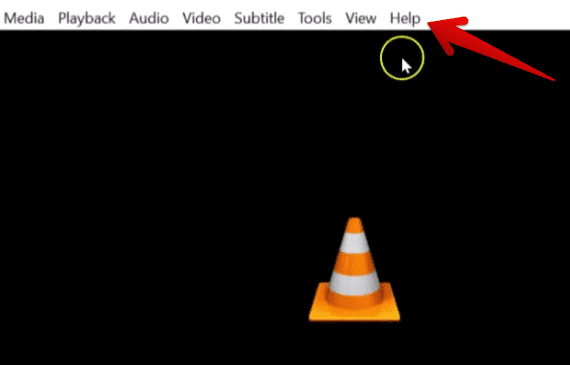
Clicking on the “Help” button
2. After clicking on the “Help” button, multiple options will appear on the screen for you. Click “Check for Updates,” as shown in the screenshot below.
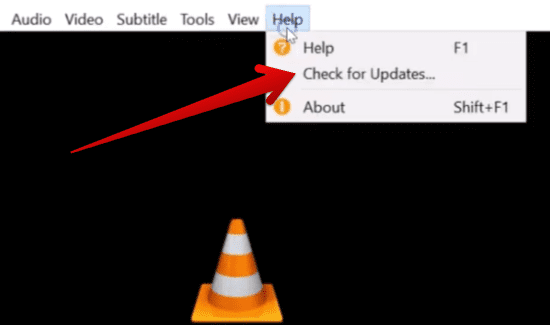
Clicking on “Check for Updates”
3. As soon as you click on the relevant button, a prompt will appear on the screen, detailing that a new update is available for VLC. You will be briefed about the new changes in a simple paragraph. Read through it and click on the “Yes” button if you want to update the VLC player.
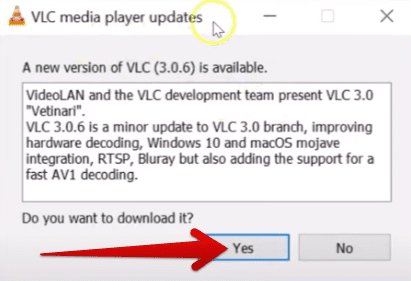
New update prompt received
4. Clicking on “Yes” will prompt the window to commence the installation of the new update. A progress tracker will appear on the screen, allowing you to visualize the amount of data left being downloaded.
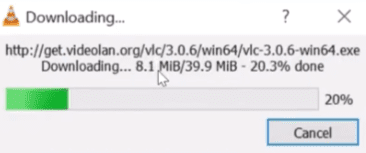
Update download under progress
5. As soon as the download finishes, the next step will be to restart the VLC player to apply the changes. This will be done quickly with the help of a subsequently appearing prompt. Click the “Install” button, and you will be ready to go.
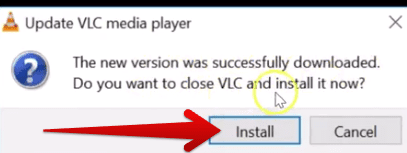
Installing the new update
6. A new window will appear on the screen, similar to the initial installation setup. However, this time, you have to get to the update part. To do that, click on “Next.”
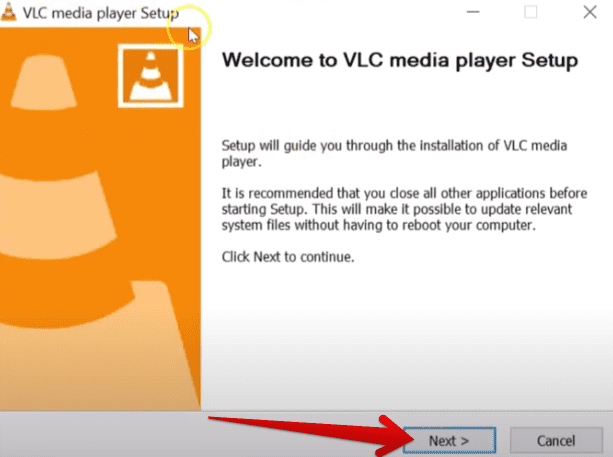
Getting to the update part
7. Right after the previous step, you will have to click on “Upgrade VLC using previous settings (recommended)” and click on the “Next” button afterward.
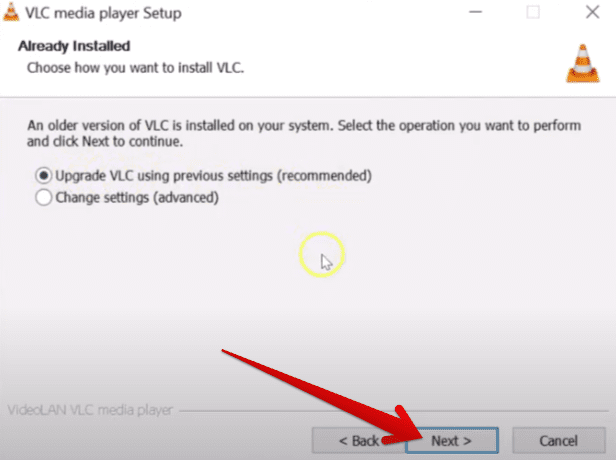
Selecting the right option
8. The installation of the update will commence one final time. Wait out this period until the procedure concludes on its own.
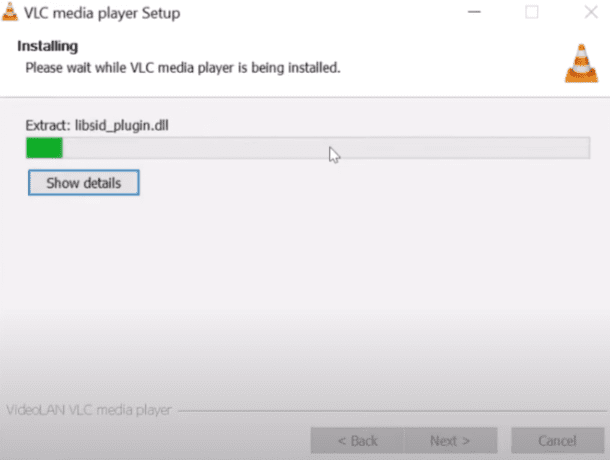
Update commenced
9. The final step is acknowledging that VLC has finished installing on your Windows PC. Check the “Run VLC media player” box and click on the “Finish” button. You are done now.
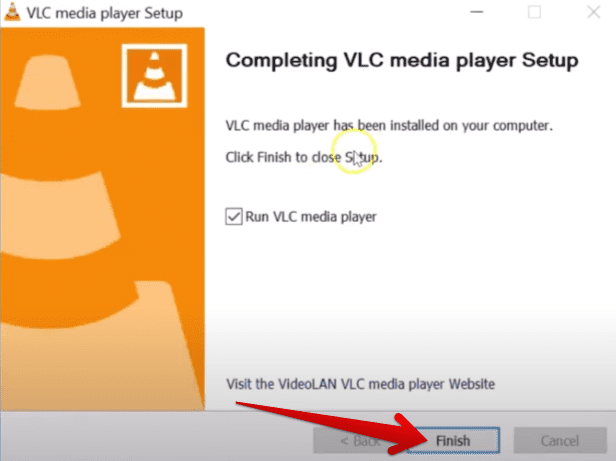
Finishing the update process
That’s all there is to updating the VLC media player. We hope that the instructions were clear enough for you to follow easily. It is now time to conclude the article.
Conclusion
VLC media player is a must-have for anyone using a Windows PC, given how effectively it handles everyday multimedia content. It features a bevy of valuable features that individuals will appreciate throughout their usage of the playback-centric tool. As you can comprehend from the sections above, installing and updating VLC on a Windows PC is not difficult.
All you need to do is follow some steps, and you’ll be gooqw4d. Do let us know in the comments section down below whether you found the guide useful for your cause. We would love to read your feedback for Windows Pixel!
