Table of Contents
From mobile phones and tablets to laptops and desktops, there is a comprehensive variety of operating systems that power our devices and let us use them optimally. However, it’s not uncommon for people to get creative and try the functionality and working of one operating system on the other. This is commonly known as emulation, and there are plenty of emulators out there doing a specific job.
If we look closely at a more narrow space, it is worth pointing out Android emulation in recent times, which has grown significantly. Android emulators on Windows mimic the functionality of the mobile operating system and allow us to experience Android apps and games on full-blown desktop operating systems. When such a topic springs up, BlueStacks is the first thing that pops in mind, the world-famous Android emulator for Windows PCs.
This article will talk about how to install BlueStacks on Windows 10 and Windows 11, so you never have to look for another guide for accomplishing this purpose. Let’s jump right in without wasting any further time.
BlueStacks explained
As mentioned just now, BlueStacks is an Android emulator. It replicates the core mechanics of Android on Windows, so our Windows PCs can run Android games and applications without gaining access to a mobile phone in any way. It’s pretty advanced software that enables mobile gaming on a desktop.
While there are many Android emulators, none are better than BlueStacks. First of all, it is a legitimate company running this product for a decade, more or less. It’s highly secure, works just as intended, and is high-quality from top to bottom.
You will experience some issues during your time playing Android apps simply because of the nature of this whole operation. Still, none of it is going to be too unmanageable. From purely a performance point of view, BlueStacks is more efficient than rival competitors, including MEmu, another Android emulator praised for its Android app emulation capability.
BlueStacks, on the other hand, is faster than any other emulator out there, offering a full-fledged Android experience and letting you perform unimaginable stuff on your Windows PC. For instance, you can download tons and tons of mobile apps on your computer, but you get a virtual Android phone running on the PC that’s fully capable of doing anything a mobile can do.
We’ve gone enough now on what BlueStacks is and how it works. Let’s get on with the installation part of the software now and further this article with some installation steps. The following section will walk you through the download and installation of BlueStacks on both Windows 10 and Windows 11.
Installing BlueStacks on Windows 10 and Windows 11
The good news is that the installation procedure of BlueStacks is identical on both Windows 10 and Windows 11. Therefore, you can follow the guidelines given below on any operating system and get favorable results. With that being said, let’s get right to the steps for BlueStacks installation.
1. To get started, use this link to go to the official BlueStacks website. As soon as you are there, click on “Download BlueStacks 10” to download the setup file of the software at hand. We recommend going with BlueStacks 10 at the start since it offers more of a lightweight experience and determines whether your device can handle high performance and GPU load or not.
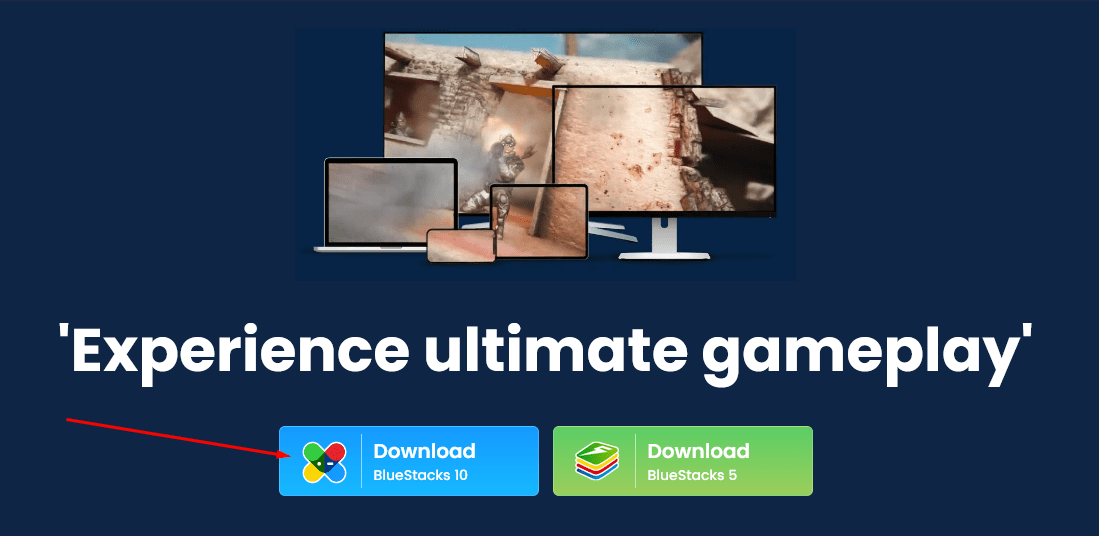
Downloading BlueStacks 10
2. After the setup file finishes downloading, go to the Windows Explorer app to find it. Double-click on the setup file right after locating it to launch the program and subsequently begin the installation of BlueStacks in one of the following steps.
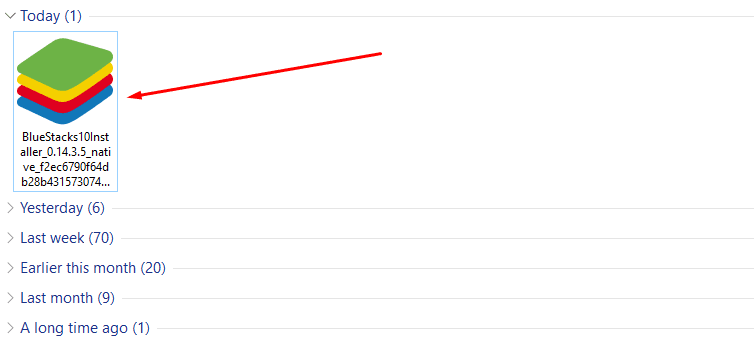
Running the BlueStacks 10 setup
3. After launching the setup file, the program will take a brief moment to get everything ready. When it does, the following window will launch on your Windows PC, prompting you to click on “Install Now” and begin the installation. Before you do that, however, you can click on the “Customize installation” button to tweak some options related to the download. These include changing the destination path of the app’s installation. When you’re ready, go forth with the installation.
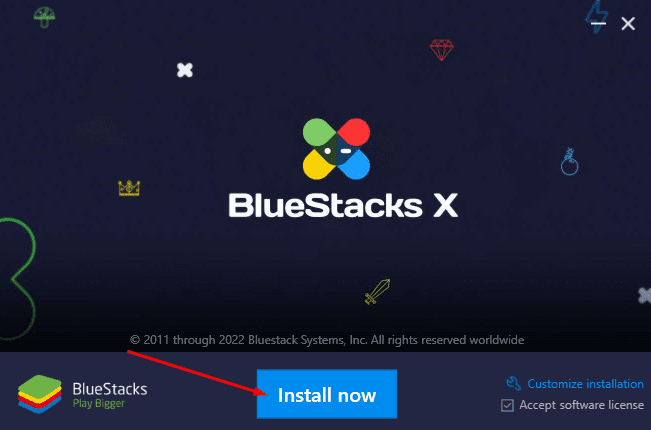
Clicking on “Install Now”
4. In this step, you have to wait until the BlueStacks 10 finishes installing on your Windows PC. After clicking on “Install Now,” a progress tracker will appear and walk you through the download percentages of the software.

Download commenced
5. As soon as the download finishes, you will be taken straight into the user interface of BlueStacks. We have been relatively impressed with how well-designed the graphical elements of the emulator have been put together. Congratulations! You have successfully installed BlueStacks on your Windows 10 or Windows 11 PC.
BlueStacks 10 installed
Now that you have the emulator all up and running on your PC let’s look at how it functions.
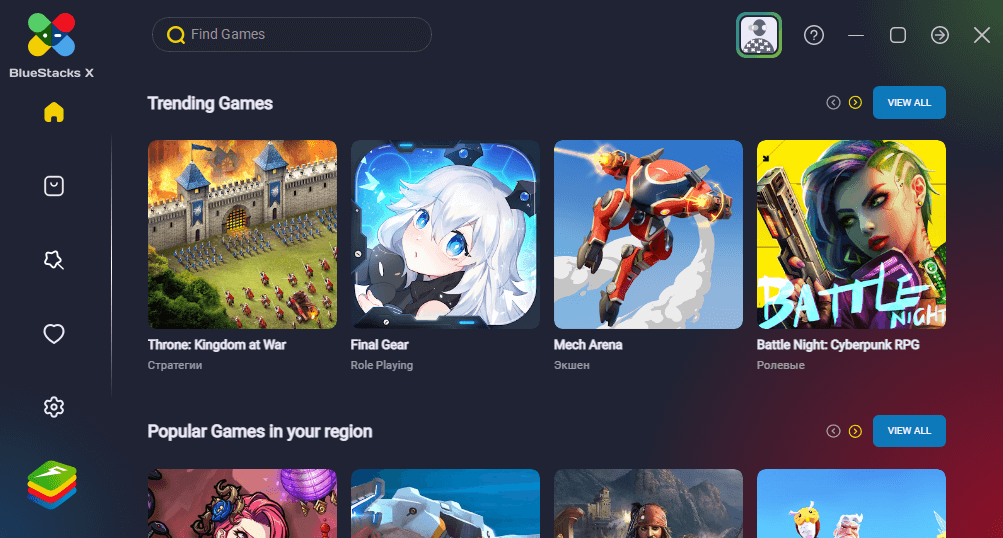
As mentioned just now, BlueStacks boasts a highly interactive user interface that’s well-organized and designed with a lot of thought. When you first launch the application on your Windows PC, you’ll observe the “Home” section. This is where you can see games trending on various Android marketplaces, especially the Google Play Store.
If you start scrolling down a little, you’ll observe another section called “Popular Games In Your Region.” This is a locale-based suggestion that analyzes the stats of the area of your residence and displays entries accordingly. Other than the contents of the “Home” section, the sidebar to the left is quite possibly the most important part of BlueStacks’ user interface.
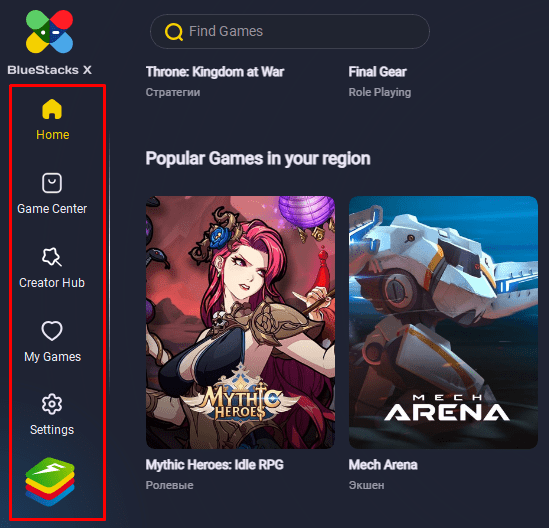
BlueStacks X sidebar
You can use it to control the emulator and engineer it following your preferences. In addition, what’s essential about this sidebar is the icon present at its very bottom. The BlueStacks App Launcher launches a separate window that allows you to enjoy Android apps inside.
You can try the App Launcher on its own or boot it directly after hovering over a specific game and selecting the “Play” button on it. The BlueStacks App Launcher will start reading essential components for the game to start. To illustrate with an example, we’ve tried playing Valor Legends, as you can see in the screenshot below.
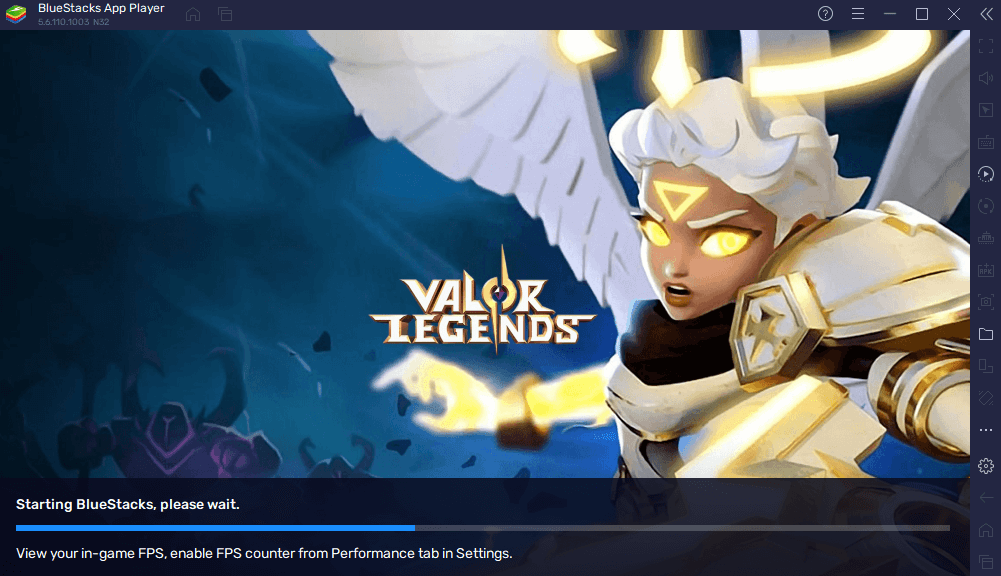
Trying Valor Legends in BlueStacks X
The BlueStacks App Player comprises another sidebar to the right and offers to play a set of controls to enhance the overall Android emulation. It’s pretty rich in terms of features, and we highly recommend experimenting and seeing what works the best for you.
That’s all about installing and using BlueStacks in Windows 10 and Windows 11! It is time to conclude the article.
Conclusion
BlueStacks is a well-grounded Android emulator that serves as the “best mobile gaming platform for Windows.” You can install it on your PC effortlessly, considering that you know what to do. In this guide, we’ve outlined the steps needed to be performed to install BlueStacks on both the current-gen and the next generation of Windows.
We hope that you’ve found this guide helpful. Do let us know down in the comments section whether you were able to get BlueStacks on your Windows or not. We would love to read your feedback!