Table of Contents
We’ll go over Docker installation on Windows in-depth in this article. But before we get into the installation process, let’s look at what Docker is all about. Docker is an operating system-level virtualization software platform that assists users in developing and managing applications in the Docker environment, including all of their library dependencies. Note that a Docker Container is a small software package that contains all of the dependencies (frameworks, libraries, and so on) needed to run a program.
Scenario for consideration
Let’s start with a discussion of hypervisors before moving on to Docker. So, for building, testing, and deploying an application, there is a development team, a testing team, and an operation team in an IT company or any cooperative.
Now, let’s say the developers are working on a different OS, such as macOS. They used some dependencies or libraries specific to the language they’re using, so they won’t just hand the software to the testing team but also the libraries. However, the application didn’t run on the tester’s machine, but it did on the developer’s, possibly because the tester’s machine has different OS features than the developer’s.
Now, developers must send the OS, but this is not practical because one cannot simply copy the C drive and hand it over. It is where Hypervisors come into play. Think of it as a virtual machine or Wim-ware, where you have the physical hardware, you host an OS on it, and the OS can now host another OS, also known as Guest OS, and this guest OS can be packed and sent to the testing team, notable isn’t it?
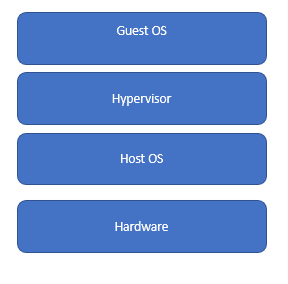
Guest OS over Hypervisor
However, because each program requires a different operating system, this will result in resource waste as numerous operating systems run. So we have the concept of Containers to solve this problem; the difference between Hypervisors and Containers is that we don’t require several operating systems for each application; instead, many apps can share the same OS kernel, which is fantastic. As a result, we’ll be installing DOCKER instead of installing HYPERVISOR.
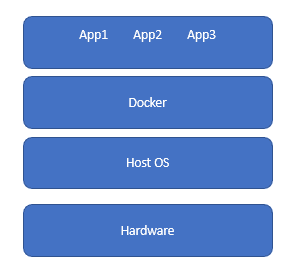
docker running multiple apps
The following are some of the most significant advantages of using Docker on Windows:
- Allows users to see and monitor Docker containers with an integrated user interface.
- Docker is started in less than ten seconds.
- Workspaces for Linux that are simple to use
- Allocates the necessary resources and memory space.
- CA synchronization is included.
- Proxy settings for HTTP are supported.
The following is a list of prerequisites for creating and running Docker containers:
- Docker Engine is a program that runs on the host machine that allows you to construct and operate containers.
- The Docker Daemon is a program that handles Docker containers.
- Client for Docker: It carries out commands.
- The REST API translates the command and delivers it to the Docker Daemon.
- Docker Compose is a service that runs two containers in one.
Docker installation on Windows
System requirements
We’ll walk you through the Docker installation procedure on Windows 10 and 11. First, let us look at the requirements:
- Backends for WSL 2 and Hyper-V, as well as Windows containers
- Ensure you have Windows 10 64-bit Home or Pro (2004 or higher) or Enterprise or Education to utilize Docker on Windows 10. (version 1909 or higher).
Note that to run Docker on Windows 10, you’ll need a 64-bit processor and 4GB of system RAM. Your PC must meet or exceed the following requirements:
- Second Level Address Translation on a 64-bit CPU
- 4 GB RAM for the system
- Hardware virtualization support at the BIOS level must be enabled in the BIOS settings.
- Make sure the Hyper-V and Containers features in Windows are turned on.
- Make sure the WSL 2 feature is turned on in Windows.
Besides the generic system requirements above, we have a Hyper-V backend and Windows containers and a WSL 2 backend that has specific requirements as follows:
Backend for WSL 2
Windows 11 64-bit: version 21H2 or higher for Home or Pro, or version 21H2 or higher for Enterprise or Education. Home or Pro 2004 (build 19041) or higher, Enterprise or Education 1909 (build 18363) or higher, Windows 10 64-bit. On Windows, enable the WSL 2 feature. You can refer to the Microsoft manual for more information.
To run WSL 2 on Windows 10 or Windows 11 successfully, you’ll need the following hardware:
- Second Level Address Translation on a 64-bit CPU (SLAT)
- 4 GB RAM for the system
- Hardware virtualization support at the BIOS level must be enabled in the BIOS settings. See Virtualization for further information.
- Install the Linux kernel update package after downloading it.
Windows Containers and the Hyper-V backend
Pro version 21H2 or above, or Enterprise or Education version 21H2 or higher, for Windows 11 64-bit. Pro 2004 (version 19041) or above, Enterprise or Education 1909 (build 18363) or higher, Windows 10 64-bit. The following are the system requirements for the WSL 2 backend for Windows 10 and Windows 11 Home.
- Windows features such as Hyper-V and Containers must be enabled.
- To run Client Hyper-V on Windows 10 correctly, you’ll need the following hardware:
- 4GB system RAM, 64-bit processor with Second Level Address Translation (SLAT).
- Hardware virtualization support at the BIOS level must be enabled in the BIOS settings. See Virtualization for further information.
Docker Desktop only works with Windows versions that Microsoft still supports, so make sure yours is up to date.
Installing Docker
To install and configure Docker on Windows, follow the steps below:
Step 1: Go to your preferred browser to install Docker (chrome will be used here, but it can be done by using any browser). Type Docker download into the search bar. Then, on the first link that shows, click it. By default, this should take you to the official Docker website. After selecting the link, choose your operating system for installation, whether Windows, MAC, or Linux. For the sake of this tutorial, we will choose Windows. Alternatively, download the docker file from the website https://docs.docker.com/docker-for-windows/install/.
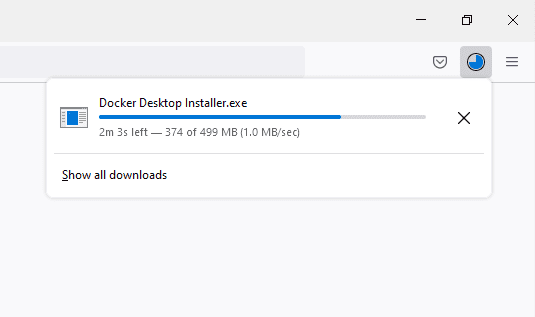
downloading docker for windows
The download will begin, and it may take some time, depending on your internet speed.
2. Then, to execute the installation, double-click on Docker Desktop Installer.exe.
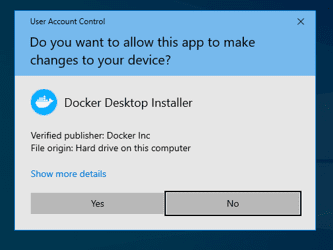
Docker Desktop Installer
If you don’t have the installer (Docker Desktop Installer.exe), you can acquire it from Docker Hub and execute it anytime you need it.
3. On the Configuration page, always enable Hyper-V Windows Feature after beginning the installation process. In addition, you can even configure the Desktop shortcut as follows.
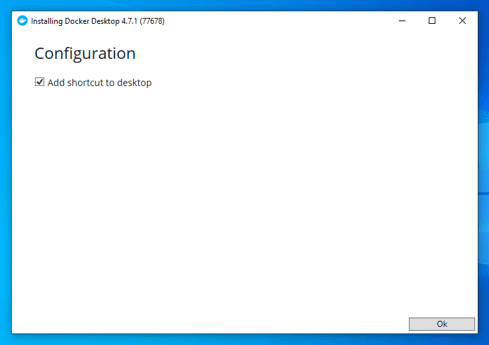
Docker Desktop configuration
4. To allow the installer to go through the installation process and wait till it’s finished.
5. Click Close and restart after the installation process is completed.
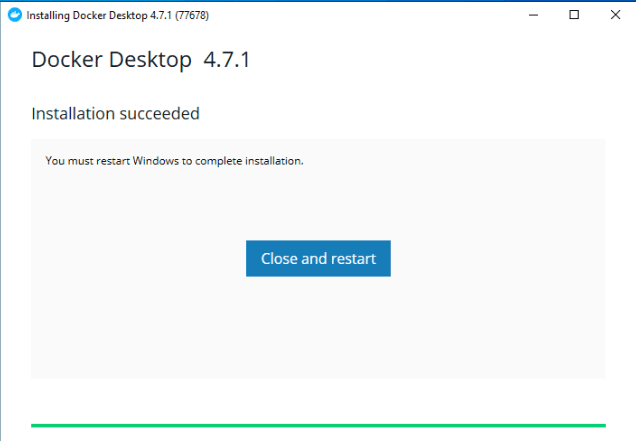
close and restart
After installation, we must restart our computer and install WSL 2, which stands for Windows Setup for LINUX. It’s a compatibility layer that allows Windows 10 to run Linux binary executables natively. Please pay close attention to the instructions that follow. After restarting, the following dialog box will show; click the Stop Docker button there.
After clicking, we’ll need to restart the PC and go to BIOS setup, Settings>Update and Security>Recovery>Advanced Setup>Device Configuration to enable Hyper-V. Then, if the option Enable Turbo Boost on DC. is not selected, select it, save, and quit.
After that, go to Control Panel> Turn Windows Features on and off in the final step. Then select Hyper-V and Windows Hypervisor Platform to activate Hyper-V. You’ve successfully installed and set up Docker on your Windows system at this point.
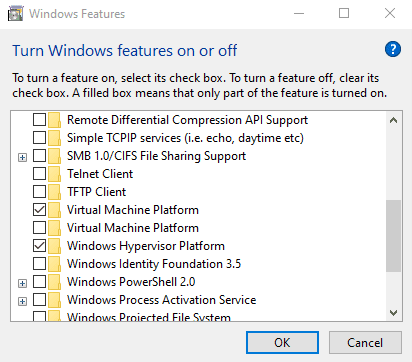
activate windows hypervisor platform
Docker Desktop creates containers and images shared among all user accounts on the machines where it is installed. Because all Windows accounts use the same VM to create and run containers, this is the case. When utilizing the Docker Desktop WSL 2 backend, it is impossible to exchange containers and images between user accounts. Nested virtualization scenarios, such as running Docker Desktop on a VMWare or Parallels instance, may or may not work.
Launch the Docker desktop tool
The utility does not start automatically after the installation process is completed. To use the Docker tool, look for it in your desktop search results and select Docker Desktop. Docker provides onboarding training before you begin using the application. The tutorial walks you through the steps of creating a Docker image and running a container. Docker Desktop is now running on Windows successfully. Then, to install the Docker engine on your PC, follow the steps below.
To validate the version of Docker installed on the system, go to Docker CLI and run the Docker version command. Congratulations, your Docker installation on Windows is complete, and you are now ready to create and run Docker images and containers within the Docker ecosystem.
The Docker menu displays the Docker Subscription Service Agreement window (whale menu). It incorporates an update to Docker Desktop’s terms of service.
Here’s a rundown of the most significant changes:
- The conditions of usage for Docker Desktop have changed as part of our Docker Subscription Service Agreement.
- Small firms with fewer than 250 employees and annual revenue of less than $10 million and personal use, education, and non-commercial open source initiatives will continue to be free.
- For professional use in larger businesses, it requires a paid subscription.
- These terms will take effect on August 31, 2021. Those who will require a paid subscription to use Docker Desktop will have until January 31, 2022, to do so.
- The Docker Free membership has been renamed Docker Personal, and a Docker Business subscription has been added.
- Docker Desktop is included in the Docker Pro, Team, and Business subscriptions.
Check the box to indicate that you accept the amended conditions, then click Accept. After you accept the terms, Docker Desktop will start.
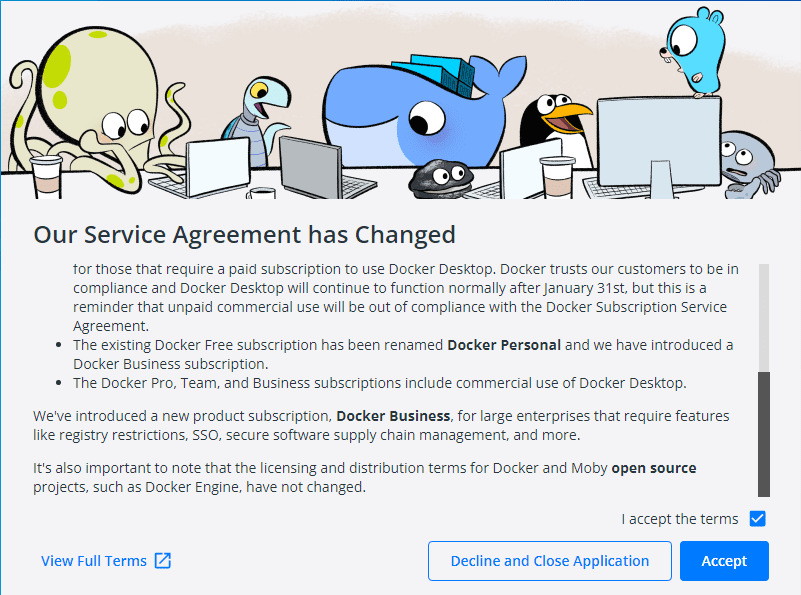
agree to the Docker service agreement
How to uninstall the Docker desktop tool
If you want to uninstall Docker Desktop from your Windows Home computer, follow these instructions:
- Start typing from the Windows Start menu, then Select Settings > Apps > Apps & features from the Windows Start menu.
- Select Docker Desktop from the list of Apps & Features and click Uninstall to confirm the process.
Docker Desktop is uninstalled, which destroys local Docker containers, images, volumes, and other Docker-related data and the files generated by the application. To discover how to save crucial data before uninstalling, go to the backup and restore data section.
Why should you use Docker?
Docker is so widely used that “Docker” and “containers” are frequently interchanged. Here are a few reasons why Docker is so popular on Windows 10 and 11:
- Docker containers are highly portable, and they may be utilized without modification in any desktop environment.
- Lightweight: In Docker containers, only one process can run simultaneously, so you can run the app while repairing or updating its components.
- Docker can swiftly generate containers based on the source code of an application.
- Versioning: A container’s versions can be readily tracked, rolled back, and traced.
- Container reusability: Existing containers can be utilized as templates for new container construction.
- Developers may quickly access a registry containing thousands of containers that people have provided.
Is Docker Desktop available for free?
According to the Docker website, Docker is free for personal, small company, education, and non-commercial purposes. It does, however, require a monthly subscription for use by experts in larger businesses.
Guide to getting started
Docker Desktop launches the Quick Start Guide after the startup is complete. This guide includes a simple exercise that involves creating a Docker image, running it as a container, and then pushing and saving the image to Docker Hub.
To run the Quick Start Guide on demand, enter the Docker Desktop menu by right-clicking the Docker icon in the Notifications area (or System tray) and selecting Quick Start Guide.
Updates
Docker Desktop displays an icon on the Docker menu when an update is available to signify the availability of a newer version. Additionally, the Software Updates section of Preferences (Settings on Windows) will notify you of any available Docker Desktop updates. You may either download the upgrade right away or read the Release Notes to learn more about what’s new in the new version.
Users on all Docker subscriptions, including Docker Personal and Docker Pro, can turn off the automatic check for updates starting with Docker Desktop 4.2.0. See Software Updates for more details. After August 31, 2021, you must agree to the Docker Subscription Service Agreement to continue using Docker Desktop.
Updates can be downloaded by clicking the Download button. When you’re ready, click on the link to download the update. The update is downloaded in the background. From the Docker menu, select Update and restart after downloading the update. It installs the most recent version and continues Docker Desktop to apply the changes.
The Docker Subscription Service Agreement window appears when Docker Desktop is launched. Read the information on the screen to see how the changes will affect you. To continue, check the box to indicate that you accept the amended conditions, then click Accept.

agree to the Docker service agreement
If you do not agree to the terms, Docker Desktop will close, and you will no longer be able to use it on your computer. By launching Docker Desktop later, you can accept the terms.
After you accept the terms, Docker Desktop will start.
Conclusion
One of the best things about open source is the freedom to choose the technology you want to utilize to complete a task.
The Docker engine is suitable for lone engineers that require a lightweight, clean environment for testing but do not require extensive orchestration. Docker Community Edition (docker-ce) is a wonderful method to get started with containers if Docker is installed on your system and everyone around you is familiar with the Docker toolchain.
