Table of Contents
Microsoft Windows is the world’s most popular operating system that houses a wealth of different software and programs to download, experiment with, and work on. The Microsoft Store can help users profoundly in this regard, but when things get a little complex, it’s natural to gravitate toward other, more robust available solutions. We’re talking about software that lets you employ a command-line functionality and implement advanced methods of trying out new things on Windows.
Naturally, we have had the Command Prompt in the Windows operating system for an exceptionally long time. However, a more feature-filled program allows us to pull off various tasks, whether centered around administrator controls or source code management. You guessed it right. We are talking about Git Bash and its working mechanism.
In this guide, you’ll be learning how to install Git Bash on Windows with easy-to-follow instructions. Without any further delay, let’s get right into it.
What is Git Bash?
At its very core, Git Bash is no more than a particular application for Windows. Its primary purpose is to offer services that replicate a Unix-focused shell and allow users to use Git commands. The terminologies will get very technical here, so we will do our best to explain things clearly. Let’s start with what a shell is.
A shell is a program that makes it possible for an end-user to test the different services that an operating system offers. It is where you can input commands and get favorable results for yourself. Now, you must be wondering about Bash. The word “Bash” is short for Bourne Again Shell. Therefore, it’s now easily understandable how these two components correlate.
Git Bash, in essence, is a package for Microsoft Windows in which people can have Unix-like services. Some of the various functionalities include Secure Copy Protocol which allows an individual to duplicate specific files and even directories to different locations within the terminal, and Secure Shell Protocol. The latter is another high-grade feature employed to secure the connection between two hosting ends when the network itself isn’t highly protected.
Now that you have a fair understanding of what exactly Git Bash is let us go over the process of its installation in the next section in detail.
Installing Git Bash on Windows
Downloading and installing the setup of Git Bash on Windows is quite simple. However, the configuration part of the whole procedure can get pretty complex. We will cover all you need to know about installing Git Bash on Windows in the following steps, so follow them carefully for great results.
1. The first step is to use this direct link and get straight to the official Git website. Select “Click here to download” below the “Download for Windows” section. That will begin the download of the Git Bash setup.
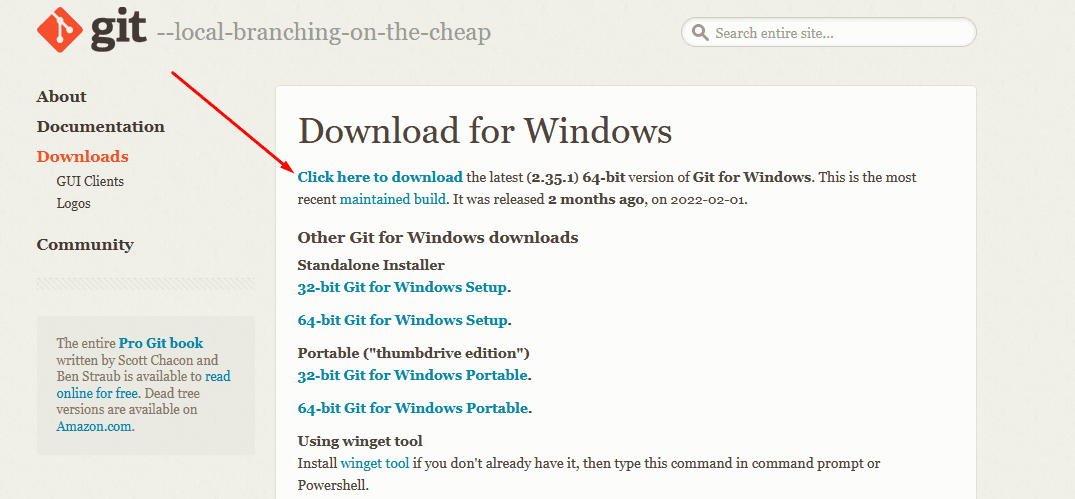
Downloading the setup file of Git Bash
2. When the setup file has been downloaded on your device, go to the Windows Explorer system app. You will find the setup of Git Bas there. Double-click on it to run the software on your Windows PC. Don’t forget to click “Yes” on the UAC prompt that will appear shortly afterward.
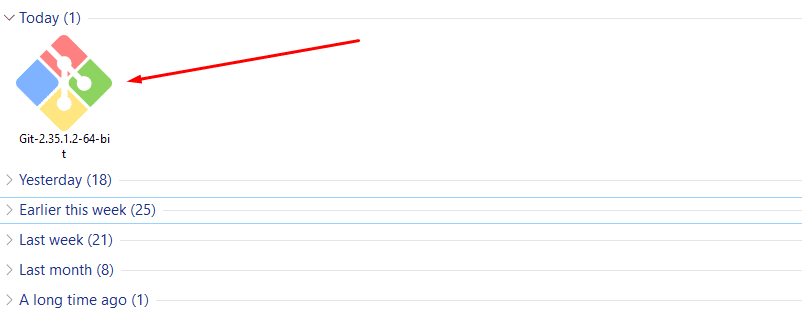
Running the Git Bash setup
3. After clicking on the file, a window will appear, and it’ll take you through the setup of Git Bash on your Windows PC. You’ll have to go through the steps to completely install this software on your PC. Click on “Next” after reading the GNU General Public License to get to the next step.
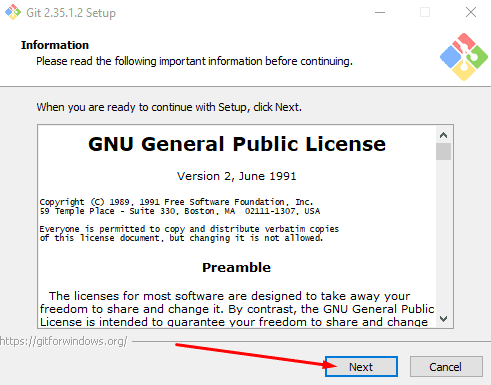
Going further with the setup
4. Right after that, you will be required to choose the destination location for the installation of Git Bash. You can click on the “Browse” button and select whatever pathway you want to allot. Click on “Next” to continue.
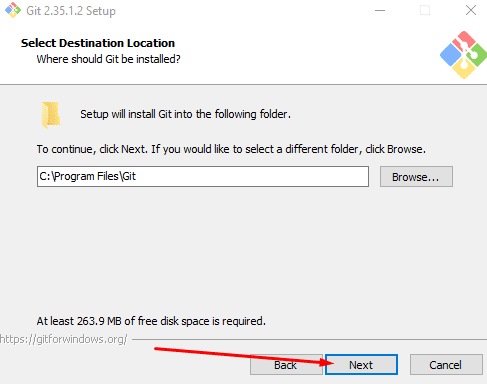
Selecting the destination folder
5. The next step is to specify the components you want to install for Git Bash. We recommend clicking on the checkboxes beside the “Additional icons” and “On the Desktop” options. Once done, click on “Next” to proceed.
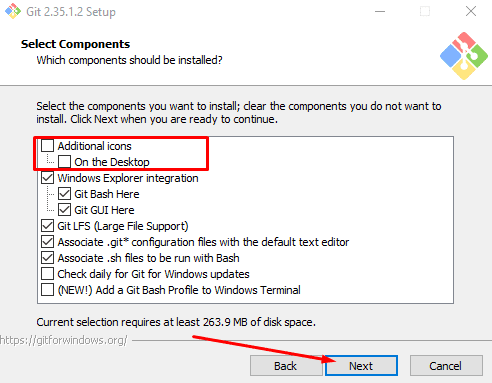
Selecting the components
6. To continue, you will be required to select the default editor used by Git. Vim is the ubiquitous text editor for Git, but it’s challenging to use. If you have a preference, feel free to use the drop-down menu and choose the text editor yourself. If not, Vim can be used as a good starting point. Click on “Next” to get ahead.
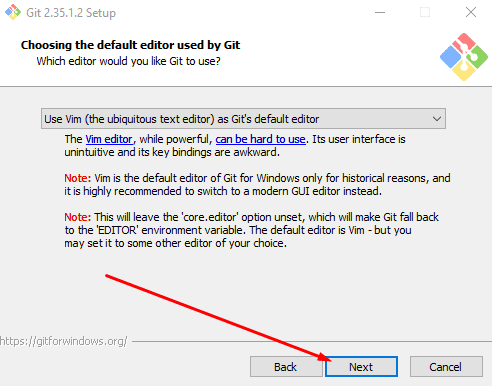
Selecting the default editor for Git Bash
7. You now have to adjust the initial branch name for Git. Leaving the option as default, “Let Git decide,” is the best way to go for now, and there’s no need to override the default branch name. Click on “Next” again to get to the next step.

Selecting the branch name
8. To proceed, your task now is to adjust the correct PATH environment. This is basically to ascertain the methodology applied to utilize the services of Git. It’s recommended to select the “Use Git and optional Unix tools from the Command Prompt” option here for the most favorable type of results. Click on “Next” to proceed.
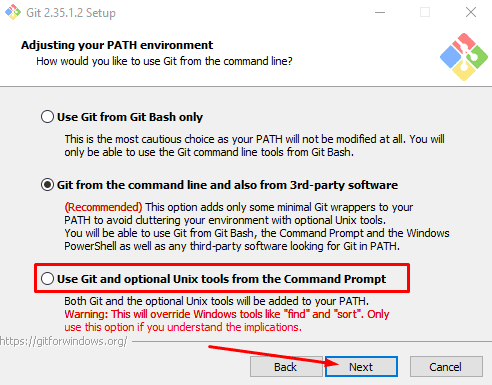
Optimizing the PATH environment
9. After optimizing the PATH environment, the next step is choosing the SSH executable, the Secure Shell client program you like to use to accommodate Git.
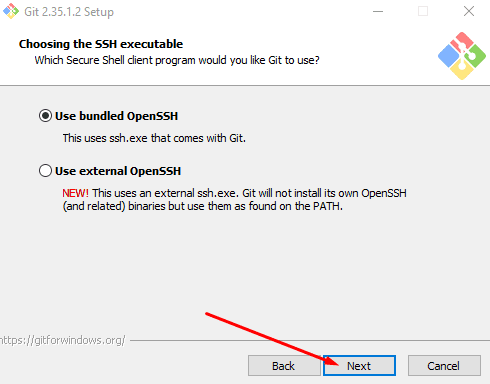
Choosing the SSH executable
10. After that, choose the type of library you’d like to use Git with for establishing HTTPS connections. We recommend going with the OpenSSL library option.
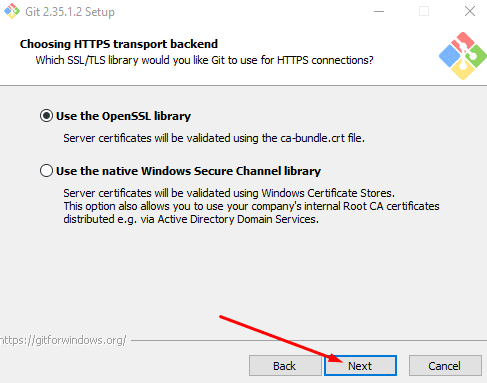
Choosing the library type for Git HTTPS connections
11. To continue, use the “Checkout Windows-style, commit Unix-style line endings” as your configuration for line-ending conversions. That should give you a good experience with Git Bash.
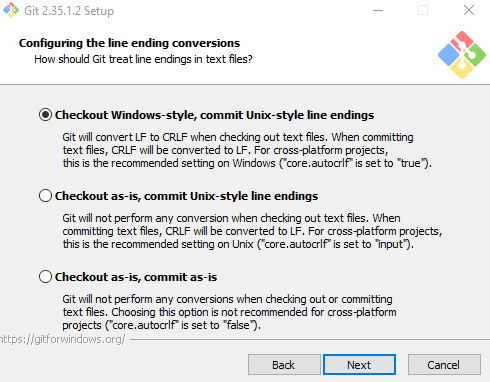
Configuring the line ending way
12. Select the terminal emulator you’d like to use with Git Bash. The “MinTTY” default terminal should be the right choice here.
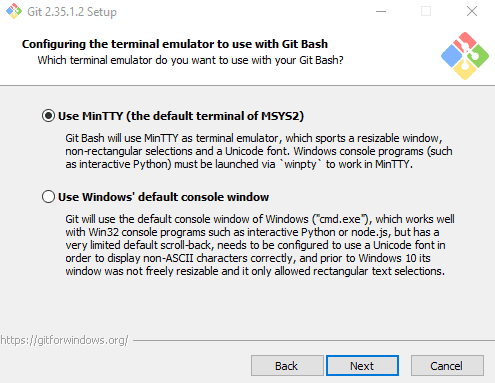
Terminal emulator optimization
13. After that, you will be required to choose the default behavior of the “git pull” command. Keep it set as the default option to proceed.
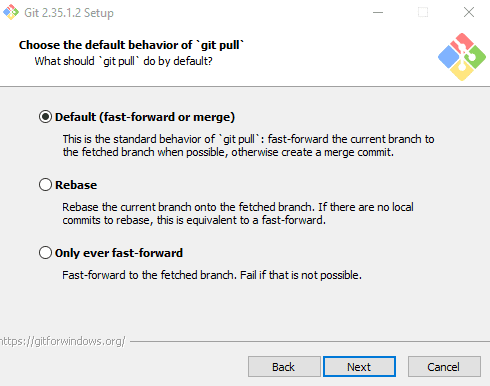
Git pulls default behavior.
14. You now have to choose a credential helper. This particular feature will allow you to grab your credentials from hefty storage. It’ll also be responsible for taking the information back to the storage area. Select the “Git Credential Manager” option to get to the next step.
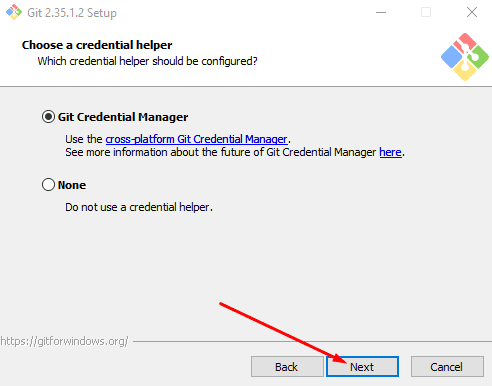
Choosing a credential helper
15. The third-last step that you have to go through revolves around configuring some extra options for your experience with Git Bash. We recommend toggling on the “Enable file system caching” option and then clicking on the “Next” button.
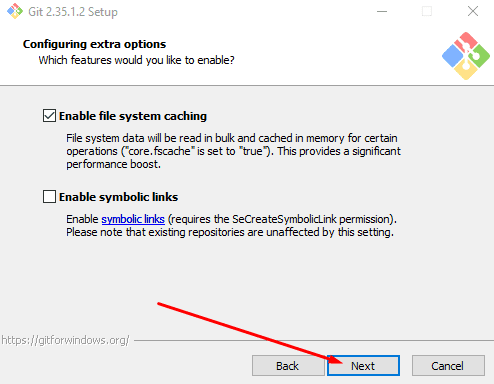
Extra options
16. Before you begin the installation, please confirm to the setup whether you want any experimental features on Git Bash. If you’re new to the program, we recommend against this. Click on “Install” to begin the installation. However, if you’re an ingrained Git user, evaluate if the experimental options will be worth your time.
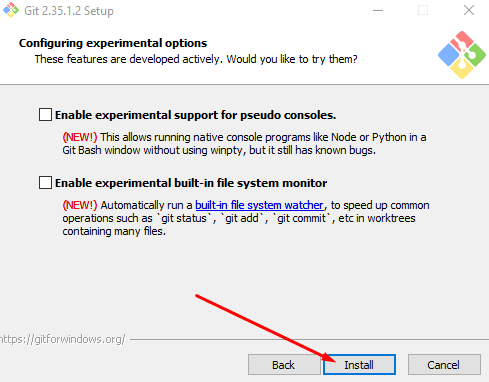
Installing Git
17. Clicking on “Install” will begin the installation. Soon afterward, the setup file will say that the installation has been finished and you’ve completed the Git setup wizard.
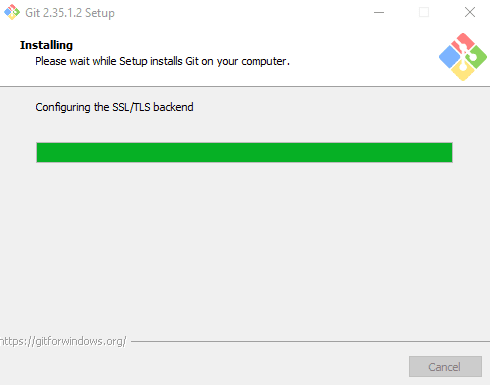
Installation underway
18. After the installation concludes, you’ll see the following on the window. Uncheck “View Release Notes” and click on “Launch Git Bash” to finalize the download procedure.
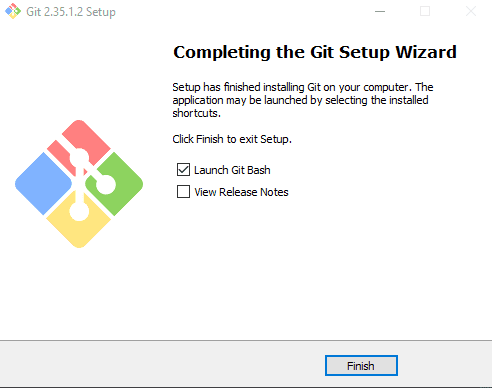
Finishing the installation and launching Git Bash
19. Now that you have installed Git Bash on your Windows PC after a lengthy setup, it’s finally time to launch the program. Following the closure of the setup, the software will launch on its own the first time. However, you can always search for it again in the Window Search menu by tapping “Git Bash,” The application will pop right up.
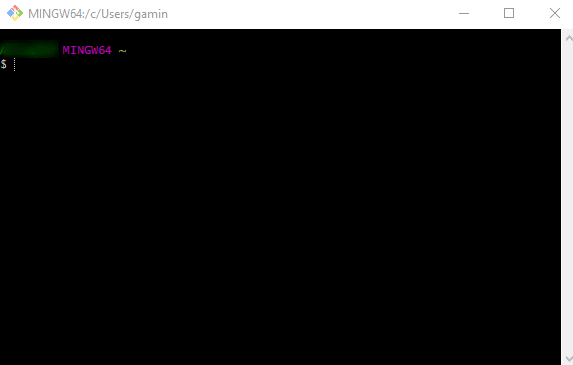
Git Bash
That’s all about it for installing Git Bash on a Windows PC. We have covered all the necessary details in this step-by-step guide, so you shouldn’t be struggling with it now.
Conclusion
Git Bash is effective software that Windows users can enjoy right from their desktop PCs. It opens up the operating system in multiple ways, allowing power users to get more out of their devices easily and quickly. Therefore, it’s easy to comprehend why one would want to get Git Bash on their Windows PC.
In this in-depth guide, we’ve talked about the installation of Git Bash in easy-to-understand terms so that you won’t have any problems related to it from here on out. Do let us know down in the comments section if you found this tutorial helpful. We would love to read your feedback!
