Table of Contents
Installing a game can seem easy and seamless until you try and things fail to go quite as planned. Frustrating right? Especially when you are looking forward to playing a vintage game. Well, this article aims to help you install Red Alert 2 and, most importantly, get it to work on your Windows 10. So stick to this article to learn and understand how to install Red Alert 2 on Windows 10.
Installing Red Alert 2 on Windows 10
Step 1: Downloading Red Alert 2
The first step is to download the Red Alert 2 installer. To do this, click this link. You will be redirected to the “oldgamesdownload,” where you will download the Red Alert 2 game installer. Click the first link, “Command_and_Conquer_Red_Alert_2_Incl_Yuris_Revenge_Win_RIP_EN.zip(406.6MB) highlighted in blue as shown in the image below:
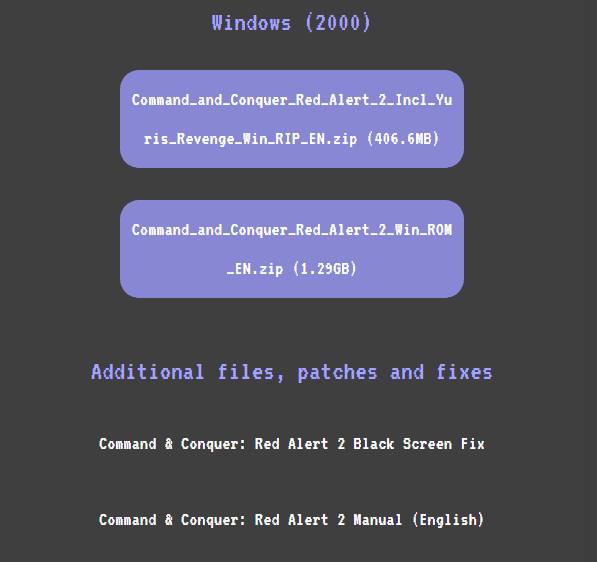
Red alert 2 download page
You will be redirected to a new page. On that page, scroll down and locate “Archive.org,” as shown in the screenshot below. Next, click the “Archive.org” link, and your download will start automatically.
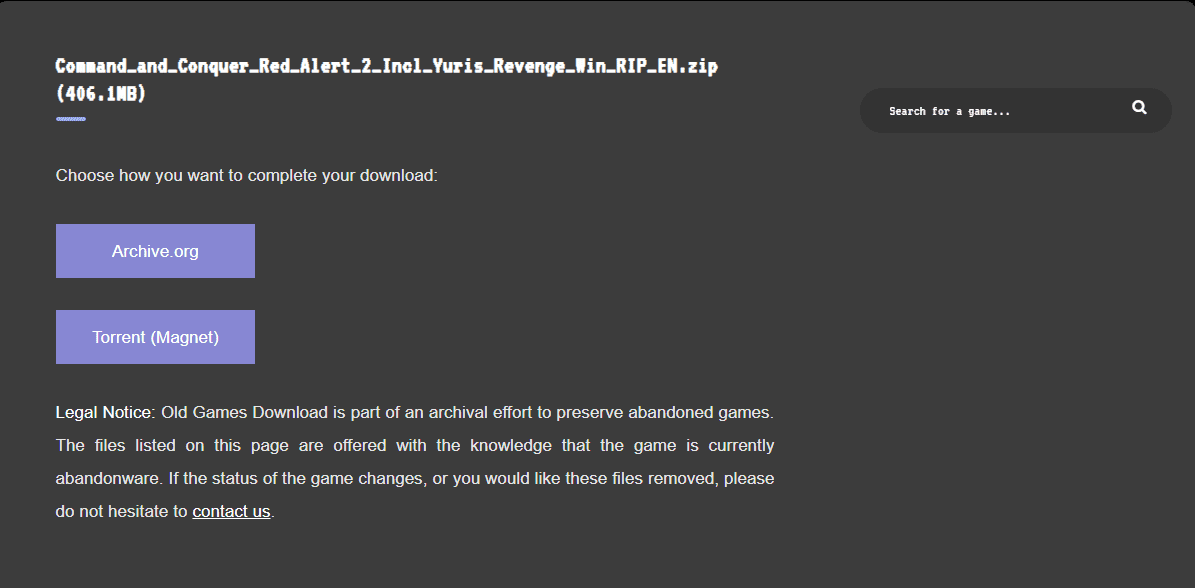
Red alert 2 download file
Please be patient while the installer downloads. Remember, the download speed will depend primarily on your internet speed, but you shouldn’t freak out since the red 2 alert installer is 406 MB only.
Once you have finished downloading the Red Alert 2 installer file, click this link “Command & Conquer: Red Alert 2 Black Screen Fix” to download the additional files that you may require to fix the installer in case of any mishaps like black screen.
Step 2: Installing Red Alert 2
After downloading the installer, locate it in your “Downloads” folder. Unless you changed your default download directory, your downloader installer would be in the “Downloads” folder. Once you locate the installer, right-click on the file and choose the “Install” option. This will start the installation process.
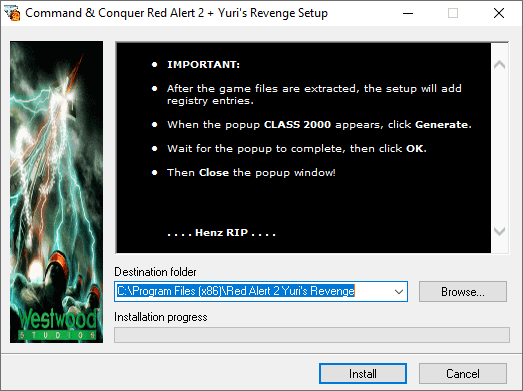
Red Alert 2 Installation
Once the installation process is complete, Open the other downloaded folder, “Command & Conquer Red Alert 2 Black Screen Fix”. This folder contains two files, as shown below:

Red Alert 2 Black Screen Fix Files
Right-click on the first file highlighted in the image above and open with “Notepad.”
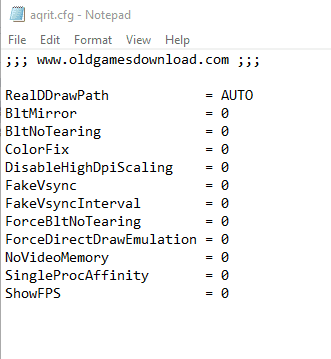
Open file with notepad
You will see something similar to the image above. Here we shall change the value of “ForceDirectDrawEmulation” from “0” to “1”. After that, save your file and exit notepad. You should have a file similar to the one shown below:

Changed file contents
After exiting the notepad, navigate to your desktop and locate Yuri’s Revenge shortcut Icon. Right-click on it and select “Properties” as shown below:

Select Properties
Next, click the “Open File Location” as shown:
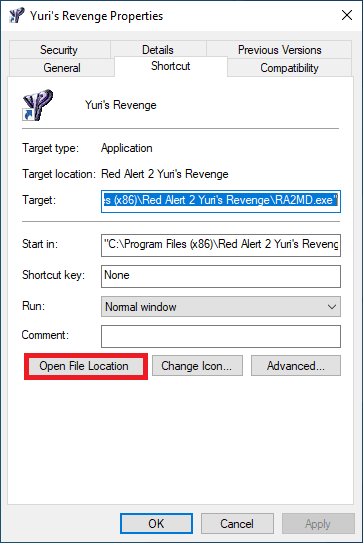
Yuri Revenge Properties
Once the file location has been opened, paste the two files in the Red alert 2 black screen fix into that file location. Close the file explorer when done.
Now navigate to this link to download Red Alert 2. Next, click “Download CnCNet & Play Online.” That link will download the Red Alert 2 installer.

Download Red Alert 2
When you click the link “Download CnCNet & Play Online,” you will be redirected to another download file on the same page, as shown in the image below:
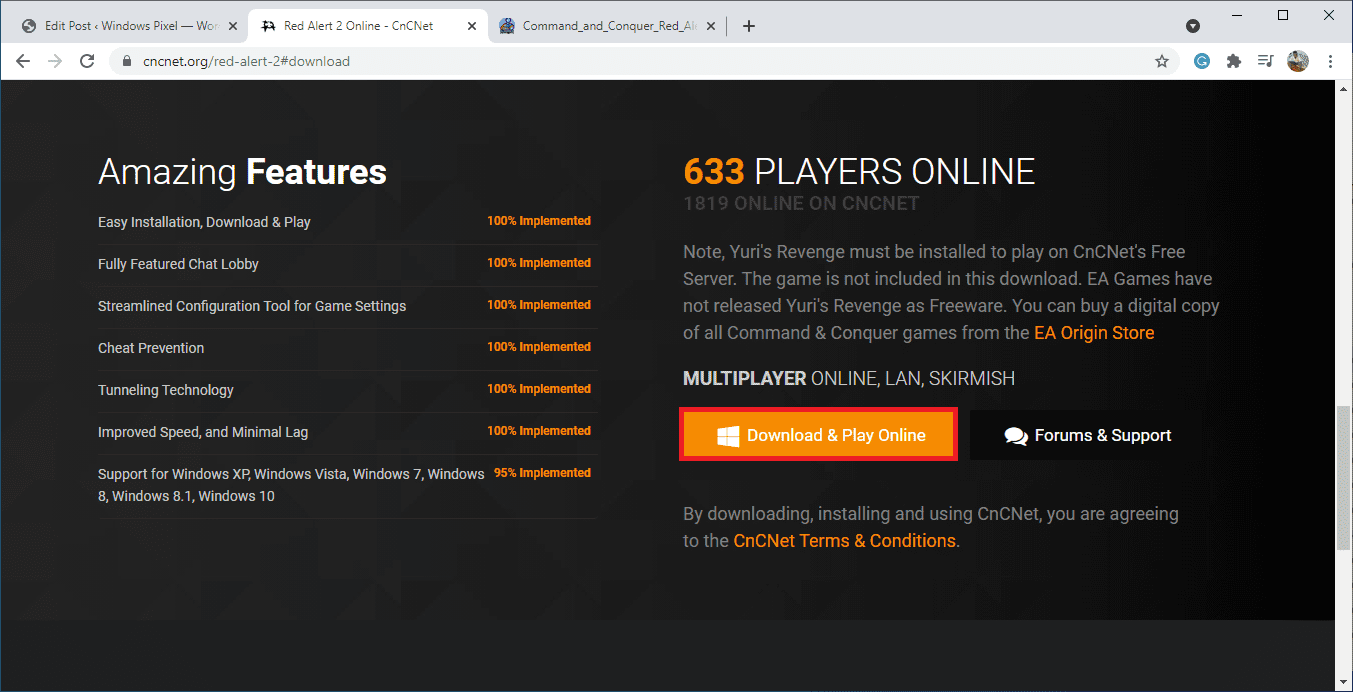
Download Red Alert 2 for windows
Once you click “Download & Play Online,” the installer will automatically be downloaded into your Downloads directory. This process should not take long as the installer is only 127Mb. However, if you have low internet connection speeds, you might have to wait for quite a while. Once the download process has been completed, navigate to the downloads directory and locate your recently downloaded installer.
Now double-click the installer to install the file into your windows operating system as shown:
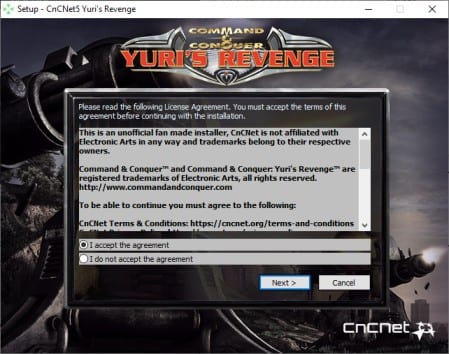
Yuris Revenge Installation
Once the installation is complete, the game will automatically launch as shown on the screen below:
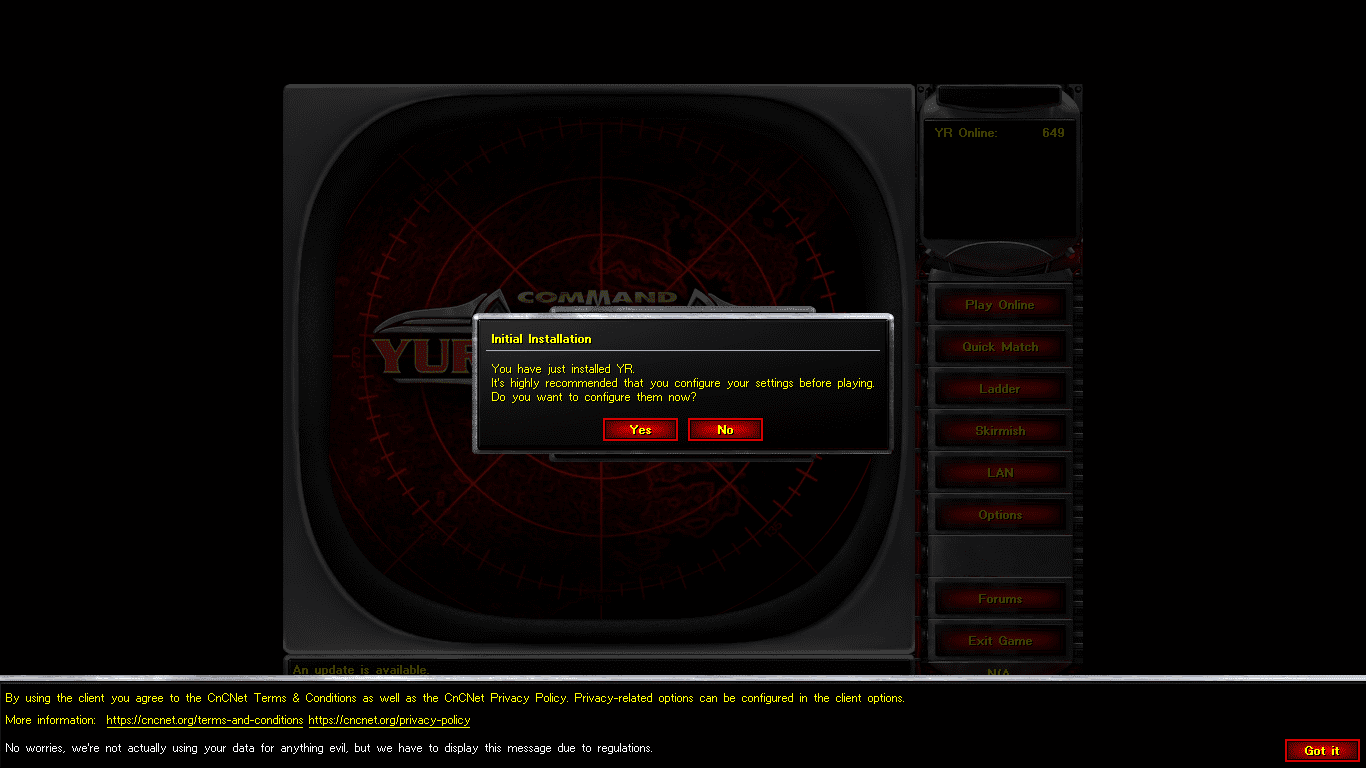
Yuris Revenge Game
Click “No” on the screen above to skip configuring the game settings.
Note: Once you have installed the game, you might be prompted to install an update. Don’t freak out. Just click the update button and let the installer do its thing. After it completes, the game will restart and relaunch. Now let us do the game configuration.
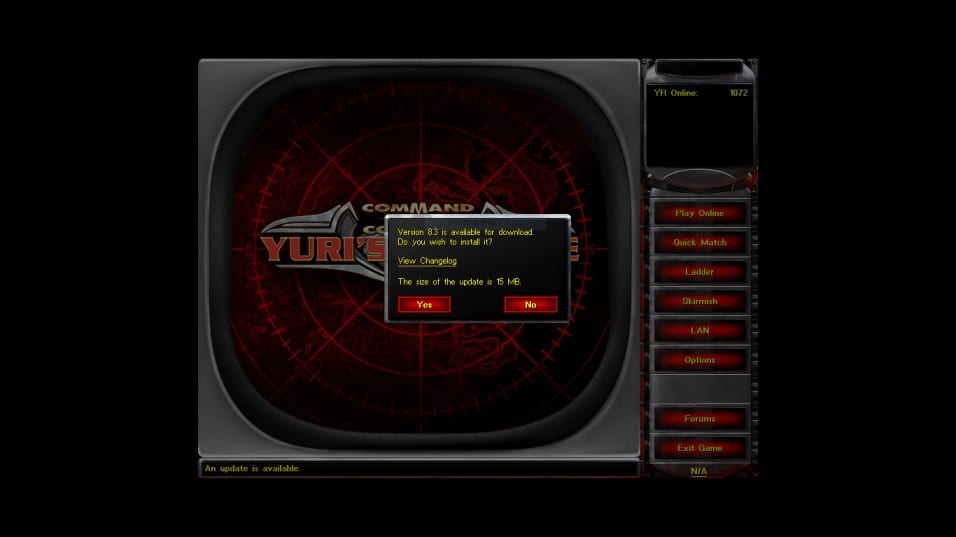
Red Alert 2 update
Once Yuris Revenge has been installed, Red alert 2 will also automatically install your Windows operating system. Then, to access the game, navigate to your desktop, and you will see the game shortcut as shown below:
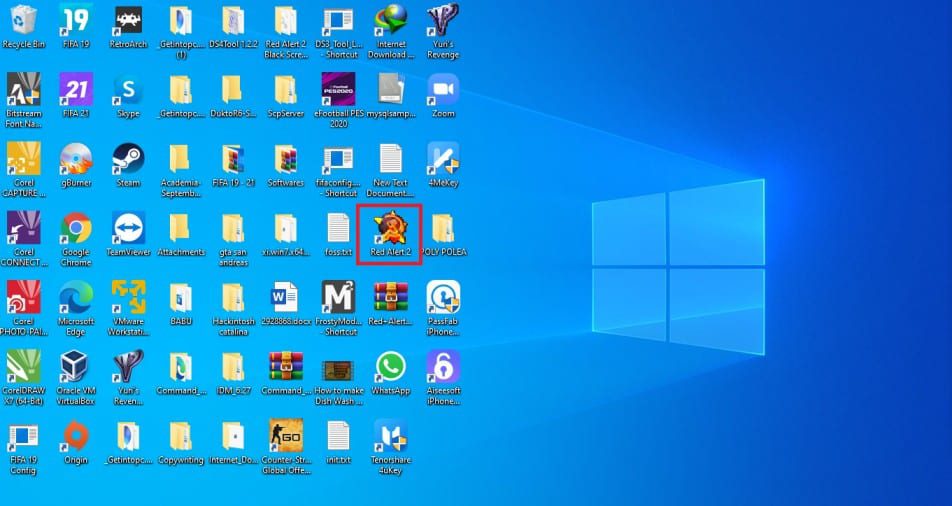
Red Alert 2 Desktop Shortcut
Double click the file to run the game. Once the game has opened, you will see a similar screen to the one displayed below:

Red Alert 2 welcome screen
If you have the retail CD version of Red Alert 2, follow the following steps:
- Download and install XWIS’ Red alert 2 multiplayer distribution from this page.
- From the Allied disc, copy multi.mix, theme.mix, maps01.mix, and movies01.mix to the Red Alert 2 directory.
- From the Soviet disc, copy maps02.mix and movies02.mix to the RA2 directory.
- Run the game.
If you have the First Decade version of Red Alert 2:
- Put your First Decade disc on your DVD drive.
- If you are not using Windows XP, exit the autorun, and run setup.exe on your disc as administrator.
- Follow the directives on your screen. Select a custom installation.
- If the User Account Control on your computer is not disabled, install the First Decade to a folder but ensure you do NOT install it in “Program Files (x86).”
- Wait for the installation of the game to conclude.
- Download and apply the TFD unofficial patch 1.03 rev4.
- Run the game.
Download Unofficial TFD patch 1.03 revision 4 (164 MB)
Note:
Since we are running Red Alert 2 on Windows 10, we should remember that it requires additional steps to get the game running. The most recent procedure requires installing the latest version of the CnCNet YR client, which even patches the regular Red Alert 2 gameplay.
To patch the game successfully, move ts-ddraw or DDrawCompat to the Red Alert 2 directory. Alternatively, you can put ddwrapper into the Red Alert 2 directory and apply the C&C Graphics Patcher to Red Alert 2 executables. If that fails to work, apply XWIS’ fix for Red Alert 2.
Here are the steps to follow if you have the Origin version from The Ultimate Collection.
- Download and install “Command & Conquer™ The Ultimate Collection” from the Origin client.
Remember, the game is a paid version; hence you will have to spend some cash downloading the game. Once you have purchased the game, download and install it on your Windows operating system.
- After completing the installation, right-click on the game’s cover in the Origin library, select “Game Properties,” and disable Origin In-Game/cloud saves. This will block Origin from overwriting any manual edits to your game.
- Download and install Medstar’s fixed TUC launchers to run the game as an administrator.
- Run the game.
Alternatively, here is another way to have a working Red Alert 2 on Windows 10.
First off, below are the files that we need.
- XWIS’ Red Alert 2 multiplayer distribution. You can get it from here
- Multi.mix, Theme.mix, Maps01.mix Movies01.mix, Maps02.mix, Movies02.mix. From Red Alert 2 installers.
- The Noobient’s preconfigured DDWrapper. You can get it from here
- Command & Conquer: Red Alert 2 Windows 8 and 10 Fix Files. You can get them from here.
If you want a much quicker way to download the game instead of getting the above files separately, you can download this RA2 Windows 10.zip. Once you have done this, you can now follow the steps below to install the Red Alert 2.
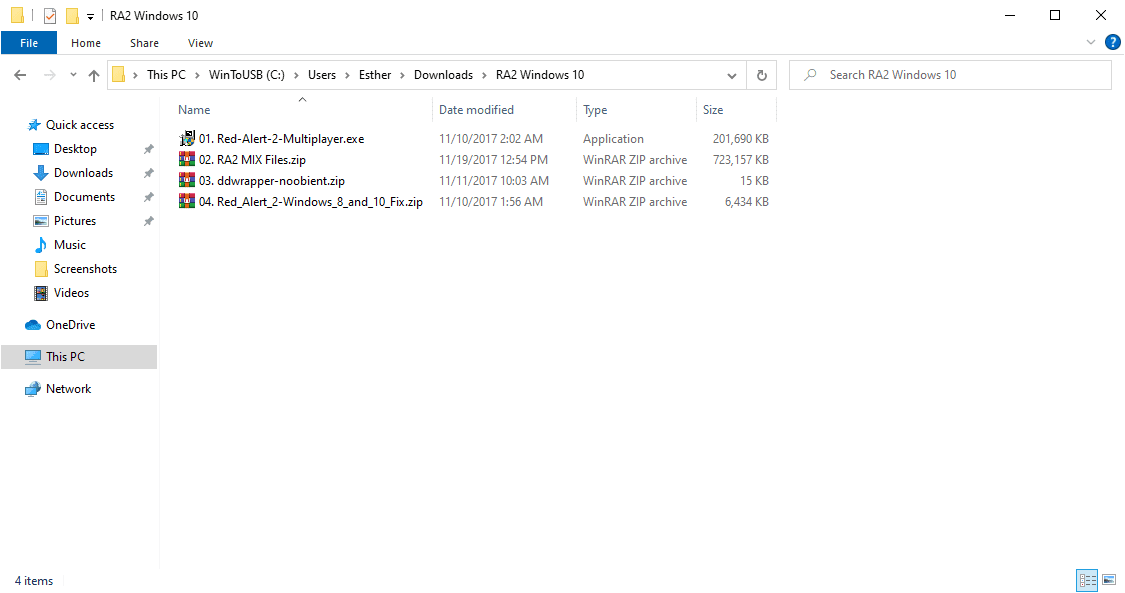
After unzipping the RA2 Windows 10.zip, you will see these files:
- Red-Alert-2-Multiplayer.exe
- RA2 MIX Files.zip
- ddwrapper-noobient.zip
- Red_Alert_2-Windows_8_and_10_Fix.zip

RA2 Windows 10.zip files
As you may have already noticed, each file has been numbered, that is, from 1 to 4. This numbering indicates the order in which you are to install the files. Below are the steps to follow:
1. First, Install the “Red-Alert-2-Multiplayer.exe” file as administrator. Ensure you install it in the C:\Westwood\RA2 folder.
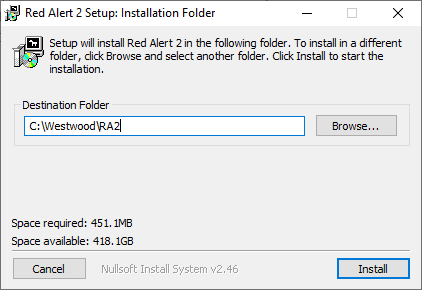
RA2 Install folder
Note: The game may fail to work if you install it in another folder.
2. The “RA2 MIX Files.zip” has all the MIX files of Red Alert 2. Unzipping this file will give you:
- MAPS01.MIX
- MAPS02.MIX
- MOVIES01.MIX
- MOVIES02.MIX
- MULTI.MIX
- THEME.MIX
- WDT.MIX

RA2 Mix files
All you have to do at this point is to copy all the above MIX files to your C:\Westwood\RA2 folder.
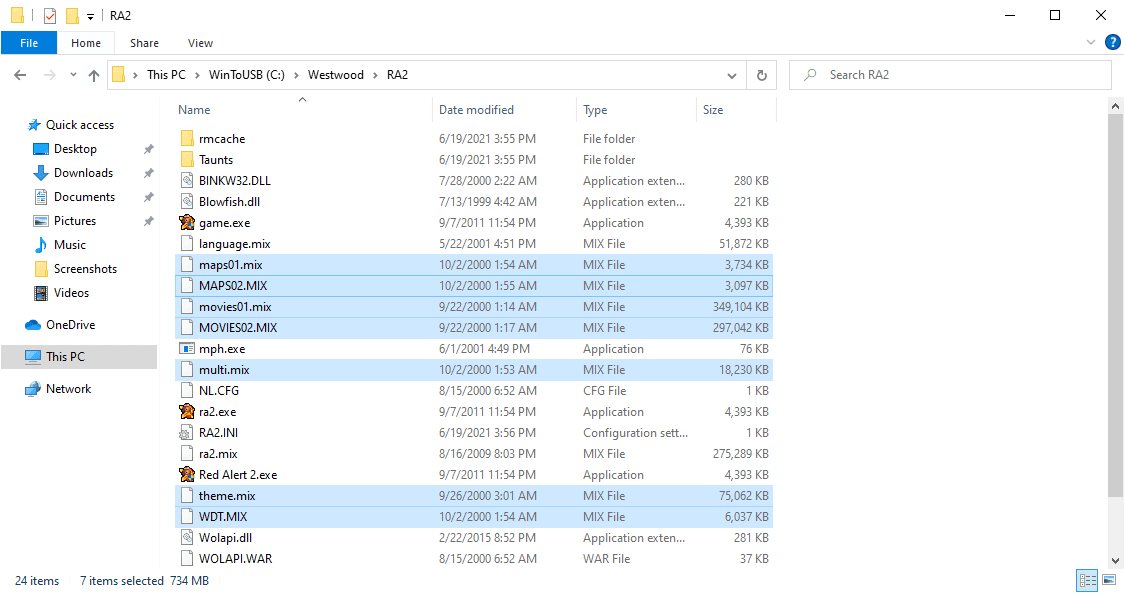
Copy and paste Mix files into Westwood folder
3. The “ddwrapper-noobient.zip” file has these two files when unzipped.
- aqrit.cfg
- ddraw.dll
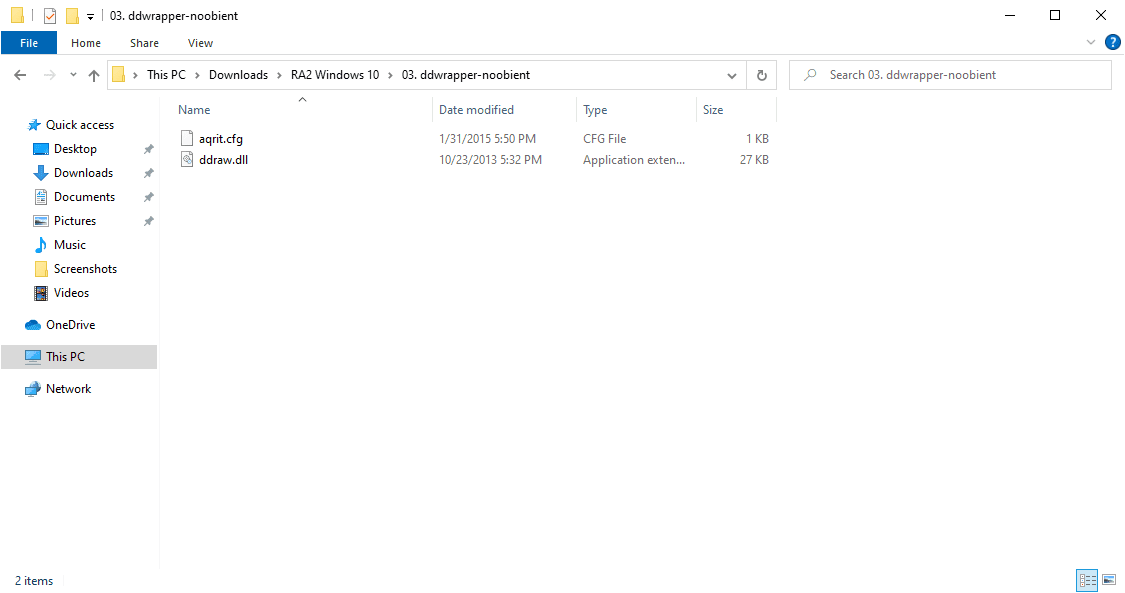
ddwrapper-noobient files
And just like we did on the MIX files, copy these two files to your C:\Westwood\RA2 folder.
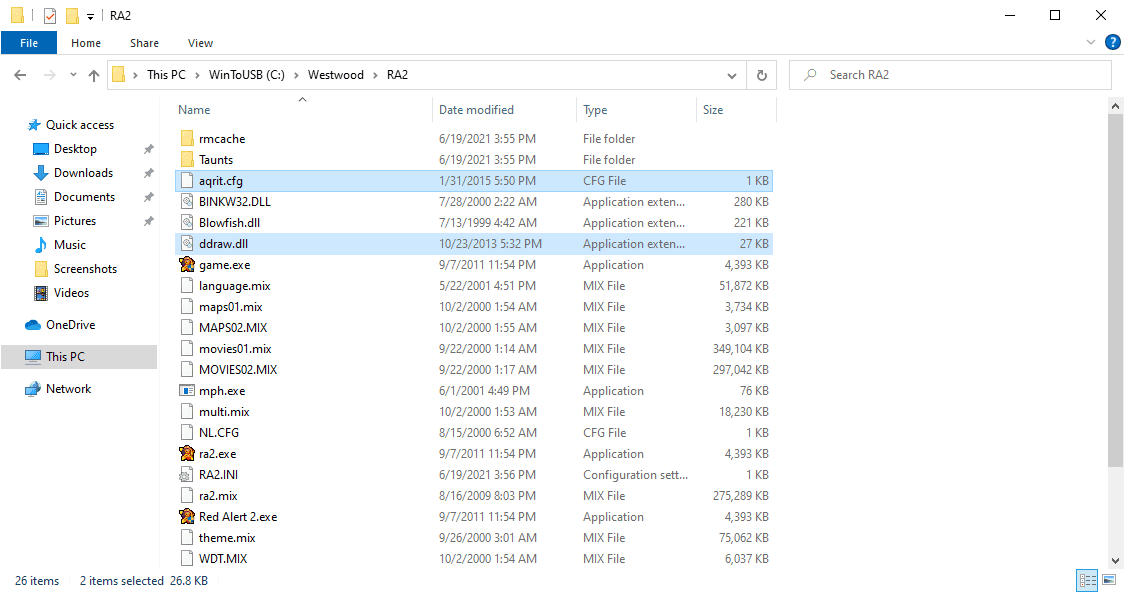
Copy and paste ddwrapper-noobient files into the Westwood folder
4. For the 4. Red_Alert_2-Windows_8_and_10_Fix.zip, you will find “Compatibility Database” and “Game Files.” Under “Game Files,” you will find the following files:
- game.exe
- ra2.exe
- RA2.INI
- Red Alert 2.exe
- Wolapi.dll
- xwis.dll
- xwis0.dll
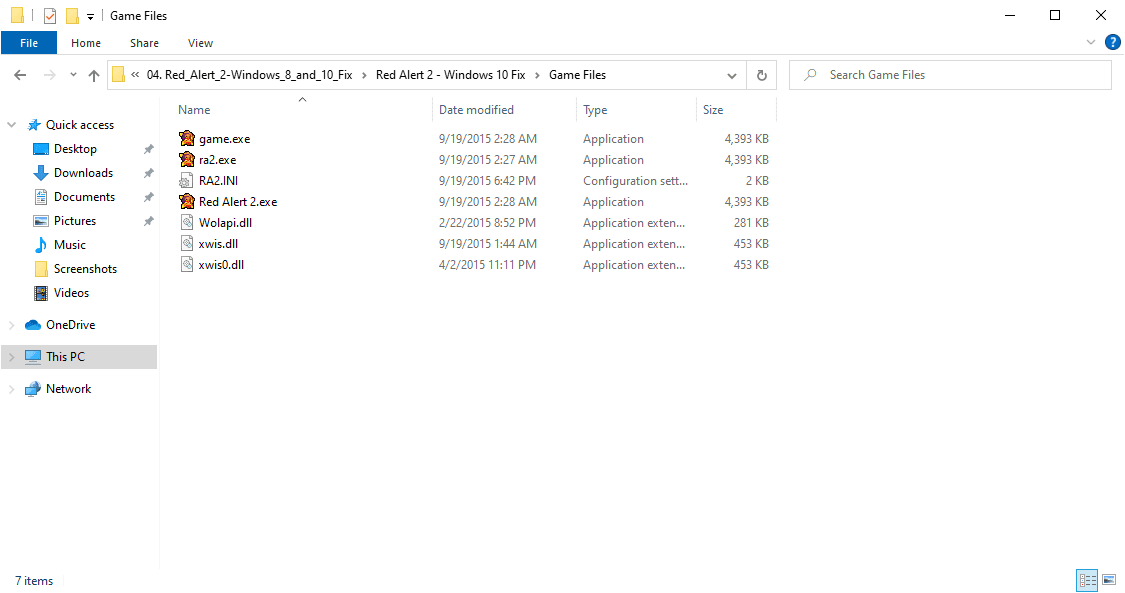
RA2 Game Files
Copy all the above Game Files to your C:\Westwood\RA2 folder.
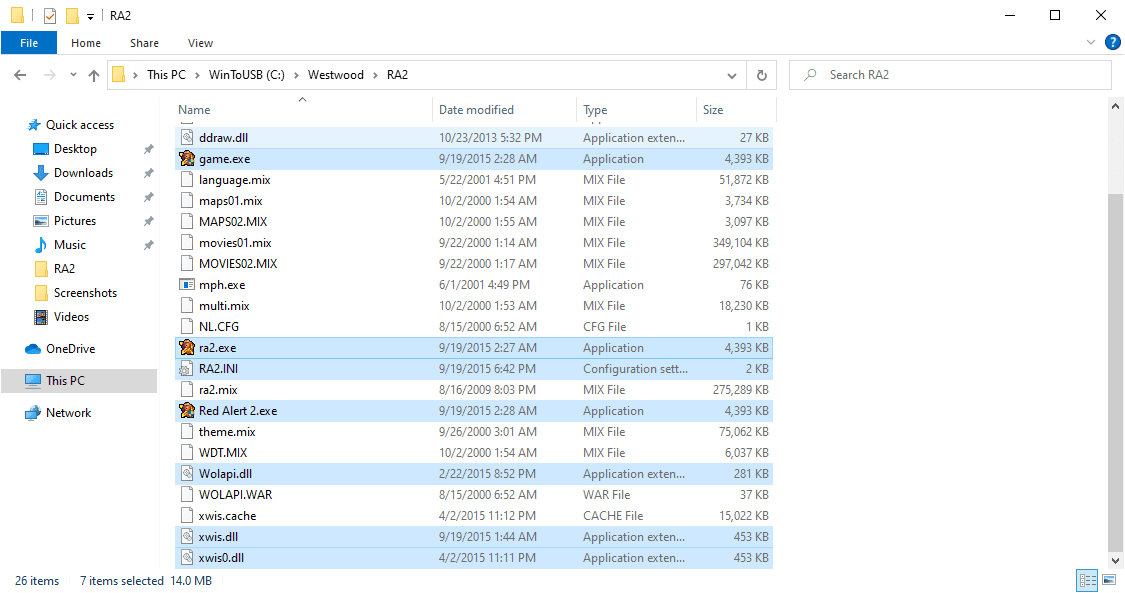
Copy and paste Game files into the Westwood folder
5. The 04. Red_Alert_2-Windows_8_and_10_Fix.zip will also have these files in a folder named Compatibility Database:
Double Click Me.bat
RA2-Compatibility-Fix.sdb
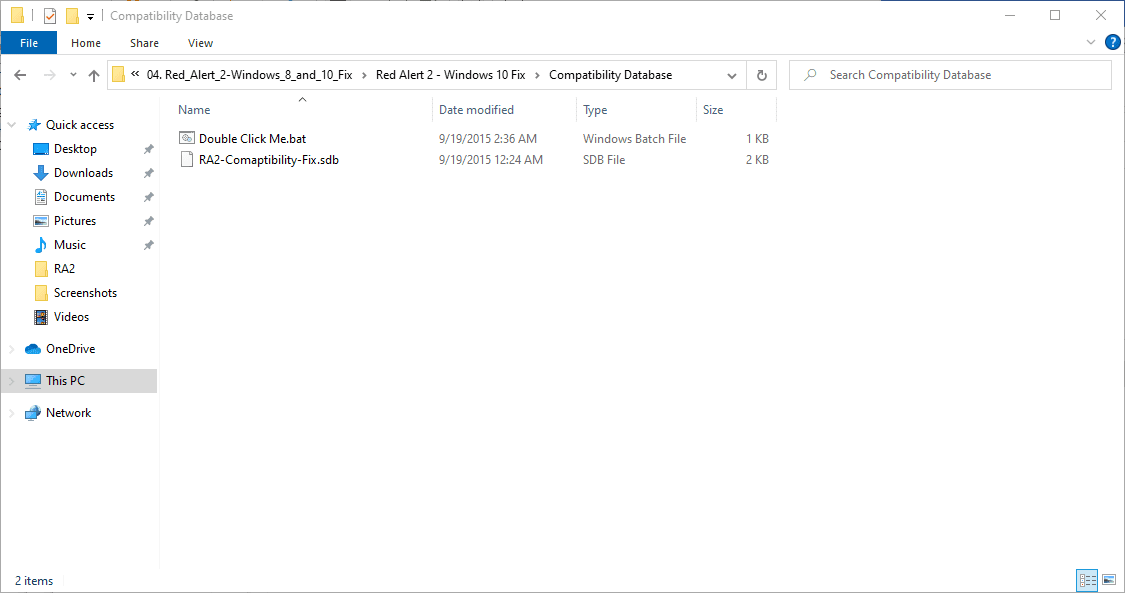
Compatibility Database files
There is nothing much here. Just run the Double Click Me.bat file so that it may sdbinst the RA2-Compatibility-Fix.sdb file. In case you are wondering what sdbinst does, stick to the article as it has been explained towards the end of the article.
6. Set all the .exe files in your C:\Westwood\RA2 folder to follow the compatibility settings illustrated in the figure below (The screenshot may vary to the one in your system, but they are somewhat similar):
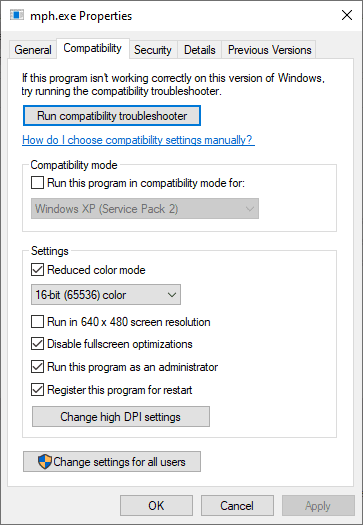
Set all .exe files to have similar settings
7. You can now launch the game by going to your C:\Westwood\RA2 folder and running the game.exe file.
RA2 Game running
What sdbinst does
Sdbinst is a file that is part of the Microsoft Windows operating system, and it was developed by the Microsoft Corporation. It is an application Compatibility Database Installer, and it is also known as AppFix & AppHelp Installer. It is mainly located in the %SYSTEM% sub-folder, and it is usually 77,312 bytes in size.
To deploy an application compatibility database across some computers, you can use a system management solution to deliver the database to numerous computers and then use the SDBInst.exe command-line tool to install the database.
Alternatively, copy the application compatibility database to a network location and run a logon script that includes SDBInst on every computer, designating the UNC path of the file.
Use the command below to run SDBInst from a script or the command line
SDBInst \\<Path to .sdb file>\<FileName>.sdb
You must deploy your customized database (.sdb) files to other computers before compatibility modes, compatibility fixes, and AppHelp messages are applied. There are several ways to deploy your customized database files, including using a logon script, using group policy, or undertaking file copy operations.
You have to register the database files, but this is after you have deployed and stored the customized databases on each of your local computers.
Here is sample output from the command Sdbinst.exe /?
C:\Windows\system32>Sdbinst.exe /?
Usage: Sdbinst.exe [-?] [-q] [-u] [-g] [-p] [-n[:WIN32|WIN64]] myfile.sdb | {guid} | "name"

-? - print this help text.
-p - Allow SDBs containing patches.
-q - Quiet mode: prompts are auto-accepted.
-u - Uninstall.
-g {guid} - GUID of file (uninstall only).
-n "name" - Internal name of file (uninstall only).

C:\Windows\system32>_
The following conventions are used by the command-line options
Sdbinst.exe [-?] [-p] [-q] [-u] [-g] [-u filepath] [-g GUID] [-n “name”]
For further elaborations or understanding of the sdbinst, kindly look at this Microsoft webpage: Using the Sdbinst.exe Command-Line Tool
Conclusion
By following either of the steps given above, you should be able to successfully install the Red Alert 2 on your Windows 10 without any problems. Of course, if you encounter any challenges, you can always try out a different method, as I have reviewed quite a few in this article. You may also click on the links given in this article for further information or download installation files.
Remember to reach out via the comments section if you need help or are stuck with the installation process. Enjoy your game, and thanks for reading.
4 comments
who is the author bright?
Hello,
Thank you for the great guide.
Can you do a guide to Yuri’s revenge?
Did this work?
Awesome! Thank you