Table of Contents
Disk partitioning is the process of sub-dividing your hard disk storage into separately manageable regions called partitions. Users with several disks in their computers wonder if they are more useful partitioned or work better as a single disk. There are three types of partitions which include: primary partitions, extended partitions, and logical partitions.
In this tutorial, we will look at multiple ways to merge partitions on Windows 10.
Pros and cons of partitioning your disk on Windows 10
Pros
With a partitioned disk, it is easy to install Windows. This is because, in the installation process, you have to clean the disk you intend to make the primary disk of your computer. In other words, you have to install Windows on a clean disk. Now imagine having your HDD as a single disk on your computer. This will mean you have to format the whole disk.
The above point also applies to the backup process, in that backing up will be more complicated on the whole disk rather than on partitions. You can easily back up only the data you want of the whole drive.
Partitions also give you the advantage of security by enabling Bitlocker in Windows. You can find more about how to protect your partitions with BitLocker here. This means you can lock your data in one partition and still let people use your computer and access the files you have allowed them to. If it were a single partition, you either do not allow access of any sort by other people or let them know if it is important to use your computer.
Partitions also improve the organization of your computer. You can place similar files in one partition and the rest in another. This way, you can easily access what you want.
Cons
Partitioning creates a space problem. Imagine a case where you need 50GB of space to store a file that cannot be split into two. But your computer has 20GB in one partition and 30GB in another. This means, even though you have the space you need, you cannot store the file on your computer unless it can be split. Without the worry of partitioning, it will save you the hassle of understanding how Master boot record and Guided partition operates. Let’s now jump into how to merge partitions in Windows 10.
How to merge partitions in Windows 10
This is an easy task and should take a few minutes to complete. So follow this guide keenly, and you should have your results and the end of it.
First, you need to open your Disk Manager. To do this, click Start and type ‘create and format disk partitions’ and press enter.
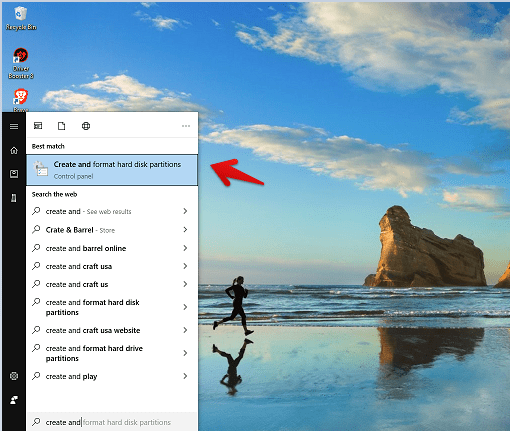
Create and Partition harddisk
Alternatively, right-click on ‘This PC and select ‘Manage’.
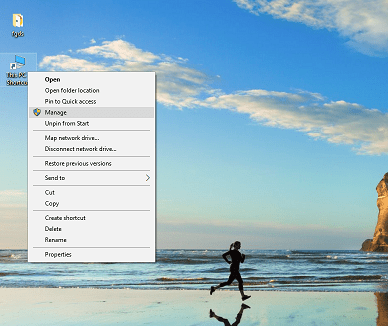
Manage
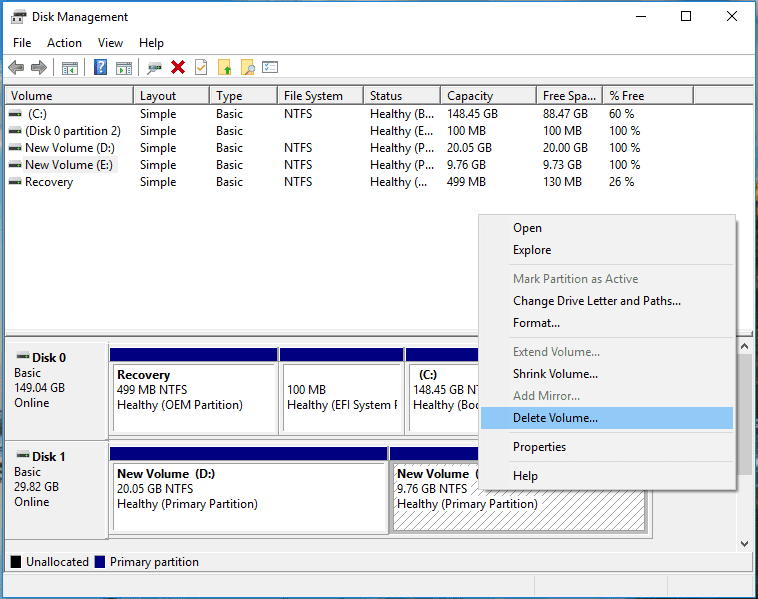
You will then have the Disk partition manager, as shown below, listing all the partitions in your Hard Drive.

Disk Management
Let’s go ahead and merge the two partitions shown in the image above. There are two ways o achieve this. Before we start, make sure to buck up all your data somewhere outside the partitions you want to merge, as you will have to erase format them.
Method 1: By deleting both partitions
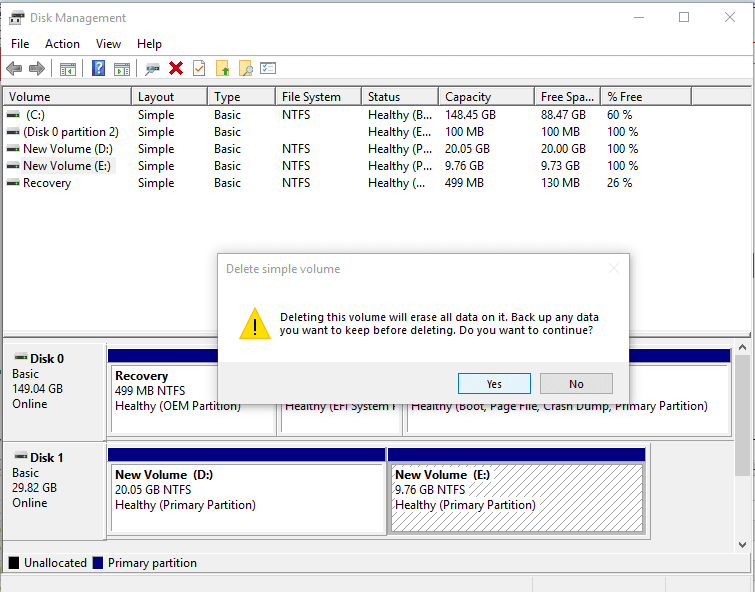
What you need to do is right-click on one partition and select ‘Delete Volume’. In my case, I am deleting ‘New volume E.’
Delete Partition
You will be prompted to choose if you want to erase all the data in that partition, click ‘Yes.’ As mentioned above, you should have bucked up your data.
Format Request
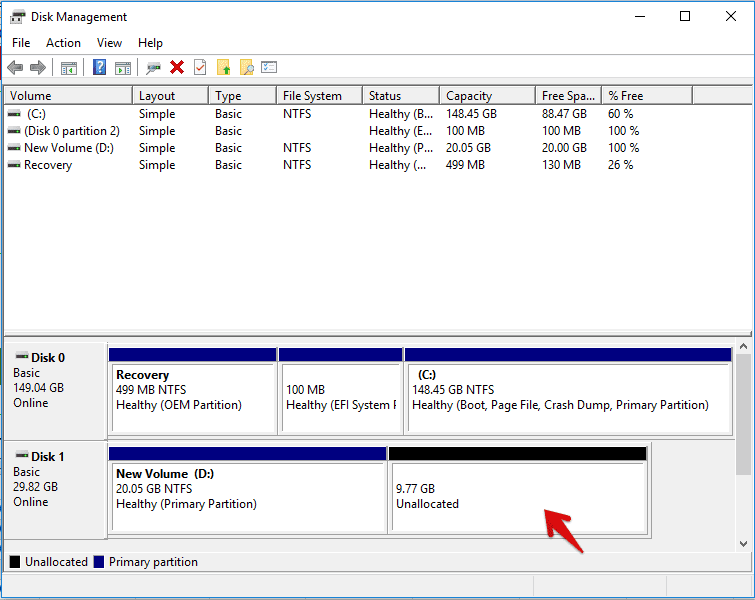
The deleted partition should change to ‘unallocated’.
Unallocated Partition
Go ahead and do the same on the second partition. Right-click on it and select ‘delete volume.’ In my case, it ‘new volume D.’ The unallocated partition should now increase in size to include the size of the second deleted partition.
New simple volume
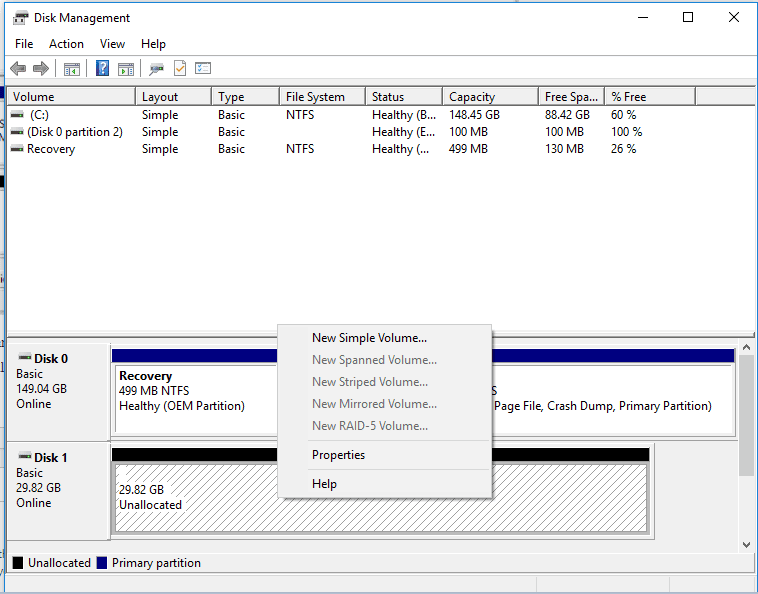
By this method, you will notice the two partitions will automatically merge to form one ‘unallocated partition. We can now go ahead and create one new volume to complete. To do this, right-click on the unallocated disk and select ‘new simple volume.’
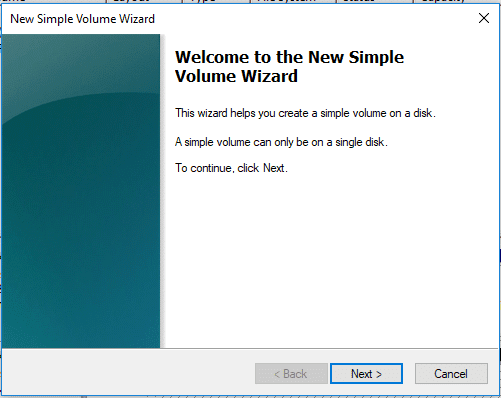
You will be welcomed to a new dialog for creating a new partition. Click ‘next’ to proceed.
Partition Guide
In the next window, you are to allocate the size you want your partition to have. But because we want the whole disk to be a single volume, we will not change anything. So click ‘next.’
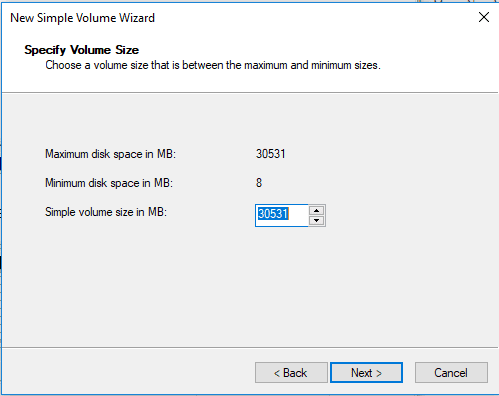
Volume size
The next window will require you to assign a letter to the new volume. I will leave the letter to be automatically chosen for me. Click ‘next’ when satisfied with your selection.

Assign drive letter
In the next window, you can choose the file system and the label for your new partition. I will be going with the default ones, so I will not change anything. If you want to make some changes, there are drop-down buttons and choices to make. The first thing to choose is whether to format the volume or not. This we already did when we were deleting the volumes, but because we want to make sure we have the File system we want, we will choose ‘Format this volume with the following settings.’
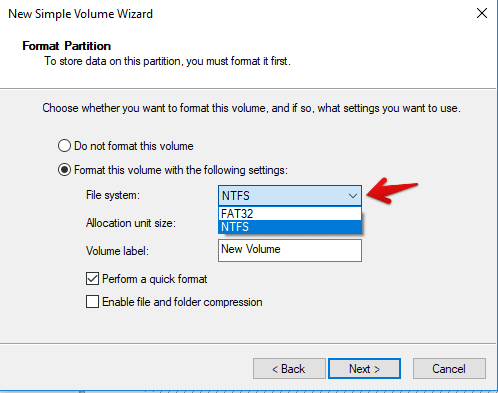
Partition file system
Next, we are going to choose the File system. This is a drop-down button and has two choices; NTFS and FAT32. I recommend choosing NTFS as most systems are compatible with it. FAT32 can be said to be obsolete, although some systems still use it.
Having chosen NTFS, we move to ‘allocation unit size.’
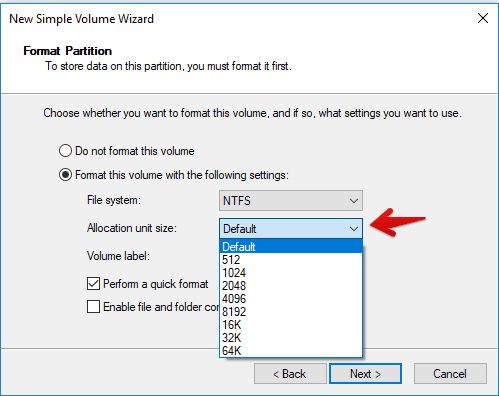
Allocation unit size
The next thing is the label for the volume. Here you are free to give any name you desire. I will go with ‘Local Disk.’
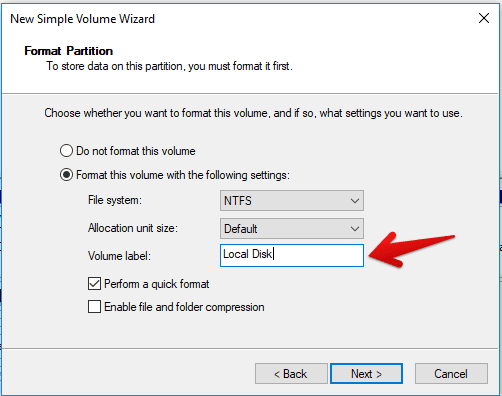
Volume Label
Leave the rest to default and click ‘Next.’ The next window will review the selections you made. If you want to go back and make changes to your selection, you can click ‘back,’ and you will be taken to the previous window. Otherwise, click ‘Finish’ to start the formatting process, which should take only seconds. Now your new merged partition is created and ready for use.

Merged Partition
Method 2: By extending one partition
This method is a bit similar to the first one but has a few advantages. With this method, you can get to keep the files of one partition, the partition, on the left.
NOTE: You can only extend volume if there is an unallocated partition on its right. That means if the volume you want to extend is on the left of the unallocated disk, then you will not be able to.
The first step is to delete one partition, and you strictly have to be keen here. The partition you are to delete is the one on the right. So follow the first step of ‘method 1’ and delete it.
Unallocated Partition
Next, right-click on the second partition, in my case ‘New Volume (D),’ and select ‘Extend volume.’ On the window that opens, click Next. It doesn’t have much to do there.
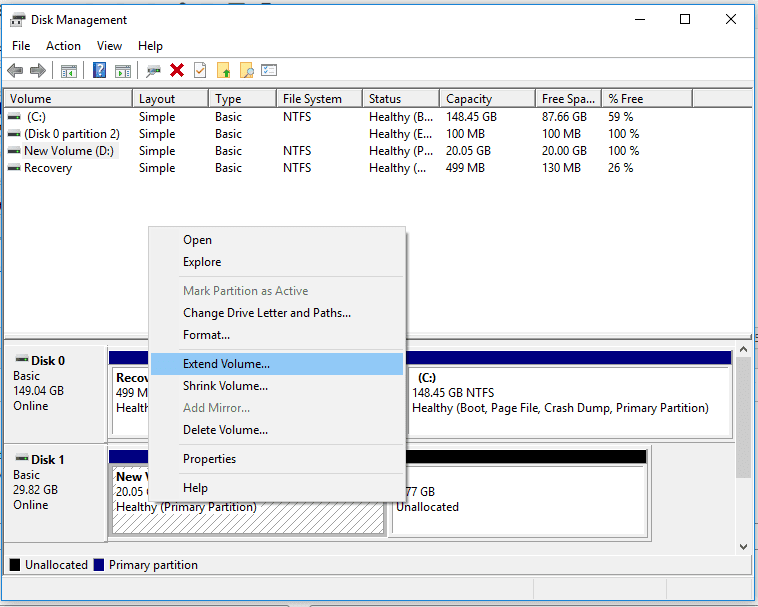
Extend Volume
You will be taken to another window to choose the size to extend your partition with. The size chosen already is the size of the unallocated part on the right.
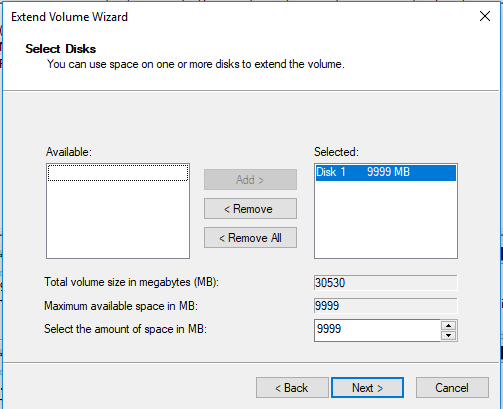
Disk size
So, in this case, we will leave everything as they are and click ‘Next.’ You will be given a review of the size you have chosen on the next window. Click ‘Finish.’
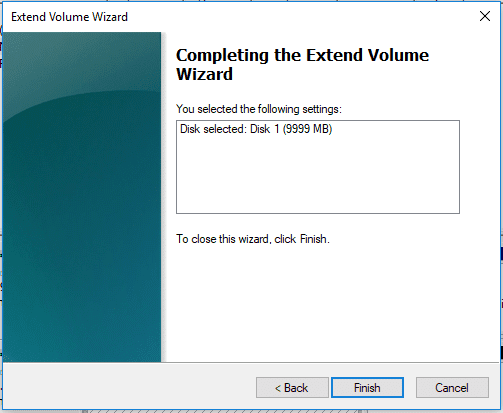
Complete merge
You now have one partition, and the disk is ready to use.
Merged Partition
Conclusion
Having read this tutorial, I believe that you can now easily merge partitions with no worry. Choose the right method that will best suit you. When using the second method, you need always to remember that it will not work if the ‘unallocated’ space is on the left side of the partition you want to extend.