
Table of Contents
Windows 10 is unquestionably a powerful operating system used by millions of people around the globe. Although helpful, the Windows OS is loaded with plenty of futile apps and software. These apps/software, commonly called bloatware, can give its users a troublesome experience.
Before heading to our main topic, it is essential to know what the term bloatware actually means? In simple words, bloatware refers to the redundant apps/software which comes pre-installed on any OS. These apps/software often ruins the user experience by slowing down the system or, even worse, reduces the system’s battery life.
Some examples of bloatware in the recent version of Windows 10 include Candy Crush Saga, Sports, Spotify, Gardenscapes, and many more.
Unfortunately, at many times, this bloatware becomes hell annoying when they start to appear as useless pop-ups on the screen. Therefore, to avoid getting in such situations, many people choose to ‘debloat’ their systems.
Removing Bloatware from Windows 10
Some manufacturers include a ton of sponsored apps and other programs that may not be useful for you. Uninstalling or removing them will improve your system’s performance. Moreover, it’ll also provide additional space on your hard disk.
Luckily, many of the Windows 10 bloatware is easy to remove and require little work. Thanks to the built-in bloatware-removing apps which clean your system efficiently.
So, if you’re tired of your slow-speed computer, it’s high time to debloat it. In this section, we’ll discuss 3 methods to remove bloatware from Windows 10 easily.
Method 1 – Remove Bloatware Using Fresh Start
The first method we’ll look at utilizes an in-built feature named Fresh Start. It is a pretty straightforward method because you wouldn’t have to download any specific app for this method. All you have to do is to follow the below-mentioned steps and get your job done effortlessly.
Important: Using Fresh Start is an entirely safe process as it doesn’t interfere with the files saved on your system. But, we still advise you to backup your important data before starting with this method.
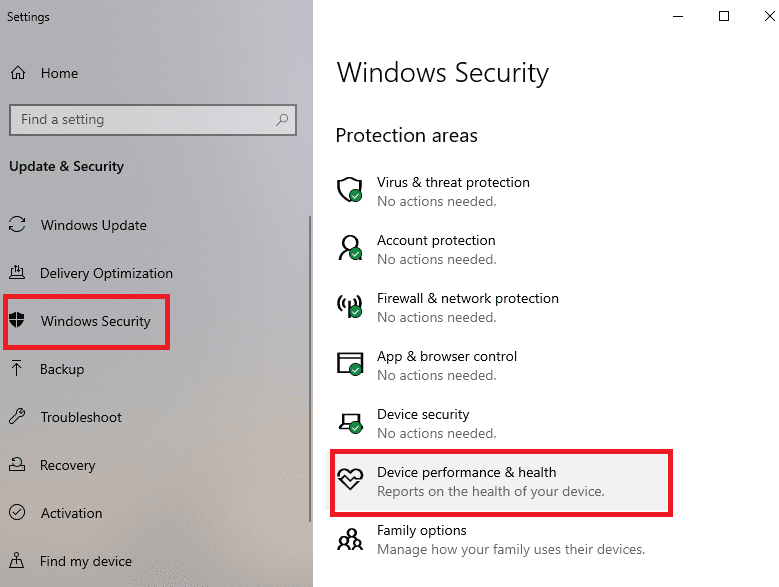
- On the taskbar, go to the search box and search Windows Security.
- In the Windows Security tab, click on Device performance & health.
Device & Performance in Windows Security
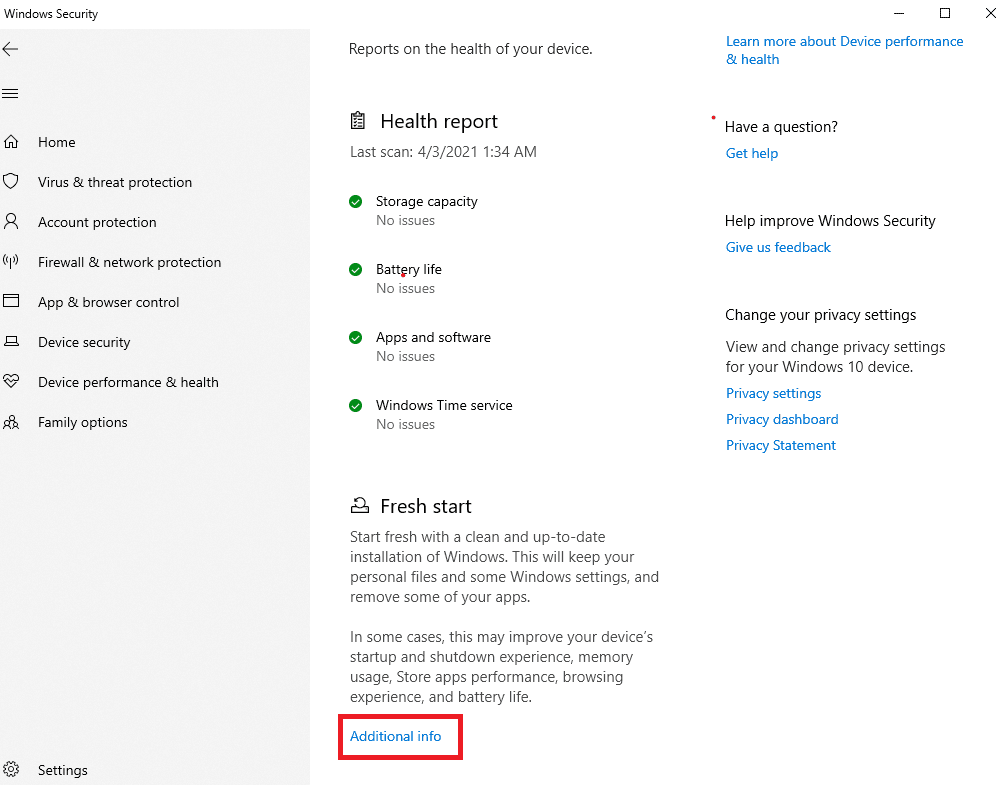
- Now, tap on Additional Info under the Fresh Start feature, and a new Fresh start page will appear.
Selecting Additional Info
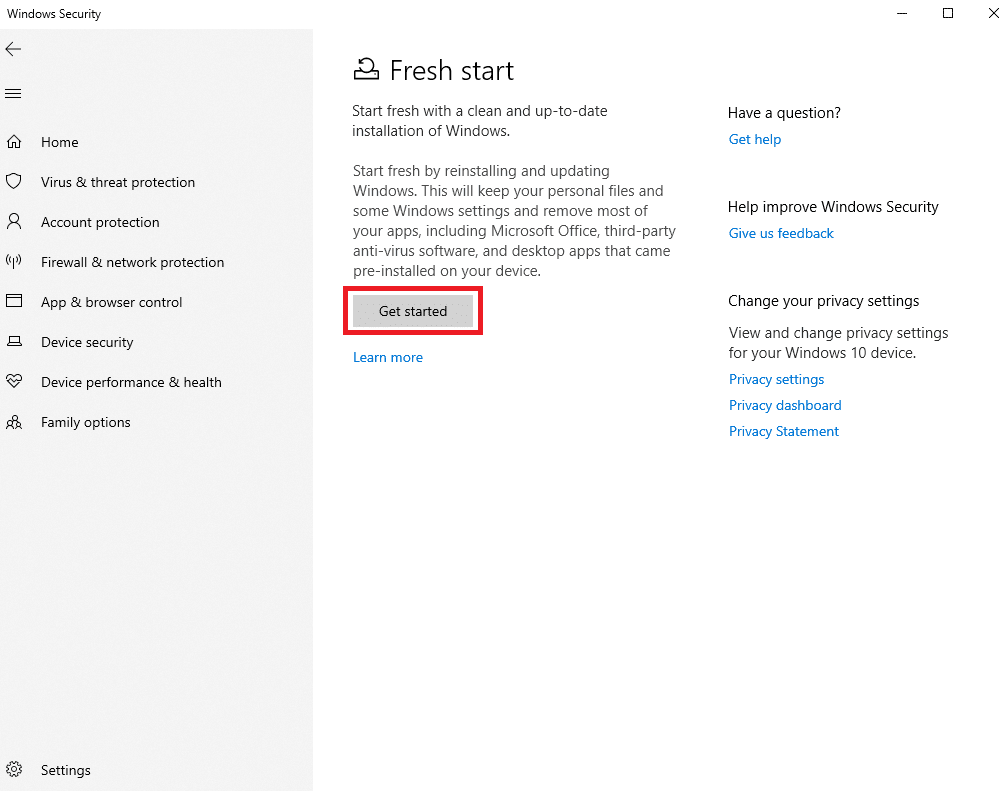
- Click on the Get Started button, and a Windows Security prompt will appear. Tap Yes on it.
Clicking on the Get Started button
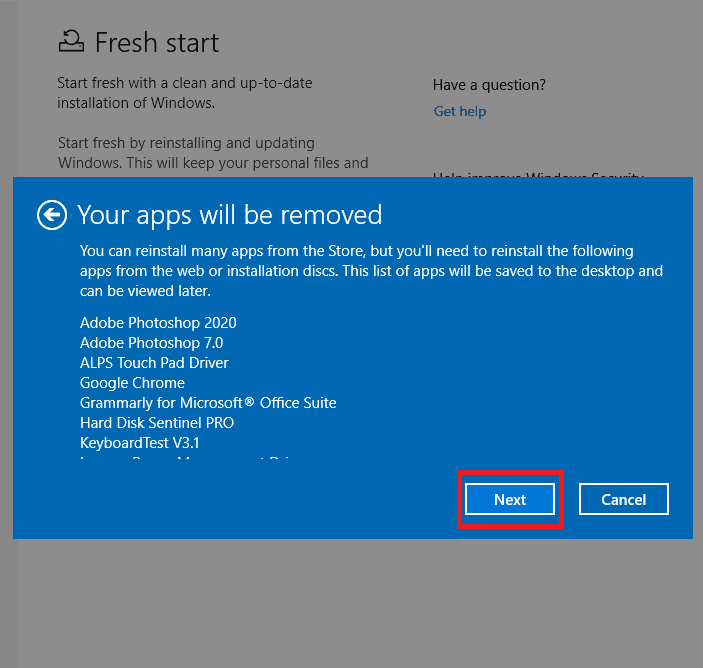
- Next, a blue box will open, to which select Next.

Selecting Next on the Fresh Start Window
- Now, wait for 5-10 min until you get the bloatware app list.
- Carefully examine the list and click Next.
Selecting Next to the List
- On the let’s get started box, read the instructions and select Start.
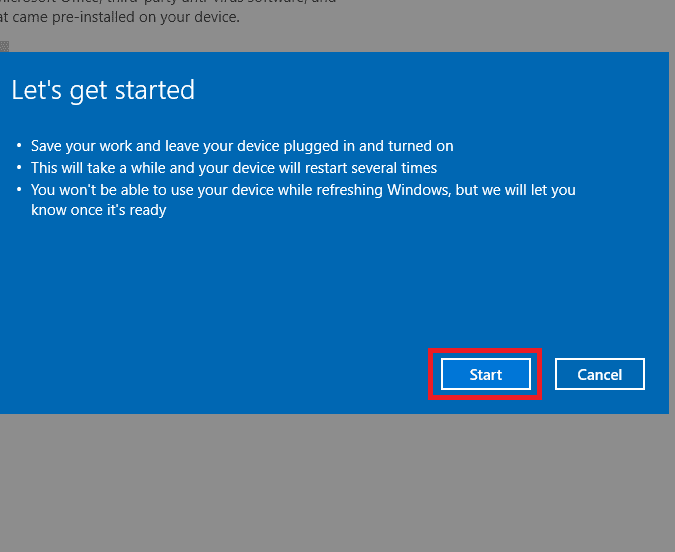
Clicking the Start button
In this way, you can easily remove the bloatware apps from Windows 10 OS using Fresh Start. An advantage of following this method is it’ll automatically update your system to the latest Windows 10 version. Hence, it will save you from downloading updates in the future. Also, your important data will remain stored on your computer even after the process.
A disadvantage would be you cannot restore the apps once you have removed them. But you can reinstall them from your store if you ever need them in the future.
Method 2 – Remove Bloatware Using Windows PowerShell
Powershell is another handy tool to try if you want to remove bloatware from your computer. It’s a tool that will let you perform automated tasks using the scripting language. Moreover, it is easily accessible via the search bar, so you wouldn’t face any problem using the Windows Powershell tool.
- Go to the search bar and type Windows Powershell.
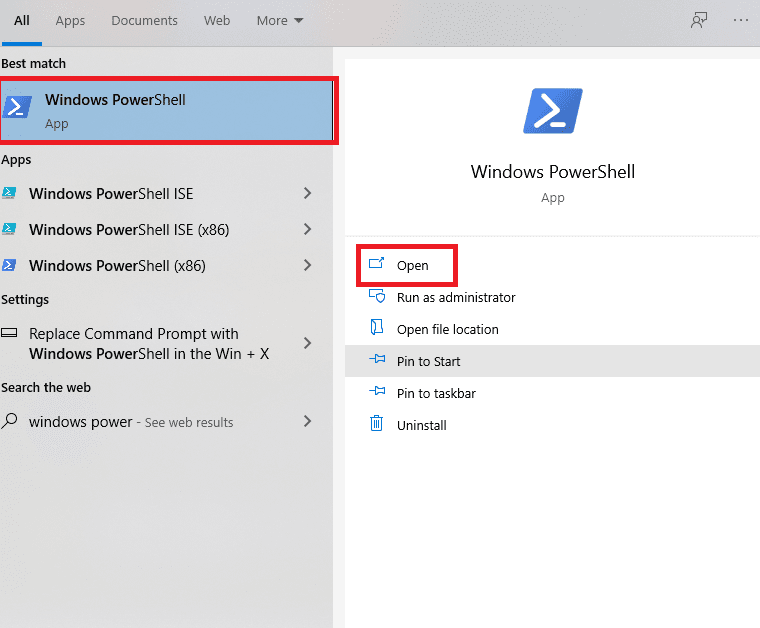
Opening Windows PowerShell
- Tap it open and copy the below-mentioned command on the Powershell prompt, and then press Enter.
Get-AppxPackage *spotify* | Remove-AppxPackage
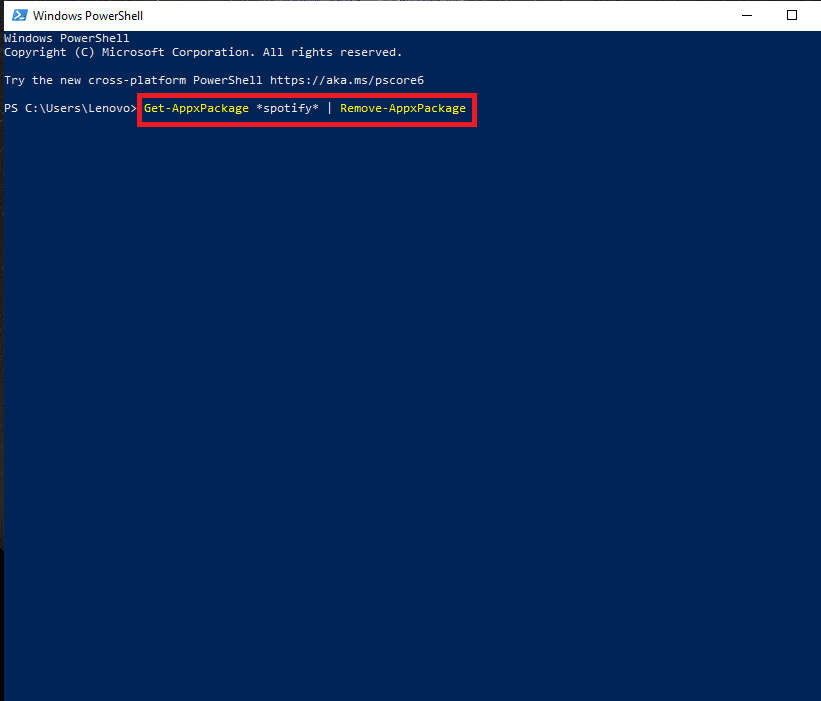
Running Command on PowerShell Prompt
Once you press enter, the bloatware will be removed forever.
In the picture above, we’ve copied the command for Spotify. Similarly, you can copy the same command and replace Spotify with the bloatware you want to remove. For example, you will write the following command for removing the windows alarm app:
Get-AppxPackage *windowsalarm* | Remove-AppxPackage
Method 3 – Uninstall Bloatware Apps from Your System
Like already mentioned, even with all the bloatware-removing tools, you cannot uninstall the Microsoft apps from your system. For this, you need to apply a separate method which is somehow draining. Besides, removing bloatware apps will not provide you with MBs of space. However, it’ll clear up your desktop from tons of meaningless apps, which frankly no one has ever used.
To uninstall bloatware apps, the following steps have to be followed:
- Tap the Windows icon on the taskbar and head over to the Settings.
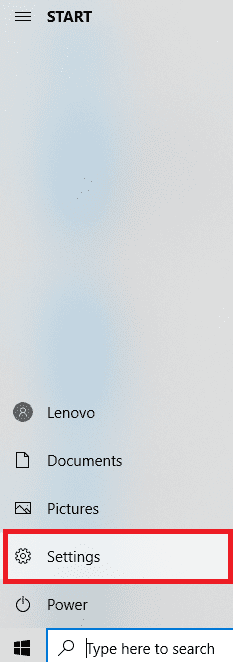
Accessing Settings from the Start Menu
- Go to the Apps & Features tab and search the apps you want to uninstall.
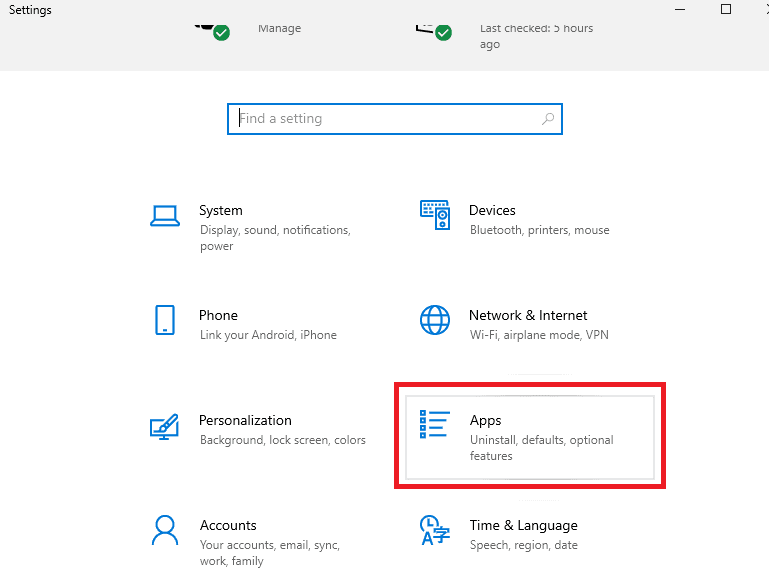
Clicking on Apps & Features
- Click the desired app and select uninstall to remove the app from your system.

Uninstalling the Bloatware App
Conclusion
Although removing the bloatware wouldn’t get you a considerable amount of space on your computer, it is still necessary. Why? Because like our rooms and mind, our computer also needs a decluttering session to remain productive. Deleting huge files and pictures that you no longer need will retrieve sufficient space on your device. Furthermore, removing bloatware will improve its functioning and save you from future headaches.