
Table of Contents
Alarms and timers are incredibly productive tools that are very widespread today. The first known alarm clock inventor was Levi Hutchins, who had this outstanding achievement in 1787. He created a device that would allow him to get up early. His curiosity led him to develop what is now a beneficial phenomenon. Well, in the modern era of 2021, we no longer have to resort to old-school devices made centuries before our time. Each present-day electronic device, may it be a refrigerator, a smartphone, or even a laptop, comes with the ability to set alarms and timers.
If anyone were to look straight at their Windows 10 PC, they would find that there are many ways to set alarms and timers on this full-blown operating system. All you need to know is the process of doing that exactly. This guide will discuss this in detail, so keep on reading if you didn’t previously know the methodology of setting alarms on a Windows 10 PC. Without wasting any more time, let’s jump right into this guide.
Setting alarms and timers on a Windows 10 PC
There are different ways that you can go about doing this. We will talk about all of them, so you know your options and choose the one that works the best for you accordingly. Let’s start with the first option of setting alarms and timers on Windows 10.
Method 1. Use the “Alarms and Clock” built-in application
Every Windows 10 PC comes with a pre-installed application called Windows and Clock. This app is dedicated to showing you the world clock, your local time, and, of course, setting alarms and timers on your Windows 10 PC. We will be utilizing this application as our first method of setting the alarm on your device here. The following steps are going to further this process.
1. Click on the Windows Start menu or click on the “Windows” key to focus on the “Search” bar. Once done, type in “Alarms and Clock” to continue. You will now see a specific application popping up on the screen. Click on it to continue.
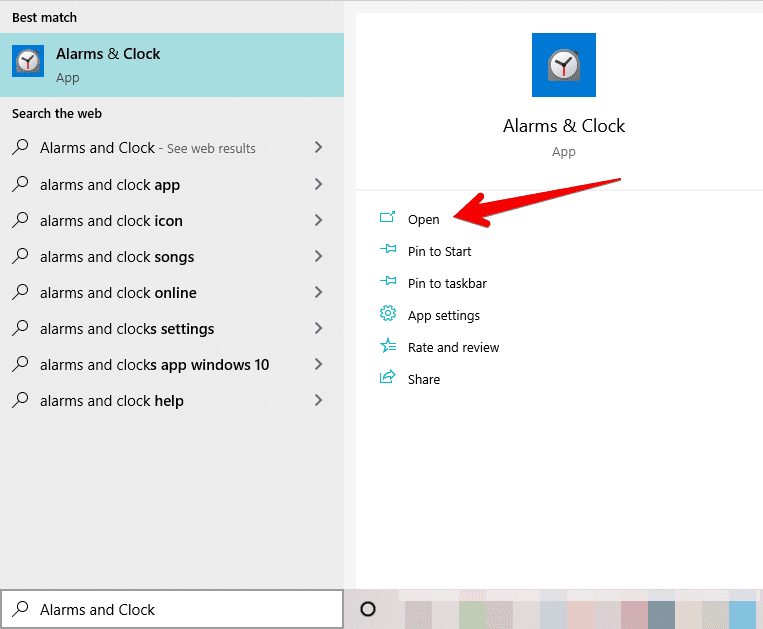
Opening the Alarms and Clock application
2. You’ve now reached the user interface of the Alarms and Clock app. This is where you’ll be setting your alarms and timers on Windows 10. To get started, click on the first button on the left column. This is the dedicated area for “Timers.” This will show you another page on your screen.
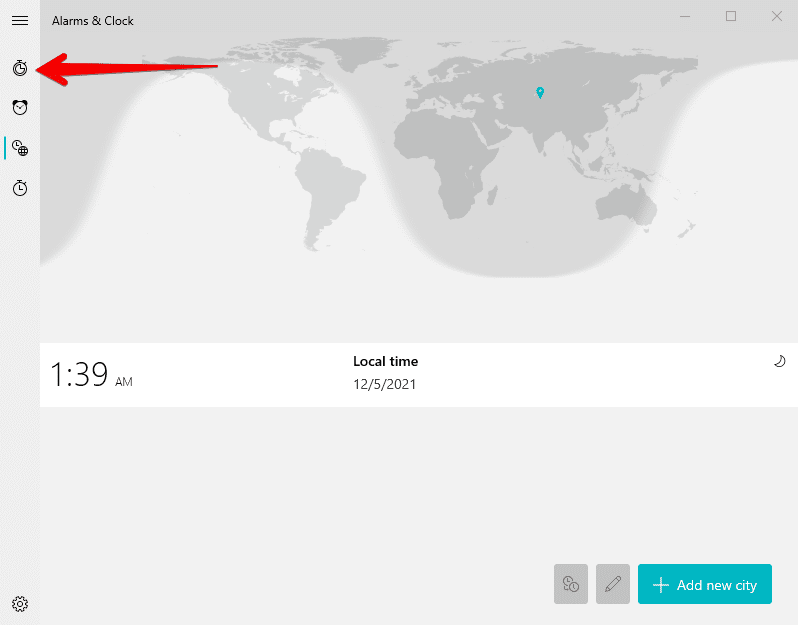
Selecting “Timers” in the Alarms and Clock application
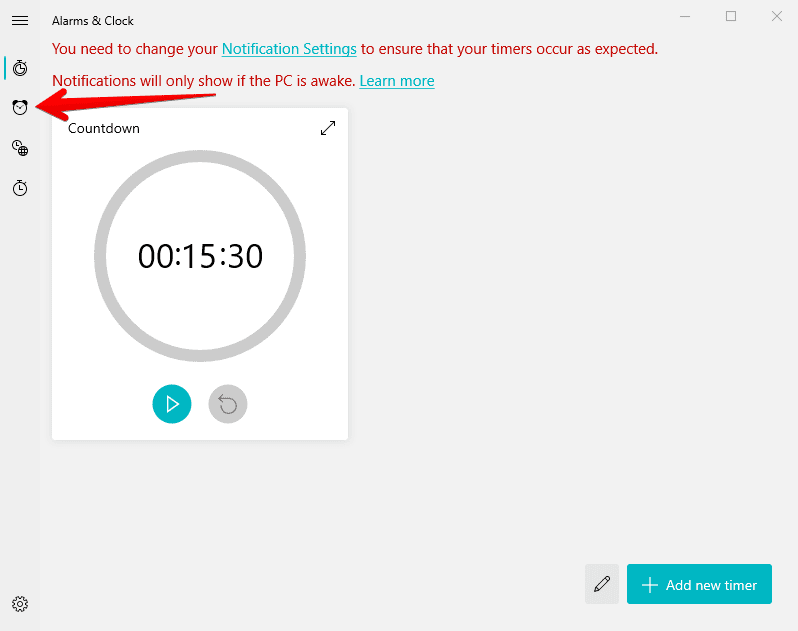
3. Completing that last step will take you to the “Timers” section of the application. You now have to click on the large countdown area in the middle to get to the next step.

Editing the timer
4. Right after that, a small-scale window will appear that’ll allow you to tweak the parameters of your timer. You can set the hours, minutes, and seconds, so the timer goes off exactly when you want it to. Once done, click on “Save,” and that should do the trick for you.
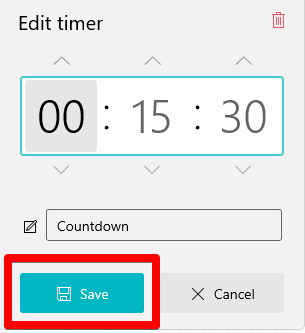
Optimizing the timer
5. You’ve nicely learned how to set a timer on a Windows 10 PC. However, it’s worth noting that you can also create more timers if the situation needs you to. You click on the “Add new timer’ present at the homepage of the tool to stack your timers on top of each other. This is a beneficial feature, especially when you need to get different things done, and a single timer just won’t cut it.
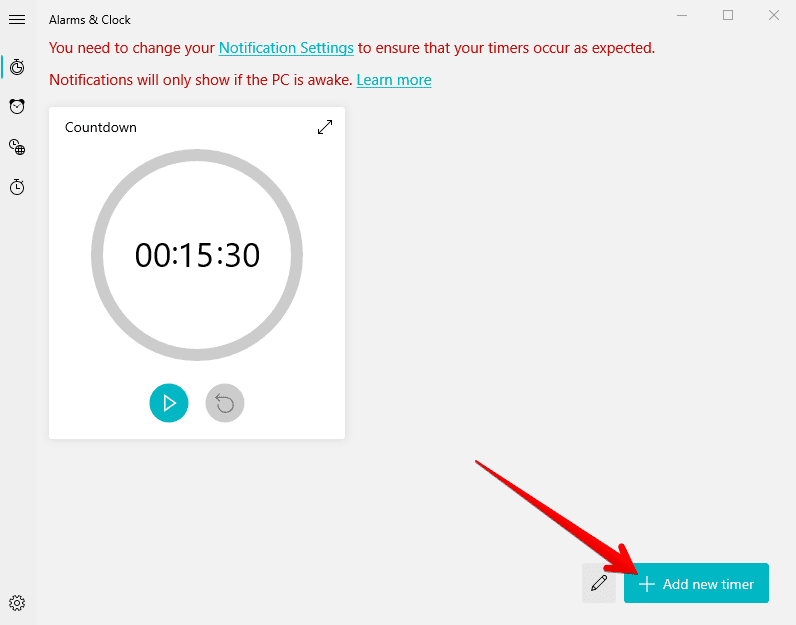
Adding a new timer
7. Now that you know how to set timers on a Windows 10 PC, it’s a wise choice to look into the process of setting alarms too. Don’t be afraid since this too isn’t complicated. We’ll take you through the process step-by-step. For now, click on the second button on the column from the top called “Alarm.” Then, make the click to get to the next step.
Clicking on the “Alarm” section
8. You will now be easily able to set the alarm on your Windows 10 device. Click on the card-like representation of the currently available alarm to get to the next step. Doing so will allow you to edit that alarm and change its preferences to those that will work for you.
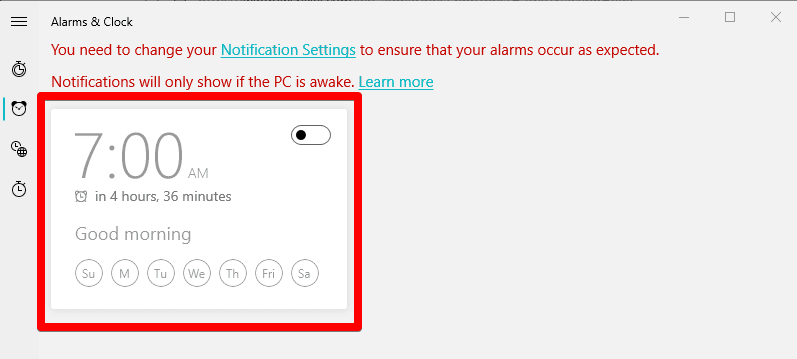
Editing the alarm
9. A small-scale window will appear right after clicking on the available alarm. This is the area where you will be editing the alarm. Select what works for you here to get the best results. For instance, you can choose the exact time the alarm will go off, pick the number of days for its repetition, and even write a label for the alarm to show you when it’s live. Furthermore, you will also be able to select the alarm’s ringtone and the time duration of the snooze feature. All of these settings will have to be tended to in this step. Once you’ve made all the changes you want to, click on “Save” to finalize.

Confirming the alarm
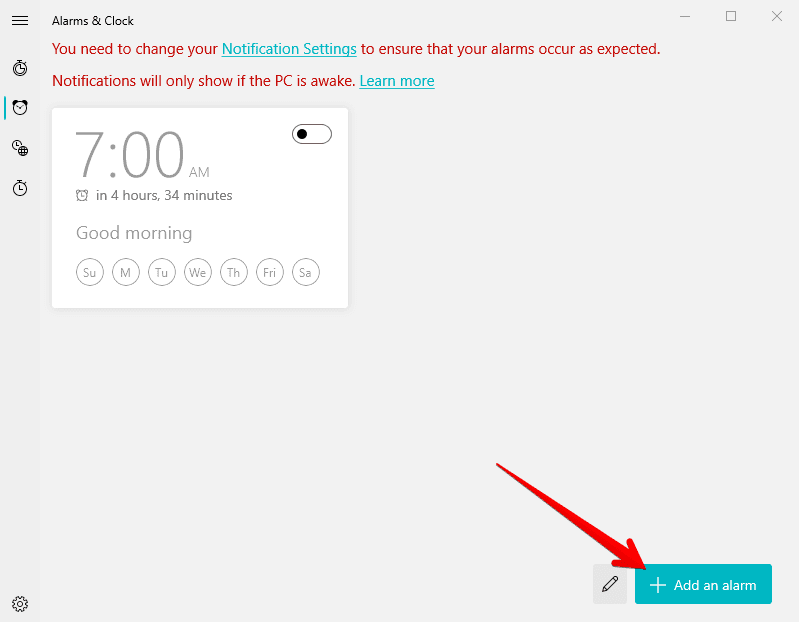
10. You’ve finally set your very own alarm on a Windows 10 PC. Great going! We would also advise you to add more alarms if you need them. The option for doing that is right in the bottom-right corner of the main “Alarm” page. By clicking on “Add an alarm” repeatedly, you can add as many alarms as you want, although we haven’t tested the sheer limit of the total number of concurrently set alarms. Anyways, you get the point.
Adding multiple alarms
Pat yourself on the back for making it this far! You know successfully what it takes to set alarms and timers on Windows 10. However, this was only the first method of accomplishing the task in question, and there are a couple of more techniques that you can easily employ. Let’s now look into them and further the article. This ensures you know all your options when it cuts down to set alarms and timers.
Method 2. Use the Calendar application to set a reminder
Although we admit that a reminder is somewhat different from an alarm or a timer, the basic ideology is quite the same. Reminders aren’t forgetful of the events you have to attend or the things that you have to do. You can use them in place of an alarm or a reminder just as well, and you’ll find them working just perfectly. To accommodate this, Windows 10 has an in-built Calendar application that not only keeps the days and years of the world in check but also lets you create reminders. Without any further ado then, let’s jump right into the steps detailing the creation of a reminder.
1. The first step is to launch the Calendar application. It is easy to do that by clicking on your date and time area. This will be present in the bottom-right corner of the user interface where the Taskbar is located. Doing so will open up a dedicated section for it.
Clicking on “Date” and “Time”
2. The next step is to pick out a day for the reminder. For instance, the system can remind you to call your friend. It can work similarly for a variety of other genuine reasons. Therefore, click on the date you would like to be reminded of. Doing so should clear out the basic step for you.
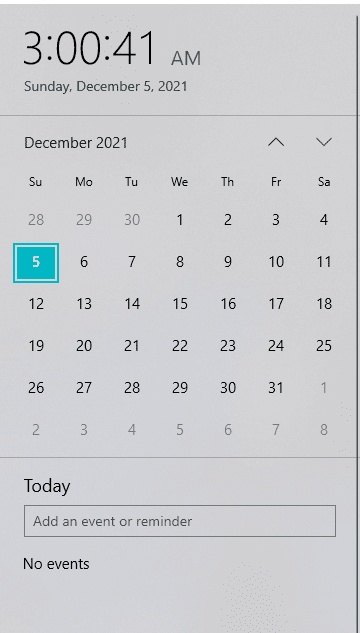
Picking out the date for the reminder
3. Once you’ve selected the date, the next task is to type in your reminder in the “Add an event or reminder” bar. As soon as you start typing something, more options will appear below the bar. They will allow you to adjust the timings of the reminder at will. Therefore, pick what suits you, in this case, the best, and click on “Save” to finalize the process. The screenshot given below will help illustrate what to do.
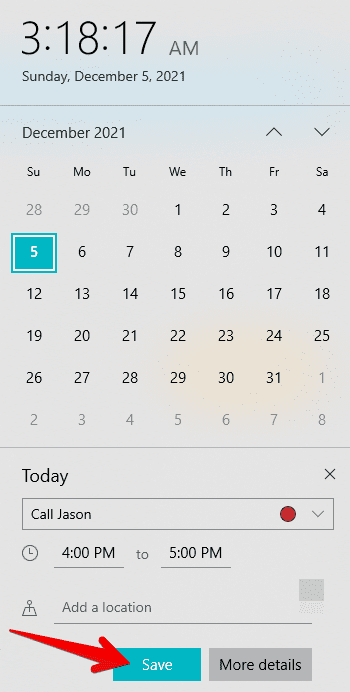
Saving the reminder preferences
That’s about it for the second method! You now know how reminders are created on a Windows 10 PC. These are no less than an alternative type of alarm, so you should utilize everything available at your disposal for desirable results. So let’s move onwards to the third and final method of setting the alarm or timer on your computer.
Method 3. Using a Chrome Web Store extension
The Chrome Web Store has been by the side of the Google Chrome browser for multiple years now. It powers the famed net surfer with the tools and features that millions of people look for to enhance their productivity and bring more convenience into their lives. In addition, extensions downloaded from the Chrome Web Store are lightweight and don’t even cause performance drops when used consistently.
Therefore, to set alarms and timers on Windows 10, you can make the best of a high-quality Chrome Web Store extension called Lightweight Alarm Clock, Timer, and Countdown. The web app has over 10,000 users and works like a charm within the Chrome browser.
The following steps are going to take you through the installation process.
1. Visit this direct link to get straight to the official app page on the Web Store. Then, click on “Add to Chrome” to commence the process when you’re there.

Adding the extension to Chrome
2. You will now be asked for a confirmation prompt before the system adds the extension to the Google Chrome browser. Click on “Add extension” when the pop-up appears to continue.
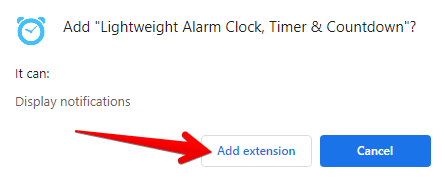
Adding the extension
3. Your extension will now be installed on the Chrome browser. Check the extensions bar in the top-right corner to affirm.
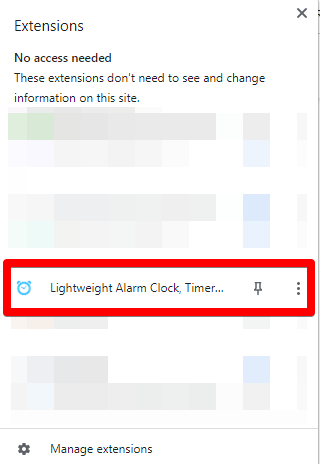
Lightweight Alarm Clock, Timer, Countdown installed.
That’s about it! You’ve installed the extension on your Chrome browser successfully—time to take it for a spin and see how it performs on Windows 10.
Lightweight Alarm Clock, Timer, Countdown working
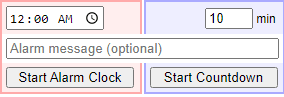
Light Alarm Clock, Timer, Countdown working
As you can comprehend from the screenshot above, the Lightweight Alarm Clock, Timer, Countdown extension is pretty easy-going. It’s keen on getting the job done and nothing more. It has its beep and tones for the alarm and countdown to go off, respectively, so there’s not a lot of customization options that you’ll be getting with this web application. Rest assured, however, because it works very well and only has three sections to play with: the time, alarm message, and the button for starting the alarm.
On the other hand, you also have the countdown feature. This is excellent value for an application that’s this lightweight on Windows 10. If you’re after something outright minimalistic, you cannot go wrong with the Lightweight Alarm Clock, Timer, Countdown app. We recommend installing this application if you find yourself working on the internet all the time, so you can keep good track of things and know when it’s time to stop.
Conclusion
Windows 10 is an intricate operating system built from the ground up with modern-day advancement in mind. It’s the world’s most popular operating system to grace the entire earth, and once you’ve got something like this, the possibilities are potentially boundless. Those people who tend to structure their lives according to a specific timetable have many going each day to be successful. Out of everything else, we can guarantee that sleeping on time and waking up on time, although anything is the habit of super producers.
That said, not everyone gets to a certain point right out the gate like that. You’ve got tools to help you along the way. This article has talked about all the different ways of setting alarms and timers on a Windows 10 PC. We’ve even brought in an agent from the Chrome Web Store should you want to take a look at it and try it out. We recommend trying each listed method for the best results, as every technique mentioned above may or may not suit you the best. Please let us know in the comments below what you decide to go with.