
For a while, a new feature has been introduced in the world of technology. The display of the screens of mobiles or computers automatically adjusts according to the adjacent lighting. Technology brings innovation and convenience for people, but that is not always the case.
For example, the display keeps automatically dimming on Windows 10, which may prove useful at times but can still bother you if the surrounding light is changing rapidly in your environment. In cases such as these, it’s probably best for you to know how to disable automatic screen brightness.
In this article, therefore, we are going to show you how to stop automatic screen dimming on Windows 10. Let’s begin.
Stopping Automatic Screen Dimming on Windows 10
Adjusting automatic screen dimming on Windows 10 is not very difficult. You have to follow a few steps, and you will be good to go.
- In the first step, you have to click on the Start key of your Windows 10. The following screenshot is going to show you how to do that.

Clicking on the Windows Start Key
2. When you click on the Start key, a menu will appear. There is also going to be a search bar beside your Start menu. You will have to type in “control panel” and click on the search result to launch it.
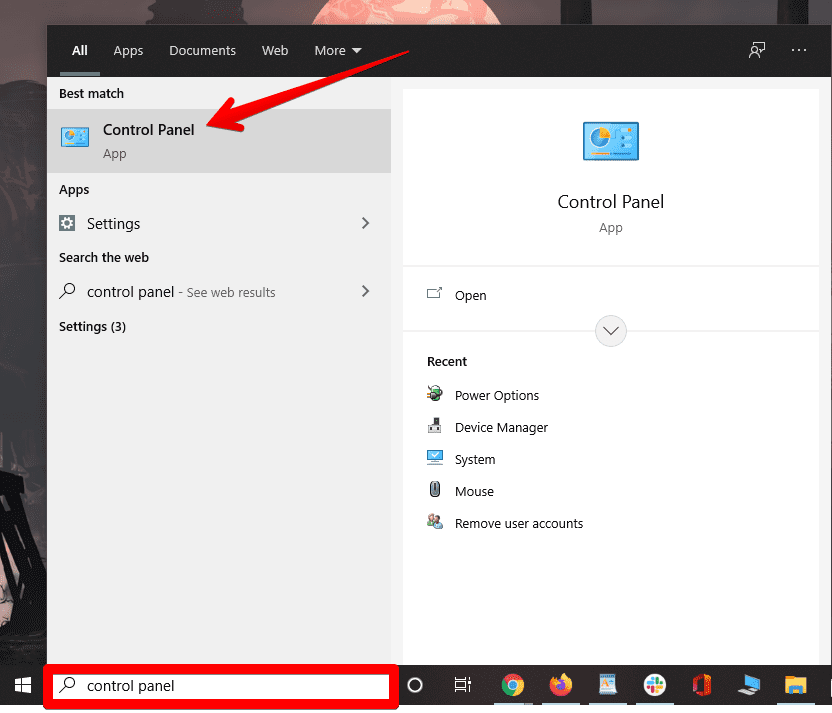
Searching and Opening Control Panel
3. After opening the Control Panel, click on “Hardware and Sound.” This will lead you to the next step.
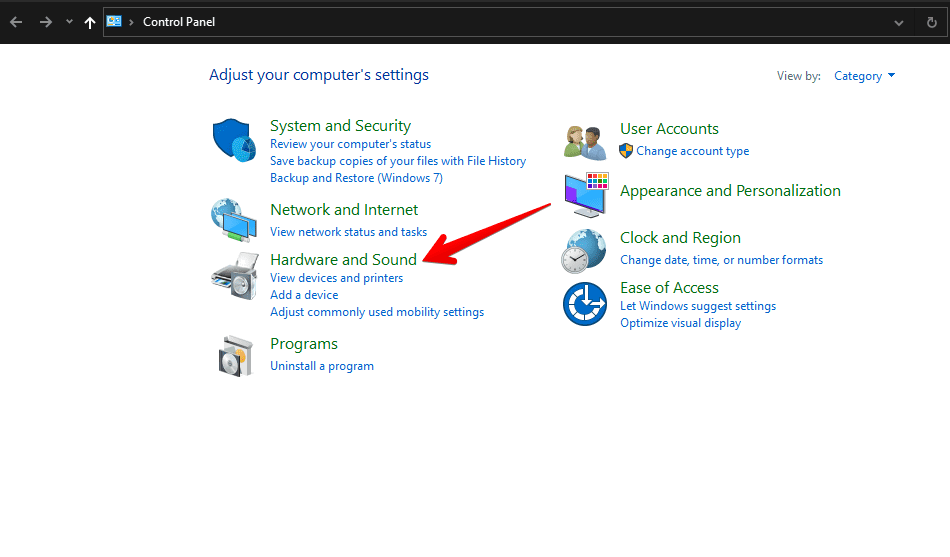
Opening Hardware and Sound
4. Now, in the fourth step, you will have to click on “Change Battery Settings” to proceed further.

Clicking on Change Battery Settings
5. In this step, you will click on “Change Plan Settings” to move forward.
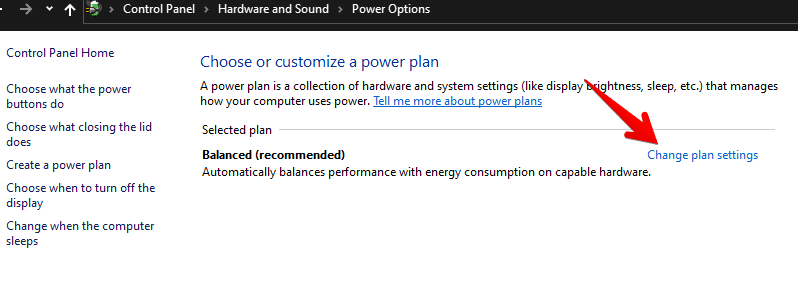
Clicking on Change Plan Settings
6. Now, you have to click on “Change Advanced Power Settings,” which will lead you to your next step.
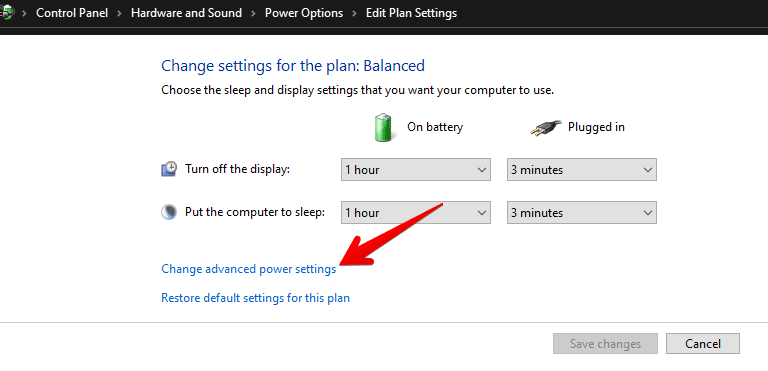
Selecting Change Advanced Power Settings
7. This will be your final step. After clicking on “Change Advanced Power Settings”, you will scroll down a little and click on “Display.” A few options will appear where you will choose “Enable Adaptive Brightness.” You can turn off this feature while your laptop is charging or it’s using its own battery.
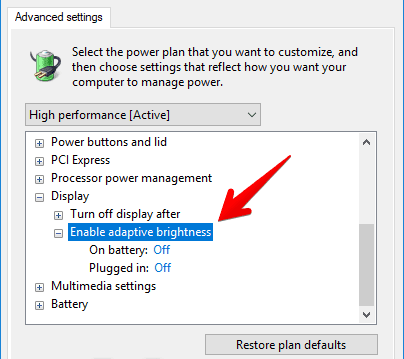
Disabling Adaptive Brightness
That’s it. Using the tutorial above, you have learned how you can adjust automatic screen brightness on Windows 10. We hope this was useful to you to stop automatic screen dimming on Windows 10 easily.