Table of Contents
Skype is known to be one of the top telecommunication programs of all time. Since its release in 2003, which was almost two decades ago, Skype has managed to stay relevant and outperform its competitors. Perhaps, that is one of the core reasons why Skype has not become obsolete. Simply put, the program has evolved with time and equipped itself with features that all of us may benefit from.
When it comes to the relationship between Windows and Skype, the classic Skype program comes pre-installed on a Windows 10 PC. Moreover, the program is set to launch itself by default every time you turn on your PC. Not only is this a con from Skype’s side, but it can also be quite annoying. Especially for users who come a bit short on processing power and RAM, having Skype launch onto one’s face on every startup is not entirely a lag-free enjoyable experience.
Stopping Skype from auto-start in Windows 10
Your PC might be taking ages to load because of Skype. By default, it has set Skype as its priority to launch whenever the PC starts up. In case you’re tired of this CPU-draining feature, worry no more. The good news for you guys is that there are a few ways to stop Skype from launching automatically whenever your PC is turned on. Let us start from the easiest and simplest method:
Method One: Stopping Automatic Skype Launch from PC’s Settings
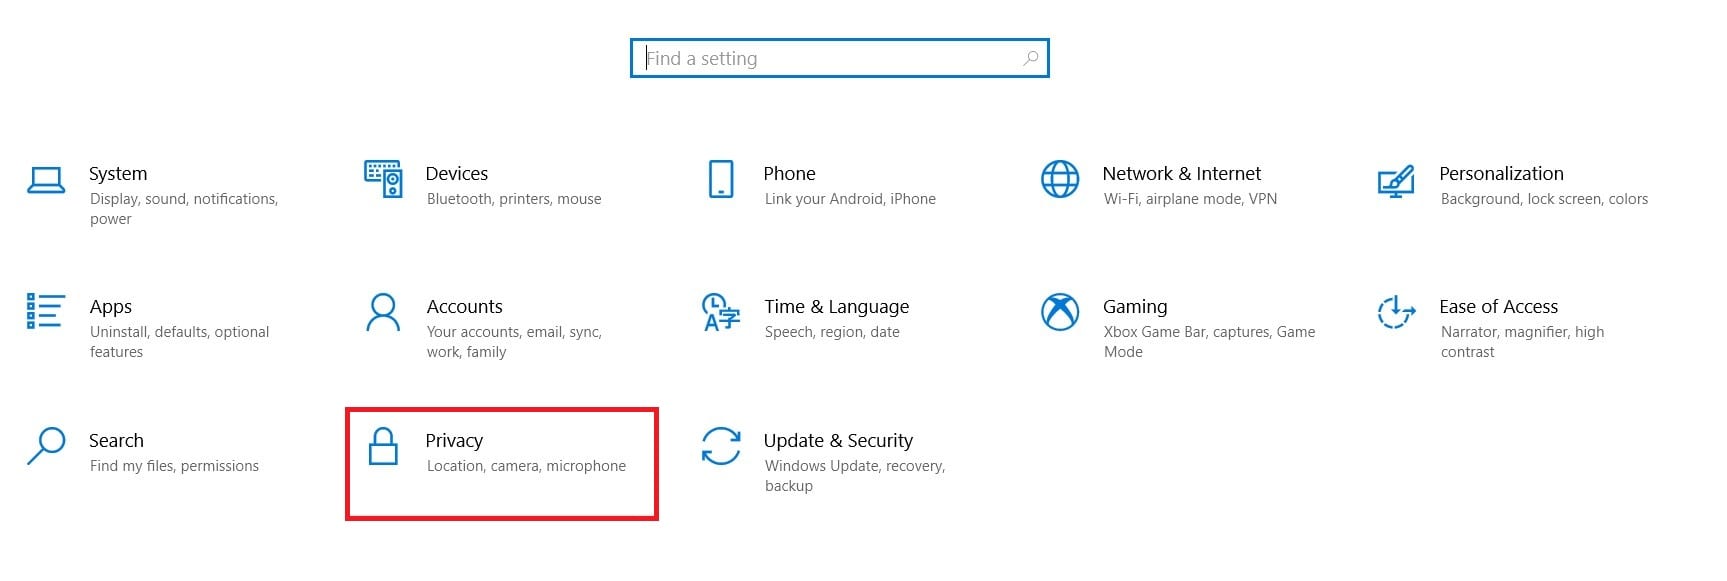
- Head on down to the Settings of your PC through the Start Menu.

Accessing PC Settings
- Access your PC’s “Privacy” settings.

Opening Privacy Settings
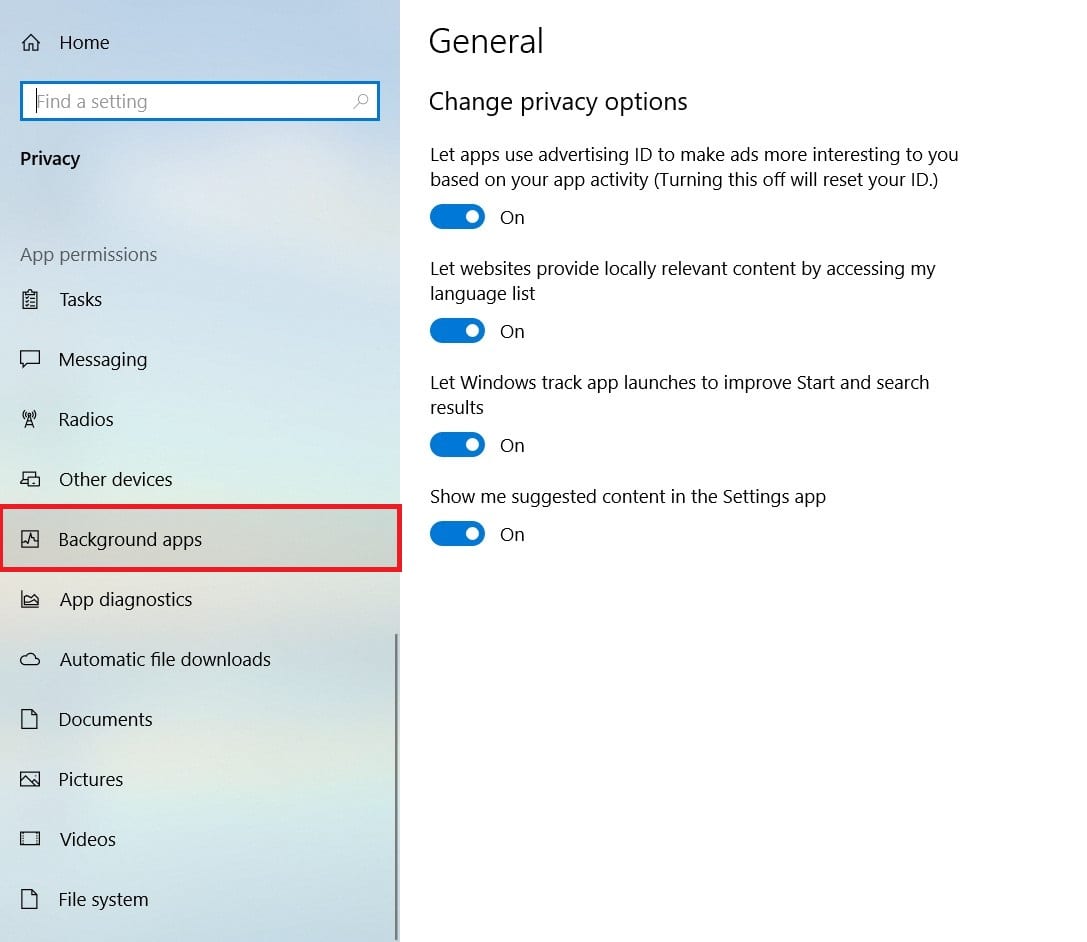
- In the Privacy Settings window, scroll down till you find the “Background Apps” option in the sub-category of “App Permissions”. Click on it.

Accessing Background Apps Settings
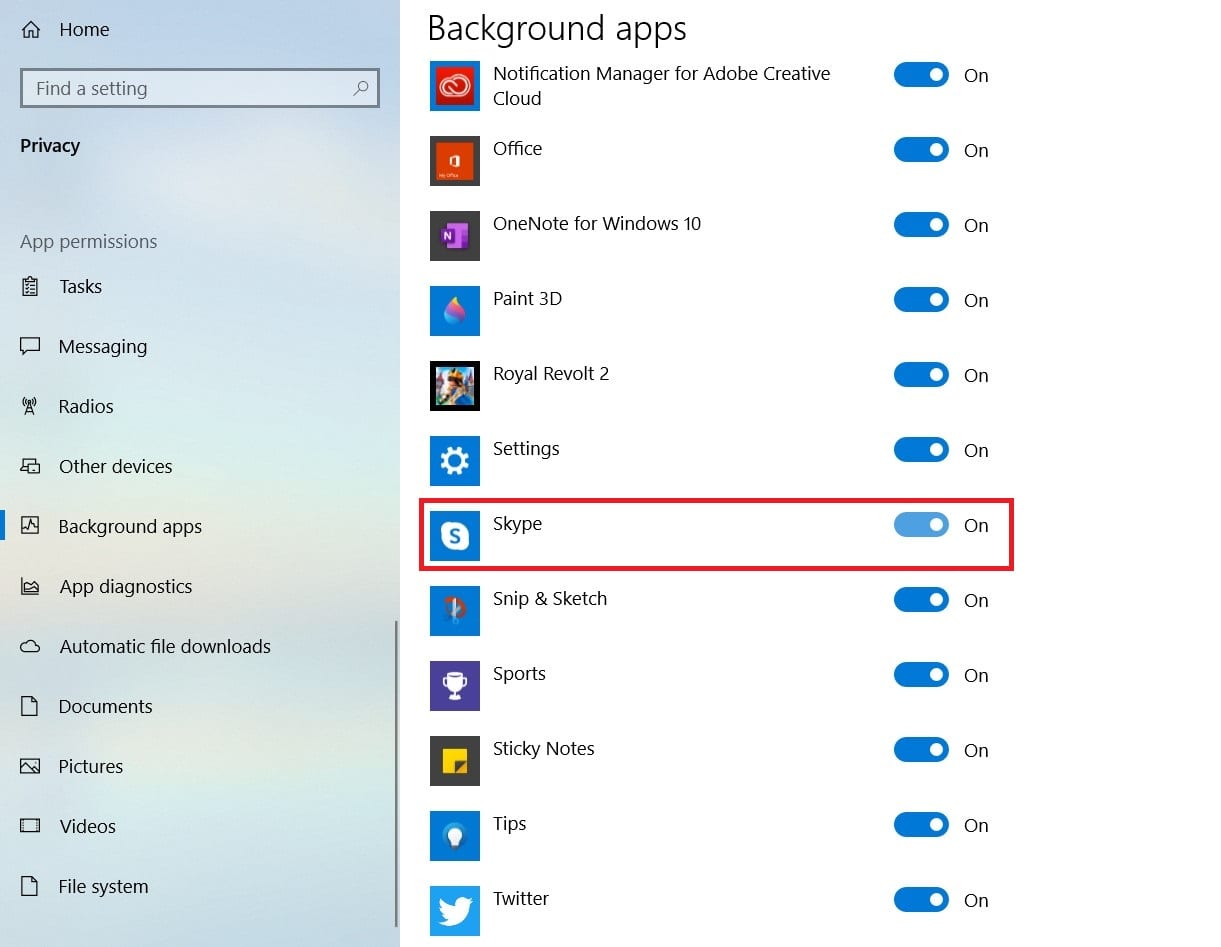
- Here you’ll find a list of all the apps that have permission to run in the background. They’re listed in alphabetical order. Look for Skype among the apps.

List of Background Apps
- Once you’ve found Skype, turn its switch from On to Off.
From now on, Skype won’t only be stopped from launching automatically, but it will also not run in the background. Stopping Skype from running in the background will certainly result in better PC performance and less CPU usage.
Method Two: Stopping Automatic Skype Launch through Skype’s Settings
In this method, we’ll stop Skype from launching by default by making some changes within the application’s settings itself. So, here’s what you want to do:
- Open Skype on your PC and log in to your account.
- See that “…” button right next to your account name? Click on it.
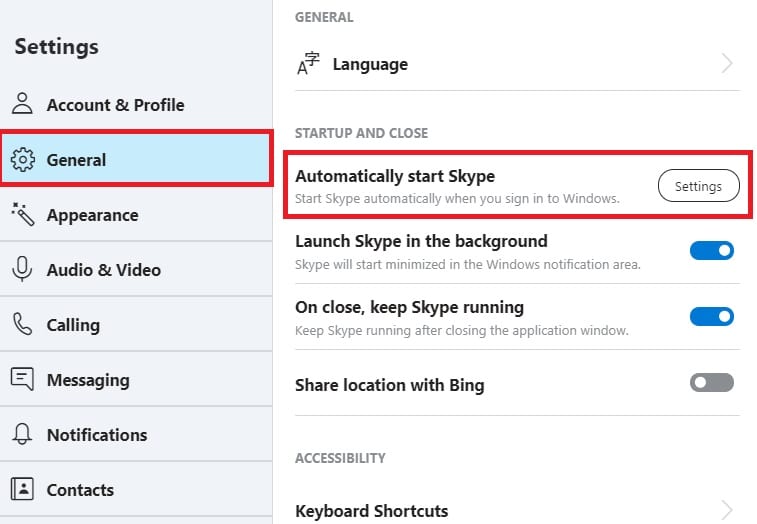
- In the drop-down menu, click on “Settings”.

Accessing Settings
- Access the second tab titled “General”.
- Here you’ll find a button right next to ‘Automatically start Skype’, which should lead you to the Windows settings, letting you disable it from starting automatically.

This was just another way to stop Skype from launching every time your PC boots. If you don’t want to log in to change the settings, we suggest you opt for method one and get the job done.
Conclusion
As you can tell, both methods are simple and straightforward. Fortunately, Skype’s auto-launch feature can easily be disabled in many ways. The two best ones are described above. We hope our article helped you in making things easier!
