
Table of Contents
The league of legends is a team-based game. It has over 140 champions whom you can choose to play with. The game is free; thus no need to worry about spending extra bucks to acquire it. The league of legends is a popular game among game lovers. Research indicates that it is one of the most play video games globally, with over a 100million playing the game every month.
If you are new to this popular game, you would first have to learn how to install it in your Windows operating system since the process is not as direct as you might think. This article assumes you already have the league of legends game installed on your computer. Therefore, our major aim is to show you how to uninstall the game from your Windows 10 operating system completely.
It is dangerous to use shortcuts like uninstaller tools since there are many of them in the market, and you can acquire the wrong uninstallers that might harm your computer. Most websites tend to host them, but according to research, it is evident that most of the tools are malicious hence posing threats to the users.
Note: You do not require any uninstaller tools or software to uninstall the league of legends from your computer. All needed is for you to stick to the guides provided in this article.
Uninstalling the League of Legends on Windows 10
There are two methods one can use to uninstall the league of legends game. This article shall cover all the methods, so no need to worry since we got you covered.
Method 1
Follow the steps provided to uninstall the league of legends game from your Windows 10 PC.
You can do this by opening your “Start menu” from the taskbar. Now type “Control Panel”. The Control panel will appear in the search option, as shown in the image below. Open it by clicking the “Enter” button on your Keyboard.

open control panel from the start menu
Step 2) Open the “Programs” section.
Under the control panel screen, navigate to the “Programs” section and click on it. A programs and features screen will pop up. Under the first option, as indicated in our screenshot below, click on “Uninstall a program”.
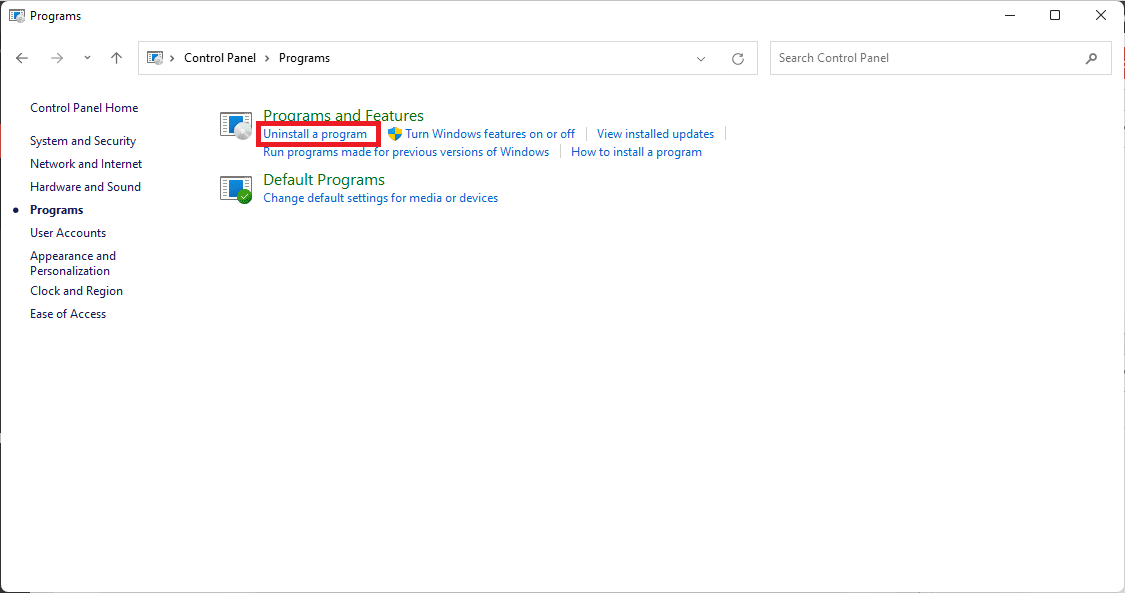
select uninstall a program
Step 3) Uninstall or change a program.
In the next step, you will have to locate the league of legends game program from the list of installed programs provided in this section, as displayed in the image below:
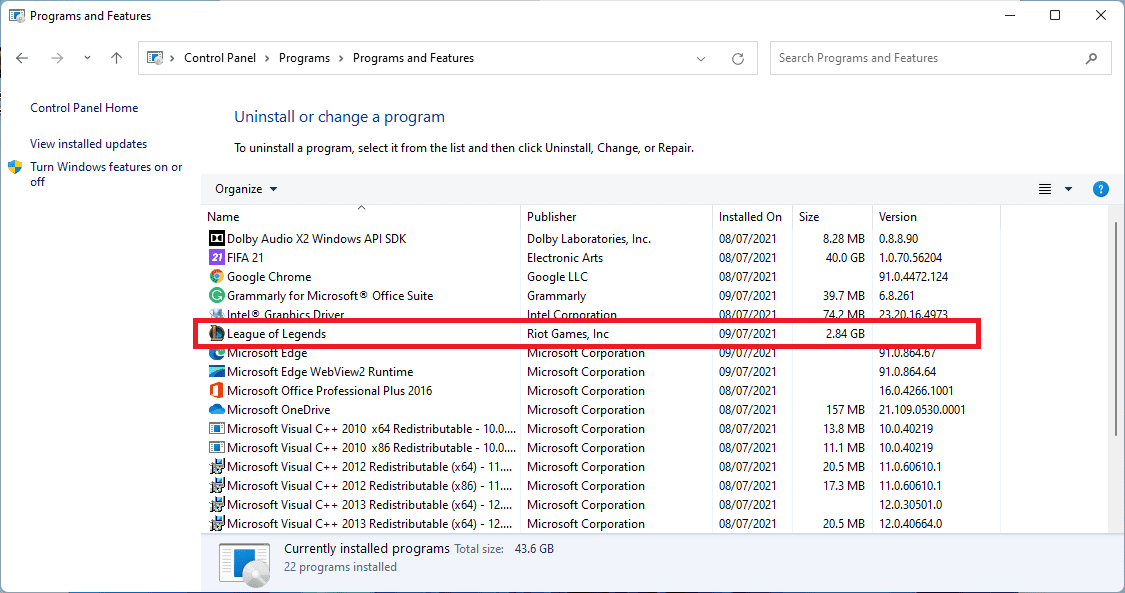
uninstall league of legends
Once you locate the league of legends program, you have three methods to uninstall it:
Method 1: First, you double-click on the program, and the uninstall menu will pop up. Follow the on-screen instructions to complete, then uninstall the game from your computer.
double click to uninstall league of legends
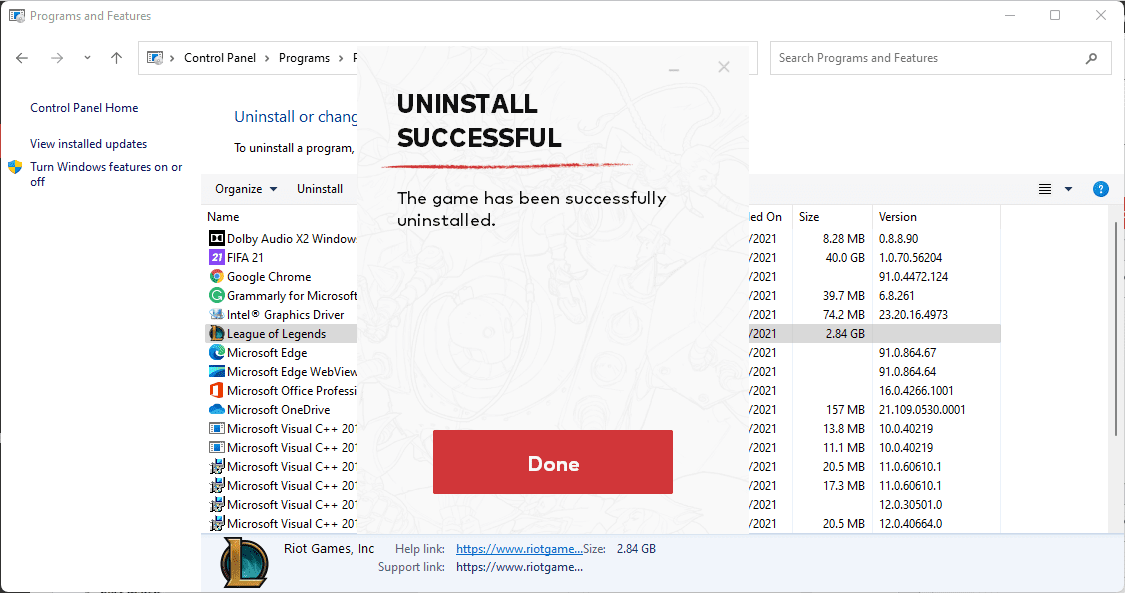
Method 2: Once you locate the program to be uninstalled, click on it, then check on the bar above the programs list as shown, then click on uninstall. Follow the provided on-screen instructions to complete the uninstall process successfully
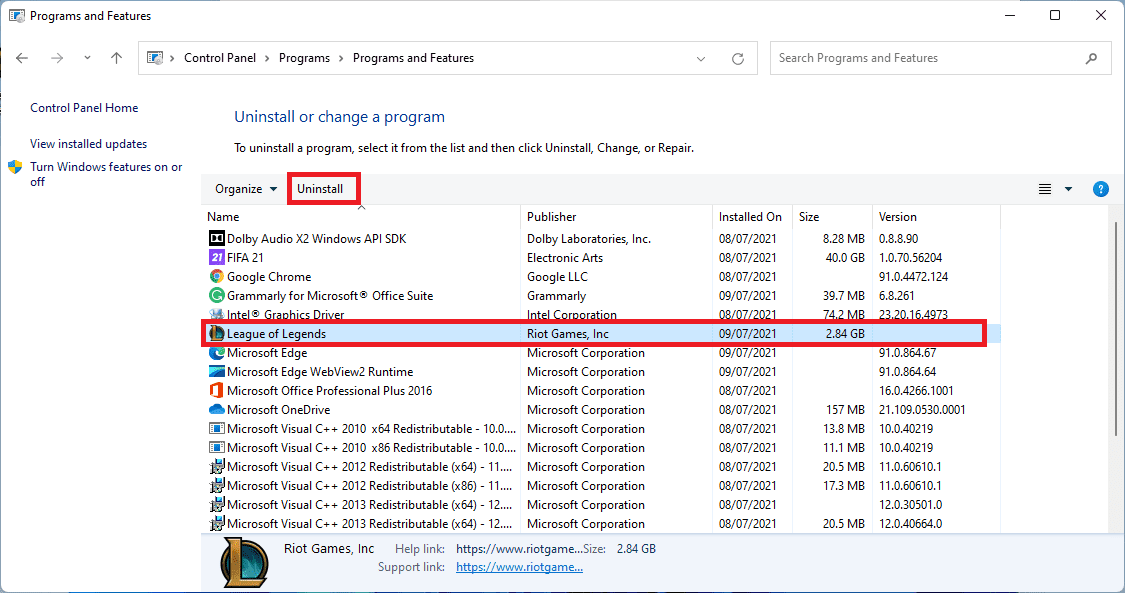
uninstall league of legends method 2
Method 3: Once you locate the league of legends game to be uninstalled, right-click on it and select the uninstall option. Follow all the provided on-screen prompts to complete the uninstallation process like you previously did on the first two methods.

right-click to uninstall league of legends
That’s all. You have successfully uninstalled the league of legends from your Windows 10 operating system.
Method 2
Follow the steps provided here-in to complete the uninstallation process of the league of legends:
Step 1) Locate the “Add or remove programs” app in Windows 10
To get this tool, open the start menu found on the taskbar or quickly press the “Windows” button on your Keyboard and launch the start menu. Now type “Add or remove programs” on the search bar. Suggestions similar to your search term will be provided. Next, locate the tool and press the “Enter” button on your Keyboard.
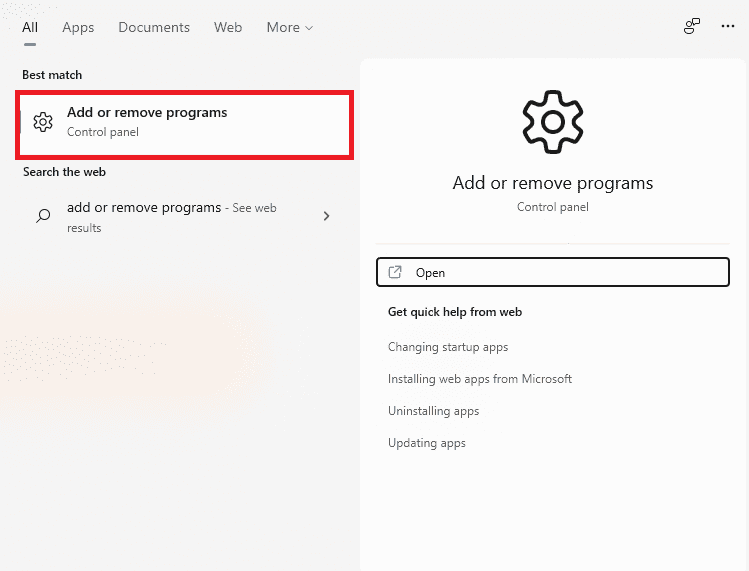
add or remove programs
Note: On most occasions, the search program or tool will appear as the first on the provided suggestion list. If not, please do not use the “Enter” button. Rather use your mouse since the “Enter” button launches the first program on the search result list.
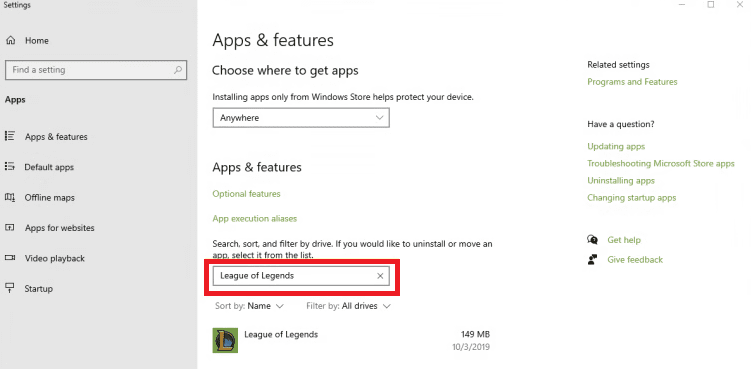
Step 2) Locate the “League of Legends”
From the “Apps & Features” search bar for league of legends. The search will filter the results of the game. Once you find the game, as seen in the screenshot below, move to step 3.
locate league of legends
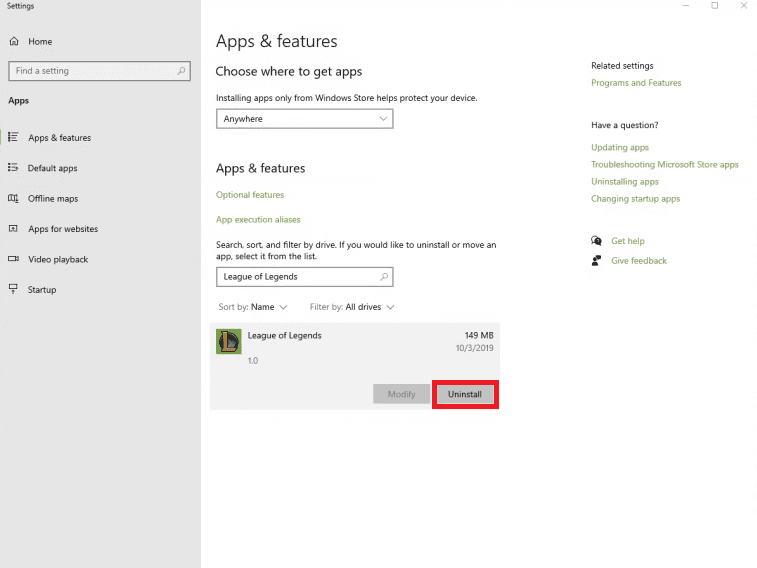
Step 3) Uninstall the League of Legends game
After filtering the search results to the league of legends, select the game and click “Uninstall” to uninstall the game from your Windows 10 operating system.
click uninstall league of legends
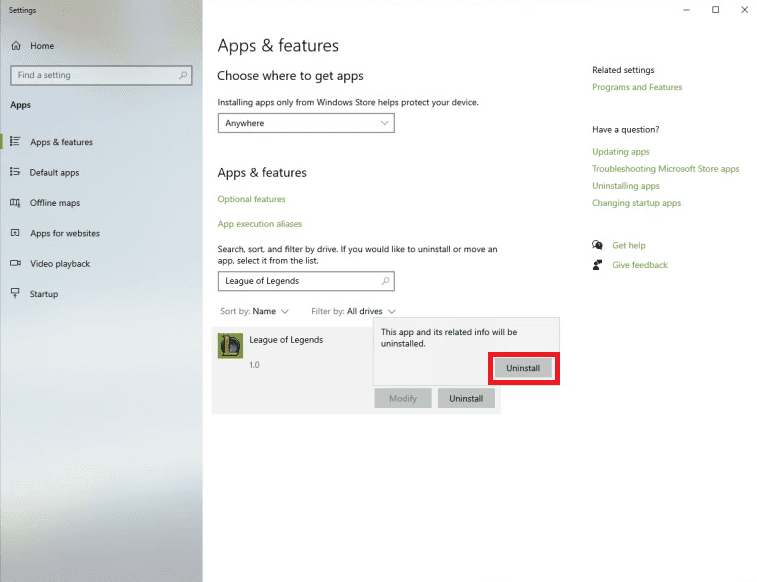
Step 4: Confirm the Uninstall process
After triggering the uninstall option in step 3, now confirm the uninstall process by pressing the “Uninstall” button as shown in the image below:
confirm the uninstallation of the league of legends
Note: this process is vital since it helps prevent users from accidentally uninstalling programs from their Windows 10 Operating systems.
That’s all. League of legends has been uninstalled from your Windows 10 operating system.
Now that the process has been completed, we must check below to confirm that the game has been completely removed.
Confirming whether the league of Legends files has been completely removed from your hard disk
- Now navigate to the C: directory since it is the default directory where the league of Legends is installed.
- Confirm if there are any folders or files related to the league of legends game
- Delete any old setup files that were previously used to install the game
- After deleting, now restart your PC.
The process is done. We have uninstalled the game and ascertained that it had been successfully removed from our drive.
Conclusion
There is no need to task yourself with unnecessary uninstall software and tools since the process is quite easy and manageable. Instead, try it by following all the steps and trying out all the methods provided in this article. We hope you will be able to remove or uninstall the league of legends from your Windows 10 computer.