Table of Contents
Windows 7 has officially entered its end-of-life phase from January 14, 2020. This has called for all Windows 7 users to upgrade to Windows 10 or some other operating system. Keeping in mind that most users would be comfortable with the same OS, we can safely assume that most of them would be shifting to Windows 10. You should know that if you have been running Windows 7 in the past and now want to move on to Windows 10, you can do it effortlessly. Moreover, you would like to make sure that none of your valued data and files get lost during this process.
With the built-in upgrade option in Windows 7, you can complete this transformation without any hitches. You will not have to erase everything on your hard drive, unlike previously. This upgrade can be performed through Microsoft Media Creation Tool as well. This tool is available on both Windows 7 and Windows 8.1. Before we dive into the actual process, you would like to make sure that your system is perfectly compatible with Windows 10. Apart from this, you will have to purchase a license for Windows 10 and create a backup of your system files. Doing all of this will definitely ensure a smooth and immaculate upgrade.
Prerequisites
Proceeding the upgrade, ensure that Windows 7 Service Pack 1 is installed on your system. Without this pack, you can run into several difficulties. It is also recommended for you to uninstall any third-party applications and programs. They might interfere with the process, resulting in unnecessary delays. Besides, they can halt a successful upgrade altogether as well. Any external hardware devices such as printers, scanners, cameras, and external hard drives should be disconnected before starting the upgrade. Doing this will minimize the chances of an occurrence of a peripheral-related issue.
Windows 10 System Requirements
As we said earlier, before you start the upgrade, it is a good choice to make sure that your PC meets the system requirements for Windows 10. If this is not the case, you will be left with no choice but to replace your computer. Unless your PC has been with you for quite some time now, it will have everything you need. Here are the minimum requirements.
- Operating System: Latest version of previously installed operating system
- Processor: 1 GHz or faster processor or SoC
- RAM: 1 GB for 32-bit or 2 GB for 64-bit
- Hard Disk Space: 16 GB for 32-bit OS o 20 GB for 64-bit OS
- Graphics Card: DirectX9 or later with WDDM 1.0 driver
- Display: 800 x 600
For more detailed specifications, you can visit Microsoft’s official website. There you will find an overview of how to find computer specification requirements, versions, and languages available for Windows 10.
Creating A System Backup
Even though the upgrade from Windows 7 to Windows 10 is completely secure, you should have a backup of your files and programs. This will keep you on the safe side and provide a security cushion if things start to go south. To create a backup on Windows 7, connect an external hard drive with your PC, and go through the following steps,
Step 1) Click on the “Windows Logo Icon” and search for “Control Panel”. Open it.
Step 2) Go to “System and Security”.
Step 3) Click on “Backup and Restore”.
Note: To reach this point much quicker, you can type “backup” in the search field of the “Start” menu and then click on “Backup and Restore” from the search results.
Step 4) Go to “Back up or restore your files” and click on “Set up backup”.
Step 5) Once you are done with Step 4, a window will pop up asking you to select a backup location. Locate the external hard drive you connected with your PC. Click on its folder and select “Next”.
Note: You can also save your backup on a DVD or a network. In the case of a DVD, you will have to insert it into the DVD-ROM when prompted. Because of the much lesser space available on a usual DVD, you will have to use quite a few. For this, you need to label each one in sequence as well. In case you plan to save the backup on a network, things are not that worrying. You only have to browse yourself to the desired location and click “OK”.
Step 6) You will see a window on your screen with a message that reads, “What do you want to back up?”. Select “Let Windows choose (recommended)” and click “Next”.
Step 7) All backup details will be displayed on your screen. Go through them carefully and check to see if there is anything out of place.
Step 8) Once you have verified everything, click on “Save settings and run backup”. This will start the backup process.
Note: Backup on your system might take some time depending on the files you selected in step 6. Once the backup is finished, you will see the complete size of reserved files.
Apart from what we just mentioned, you can create a system image. This will perform a full backup, and everything on your system will be stored on the external drive. You may also want to use a third-party backup tool. There are several applications designed for this very purpose. These external tools can store and restore your data quicker and more effectively than the default programs of Windows 7. While these tools differ in their operation and method of performing backups, their interface is simple enough to be used by anyone.
If your files are not excessively large, you can also employ a service that provides cloud storage. This will make it considerably easy for you to manage things as you will not be required to arrange an external storage device physically. When you are done with this process, you are ready to move on to the next stage, which will take the actual course from Windows 7 to Windows 10.
Upgrading From Windows 7 To Windows 10
To upgrade your Windows 7 to Windows 10, you will have to download and install the media creation tool. This tool can be used to upgrade the already installed Windows versions. This tool also optimizes your system’s performance and incorporates the most up-to-date features released by Microsoft. You can also update Windows through Windows Update; however, it may cause several frequently experienced errors by Windows users worldwide. Thus, it is recommended for you to shift to Windows 10 using the Media Creation Tool. Here are the steps you will have to go through for this,
Step 1) Download Windows 10 Media Creation Tool from Microsoft’s official website. You can do it for free.
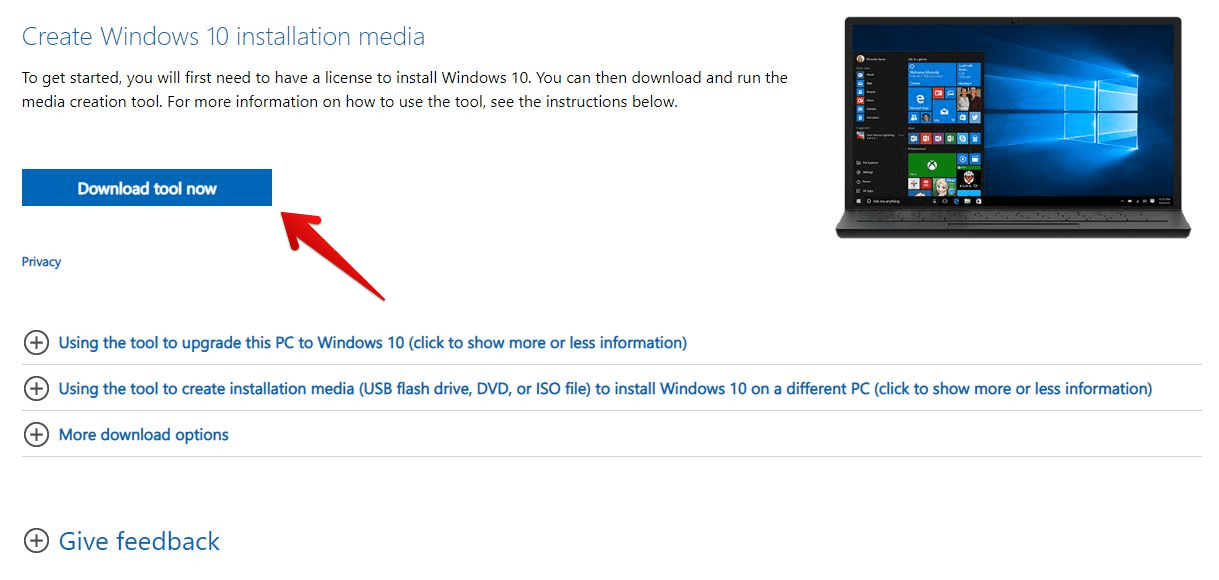
Downloading Windows 10 Media Creation Tool
Note: If you upgrade to Windows 10 for the first time, you may want to visit the manufacturer’s website for any additional information regarding updated drivers and hardware compatibility.
Step 2) Open the folder where you downloaded the Windows 10 Media Creation Tool. Right-click on the tool’s file and select “Run as administrator”.
Note: You need to be an administrator to run this tool.
Step 3) You will be faced with a license terms page. Select “Accept” to continue.
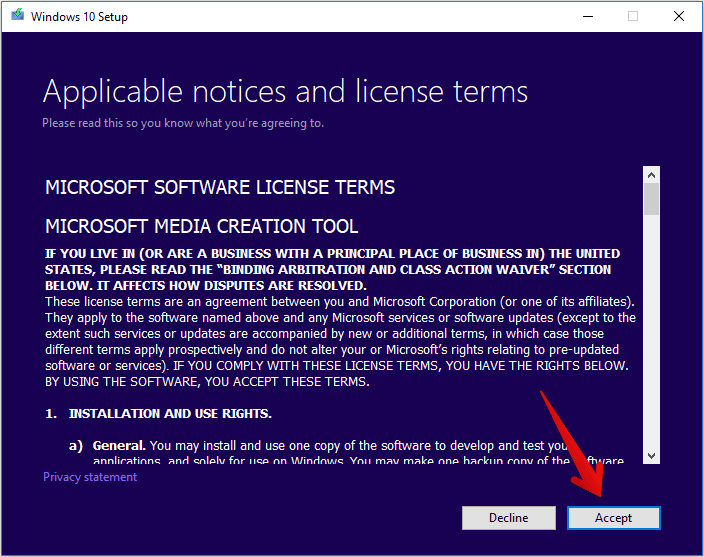
Accepting License Terms
Step 4) After this, a page will appear with a question regarding what you want to do? Select “Upgrade this PC now”, and then select “Next”.
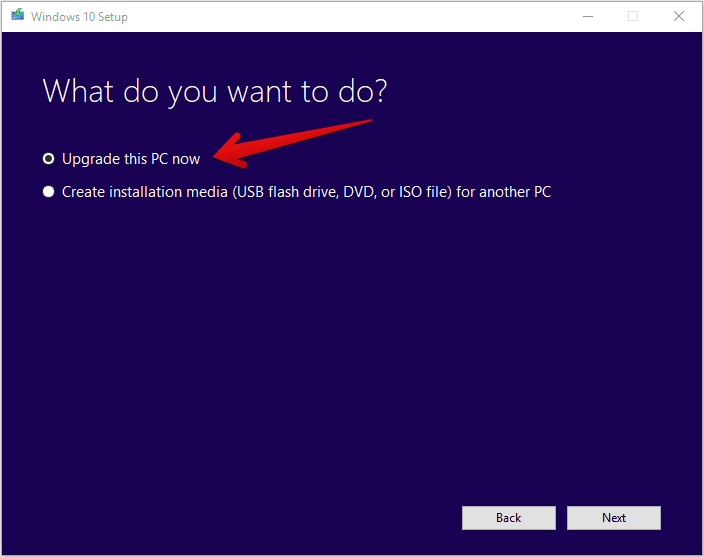
Selecting Upgrade This PC Now
Step 5) Once the download is completed, the tool will walk you through how to set up Windows 10 on your PC. You can select any version of Windows 10.
Note: If you are installing Windows 10 for the first time, you will have to type a valid Windows 10 product key. This key should be compliant with the edition you are trying to upgrade.
Step 6) When Windows 10 is ready to install, you will see a list of choices. Select “Change what to keep” to set whether you would like to “Keep personal files and apps”, “Keep personal files only”, or “Nothing” at all.

Choosing What To Keep
Step 7) You are recommended to save and close any open applications or files running at this moment. When you are ready, select “Install”.
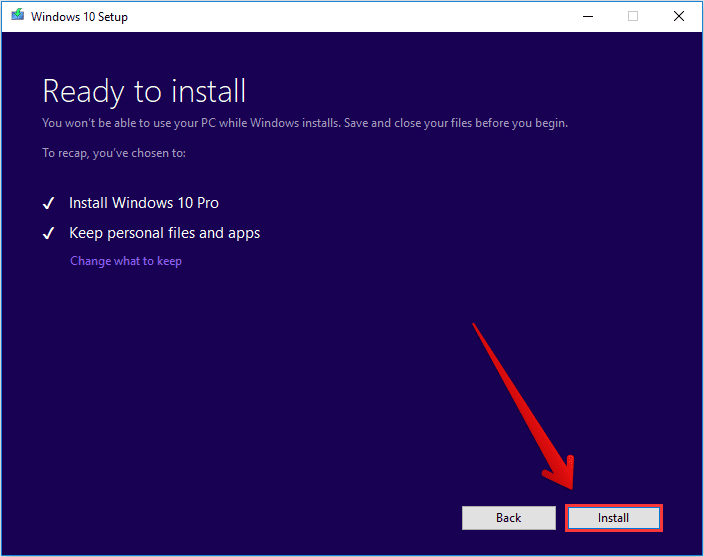
Starting Installation
Step 8) It might take some time to install Windows 10. You will have to remain patient. Your PC might restart a few times as well. Ensure you do not turn off your PC until the installation is finished.
Note: When your PC reboots for the last time, you will be met with a brand new Windows 10 interface. The first thing you need to do is go to “Device Manager” and check if every piece of hardware is installed correctly. After this, you can reinstall your preferred third-party applications as well.
Conclusion
I hope that after going through this article, you will be able to effectively use Windows Media Creation Tool to update your system from Windows 7 to Windows 10. If everything goes as planned, the entire process will not take you more than a few hours. In case you face any difficulties, you can always contact Microsoft support or your device’s manufacturer.