Table of Contents
Technology is advancing every single day. Every other day you hear news of a new gadget introduced to make your life easier. But, unfortunately, upgrades don’t seem to stop coming anytime soon when it comes to making computing easier.
Despite all of these technological advancements, we still face a problem in this age. Well, at least an average Windows user does face it, though, if not everyone. Yes, you guessed it right, it is the scarcity of storage space in our PCs. Whether we like it or not, we have to admit that shortage of storage space is still a problem for the vast majority.
Why does the shortage of storage still exist?
What might be the reason, though? Haven’t we come so far? We’ve all seen that social media post that differentiated the physical difference between 1 MB of storage hardware a century ago and 1 GB of storage hardware today. So, what piece of the puzzle seems to be missing?
Well, the reason is quite simple. As storage drives evolved throughout the decades, so did our needs. Think about it, none of us plays 1 KB games on our PC anymore. Instead, our computers are filled with dozens of applications, media files, and programs that are the reason behind the “Your storage space is full” dialog.
Furthermore, people struggle with storage mostly due to their pockets not allowing them to buy more. Nonetheless, every user has their own particular set of reasons for running out of storage space, but we’re here to help all.
Reclaiming lost disk space in your Windows PC
Therefore, in this article, you guys will be learning the top ways to free up disk space. We’ll start from the most efficient methods ending with uncommon methods used mostly as a last resort. So, let us grab our brooms and get to cleaning digital trash.
1. Windows Disk Cleanup
Windows has a built-in program that helps you free up space on your PC. It is programmed to delete files that are of no use to neither you nor your computer. They occupy storage space and basically bring no benefit. So, cleaning them out should be the way to go. Here’s how to do that through disk cleanup:
- Open File Explorer on your PC.
File Explorer
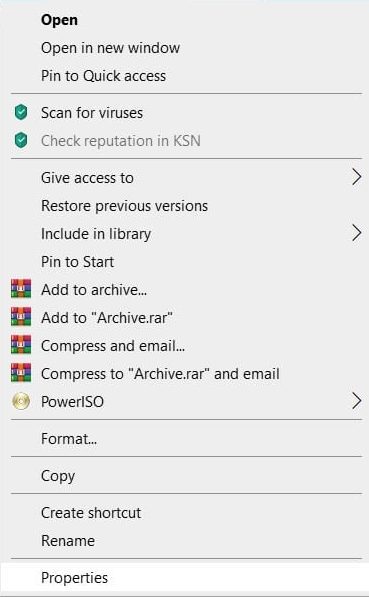
- Look for the disk you want to clean. Right-click on it, then click on “Properties”.
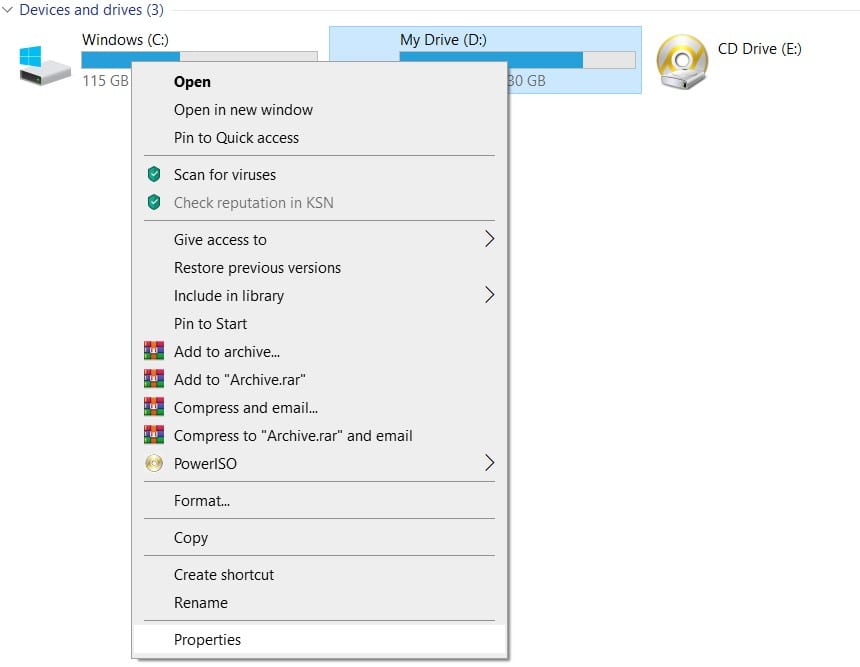
Opening Properties of Drive
- Here you’ll find the “Disk Cleanup” option right beside a pie chart storage representation of the disk. Click on it.
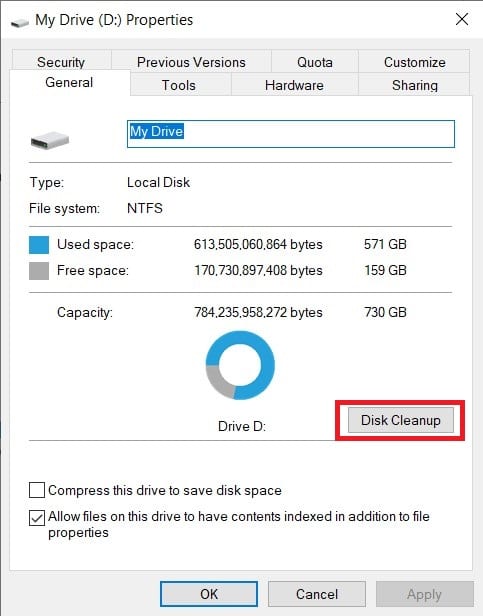
Disk Cleanup
- Now you’ll be given a list of unimportant files and taking up space on your PC. You can check/uncheck them as per your choice.
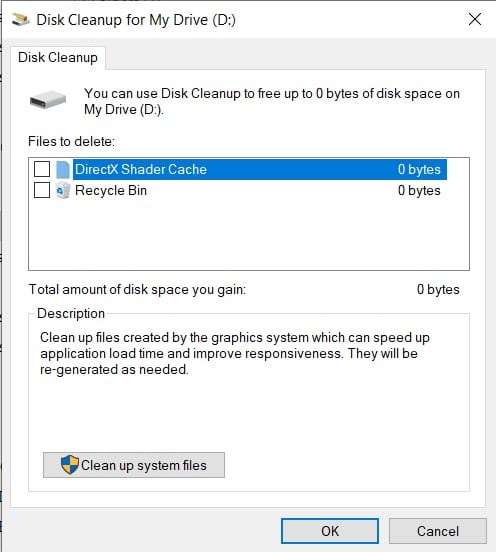
Checking D Drive Files
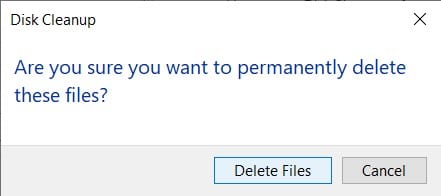
- Once you’re done choosing, click on “OK”. A confirmation dialog will pop up. Approve the confirmation to delete those files permanently.
Delete Files Dialog
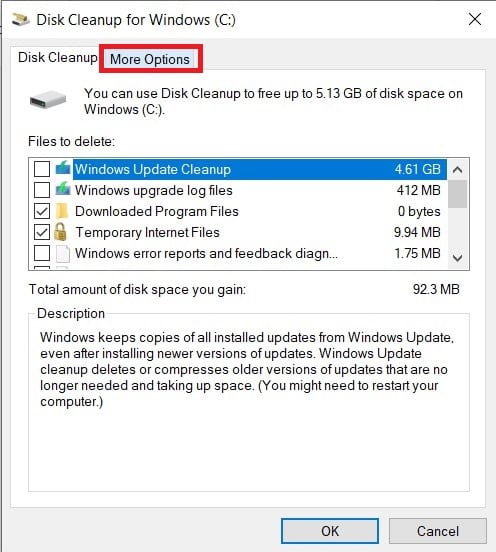
If cleaning up disk space still does not give you enough storage space, consider deleting your disk’s system files through the following method:
- Repeat the above-stated process till step three.
- Click on “Clean Up System Files”.
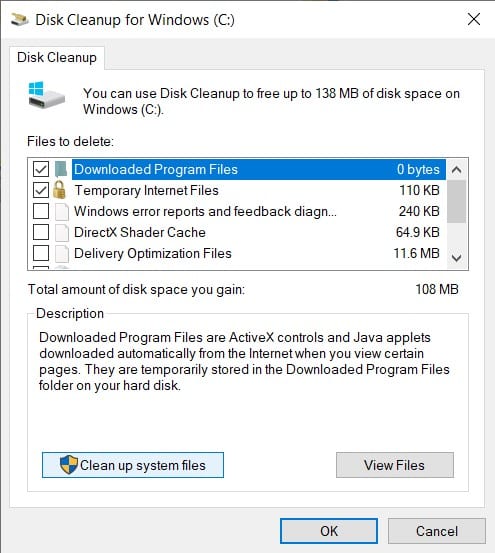
Clean-Up System Files
- The Disk Cleaner will now display files that did not show in the normal cleaning process. Note that some of these files might be important for your PC. So, be careful when checking/unchecking this list.
2. Storage Sense
If you find the method of cleaning up disks individually exhausting, there’s a way out for you. The storage sense feature allows Windows 10 users to clean up storage space automatically from one place. This means you won’t have to target drives to rid them of trash specifically. Here’s how you can turn storage sense on in your Windows 10 PC:
- Click on the Start button and then on the ‘Settings’ icon to open your PC’s settings.
Opening Settings
- Select the first option of “System.”
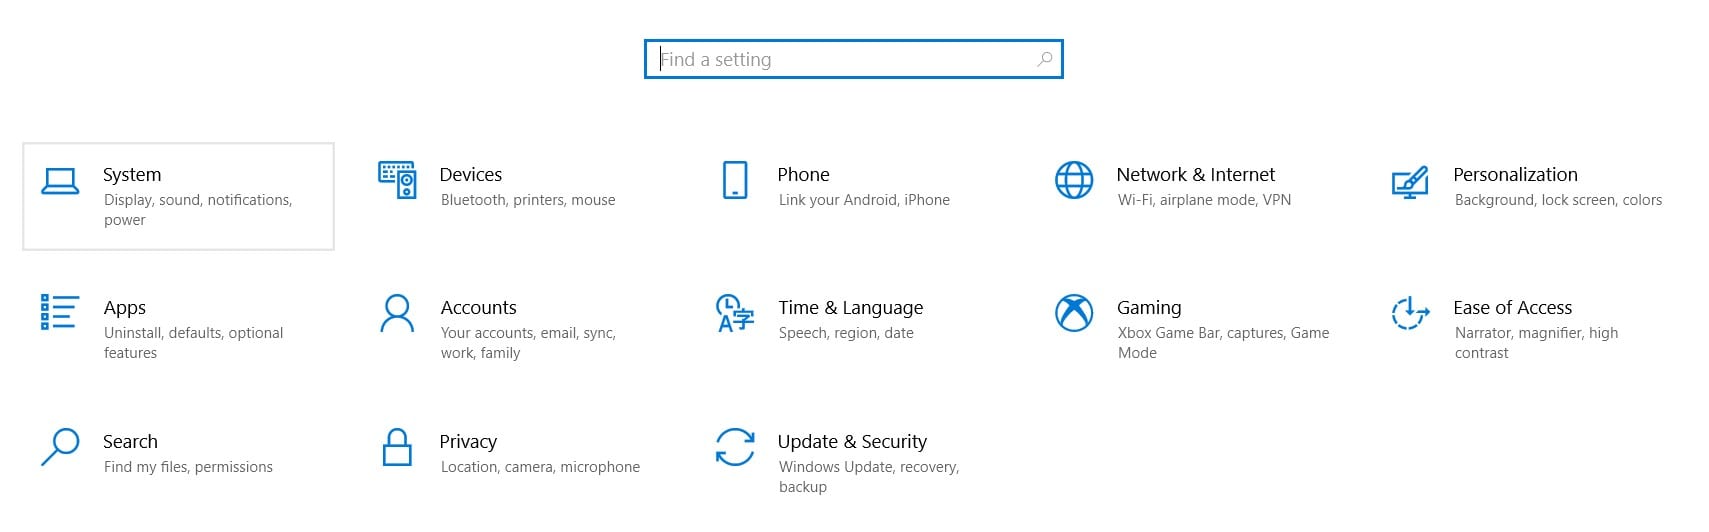
System Settings
- In the panel on your far left, you’ll find your system’s storage settings. Click on “Storage” here.
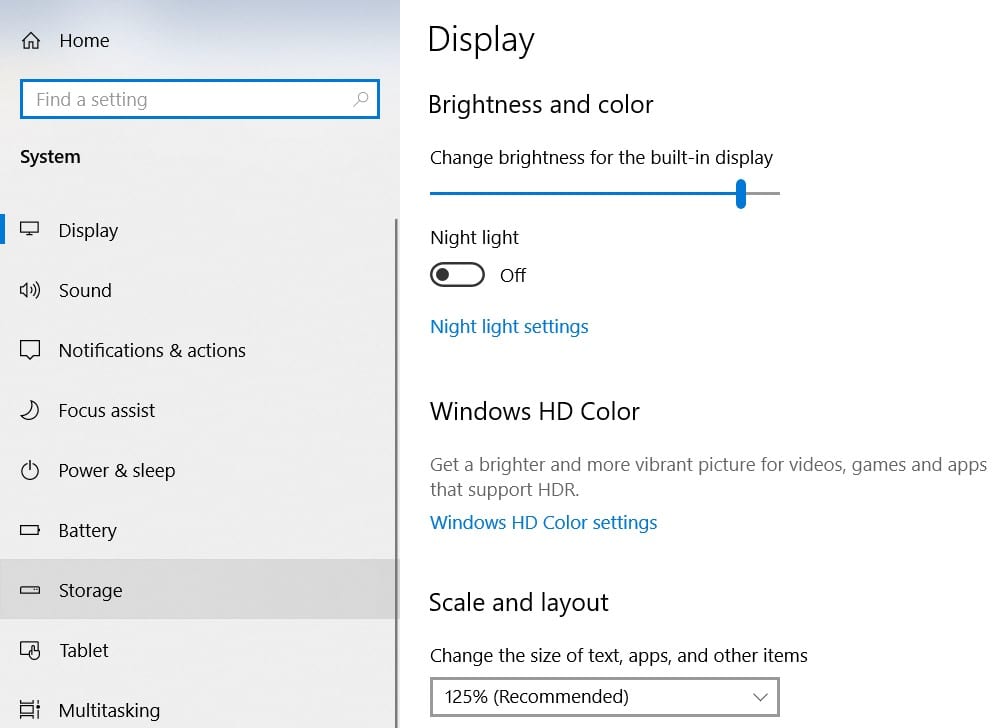
Opening Storage Settings
- Here at the top, you’ll be able to turn on the Storage Sense button. Doing so will allow Windows to automatically clean up storage space on your PC every once in a while.
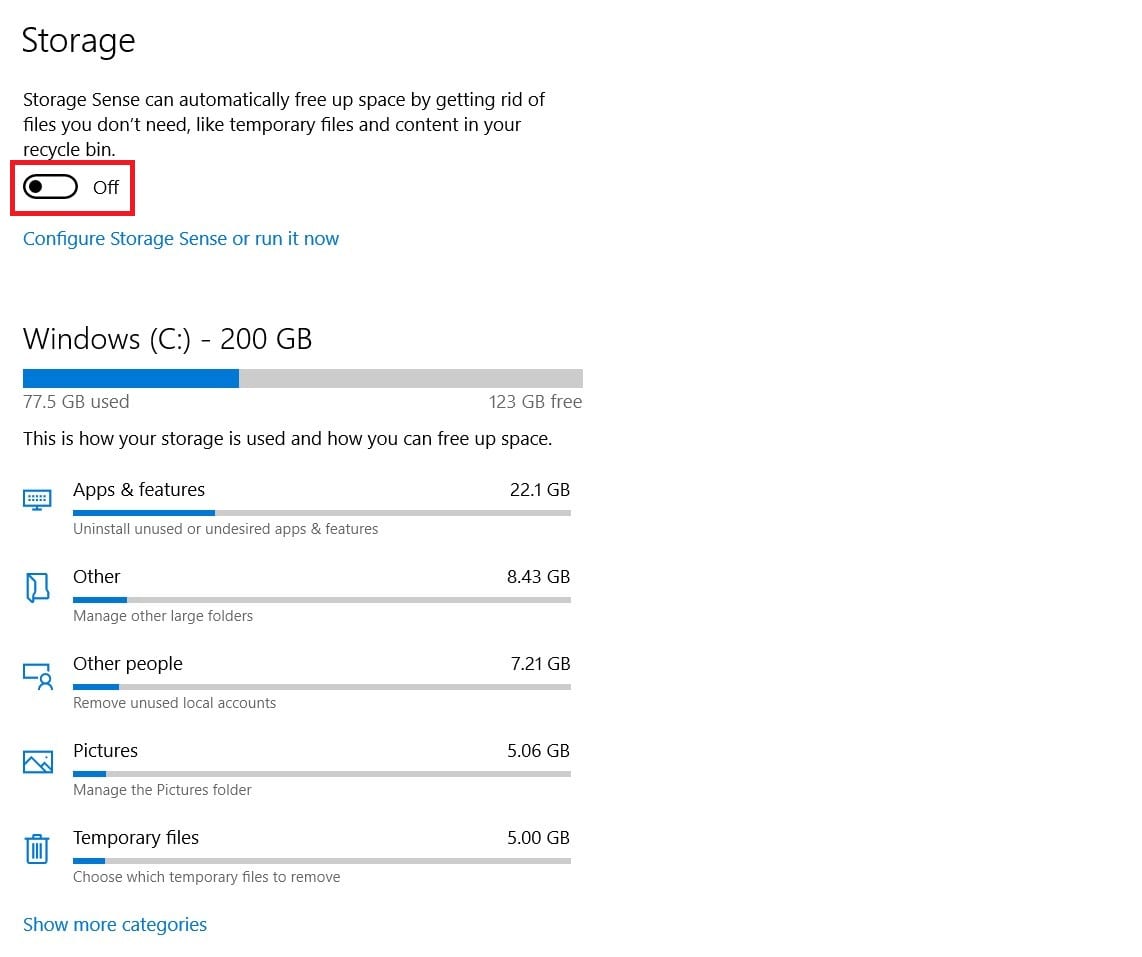
Storage Sense
Storage Sense also gives you an idea of what is taking up your storage the most. You can also configure additional storage settings, such as deleting temporary files or setting the duration of how long files would remain in the recycle bin.
3. Install Cleaning Applications
One of the best ways of freeing up potential disk space on your Windows PC is through installing cleaning applications. Such applications make cleaning way easier for you. With a wide range of features, you’re given a choice to set automated cleaning sessions and set custom restraints to save files that you don’t want to be deleted in the process.
Your PC’s built-in cleaning tools typically limit their cleaning to internal storage. Now cache and temporary files from third-party applications may build up over time, and the disk clean-up tool won’t do anything about it.
Therefore, if you want to clear out junk files in bulk with a single click, consider installing some cleaning applications. CCleaner, for example, is a widely used free cleaning application for Windows that is recommended for this job.
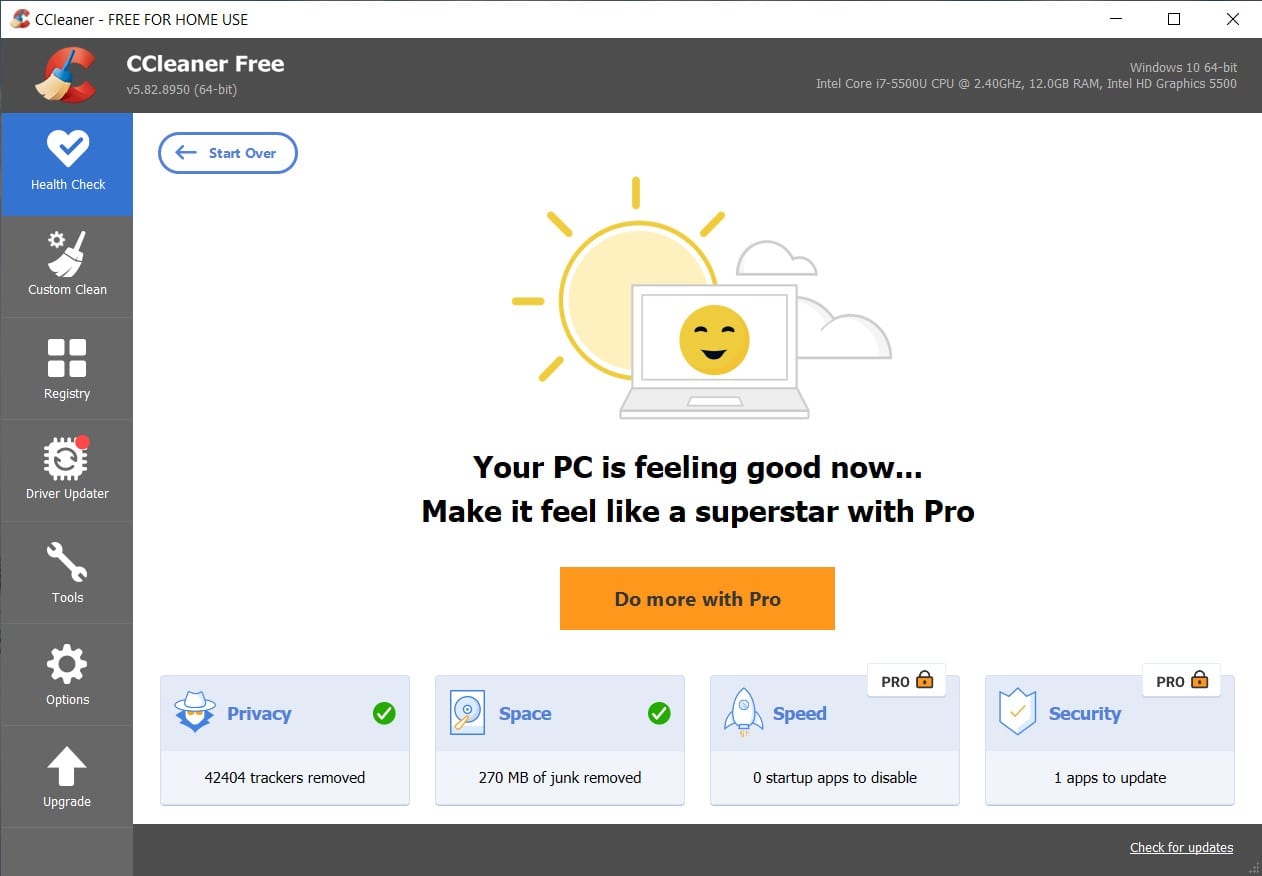
CCleaner
4. Run a Disk Tour
At times, users make the mistake of relying entirely upon cleaning tools. Even if they are installed separately, most of them do not take your personal media files into account during cleaning. For example, you might have entire gigabytes of movies you don’t watch anymore laying on your PC, and the cleaning app would likely point out the 5 MB log file that comes with them instead of the bigger picture.
Therefore, you yourself must take some time out and clear out old media files that are of no use to you anymore. Go through your personal files and folders and see if there’s anything massive that’s been sitting idle for too long. Ensure you permanently delete media files that won’t be of any use to you. You can easily free up a GB or two just through this disk tour.
5. Clear System Restore
Your Windows PC has its own backup stored as a restore point. If your PC crashes and you have to set everything up from scratch, the restore points would save the day. However, restore points can take up a plethora of disk space on your PC.
This is because Windows automatically adds more and more restore points from time to time. Although deleting these restore points would free up a lot of space, this method is not recommended for unstable computers. If your PC runs fine and has no risk of crashing, then that’s a green light for you. Here’s how you can delete those restore points:
- Open File Explorer.
File Explorer
- Navigate to the disk in My PC and right-click on it. Open its properties.
Opening Properties of Drive
- Click on “Disk Cleanup.”

Windows C Disk Cleanup
- Click on the “Clean up system files” button.
Clean-Up System Files
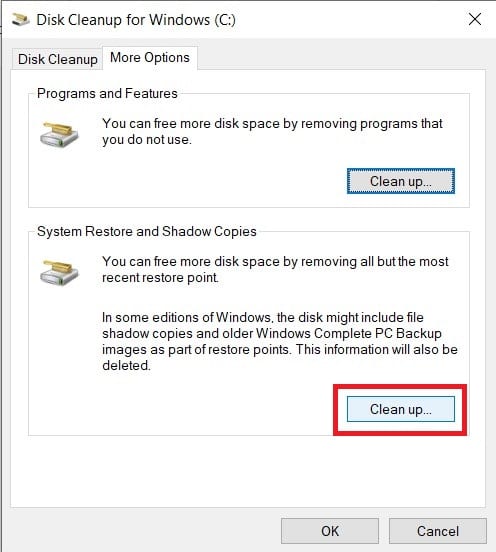
- Select the “More Options” tab.
Windows C More Options
- Click on the second box of “Clean up” under “System Restore and Shadow Copies.”
Clean Up Restore Files
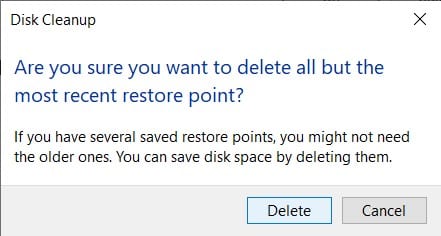
- Windows will ask for confirmation before deleting all but the most recent restore point. Confirm by clicking on “Delete.”
Restore Point Deletion
We do not delete the most recent restore point due to its importance in an emergency. However, this most recent restore point would surely be of help if your PC’s health goes south unexpectedly. Therefore, it is advised never to delete the most recently saved restore point.
6. Uninstall Excessively Heavy Programs
Be it your smartphone or your PC, the most space taken is by applications. If you have too many games installed on your PC, uninstall those you don’t play immediately. Games can take up huge amounts of storage space, and we don’t want that.
Other applications might, too, and it’s best to kick them off as well. However, not every application takes up GBs worth of space on your PC. Some are just there to sit and help you out with minor tasks. So, to make this decision of choosing and uninstalling easier, allow us to assist you through this method:
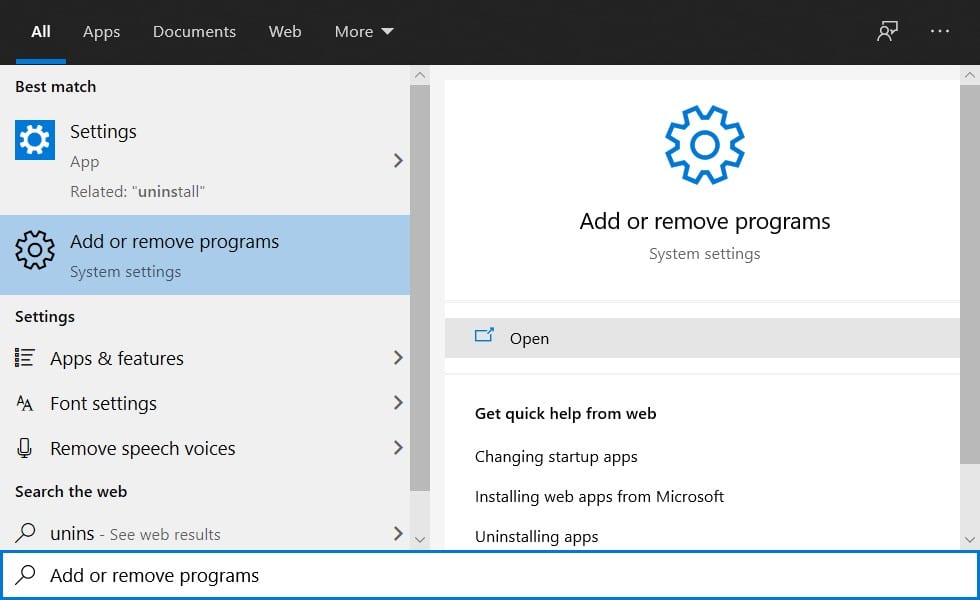
- Type “Add or Remove Programs” from your keyboard after clicking on the start button. Next, click on the open button under “Add or Remove Programs.”
Add or Remove Programs
- You’ll be taken into your PC’s settings, where you can see a list of installed applications on your PC.

Programs List
- You can also sort them by size to get a better idea of the amount of storage they have taken up.
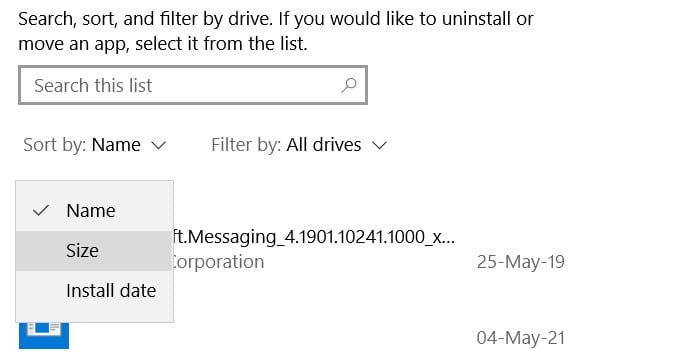
Sort Programs By Size
- Once you decide which applications must go, click on their name and then on the “Uninstall” button.
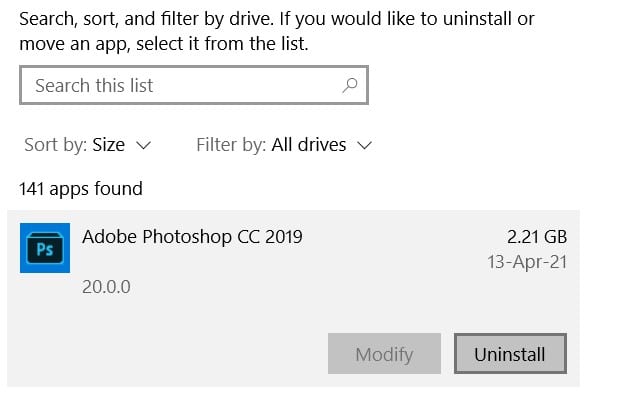
Uninstall a Program
Uninstalling heavy applications is one of the best ways to free up disk space. You can release huge amounts of GBs just by uninstalling a couple of useless applications.
7. Change Default Saving Location
If you have more than one storage drive on your PC, consider dividing your data through them. For instance, your downloaded content would be downloaded straight into its default location in the internal storage. However, your internal storage already has loads of data saved, and setting it as the default save location won’t help. So, if you have external drives on your PC, consider setting them as your default saving location. Here’s how you can do that:
- Open your PC’s settings through the start menu.
Opening Settings
- Navigate to System and then to Storage once again.
Opening Storage Settings
- Scroll down a little, then click on “Change where new content is saved.”
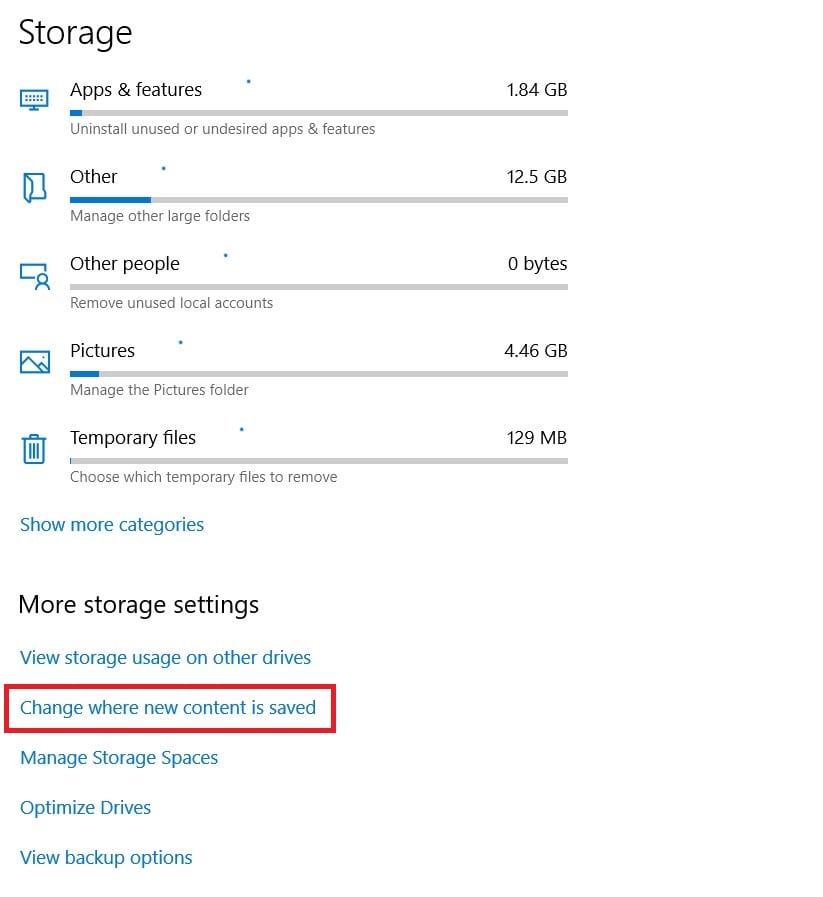
Change Default Save Location
- Here you can choose where you want your new applications, documents, photos, and videos saved.
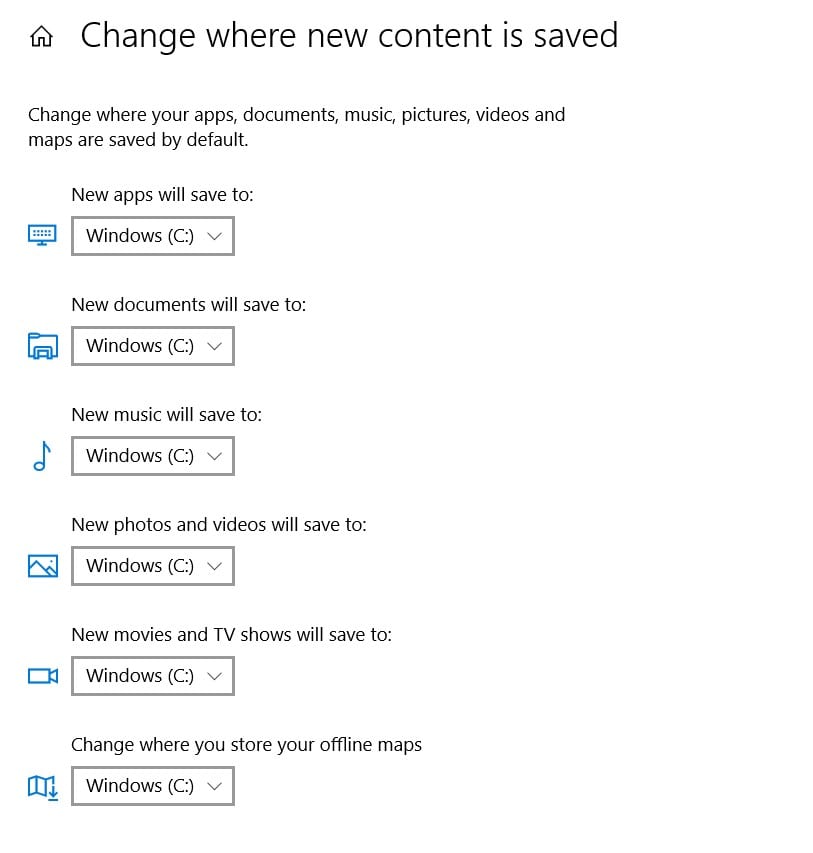
Changing Default Save Location
8. Disable Your PC’s Hibernation
If you use your PC at different intervals throughout the day, you might prefer the hibernation mode instead of shutting off your PC. This is because your PC saves your current progress into the storage and restores it every time you turn your PC back on in the hibernation state.
Hibernation is a good alternative for shutting down the PC and losing progress. However, the data stored through hibernation can take up loads of storage space. So, if you’re okay without hibernation and in dire need of some storage space, follow the instructions given below:
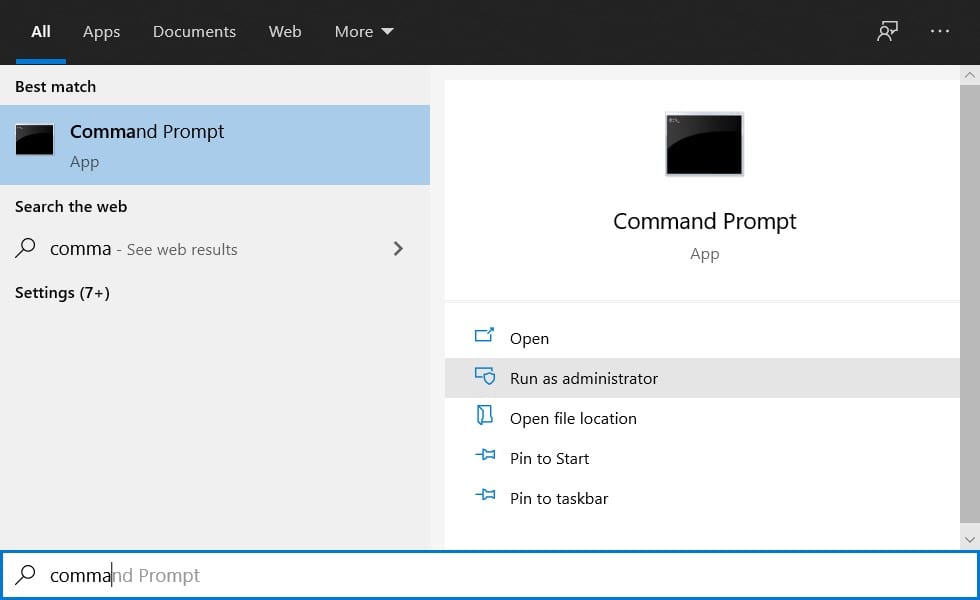
- Click on the start button and then type “Command Prompt.” Now click on “Run as Administrator.”
Run Command Prompt as Admin
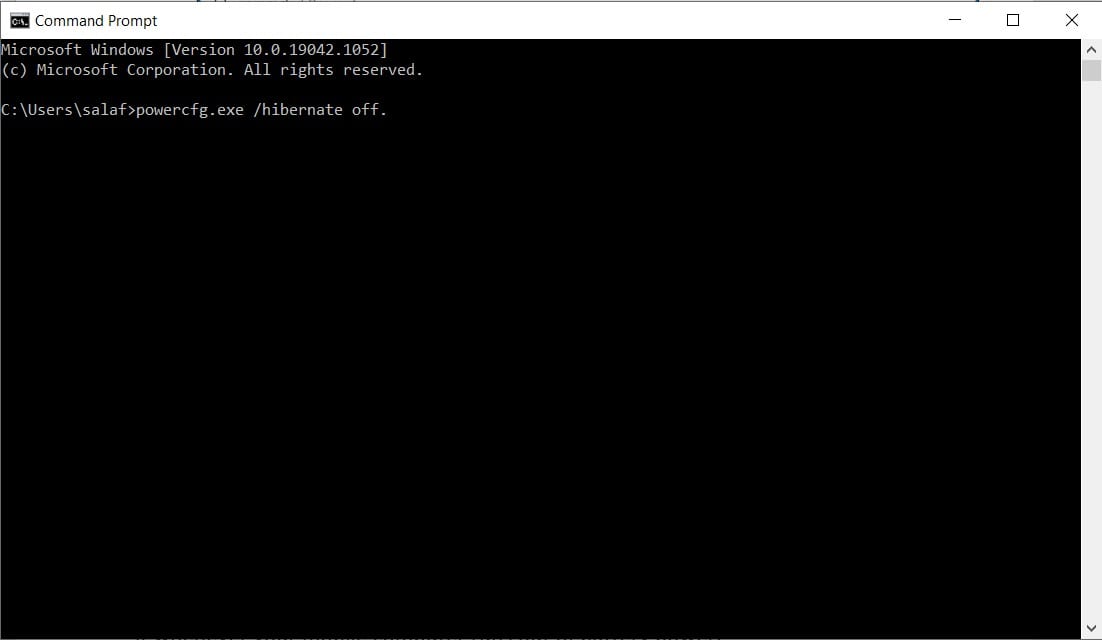
- Once the program launches, enter the command exe /hibernate off.
Typing Command
- Tap the “Enter” button from your keyboard to run the command.
That’s it! The hibernation feature has now been disabled on your PC. However, if you’re using a laptop, then it’s highly recommended only to consider this option as a last resort since the hibernation feature is responsible for saving your progress and restoring it whenever your mobile computer runs out of battery power.
Why is Storage Space so Important?
The demand for electronic storage space has increased in the last few decades. This is because storing data digitally is known to be way safer than storing it physically. With cybersecurity progressing every passing moment, storing data electronically is definitely the way to go.
Furthermore, no program comes without the need to occupy a certain amount of storage space. You can refer to cloud storage for help, you can buy external storage hardware, but you cannot deny that storage space is still an important factor that must be given importance.
Should You Buy More Storage Hardware?
Thankfully, storage hardware has become cheaper than ever. However, many users still struggle to increase their overall storage space by buying external drives. This is because the demand for storage varies from user to user. Moreover, if you can get your hands on small external drives ranging from 250-500 GBs, you can take off much load from your PC’s internal storage.
Buying more storage hardware would save you from storage problems, but it can still be heavy on your pocket if you’re tight on a budget. In that case, our tips would surely be of help in making more disk space in your Windows PC.
Conclusion
With the above-mentioned procedures, you can easily reclaim several GBs of disk space on your Windows PC. Bear in mind, though, that some of them are risky and should not be prioritized. Consider simpler methods first before you opt for risky procedures.