System Restore is a built-in operating system tool that serves to create specific checkpoints, allowing you to return to them whenever you want to fix a particular issue. Microsoft says that the System Restore feature takes a “snapshot” of critical Windows data, such as system configuration files, Windows Registry files, stored settings, and all of your data, such as apps, documents, etc., other data. The feature saves all of these components at a specific time and compiles them into one specialized element called Restore Point.
You are free to create multiple Restore Points, depending on your requirement. You wake up tomorrow to discover that some parts of your operating system aren’t working right, and the software has been infected with a virus. In this case, the most logical choice is to jump toward manifesting that Restore Point that you created to restore the optimal working of your Windows 10 PC. Now, if you had downloaded any files on the device from the time you created the Restore Point up until you’ve encountered this issue, you won’t be able to get them.
This is because you’ll be going back in time technically and reverting Windows 10 to an earlier state, particularly the one you created yourself. However, as far as the data loss is concerned, you won’t be losing any of your personal files. However, anything other than that might not be available on the other side.
Therefore, from all the chatter above, you can comprehend that the System Restore feature in Windows 10 is both a protective and a repair-centric feature. It’s protective because it readily creates Restore Points every day on the PC consistently, especially when noteworthy changes are introduced to the operating system. These include installing new software or modifications to any of the drivers of your Windows 10.
Now that you know what type of functionality the System Restore feature packing is, it is time to see how it works and how you can use it effectively.
Using System Restore on Windows 10
The following steps will illustrate the process in a detailed manner while also making it quick to follow.
1. In the first step, we need to get to the System Restore feature in Windows 10. The easiest way to do this is to type “Recovery” in the Windows 10 Search menu. Once done, an application should pop up on the screen. Click on it to get to the next step.
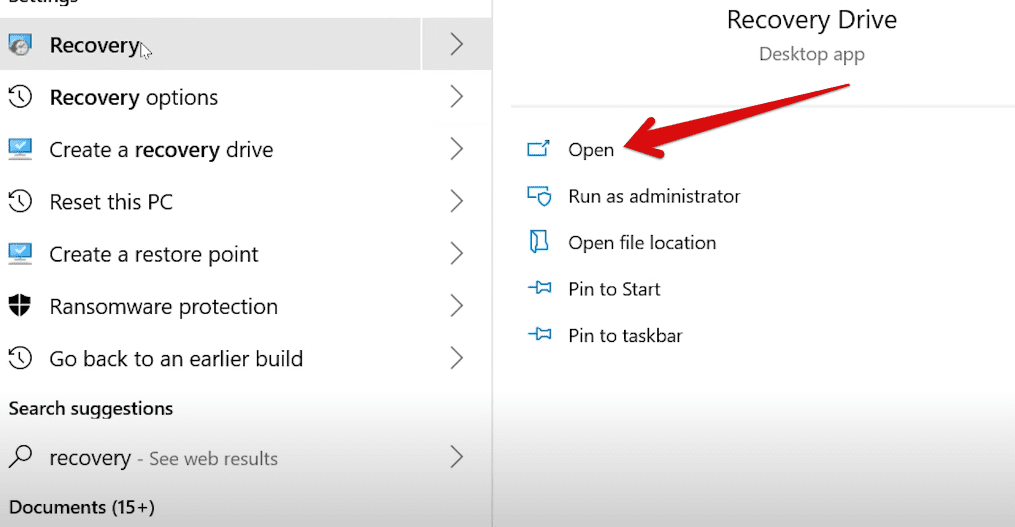
Opening the Recovery Drive
2. After opening the Recovery Drive, you will observe a window on the screen. This is where you can find multiple options related to the Recovery Drive Windows 10 feature. Out of the different features you’ll see on your end; there will be one called “Open System Restore.” You know where to click now. Get to the next step when you are done here.
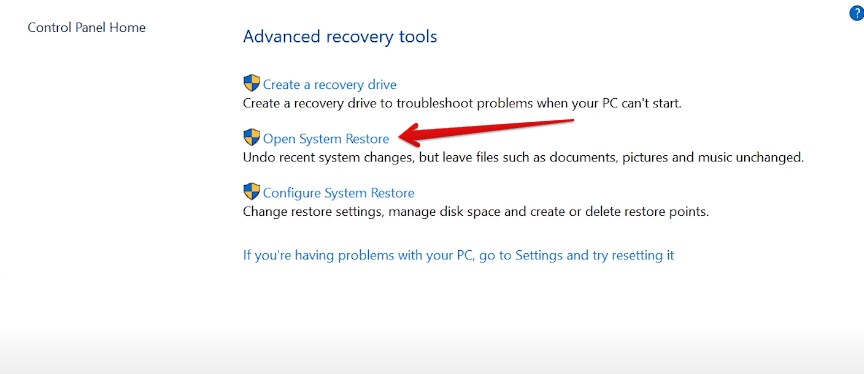
Clicking on “Open System Restore”
3. The next step is to select the Restore Point that you’d like your operating system to revert to. Now, there are two options that you can go about here. The first one is the “Recommended restore,” where the operating system picks out the best System Restore point with the help of several metrics. You won’t have much control in this regard, but if you want to go for just that, click on “Choose a different restore point,” as shown below, and click on “Next.” That should give you a clearer view of things.
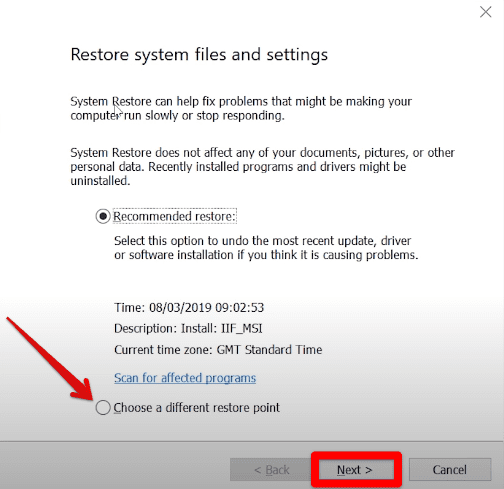
Choosing a different restore point
4. You will be shown another page that will comprise many restore points. However, there are two things worth taking into account here. The first is that the system will take a few moments to load all the previous restore points. The second thing is that you will have to click on “Show more restore points” for them to pop up. The key now is to assess what system restore point looks the best to you. After you’re done, click on “Next.” Ensure that you’ve tried out the “Scan for affected program” here for good results.
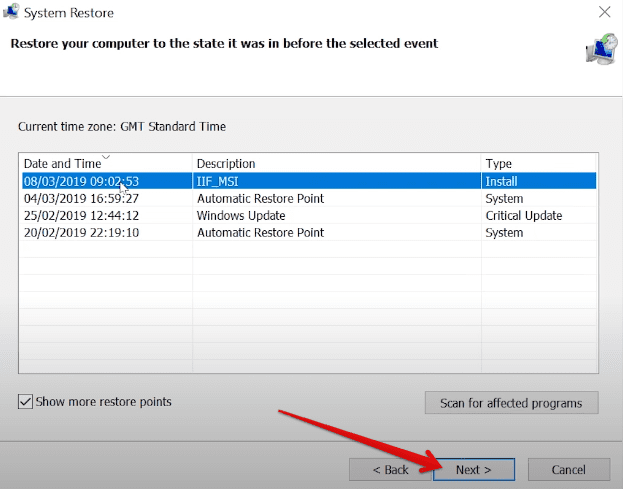
Selecting the restore point
5. In the fifth step, all you have to do is confirm your restore point, as the page you see on your screen will also be suggested by now. You will have to analyze the affected drive on your system and the restore point once again. Other than that, you will be told about the restart policy of Windows and how it’ll go live during the System Restore process. After reading through everything, click on “Next” to get ahead.
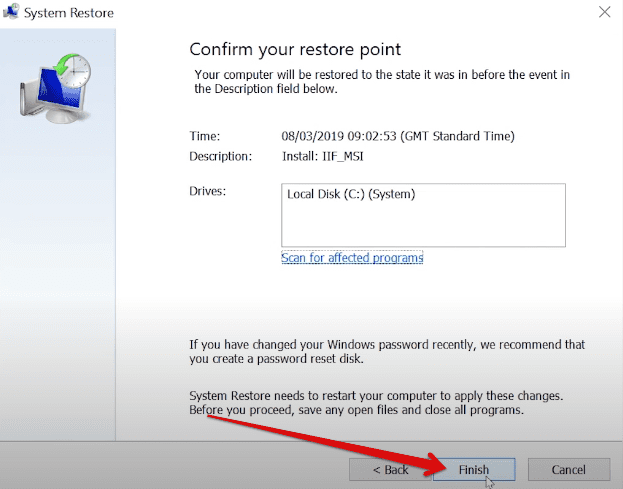
Confirming the selection
6. Good going so far. You now have to confirm whether you’d like to continue the System Restore operation or not. It’s a smart idea to be wary of all the possible consequences of what you’re about to do. For System Restore, though, it bears noticing that you won’t be able to undo the procedure until after it is completed. Click on “Yes” when you are ready to get to the next step.
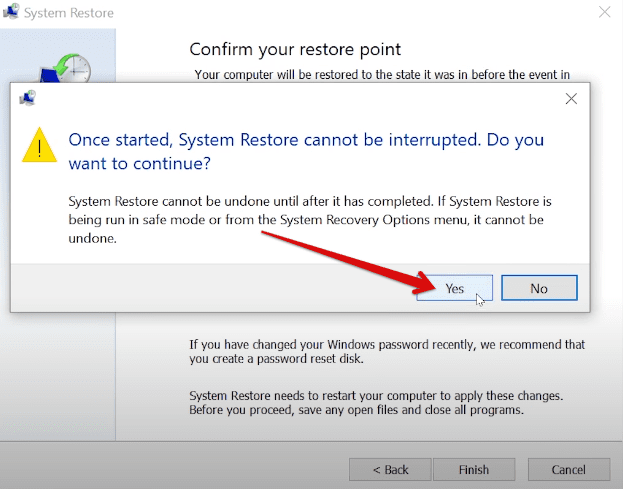
Continuing with the process
7. After clicking on “Yes,” the system will take some time to kick into motion and begin the System Restore operation. Therefore, you’ll see a blue screen with a loading icon in its middle, asking you to wait while your Windows files and settings are being restored or reverted to a previously stored state. Stay patient for a little more until your computer turns back on.
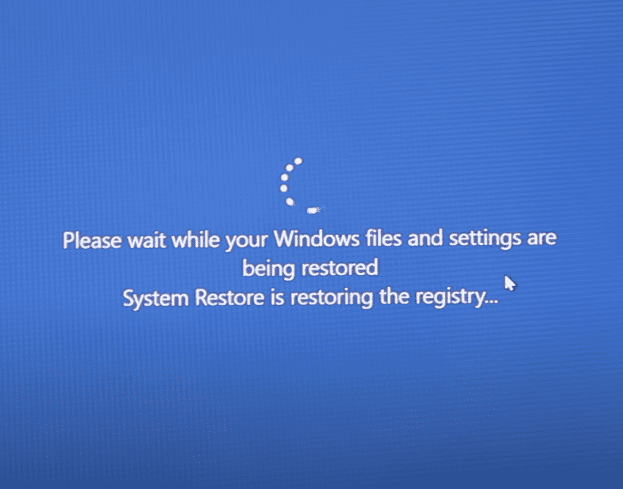
Process begun
8. You’ll see the following prompt on the screen. This will notify you that the System Restore process was a success, and you can easily use your PC now. In addition, the prompt will also affirm that your saved files haven’t been affected in any way, so you’re going well for the most part.
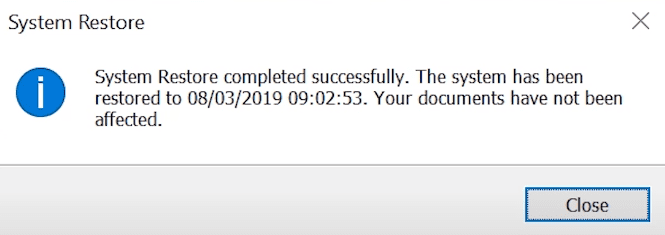
System Restore process finished
That’s about it for using System Restore on a PC. Hopefully, you should be able to fix the issue that was previously causing a problem on your end.
Before we conclude the article, you should also know that the System Restore feature in Windows 10 can also be utilized from the Windows Recovery screen. This specialized menu exists to resolve boot-up-related problems on a particular device. If you’ve run into a persistent problem that isn’t even letting your PC start, consider performing a System Restore right from the Windows Recovery screen. That helps bring the best results in most cases.
Conclusion
In this guide, you have learned everything about using System Restore on Windows 10. All initial confusion should be cleared up well now, given that we’ve covered most of the tool’s functionality. This robust operating system feature prevents vast data loss and reverts it to a previous point in time. Considering the unpredictability factor of the internet, one should be prepared for moments of disaster, and the System Restore functionality of Windows 10 is an excellent proponent of that, though.
Please let us know in the comments section if you found this guide helpful! We would love to read your feedback.
- Also, check out how to use Openshot Video Editor.
