Table of Contents
Having no sound on your pc or laptop can be frustrating. Sound issues can occur differently; your headphones might fail to connect, or your speakers might have no sound. If you are a victim of sound problems in Windows 10, you are at the right place. Follow this guide keenly to learn how to fix Windows 10 sound-related problems.
How to fix Windows 10 sound problems
Windows 10 might encounter sound problems due to various factors. This section will dive deep into learning the probable fixes for sound-related issues. The fixes provided below have been tested and affirmed. Therefore, don’t shy off from giving them a try:
1. Check the output device
If you have multiple audio devices connected or have recently connected to other audio equipment, your device may be outputting sound elsewhere. You mig¬ht also have a separate monitor and a pc, and the volume has been switched to the secondary display. If you hook up a laptop to a TV, it may be that the sound on your screen has been output to the TV. To ensure that this is in order, go to settings>system>sound. Choose the proper output device from the drop-down menu under ‘output.’ Ensure that you set the master volume to appropriate.
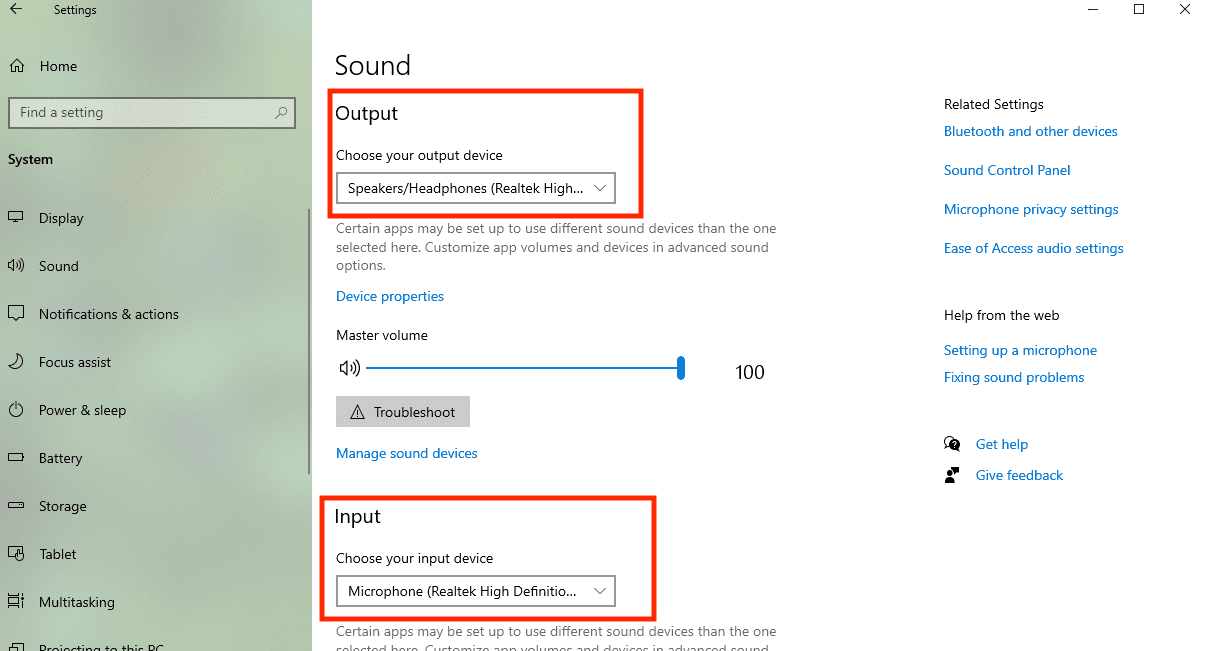
Choose proper output and input devices
2. Volume Preferences
Check on the volume sliders on your pc by going to settings>system>sound and scrolling down to see the volume preferences of your Windows 10 device.
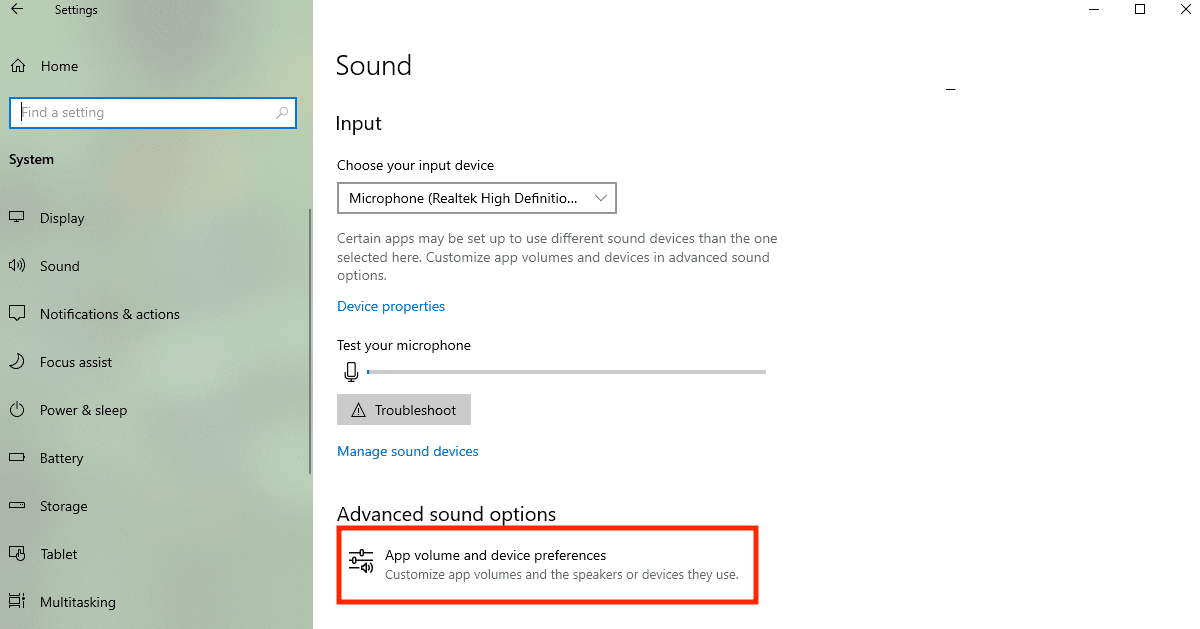
Volume preferences
Move to the taskbar and click on the speaker icon to get a basic overview of whether you have muted the speakers accidentally or your master volume is at an unacceptable level.
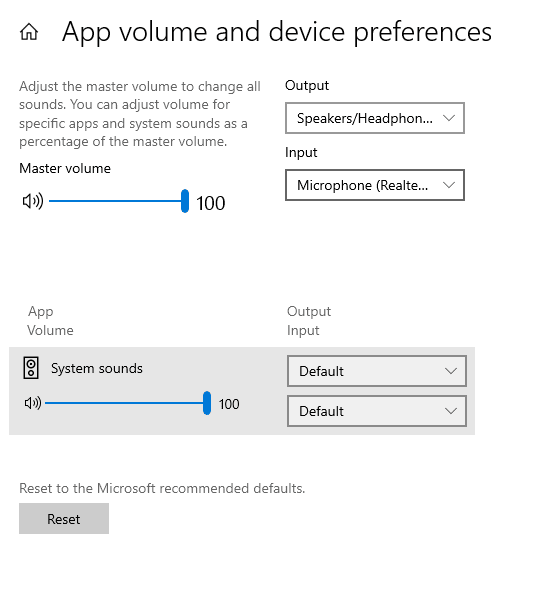
App and volume preferences
You can check to confirm if the audio output and input have been selected in the preferences section. Besides, ensure is the audio cable is loose or connected to the wrong jack.
Note: Do not forget to check the volume levels of your external speakers; because they could be a reason you are facing sound issues.
3. Check in-app audio settings
Tech experts regularly experience sound problems when using zoom and other video calling applications. These applications use audio settings, which override the inbuilt Windows settings. Hence, if you find that sound is playing from your laptop speakers yet it was supposed to be coming from your headphones, go to your in-app settings and choose the correct audio input or output. Therefore, if you encounter a challenge with your audio on your PC while using third-party applications, check if the correct audio output and input have been selected.
Note: If you connect to an audio device using HDMI or USB, you might need to set your PC to the default audio device. Remember that if you are using an external monitor that doesn’t have built-in speakers, ensure that you do not select your monitor as your default output device. If it is selected, you won’t have any audio. Here are the steps to follow when setting up your default output device:
Type control panel on the taskbar and select it from the results.
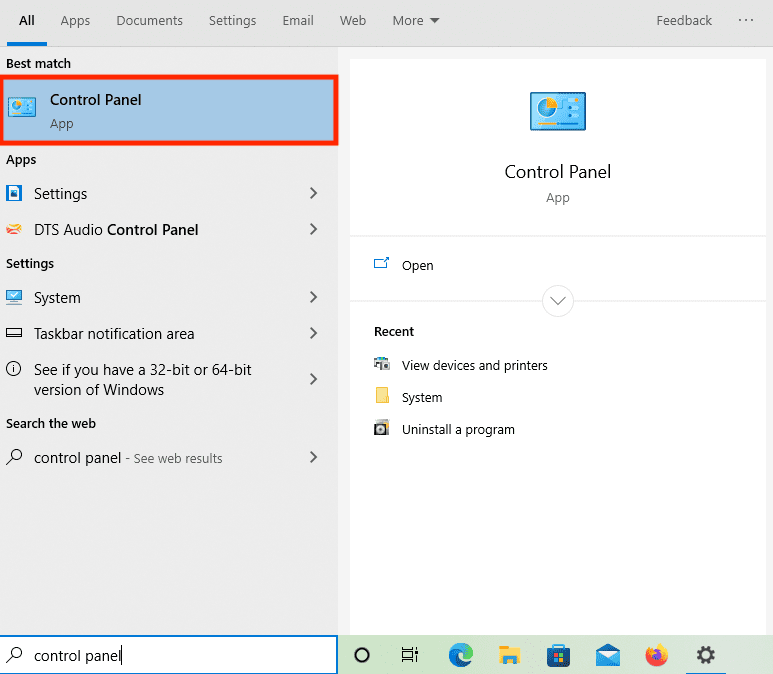
Control panel
Click on Hardware and sound from the control panel, then select sound.
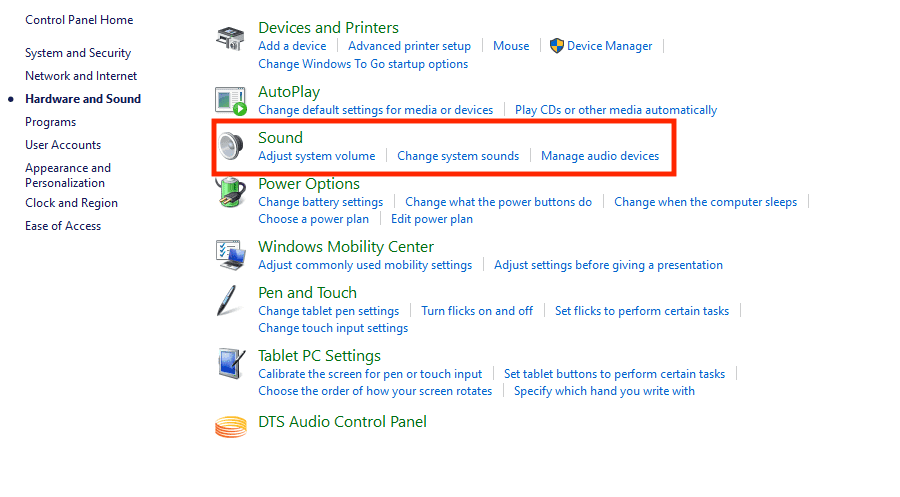
Sound
Right-click on the playback tab, select “Set as Default Device” from the listing for your audio device, and then choose OK.
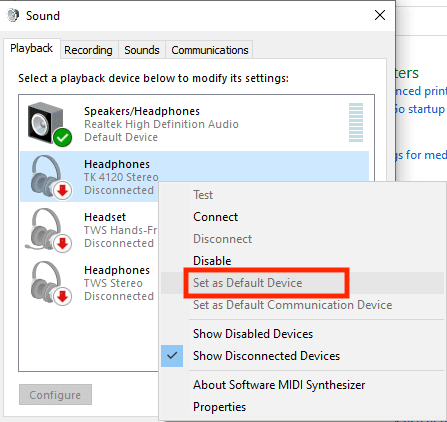
Set as default
Note: The above option only works with more than two active sound outputs. However, if you have one active sound output, the “Set as Default Device” will be grayed out, as shown in the illustration above.
4. Troubleshooting
Using an audio troubleshooter could be a better solution to fix the no sound problem on your Windows 10 PC. To use the sound troubleshooter, follow the steps below:
First, type ‘troubleshoot’ in the search box on the Start Menu.
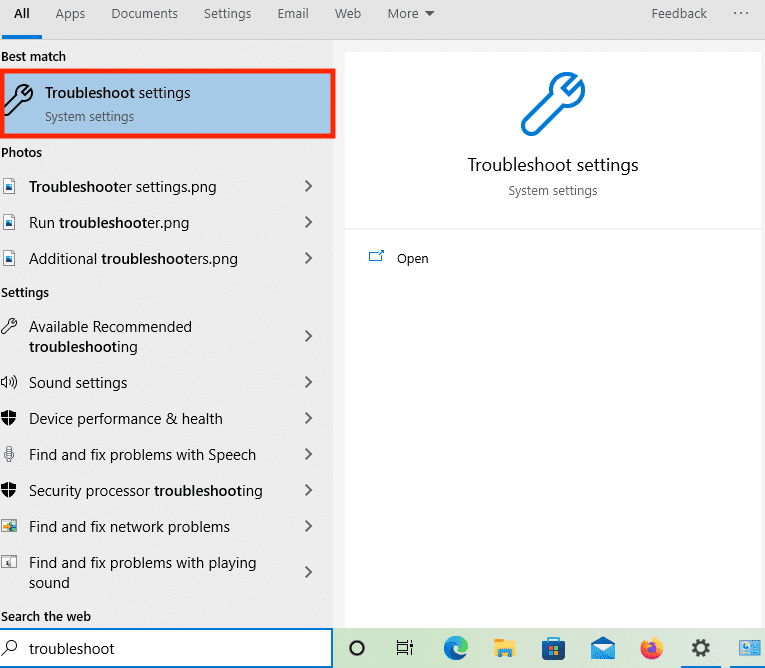
Troubleshoot
Click on ‘troubleshoot settings’ and look for a selection indicated “Additional troubleshooters.”
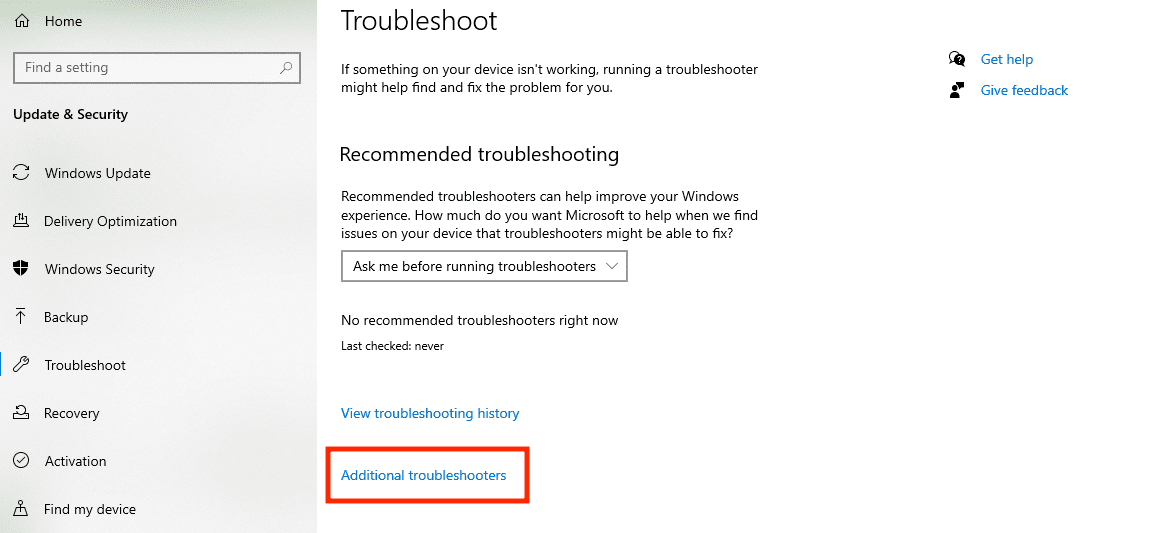
Additional troubleshooters
You will notice a ‘ playing Audio ‘ option under the “Get up and Running” section.
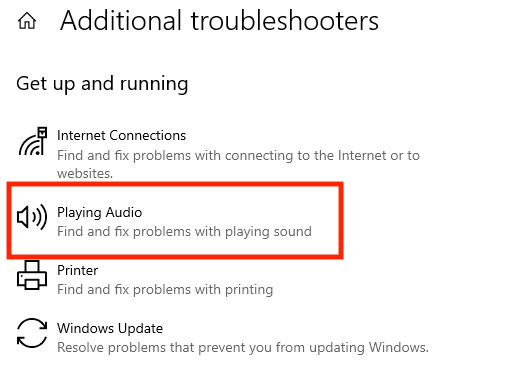
Playing audio
Click on it and then press ‘Run the troubleshooter.’

Run the troubleshooter
The troubleshooter will detect any sound problems and fix them automatically.
5. Update and upgrade drive.
Another primary reason for sound problems maybe your sound drivers. You should update sound card drivers simply because they easily cause audio issues without your knowledge, as they help Windows 10 communicate with any audio hardware. Therefore, installing updates will help them run more efficiently. Luckily enough, they are readily available, as shown below.
Go to the start menu, search “Device Manager,” and select it from a list of devices.
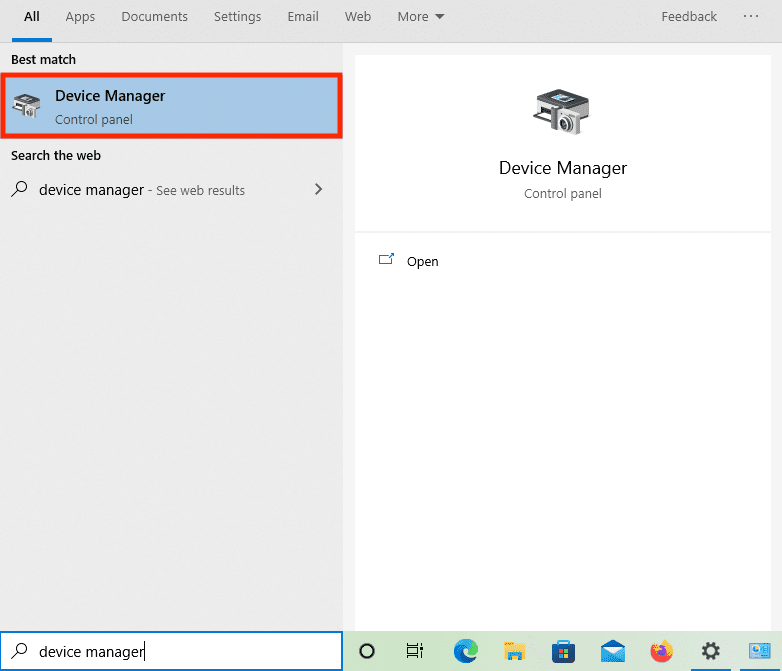
Device manager
Various folders will appear; look for “sound, game, video controllers” to expand it.
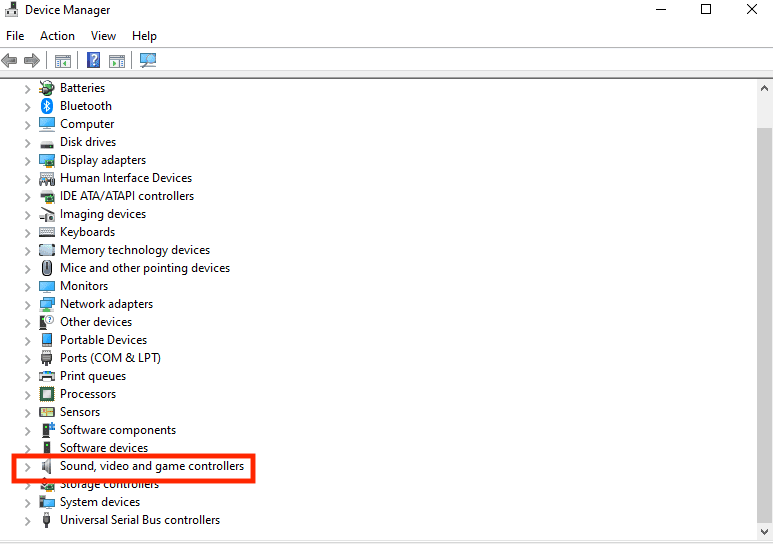
Sound game and video controllers
Double click to open; it will display a sound card.
Go to the “Driver” tab by double-clicking on the relevant icon.
Click on the option that says “update driver.” Windows should be able to update your PC with the latest sound drivers.
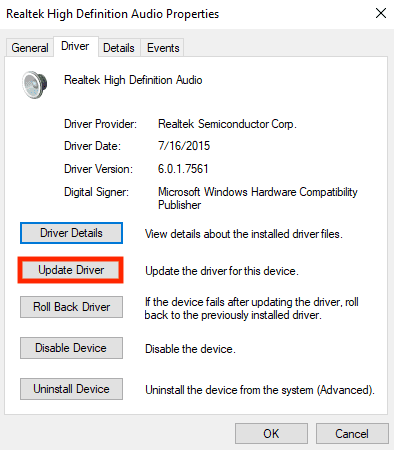
Update Driver
If these steps fail to solve your audio issue, go back to the website of your device manufacturers and install the most recent sound/audio drivers suitable for your device.
Alternatively, you can update the drive using a generic audio drive with Windows. For changes to take effect, restart your device. You can uninstall your device from the same menu because it acts as a hard reset for the driver. Windows 10 will prompt you to reinstall when you restart your device. If the updates are not working, you can switch to Microsoft’s generic drivers by clicking on “Update Driver” on the same menu and choosing “Browse my computer for driver software.” Next, choose “let me pick from a list of device drivers on my computer, find “High-Definition Audio Device.” Select this generic driver, and install it to see if the sound will work correctly.
6. Update to the latest version of Windows.
It’s worth ensuring that your PC runs on the latest software version. You can successfully do this by; heading to settings, clicking update and security, and choosing “Check for updates.” If you find an update, go ahead and install it.
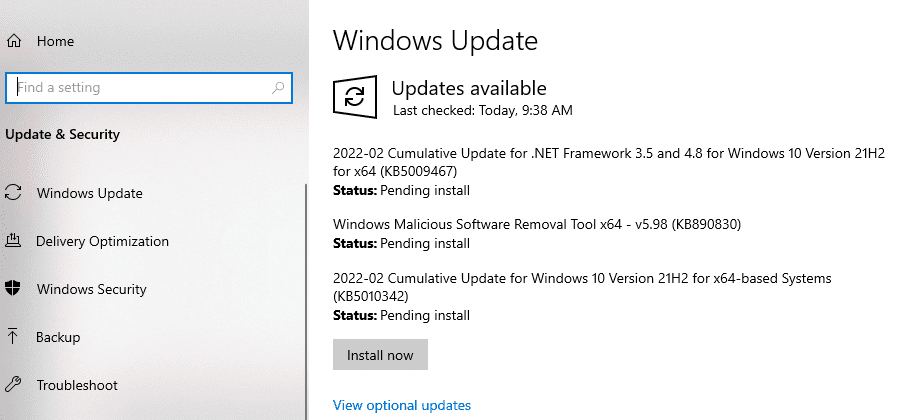
Windows Updates
7. Rollback or reinstall audio drivers
Are you having issues after installing Windows Updates? Worry not follow the guides provided herein to fix it:
Note: if your audio was working before running the Windows Update, but now it isn’t working, try to roll back your audio driver.
How to roll back your audio driver
Go to the taskbar, and in the search box, type “device manager” and select it from the results.

Device manager
Select the arrow next to “video, sound, and game controllers” to expand it.

Sound game and video controllers
Right-click on your audio device or sound card listing, then select “properties.”
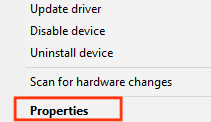
Properties
Click the “Driver tab,” then select “Roll Back Driver.”
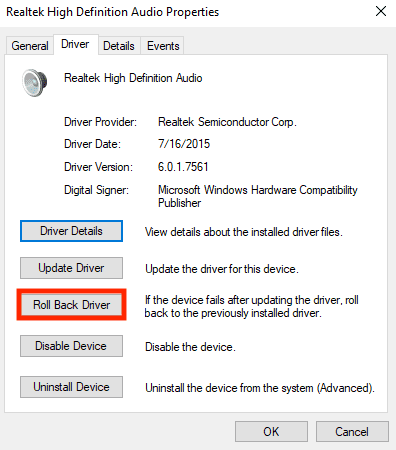
Rollback driver
Read through the instructions and select “Yes” to roll back your audio driver.
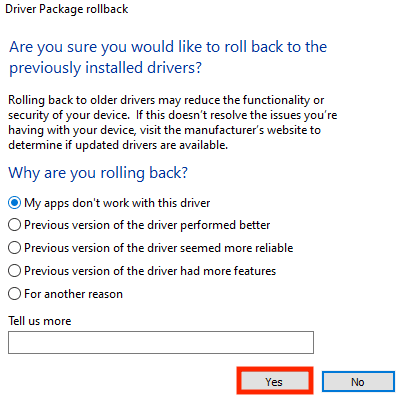
Select yes
Note: If rolling back your audio driver didn’t work or wasn’t just an option, you can try to restore your PC from a stable system restore point.
It is always important to create a restore point. This helps us revert to the stable point where the PC worked well. If you encounter sound problems and the methods provided are not helpful, try restoring your PC to a previous restore point.
8. Turn off the audio enhancements
You should know that having audio enhancements turned on can bring audio complications. Hence, disabling them may resolve your problem. To learn how to turn off the audio enhancements, follow this guide article:
Go to the search box on the “Start menu” and type the control panel, then select it.

Control panel
You will see sound and Hardware in the control panel; click on it, then select sound.

Sound
Right-click on the default device from the playback and select properties.
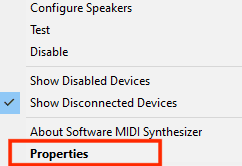
Sound Properties
The enhancement tab will appear; select disable all sound effects or disable all enhancements depending on the option you see, click OK, and try to play the audio device.
If that doesn’t work, on the same menu of the playback tab, select another default device if you have, follow the prompts as already highlighted to impose the change.
9. Restart Audio Services
If turning off your audio enhancements does not help you, you can restart the audio services as shown below:
Type services on the start menu and select it.
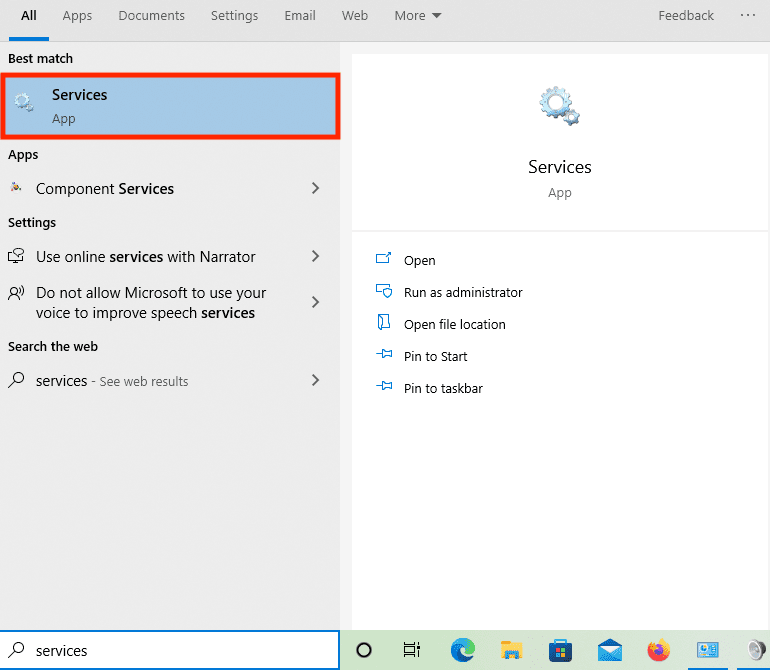
Open Services
Right-click on the following services: Windows Audio, Windows Audio Endpoint Builder,
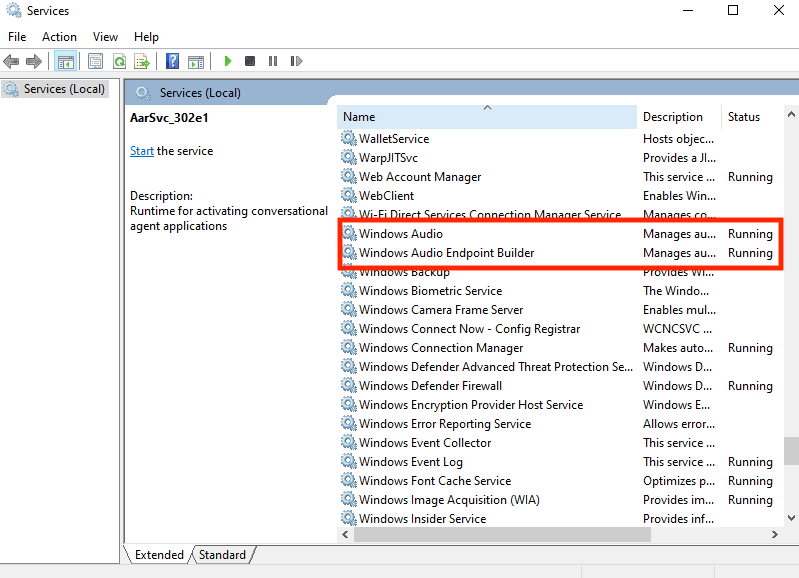
Windows end-point builder
Report procedure call (RPC), and restart them.
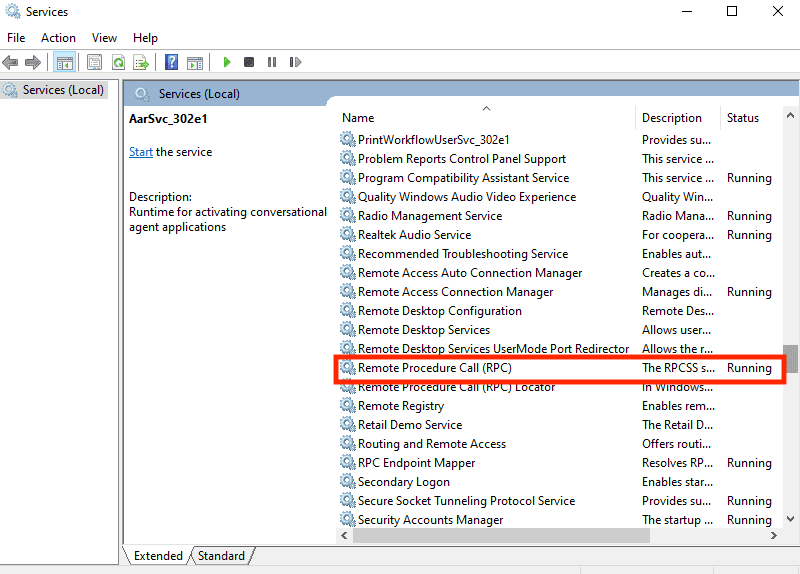
RPC
Restart your PC to see if the problem still exists. You can also try different audio formats by following the steps given below in this article. First, go to your taskbar, and in the search box, type the control panel and select it.
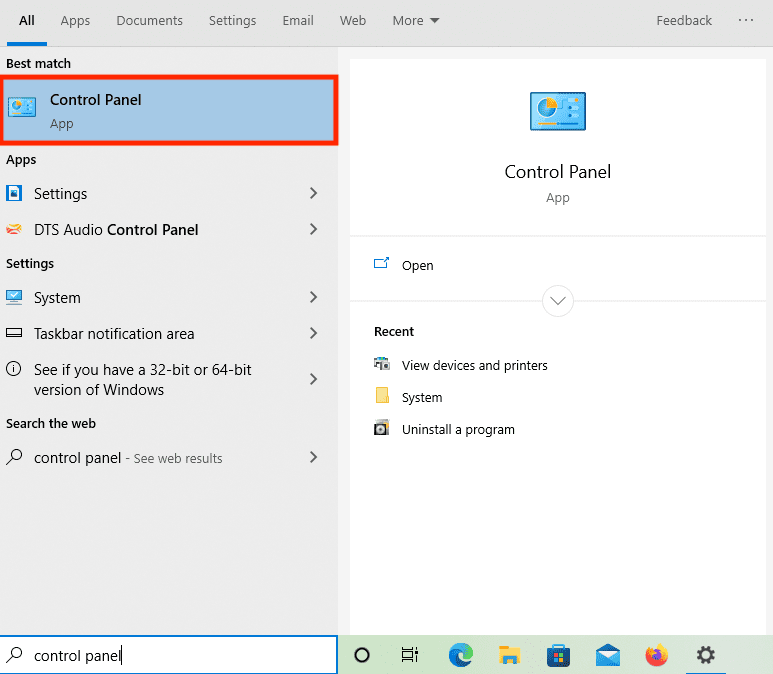
Control panel
Select Hardware and sound from the control panel and click on sound.
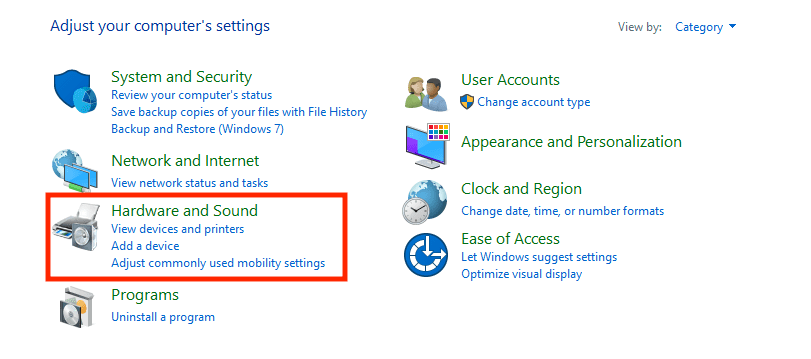
Hardware and Sound
Right-click the default device on the playback tab, and select its properties.
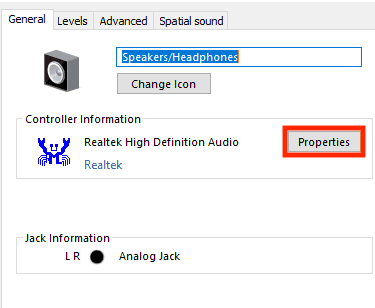
Default device properties
Under the properties window, select change the setting and select OK.
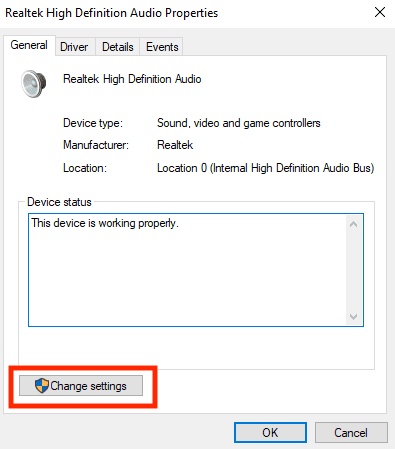
Change settings
If that doesn’t work, change the output to a different device.
Are you having issues with your microphone?
Ensure that your privacy settings are configured well if you encounter the above problem. Select start menu > go to settings > see a privacy button, and choose Microphone to do this. Select change under “Allow access to the microphone on this device” and ensure that the toggle is set to on. Do not forget that you can scroll down to choose which Microsoft store apps can access your Microphone and turn on the toggle next to that app, just in case you have issues with a specific app.
That’s all. We hope the methods provided in this article guide will help you fix your Windows 10 sound-related problems.
Conclusion
We hope that these tips will help you fix sound issues you may encounter, especially when audio is not working on your laptop or PC. Please leave a remark below and let us know which method works best for you.
