Table of Contents
Windows 11 is the next operating system to keep us Microsoft enthusiasts hooked for the next decade. It’s deemed the “future” of Windows, and plenty of reasons are available to back that up. However, with all this great functionality comes a fair bit of technical involvement. If you’re a power Windows user, you should know how to delete Windows log files in Windows 11.
This article will cover everything about erasing all temporarily stored Windows log files from your operating system. The process is far more complicated, but not unless you’re stepping in the correct direction right from the get-go. We’ll explain the information in simple-to-understand terms so you can replicate the forthcoming guidelines painlessly.
Let’s get started without wasting any further time.
Clearing Windows Logs on Windows 11
Windows Logs are a repository and a safe storage space for all the logs saved in the operating system for good measure. Now, the thing is, not all log files are worth keeping. Windows 10 and Windows 11 are extensive programs that process a lot of features and files each day. They tend to store information related to error codes in the “Windows Logs” section of your device just for safekeeping, but it turns out that this might not be needed at all.
That is why it’s pretty preferred to clear out Windows log files consistently and keep your PC running smoothly. For this purpose, we’ve curated two unique sections to help you accomplish the task at hand. Both sections are different ways of clearing out log files on the device, so you’re free to follow any of them without breaking a sweat. Let’s see which ones they are in the subtitles ahead.
Option #1. Using the Event Viewer system utility to clear log files in Windows 11
Windows 11 is rich with applications, and one specific system utility will help us delete unwanted Windows log files clearly and concisely. This app is called Event Viewer, and its primary purpose revolves around the storage of the various logs present on the operating system, including the aforementioned errors, system messages, and other warning prompts that you might get from time to time.
It’s a helpful application that helps users access Windows log files locally or remotely. At its core, the utility is purely administrative, meaning you must use it with admin privileges for the best results. This is because you must access this crucial information about your Windows 11 PC and have some semblance of authenticity.
Follow the steps to learn how to use the Event Viewer app and effortlessly delete unnecessary log files.
1. The first step is to use the Windows Search bar to look for this system utility in particular. Type in “Event Viewer” in the designated area to make the utility appear on the screen. Click on it when it does to get to the next step.
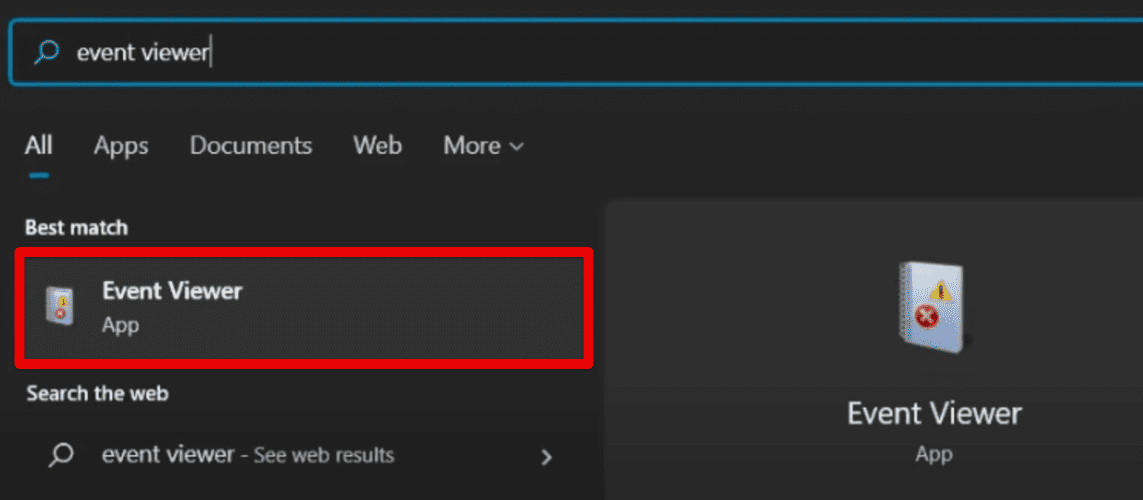
Launching the Event Viewer app on Windows 11
2. After clicking on the “Event Viewer” app, a new window will launch on the screen, providing you access to all the logs stored on the operating system. Here, your first task will be to click on “Windows Logs.” Doing so will take you to the next step. Follow the screenshot below for a visual explanation of this process.
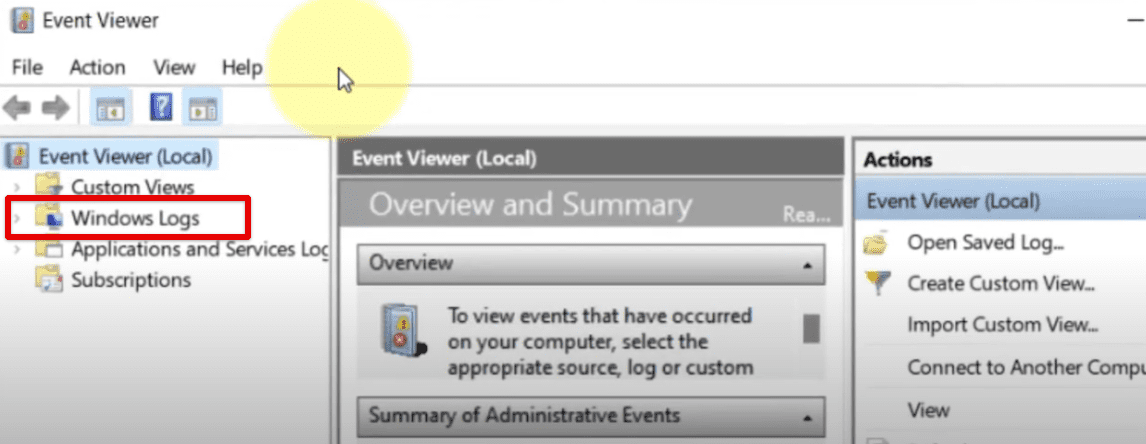
Clicking on the “Windows Logs” section
3. After clicking on the “Windows Logs” area, multiple types of files will appear from the drop-down menu of that section. These files will be called:
- Application
- Security
- Setup
- System
- ForwardedEvents
These are the Windows log files that are stored on your PC. Most of them aren’t doing anything useful for the device’s proper functioning. Instead, they’re just taking up unnecessary space and comprising purely unwanted data that we no longer need. It’s worth deleting all the file types you see here to properly get Windows log files out of your Windows 11 system.
Start by double-clicking on the “Application” file type and then clicking the “Clear Log” button. Doing this successfully will delete the log file in question for you.
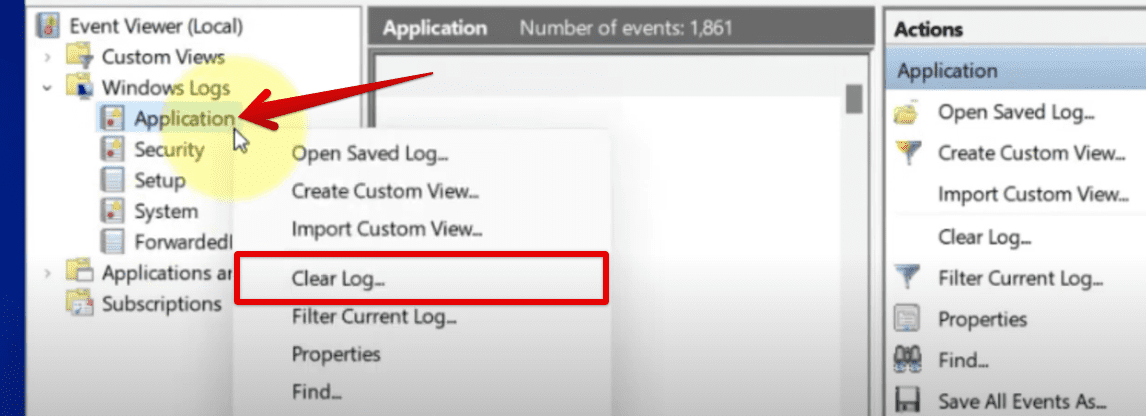
Clearing the “Application” log file on Windows 11
4. To continue, repeat the process with the remaining log files on your end. If you followed the previous step as instructed, you should now be left with “Security,” “Setup,” “System,” and “ForwardedEvents.” The methodology that you will need to implement will stay just the same. Double-click on the log file type and select “Clear Log.” Do this with each entry, and you’ll soon complete the topic.
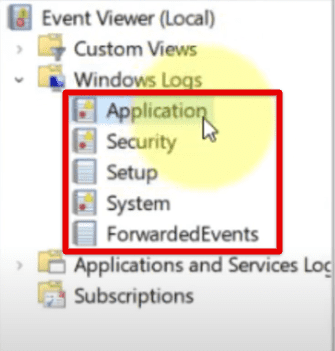
Clearing all the remaining log files on Windows 11
After clearing all the log files, shut down the application window, and you’ll be done! This was a plain and easy way of removing all the useless logs stored on the device. However, if you’re looking for more flexibility, we have another potential solution that can allow you to work things out. Let’s check that out below.
Option #2. Using the Command Prompt to delete Windows log files
It turns out that the Command Prompt, the exceptionally resourceful utility, can also be employed to clear out unnecessary log files on your Windows 11 PC.
There’s a simple command that will help us achieve this quickly, and nothing more will be required to enter. Users who prefer this hefty system utility will choose it over the first method of deleting log files.
All you need to do is follow the steps listed ahead, and you’ll be done in a moment.
1. The first step is to launch the Command Prompt on your Windows PC. Ensure you fire it up as an administrator for an uninterrupted networking experience.
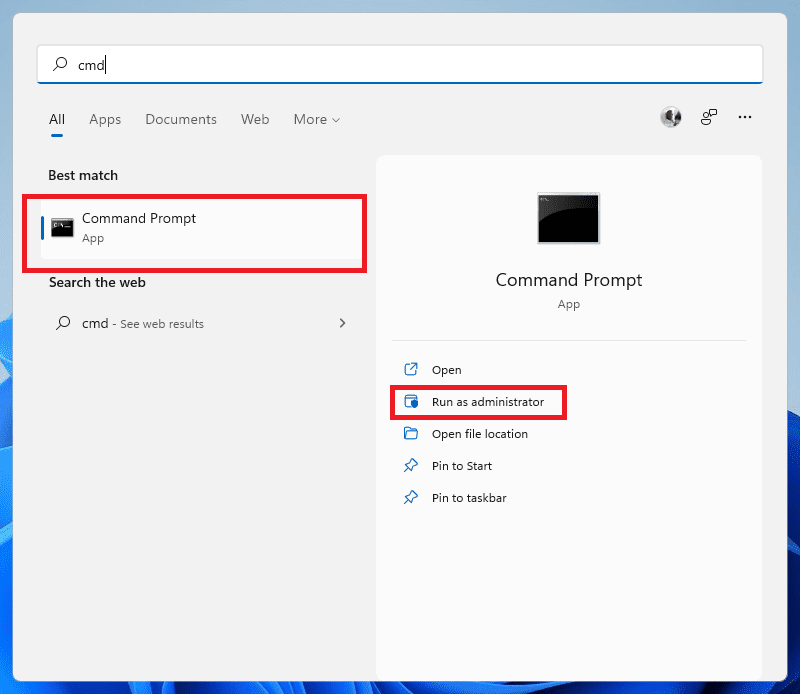
Command Prompt on Windows 11
2. Once done, type in the following command and follow it up by pressing the “Enter” key to get to the next step. This will make a whole host of logs appear within the Command Prompt interface. Doing so must clear these error-related logs out from the Windows PC.
wevtutil el

Entering the relevant command in Windows 11
3. After entering the “wevtutil el” command on your Windows PC, you’ll observe many log files surfacing and loading within the Command Prompt interface. This system utility does a better job of providing a comprehensive list of Windows logs, so you can see it being more feature-rich. Manual work is entailed by the step we have just completed. To clear out any log file on your Windows PC, you must use the following command.
wevtutil cl [name of the log you want to clear]
For instance, if we want to clear the “Security” log, we’ll type in the following and press the “Enter” key. In a moment, the command-line interface of the system utility will return with our username, affirming that the particular log file was duly erased from your operating system.
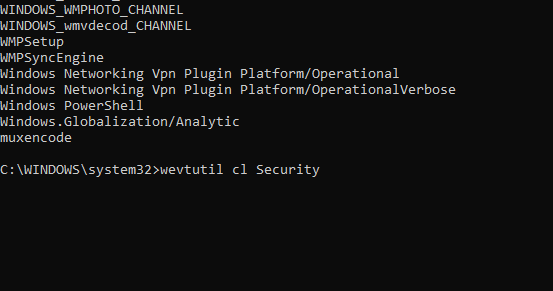
Clearing the “Security” log from the Command Prompt
Repeat the process until you’re satisfied. Keep looking back and forth between the different log files you have stored on your Windows 11 PC and clear them out accordingly with the two other commands we’ve outlined above.
One of the commands is for viewing or accessing these Windows logs, while the other is mainly for deleting them. Make sure you don’t use any brackets to write the name of the log alongside “wevtutil cl.” We just put that there to illustrate the whole command.
We hope that you’ve found this guide useful for your cause. It is now time to conclude the article.
Conclusion
Windows 11 is a reasonably technical operating system with a fair amount of advanced mechanics involved. That is why you shouldn’t just purchase and forget it. A lot goes into the maintenance side of things, so check it back and forth occasionally and maintain the presence of Windows log files in Windows 11.
We’ve outlined two different methods you can use to clear log files and restore the pristine internal condition of your Windows laptop. Clearing out unwanted logs can lead to a performance boost in some cases, along with multiple other benefits. We recommend following each step as instructed to do away with the process as quickly as possible.
Do let us know in the comments section if you could clear your Windows logs appropriately. We would love to read your feedback!
