Table of Contents
Microsoft Edge is a cross-platform browser developed by Microsoft. Its first release was in 2015 on Windows 10 PCs. The Android and iOS versions were later released in 2017. Despite being Microsoft’s default browser, some users still fancy other browsers, thus the need of this article to guide you on how to change the default browser in Windows 11.
There are various web browsers such as Google Chrome, Opera, Mozilla Firefox, Chromium, and Chrome Canary, among many others.
Downloading and installing Google Chrome
This is one of the commonly used browsers globally. Being the most used and loved browser, most users tend to use it more than any other browser in the market. To make Google Chrome the default browser in your Windows 11 operating system, we shall first download and install it.
Follow the steps mentioned below to download and install Google Chrome in your Windows 11 operating system.
Step 1) Navigate to the taskbar and select the “Start” menu.
Step 2) Under the pinned applications, locate and click on Microsoft Edge to execute it.
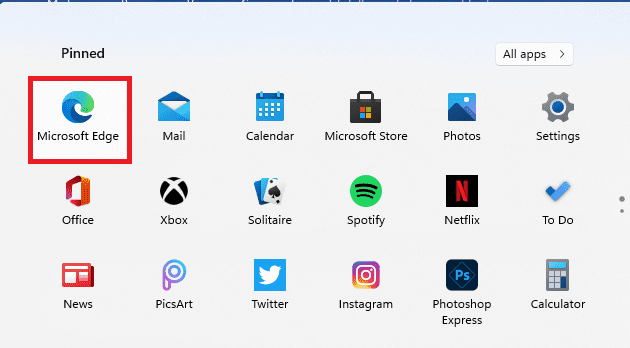
Microsoft Edge
Step 3) Go to this link and click on “Download Chrome.”
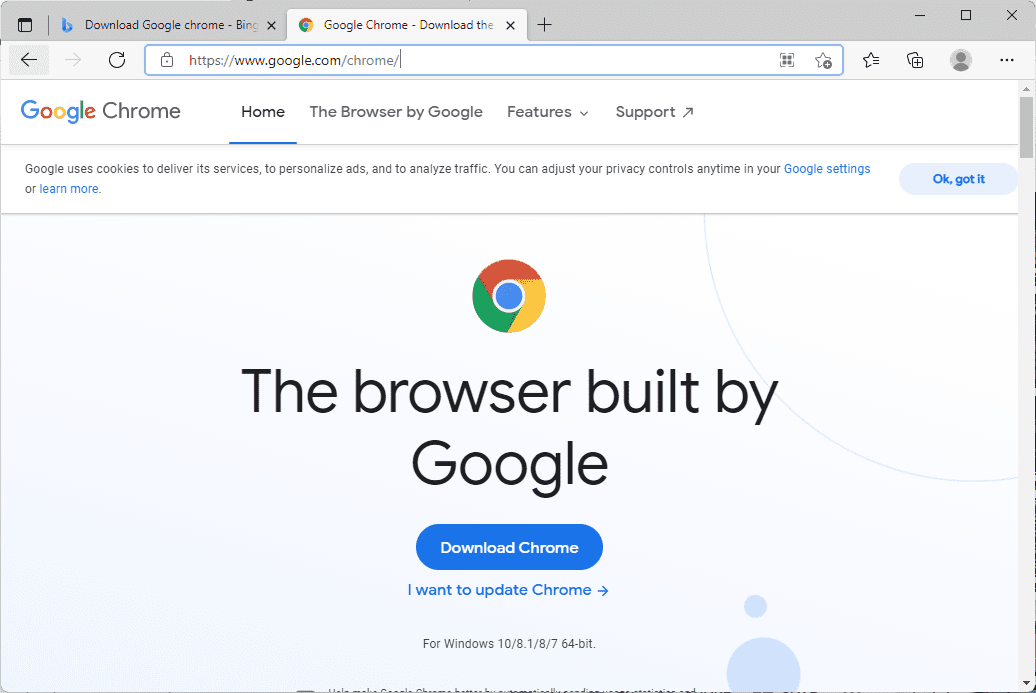
Download Chrome
Step 4) A small installer file of less than 2MB will be downloaded. Please navigate to the “Downloads” folder and double-click on the downloaded installer file to run it.
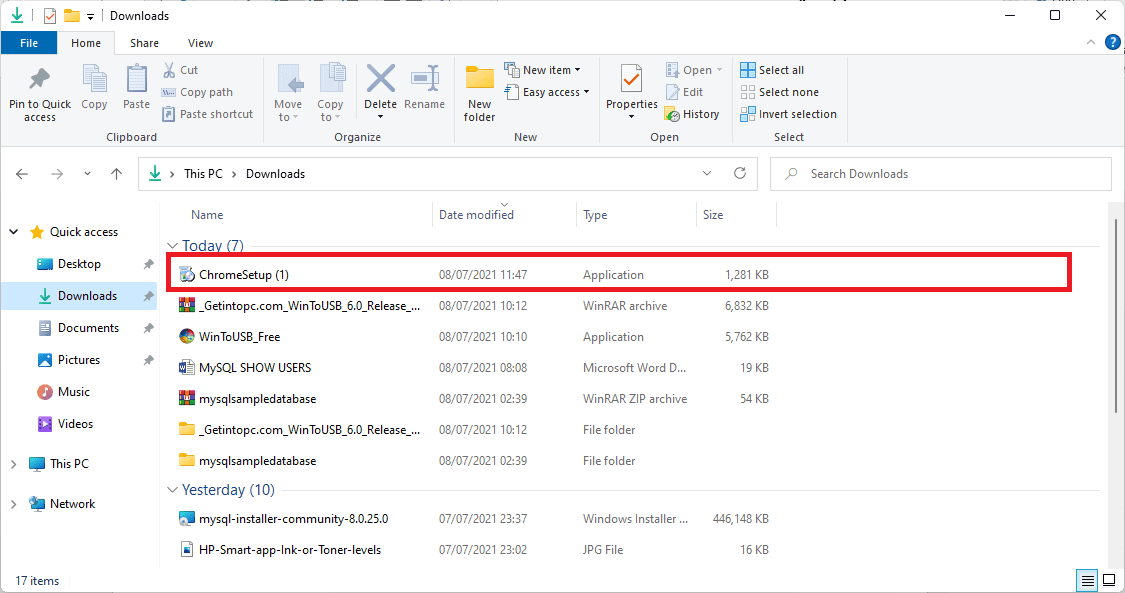
Chrome installer file
Step 5) Be patient while the installer completes the installation process. (It will download and install Google Chrome into your Windows 11 operating system.)
Once the installation has been completed, Google Chrome will launch. You can set up your account by inputting your email and password, or you can skip the process and start using Google Chrome.
Setting Google Chrome as the default browser in Windows 11
Once Google Chrome has been successfully installed into your Windows 11 operating system, we shall then set it as our default browser. To do so, check out the procedures provided below:
Step 1) Open the Start menu from your taskbar.
Step 2) Click on “All Apps” on the top right-hand side of the start menu.
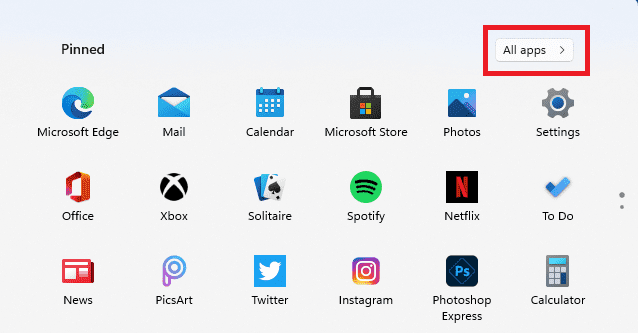
All Apps button
Step 3) Scroll down and locate the “Settings” app. Click on it to launch it.
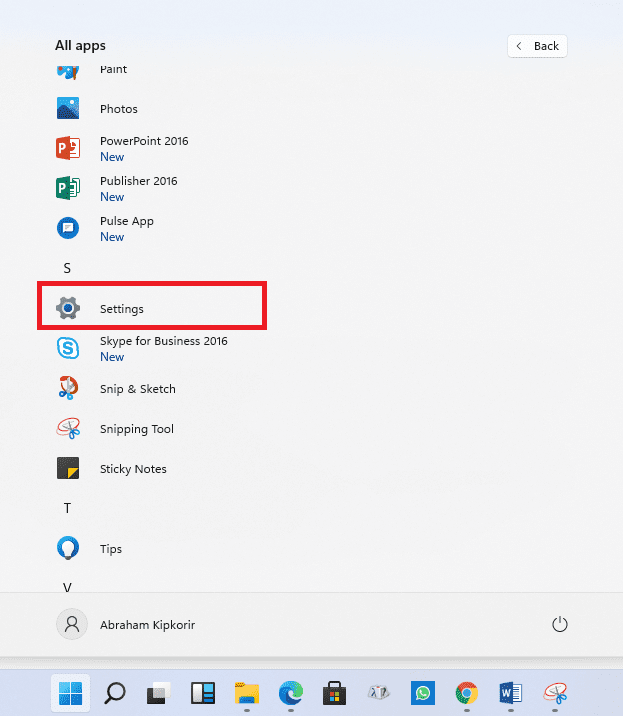
Settings
Step 4) Under the “Settings,” scroll down and open “Apps.”
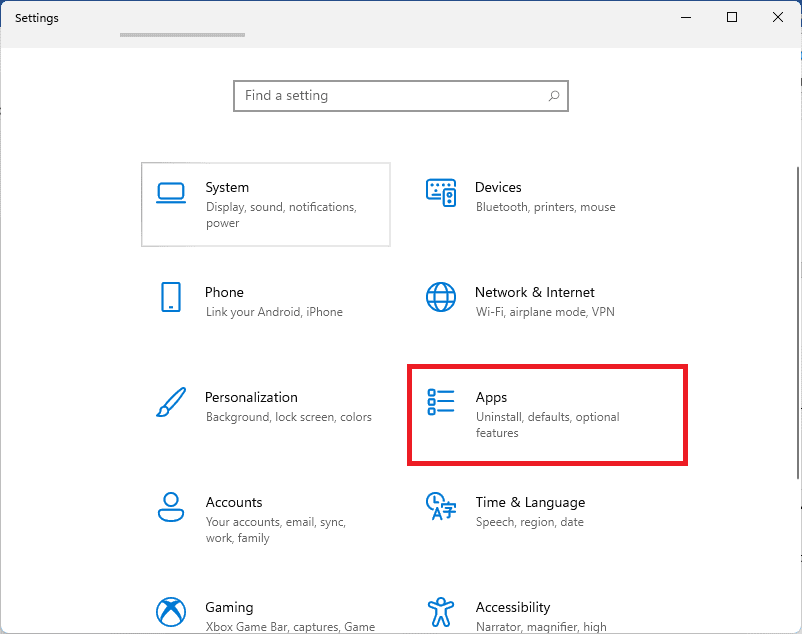
Apps
Step 5) On the left panel, select the second option, “Default apps.”
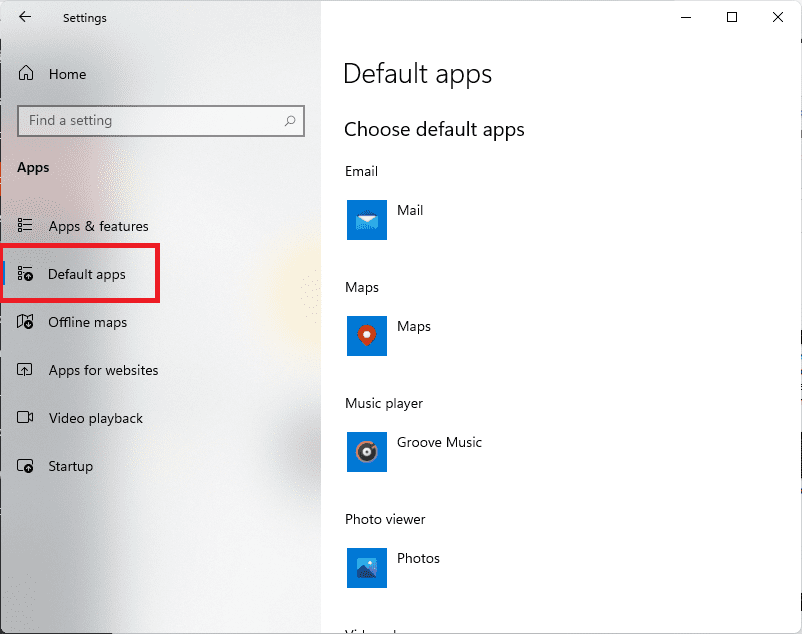
Default apps
A list of all the default applications appears once you click on “Default apps.” Here you can select the application you want and set it as the default.
Step 6) Next, scroll down to “Web browser.” You will find out that “Microsoft Edge” is the default browser (All applications listed in the Default apps section are default applications)
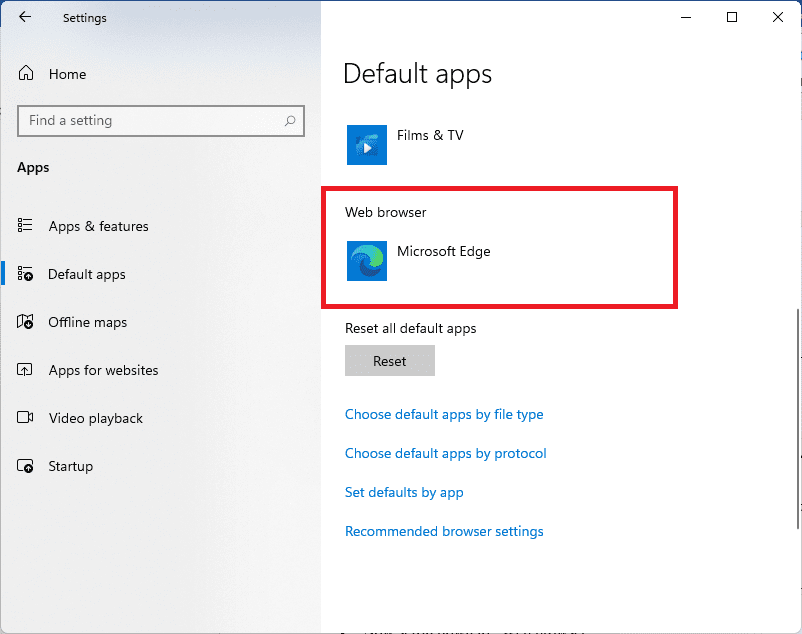
Web Browser
Step 8) To change it, click on “Microsoft Edge.” it will open a drop-down menu containing all installed web browsers.
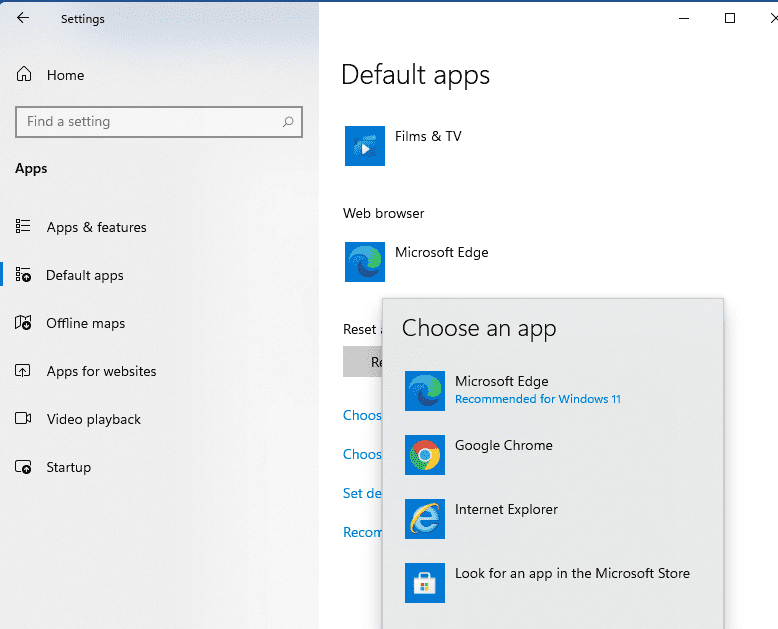
Installed browsers
Step 9) Now select Google Chrome from the drop-down list.
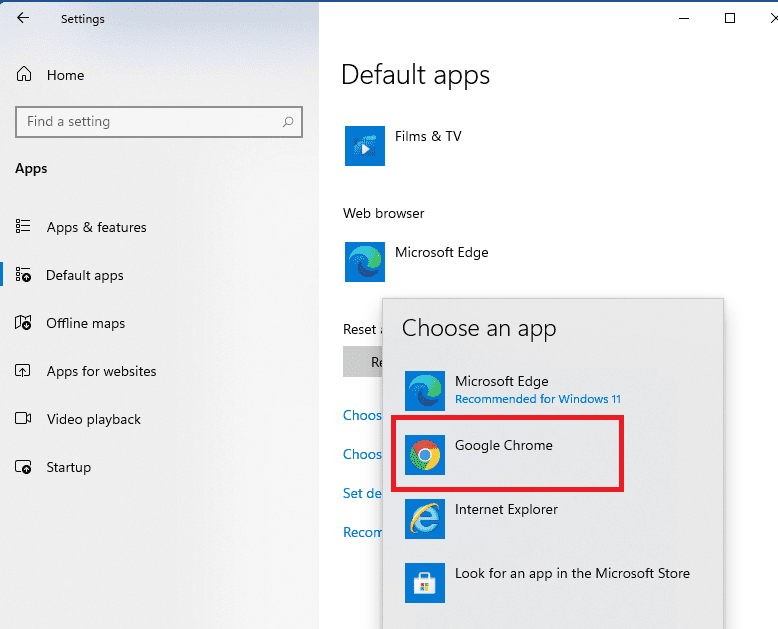
Installed browsers
That’s all. Google Chrome is now your default browser.
Note: in some instances, you might be required to confirm if you want to change from the default recommended browser “Microsoft Edge” to your preferred browser. Just click “Switch now” if a security prompt pops up asking you if you want to switch the default browser.
Downloading and installing the Mozilla Firefox browser
Since Windows 11 only comes with Microsoft Edge and Internet Explorer, as mentioned earlier, we shall first download and install Mozilla Firefox into our Windows 11 operating system. To do so, follow the guidelines highlighted below:
Step 1) Go to Mozilla’s download page.
Step 2) Now click on “Download Firefox” from the top right-hand side of the page.
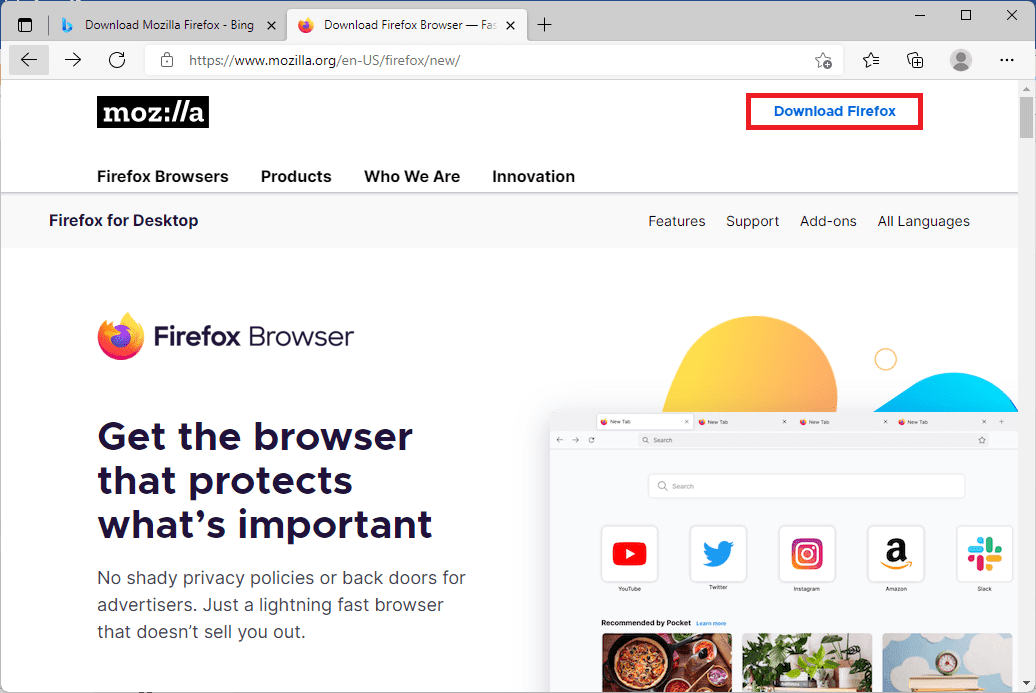
Click Download Firefox
Step 3) A small installer file will be downloaded. Navigate to the “Downloads” folder, locate the downloaded installer file, and double-click to run it.
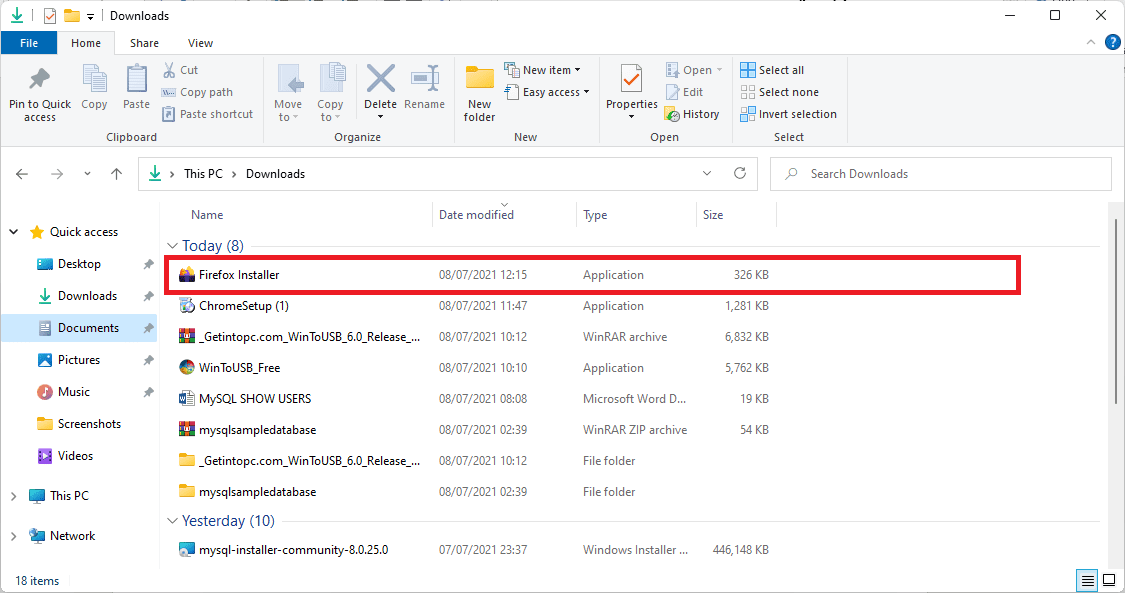
Firefox installer
Step 4) Click Yes when a security prompt pops up and relax while installing the Mozilla Firefox browser into our Windows 11 operating system.
Setting Mozilla Firefox as the default browser in Windows 11
Now that the Mozilla Firefox browser has been successfully downloaded and installed into your Windows 11 operating system, let us now set it as the default browser by following the steps highlighted below:
Step 1) Launch the Settings app from the Start menu. Click on “All apps,” then scroll down and locate the settings application.

All Apps button
Step 2) Under the Settings app, scroll down, locate the “Apps” section, and then open it.
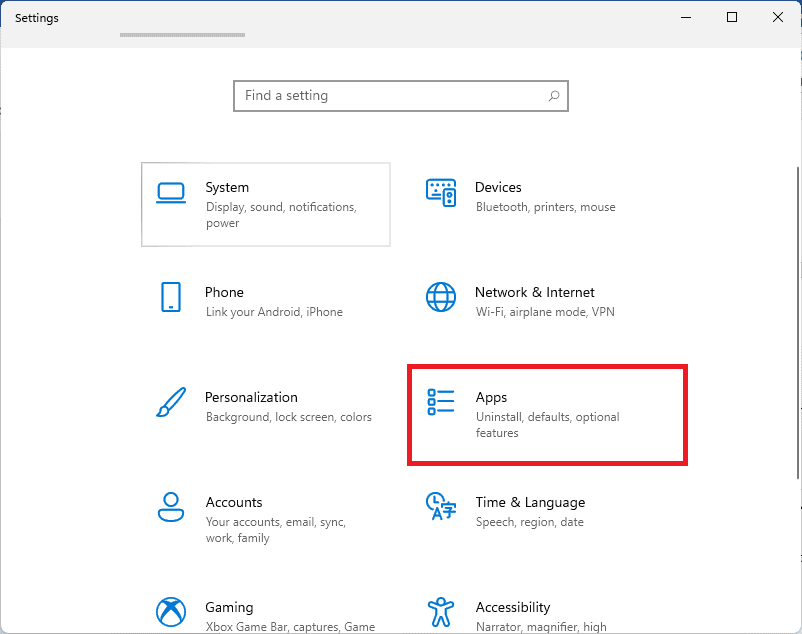
Apps
Step 3) On the left panel of the Apps section, select the “Default apps.” as shown below:
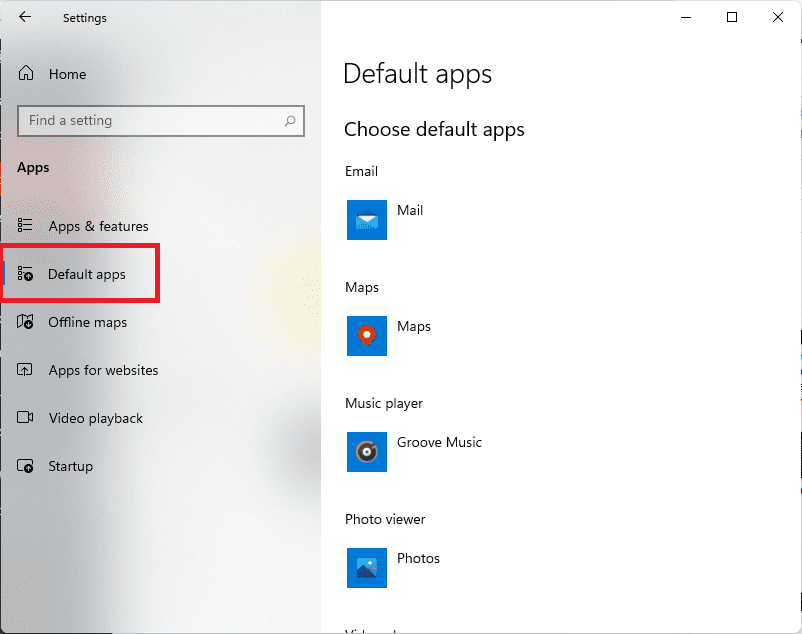
Default apps
Step 4) Now scroll down and locate the “Web browsers” section as shown in the image below:
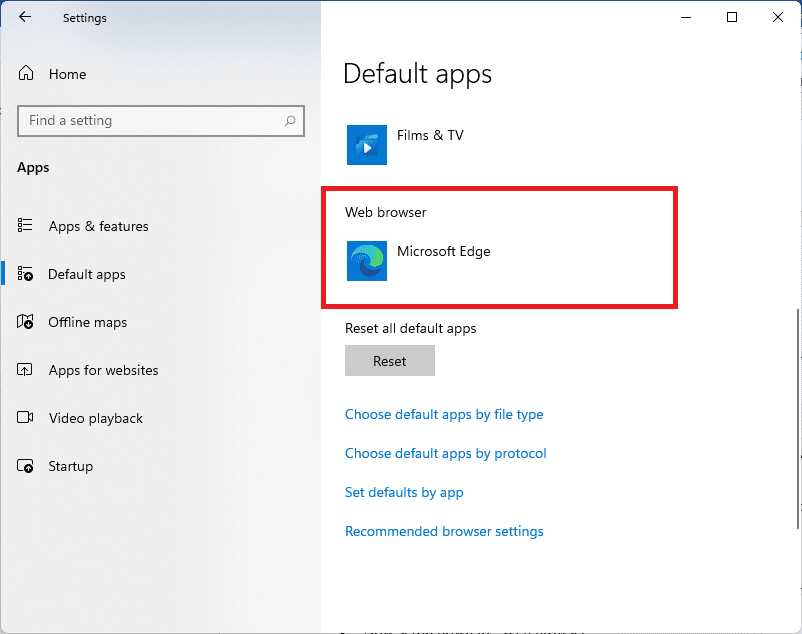
Web Browser
Step 5) Click on Microsoft Edge to launch a drop-down menu containing all the installed browsers.
Step 6) Now that we already installed the Mozilla Firefox browser scroll down and find it. Then, click on it to make it the default browser.
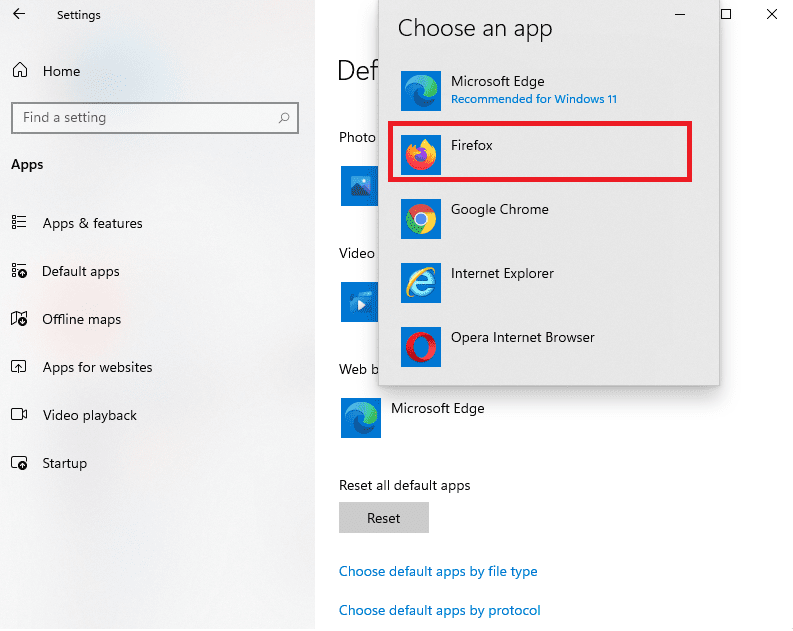
Mozilla Firefox
That’s all. Mozilla Firefox is now the default browser for your Windows 11 operating system.
Downloading and installing the Opera Browser
The first procedure is to download the Opera browser. To do this, launch Microsoft the following the guides provided below:
Step 1) Using the procedure already mentioned in the article, launch Microsoft Edge.
Note: The processes are quite similar. Thus, we shall be skipping some stages to avoid making the article monotonous.
Step 2) Click this link to download the Opera browser.
Step 3) Once the browser installer file has been successfully downloaded, locate it and double-click it to initiate the installation process.
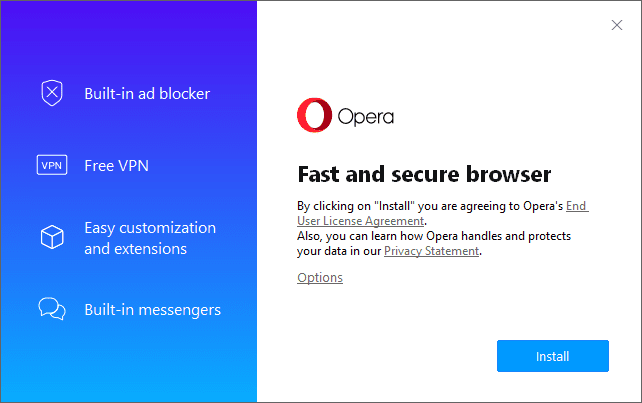
Install Opera browser
Step 4) After clicking the Install button, the installer will download and install the Opera browser onto the current user.
Now that the Opera browser has been successfully installed into our Windows 11 operating system, we shall move to the next process, setting the installed Opera browser as the default browser in Windows 11.
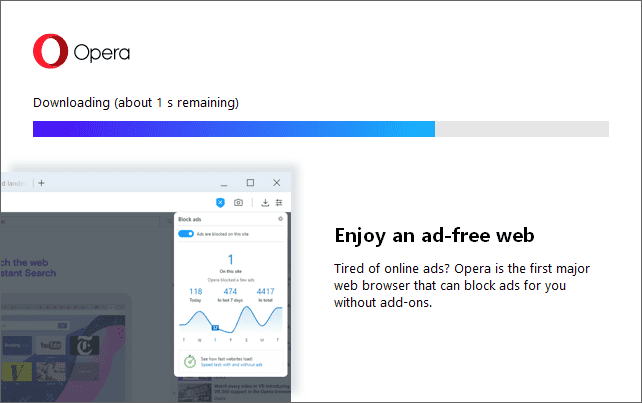
Installer downloading the Opera browser
Setting the Opera browser as the default browser in Windows 11
Follow the steps indicated below to set the Opera browser as the default Windows 11 browser:
Note: Some steps are similar to those already mentioned in this article, and hence we shall not follow all the step-by-step guides as we did for the previous browsers. If you get lost, refer to the previous steps we used for the first (Google Chrome) and the second (Mozilla Firefox) browsers.
Step 1) Open settings
Step 2) Locate and open Apps
Step 3) Under the Default apps sections, navigate and locate “Web browsers.”

Web Browser
Step 4) Click on the “Microsoft Edge” to launch a drop-down menu that contains a list of installed browsers.
Step 5) Click on Opera to make it the default browser
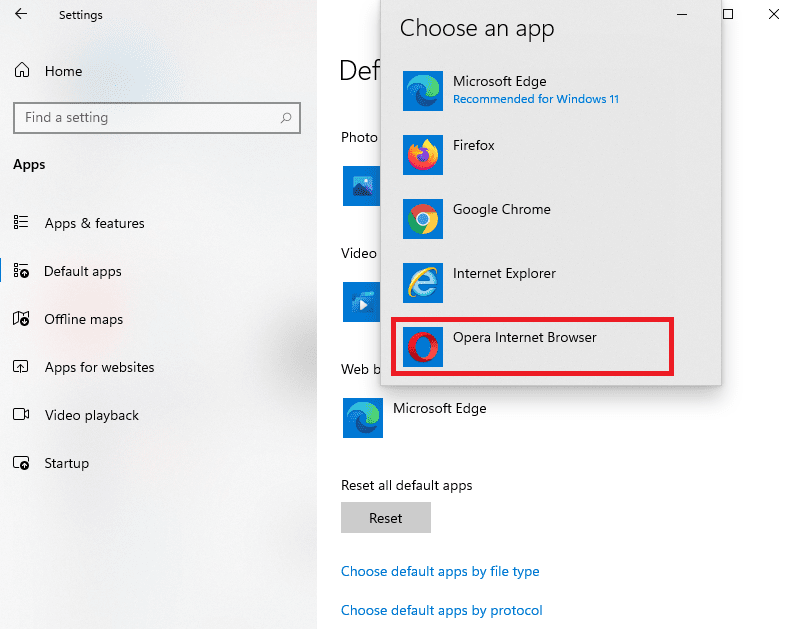
Opera Internet Browser
That’s all. The Opera browser has now been set as the default Windows 11 browser.
Note: Once the installation of Opera completes, it launches the browser, and beneath the welcome page, there is a request to make Opera the default browser. If you click on that link, it will redirect you to the “Default apps.” This process is similar to Google Chrome and Mozilla Firefox browsers (You can use the links provided after installing the browsers to make them the default browser).
It is essential to note that the processes mentioned above might change since the official version of Windows 11 has not yet been released, and you never know what changes might be made to the final release of Windows 11. However, this should not cause mayhem since it is our mandate to update our articles, and we shall do so not to miss out on any updates released regarding this subject matter.
Note: You can use your newly installed browser comfortably without making it the default browser. Hence, it is not compulsory that you have to make it the default browser once you have downloaded and installed it on your Windows 11. This depends mainly on the users’ preferences and needs.
Conclusion
This article has comprehensively covered all the steps and procedures required in changing the web browser in Windows 11. We hope that you are now able to change the default browser by yourself. Remember, the Windows 11 we are using is still in developer/beta mode; thus, changes might be made to the final release. Stay tuned!
