
Table of Contents
Windows 10 is a feature-rich operating system that’s willing to get as complex as you want it to be. One such instance where only power users are probably experienced revolves around the Telnet client, a substantial constituent of the operating system’s technical functionality. We’re talking about a network protocol here that provides communication with other devices.
Other than that, Telnet’s functionality stretches to other domains as well. This article will cover everything you need to know about this network-based client, including the method you can use to enable it and utilize it efficiently. Be sure to read until the end for favorable results.
What is the Telnet client?
At its very core, Telnet is an internet protocol that establishes communication between a client and a server. It usually employs a TCP (Transmission Control Protocol) or a simple IP (Internet Protocol) connection to allow two ends of a domain to connect under the condition that an identical network is being used. Chiefly, this platform is utilized for remote connections.
As for the working mechanism of Telnet, it’s mainly incorporated with the help of a Command-Line Interface (CLI) similar to the Command Prompt in Windows 10. However, the Telnet client is much more lightweight and speedy and allows a variety of uses to be taken up by power users from all across the globe.
Some of these high-class use cases involve troubleshooting servers, authenticating the number of ports forwarded, gaining remote access to dedicated servers, and optimizing dedicated networks on hardware. There are even more benefits to using the Telnet client in 2022 on a Windows PC, so we see eye to eye with you if this functionality has piqued your interest in recent times.
Now, the thing is, Telnet doesn’t arrive pre-enabled on Windows 10 PCs. This is because it used to be readily available on older iterations of Microsoft Windows, such as Windows XP and Windows 98, which we’re sure only a couple of people in the whole world are still using. Therefore, to use the Telnet client in Windows 10, you will first have to enable it on your operating system.
Thankfully, there is a quick and easy way to do it. By the time you’re finished, you’ll be able to start using Telnet painlessly afterward. The following section will go over just that, so keep reading for more details.
Using Telnet client in Windows 10
Using Telnet client in Windows 10 requires you to enable it first. That is why this section will comprise two distinct sections. One will teach you how to turn it on, while the other will go over its working mechanism. Let’s get started right away.
How to enable the Telnet client in Windows 10
To enable the Telnet client in Windows 10, you must follow the steps given ahead.
1. The first step is to open the Control Panel system app on your Windows PC. This can be done quickly from the Windows Start menu. Type in “Control Panel” and see the application appearing on the screen. Click on it afterward to continue to the next step.
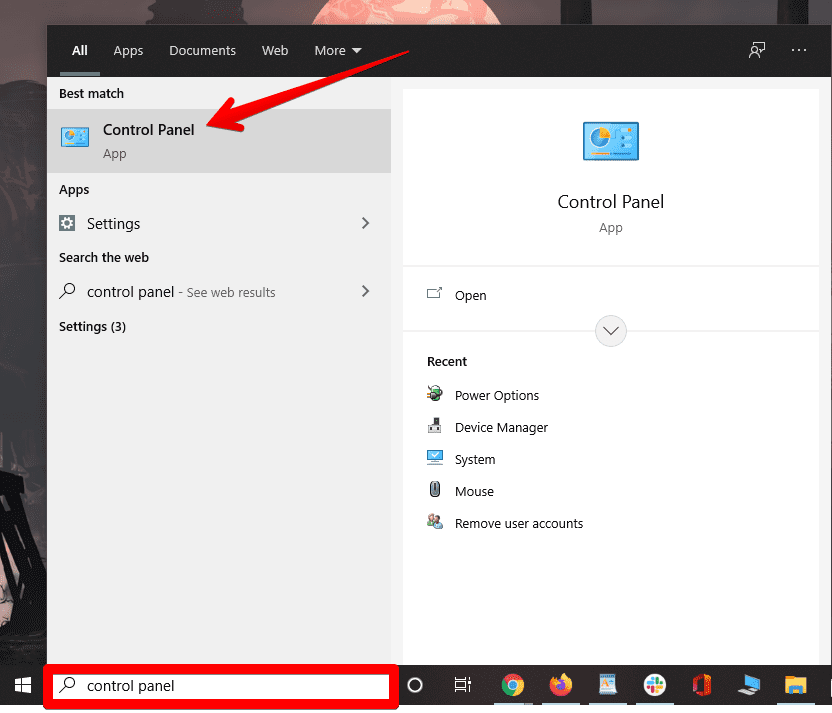
Searching and opening the Control Panel
2. Click on “Programs.”
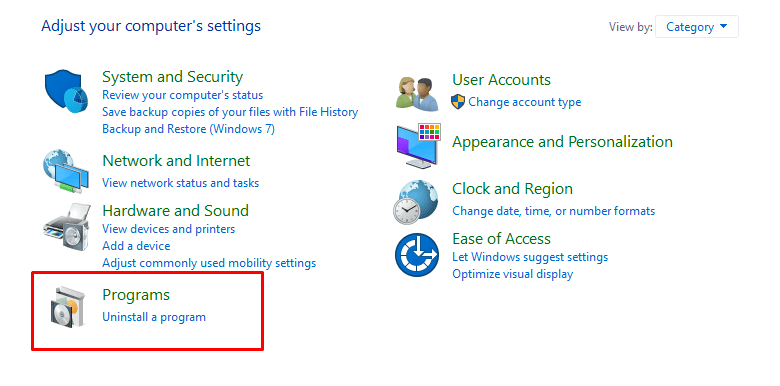
Selecting “Programs”
3. Next, click on “Programs and features.”
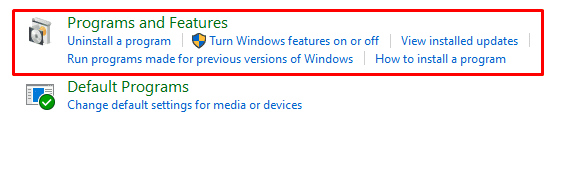
Selecting “Programs and Features”
4. Choose “Turn Windows features on or off” to get to the next step.
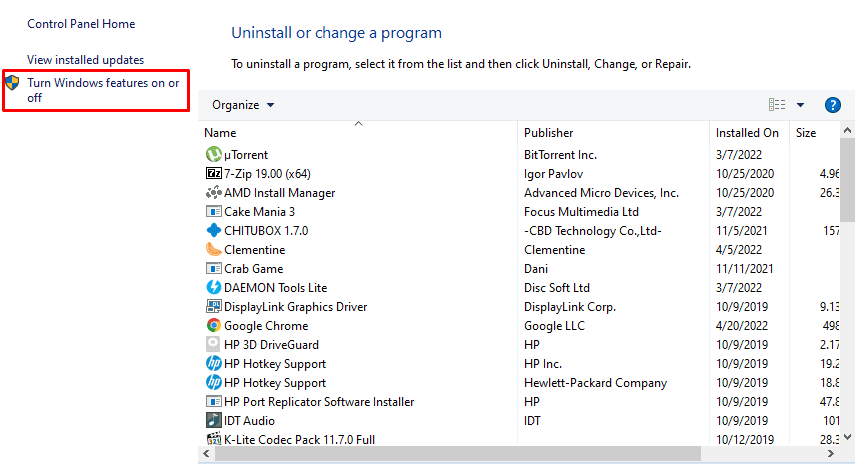
Selecting the relevant option
5. Scroll down the list of options until you see “Telnet client.” Click on the checkbox beside this option once you find it. To finalize, click on the “OK” button.
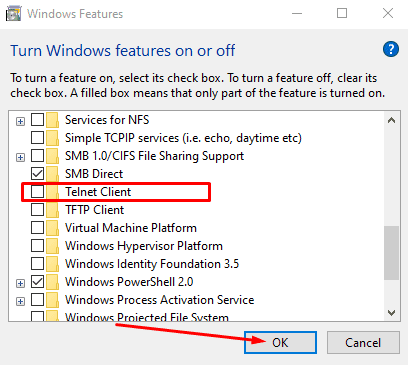
Selecting the “Telnet client” option
6. Click on “Close” after it’s done to finalize the process.
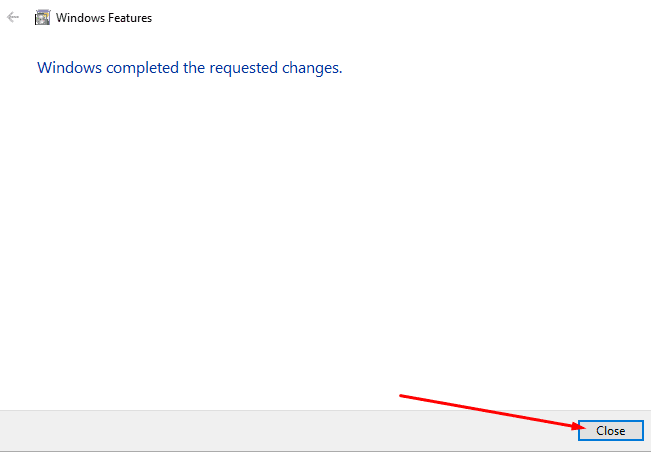
Closing the prompt window
Great going so far! You have successfully enabled the Telnet client in Windows 10, You can now ckly start using Telnet on the operating system.
How to use the Telnet client in Windows 10
The Telnet client in Windows 10 will always be utilized from the Command Prompt, although there are other complex ways to approach it. However, we won’t be getting into any complexity like that in this guide. The Command Prompt will serve as the perfect vessel for running Telnet in Windows 10, so let’s take a brief look at how you can tap into said client and unlock its true potential.
The first step is quite obvious: you have to open the Command Prompt application on your Windows PC. Type “cmd” into the Windows Search bar and click on the relevant application. Ensure that you’re running the software with administrator privileges for the best results.
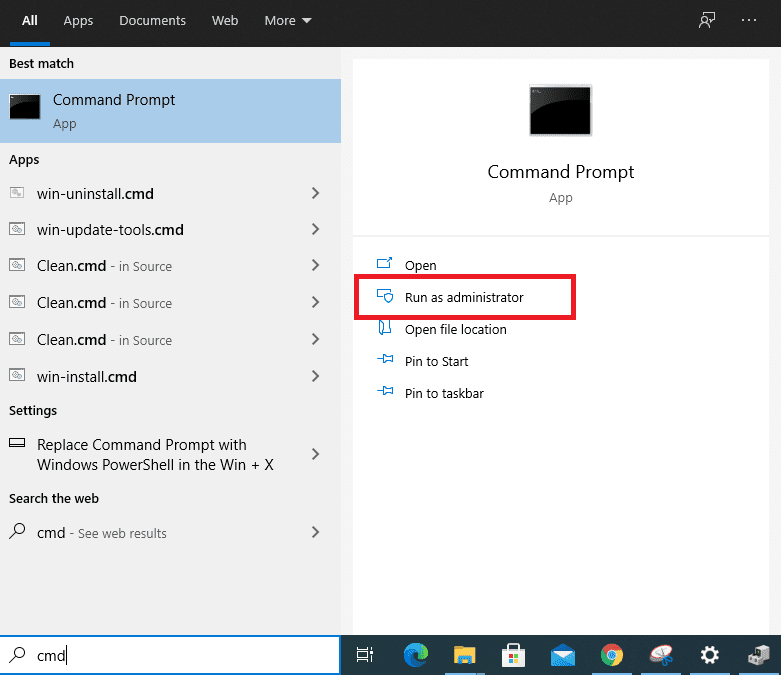
Opening the Command Prompt as an administrator
Type in the following and press the “Enter” key. Doing so will help us activate the Telnet client.
telnet

Tapping into the Telnet client in Windows 10
You’re not entirely done yet. If you want to use the Telnet client in Windows 10 at its full, you have to unlock its features first. For this purpose, you’ll use the following command. Make sure you use the command outside of the Telnet client. Use the “quit” command to exit Telnet and go back to the main command-line interface of the Command Prompt.
dism /online /Enable-Feature /FeatureName:TelnetClient
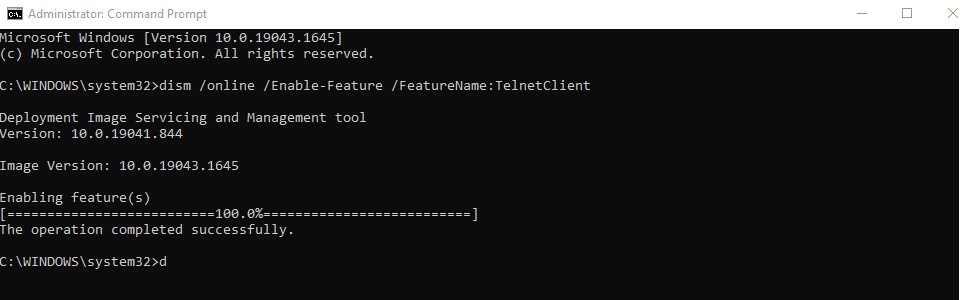
Unlocking the Telnet client
Now, as for the actual commands that permit effective utilization of Telnet on Microsoft Windows, you’ll have to refer to this handy guide created by the developers themselves. Doing so will help you get to grips with the major Telnet commands around and how to implement them in the Telnet command-line interface (CLI) on your Windows PC.
For example, the “display” command in Telnet returns you the following in the Telnet CLI. This command is effective if you want to know all the different parameters running in real-time when you connect to a Telnet server.
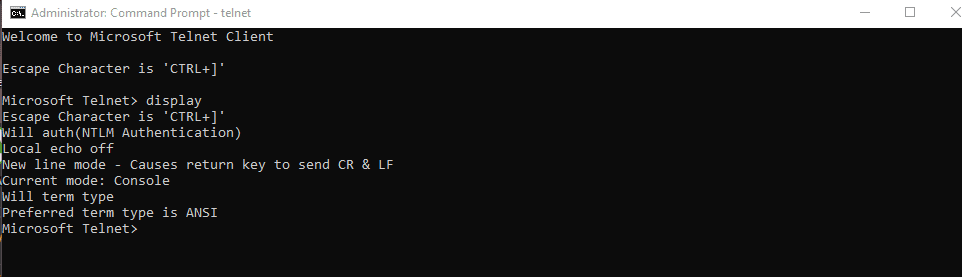
The “display” command in Telnet
Lastly, suppose you want to start connecting to a specific port using Telnet remotely, which is one of the important use cases of this feature. In that case, you can use the “open” command and follow it up by specifying the server’s name that you’re looking to manage. This will take your working experience to the next level.

Using the open command
That’s about it for using the Telnet client in Windows 10.
Conclusion
In this guide, we have discussed an easy way to enable the Telnet client if you’re on Windows 10 and using the feature on your PC. The guidelines were implemented in simple language, so you should be able to get going with this feature right away. Please let us know down in the comments section if this guide proved to help you.