Table of Contents
Trusted Platform Module (TPM) is an international standard for a secure dedicated microcontroller designed to secure hardware through integrated cryptographic keys, i.e., a cryptoprocessor. Computer programs can use a Trusted Platform Module to authenticate hardware devices since each TPM chip has a unique Endorsement key etched in as produced. The TPM provides:
- Facilities that generate cryptographic keys securely for limited use,
- Remote attestation, which creates an unforgeable hash key summary of the hardware and software configuration.
- Binding, which encrypts data using the TPM bind-key (which is a unique RSA key that descends from a storage key)
- Sealing is similar to binding, but it specifies the TPM state for the data to be unsealed(decrypted)
TPMs work by offering hardware levels of protection instead of only software. They can be used to encrypt disks using Windows features like Bitlocker or prevent dictionary attacks against passwords.
If you are planning to upgrade to Windows 11, then you will require the following checklist on what you will likely need and how you might satisfy each requirement:
Windows 11 system requirements
- 1GHz dual-core CPU, 4 GB RAM, 64 GB storage, UEFI motherboard, TPM 2.0, DX12 graphics, 720p display
- The UEFI mode must be enabled
- TPM must be enabled
- Secure Boot must be enabled
- The processor must be on Microsoft’s approved list
- 64 GB free space if you may need to dual boot Windows 11
Types of implementation of the TPM
1. Integrated TPM
In this type of implementation, the TPM chip is co-locating with some other chip. This way, it will resist bugs in software with the use of the hardware itself. Hence there is no need to implement a resistance tamper.
2. Virtual TPM
The hypervisor mainly provides this type of TPM implementation. It always depends on it for the execution. The hypervisor allows the asset to execute independently and get the codes from the virtual machines using the software.
3. Discrete TPM
The discrete TPM chip implements the functionality in its resistant temper of the semiconductor package. Therefore it is more resistant to bugs than software; hence it is preferable in all types of TPM.
4. Software TPM
This implementation acts as simple software and does not provide any additional security to the system. It just responds as per the environment. The main problem with this type of TPM implementation is that it risks bugs or attacks from external software.
5. Firmware TPM
This is the solution-type TPM that ensures a trusted execution environment in the CPU. The risk factors of this TPM are bugs, Intel, AMD, and Qualcomm.
How to turn on Secure Boot
In your Motherboard’s BIOS, you should locate the Secure Boot sub-menu. It may be under the “Security, Boot or Authentication” tab. From there, you should be able to change secure Boot into “Enabled” if it is disabled.
There are several ways to check if the secure Boot is enabled from Windows and save yourself a trip to the BIOS. First, you can start by opening the Start menu then typing System Information. Launch the app; you will see Secure Boot toggle status and your current BIOS mode. For instance, my secure Boot is off, and Bios mode is UEFI, as shown in the image below:
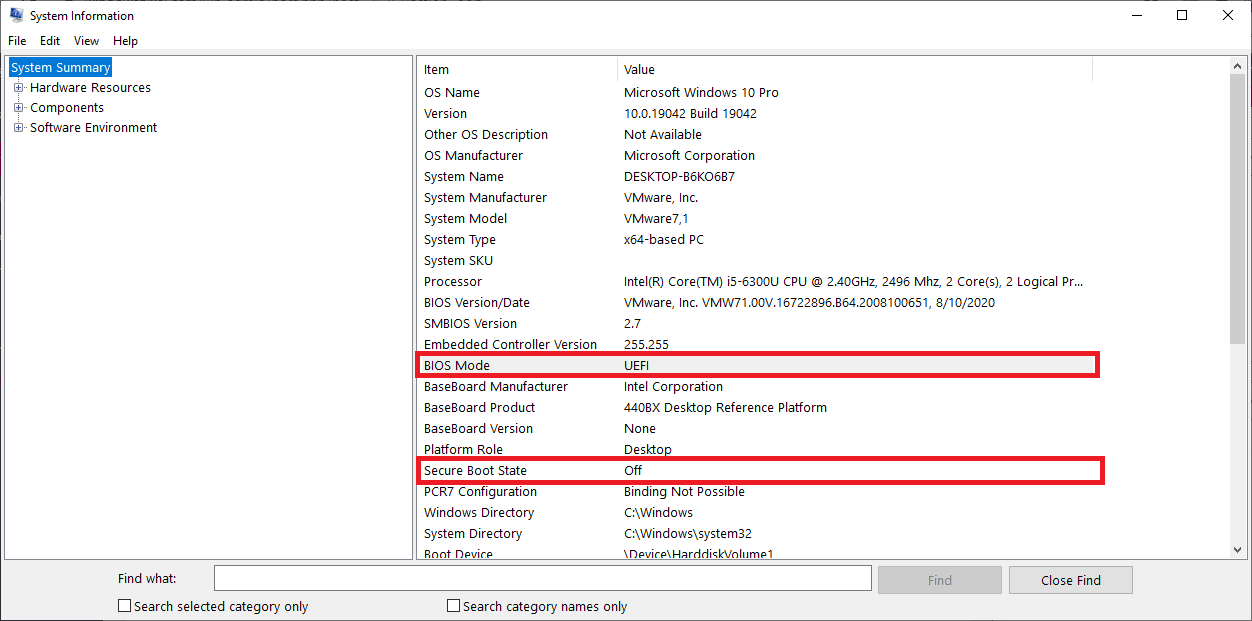
System Information
Enabling TPM 2.0 on your PC
Most recent PCs are capable of running TPM version 2.0. These PCs can run the TPM 2.0 only that they are not set up to do so in some cases. You should check if your TPM 2.0 is enabled on your device before upgrading to windows 11. Most retail PC motherboards used by people building their PCs are shipped with the TPM 2.0 turned off. Several options can be used to check if your PC has the TPM 2.0 enabled or disabled. The options are;
Option 1: Use the Windows security app
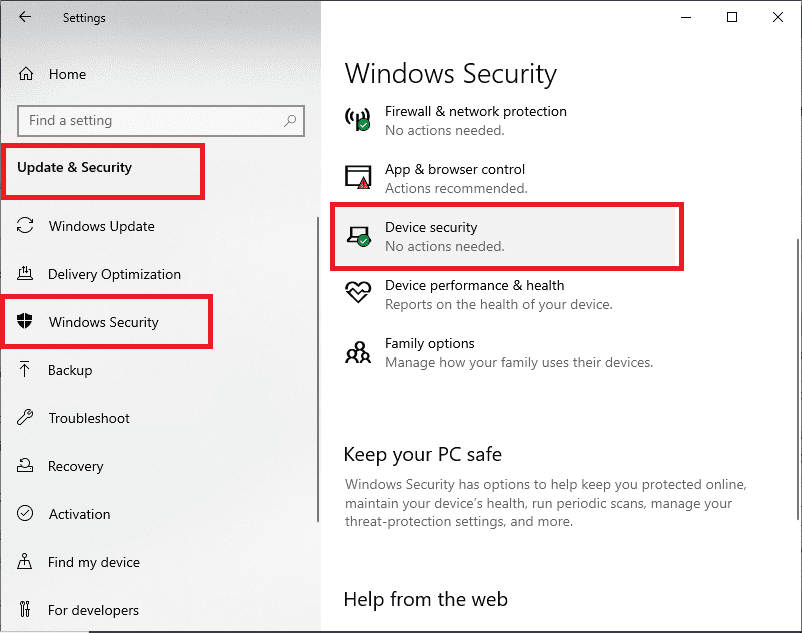
- Run Settings> Update &Security> Windows Security> Device security

Settings, Update and Security, Windows Security, Device Security
If you don’t see a Security Processor section on the screen, your PC may have a TPM that is disabled. Now see how to enable TPM in this article or check your PC manufacturer’s support information for instructions on enabling the TPM. If you can enable the TPM, follow the next step to verify that it is a TPM 2.0.
If you see an option for Security processor details under Security Processor, select this option and verify that your specification version is 2.0. If the version is less, then your PC does not meet the requirements for installing windows 11.
Option 2: Use the Microsoft Management Console
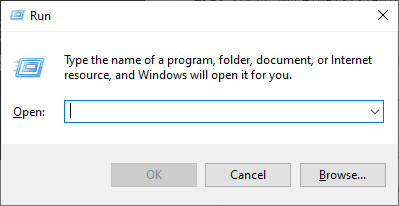
- Press the Windows key + R or select Start > Run

Run dialog box
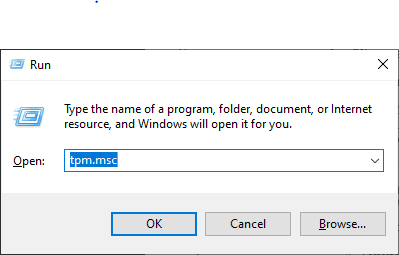
- Type tpm.msc, then click OK

tpm.msc
If a message appears saying “Compatible TPM cannot be found,” then your PC may have a TPM that is disabled. You should then enable the TPM using the alternate process that we will discuss later in this article. If you can enable the TPM, follow the next step to verify that it is TPM 2.0.
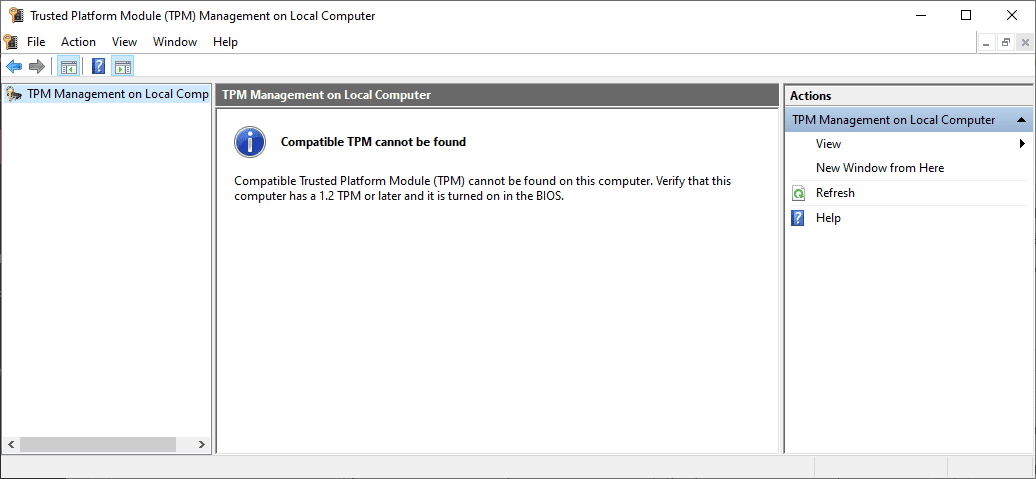
Select TPM 2.0
If a message appears confirming that the TPM is ready to use, check the Specification version under TPM manufacturer Information to verify that it is version 2.0. If it is less than 2.0, then your device does not meet the Windows 11 requirement.
How to enable TPM
Settings for enabling the TPM are managed via the UEFI BIOS (PC firmware), and they vary based on your device. To access these settings, use the following route; Settings> Update & Security, Recovery> Advanced Startup > Restart now.
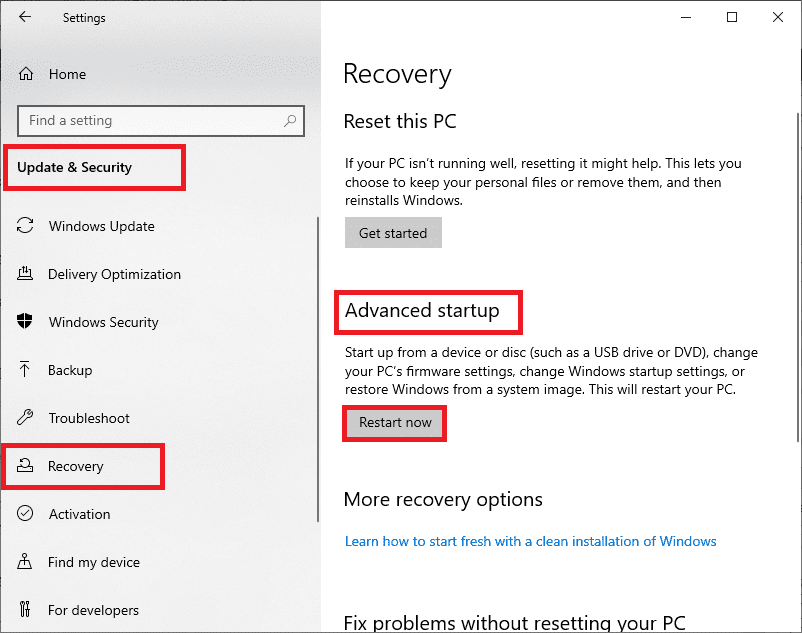
Settings, Update and Security, Recovery, Advanced Startup, Restart now.
Click on Troubleshoot> Advanced options> UEFI Firmware Settings> Restart to make the changes on the next screen. Sometimes these settings are contained in a sub-menu in the UEFI BIOS labeled Advanced, Security, or Trusted Computing. The option for enabling the TPM may be labeled Security Device, Security Device Support, TPM State, AMD fTPM switch, AMD PSP fTPM, Intel PTT, or Intel Platform Trust technology.
Suppose you are not sure how to make any needed changes to the TPM settings. In that case, we recommend that you check your PC manufacturer’s support information, or you can contact their support organization.
How to enable TPM 2.0 in BIOS for Windows 11
Start by entering into the BIOS by pressing ESC or F2 during the startup, depending on your PC. If your BIOS menu is set to ‘Easy Mode,’ you will want to change to Advanced Mode. To do this, you press F2 inside the BIOS or by clicking the option within the sidebar.
In the Advanced Mode, navigate to the settings bar by clicking it. Inside the settings section, locate the tab labeled ‘Miscellaneous.’ Double click it to enter. Inside this section, you should see an ‘Intel Platform Trust Technology (PTT) option.’ This is Intel’s TPM feature. Click it, then choose Enable from the drop-down menu that will appear. From here, you can now restart your PC by navigating to the Save & Exit tab.
Bypassing Windows 11TPM 2.0 requirement
The first unofficial TPM bypass involved downloading the software from GitHub. To do this, you press Windows + R, then typing regedit to get the Registry Editor Up. From here, navigate to HKEY_LOCAL_MACHINE\SYSTEM\Setup\MoSetup from the top bar. Right-click the main panel selecting create a new DWORD (32-bit) Value.
Name it AllowUpgradesWithUnsupportedTPMOrCPU, then set its value to 1. You will now be able to upgrade to Windows 11
Uses of Trusted Platform Module
The TPM ensures the security of various computer assets. The multiple uses of TPM include:
1. Integrity of platform
This is the essential function of a TPM. It ensures the integrity of a platform over the internet or operating system. To ensure that it is functioning, the TPM checks the process of booting and its authority via hardware and software systems. Therefore this asset acts as firmware. The TPM also contains configuration registers for storing and reporting the information securely.
2. Encryption of Disk
TPM also provides a utility to protect encrypted keys stored in storage devices on the computer system. It also checks and provides an authoritative path to the information system, including booting and firmware processes.
3. Protection of password
Authentication of passwords is essential to protect the computer system, data, and keys/passwords stored in it. It also provides hardware protection and allows for very complex and robust passwords only. The TPM does not ensure authentication in software because it will create a risk of a dictionary attack.
Some other uses of the trusted platform module include:
- The application software uses TPM to manage digital rights
- It ensures the protection and enforcement of various licenses for software
- It prevents cheating in online games or programs
Advantages of TPM
- It secures confidential information
- It provides authentication features in both software and hardware
- It does not depend upon a software-based operating system; hence security is improved with this asset
- You can use TPM on a mobile phone by encrypting the entire hard drive of the phone
Alongside with protection of information, TPM also provides hardware-oriented benefits as listed below:
- TPM records and reports the hardware functionality data.
- It provides input to improve the booting, operating system, and BIOS
- It allows direct anonymous attestation to ensure the privacy of the system from various users.
- The architecture of TPM is cost-effective.
Disadvantages of TPM
- It has the risk of bugs.
- It does not protect the system from a cold boot attack
- Although TPM provides security against theft of the system, it does not consider online threats and attacks on the system or information stored in the system
- The process of its functioning is very long as its tools run key finders until the correct key works
- Sometimes the TPM shows a problem in connecting or running the right software.
Conclusion
This article comprehensively covered the processes involved to enable TPM 2.0 on your PC. Remember that enabling TPM on your PC is vital if you plan on upgrading to Windows 11. Also, it is critical to note that Windows 11 upgrade requires TPM version 2.0. therefore, if your TPM version is less than 2.0, then your PC isn’t eligible to upgrade. We hope this article was helpful and it helped you learn how to enable TPM on your PC. In case of any complications, feel free to reach out via the comments section.
