
Table of Contents
Xpadder is a strong, viable game emulator that enables the use of different gamepads to control your PC games. Xpadder provides the best game-playing experience even if the controllers you have are not meant to give enough rides while playing the game.
Due to the rapid technological advancements, we can see various game versions compatible with PlayStation, phones, tablets, and computers. Furthermore, with the aid of Xpaddder Windows 10, you can play the games anywhere at any time.
Note: The Xpadder is absolutely free; hence you do not need to worry about spending extra bucks to use the product.
Xpadder is also supported by older versions of Windows such as Windows Vista, Windows XP, Windows 7, Windows 8 & 8.1. Therefore, don’t worry if you have these older versions since you can still use Xpadder as it is fully supported.
What is Xpadder?
The latest available joysticks and gamepads are not compatible with our Windows operating systems. To make these joysticks and gamepads compatible, we need to use compatible software to allow compatibility of the gamepads and joysticks on our Windows PC.
Nothing feels great like controlling your PC using customized key controls rather than using the primary arrow keys usually used in most PCs. In such cases, we require an Xpadder to be able to customize our controls.
Therefore, an Xpadder is a game emulator that enables joysticks and gamepads to control our PC games. The Xpadder emulates the DOS program, which supports most Windows versions. So, if you are a game user, you should be familiar with the DOS program. The good thing about the recently launched Xpadder for Windows 10 is it supports both 32 and 64-bit versions.
Now that we understand what an Xpadder is, let us now confer to the Features of an Xpadder:
- It is helpful in the management of multiple profiles
- It is specifically developed and designed for joysticks, gamepads, and arcade controllers
- Also available for in-browser games
- It supports both 32-bit and 64-bit versions
- The program is also compatible with Windows XP, Windows Vista, Windows 7, Windows 8 & 8.1.
- It also provides media player support
- The Xpadder site contains an advanced interface
The latest Xpadder version enables you to play the games easily you are fond of with much comfort.
Installing Xpadder free version
1. Click on this link to be readdressed to “the third-party website” to download the Xpadder program.
2. After downloading, extract the downloaded file.
Note: If you have not changed your default downloads folder, you can find your download in the “Downloads” folder. However, if you use third-party apps like “internet download manager,” locate a file inside the downloads folder named “Compressed” since this file is a zipped file.
3. Double-click the installer file to install it to your Windows 10 operating system.
4. Follow the on-screen instructions to complete the installation of Xpadder.
You can now launch and enjoy the newly installed Xpadder program.
How to fix the “Unsupported Windows version detected” error
While installing the program, you might encounter an error “Unsupported Windows version detected” if this is the case, don’t freak out since the solution will be provided in this article.
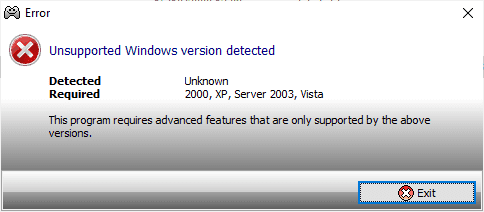
Unsupported Windows version detected
Once you get a similar error to the one shown in the image above, follow the guide below to fix the error:
Step 1: Click on the “Exit” button on the Xpadder installer to quit the installer.
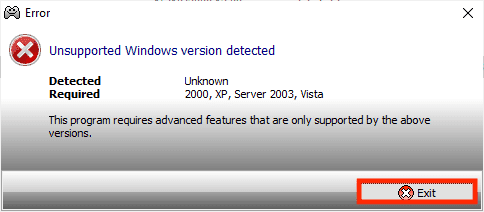
Click the Exit button
Step 2: Next, locate the Xpadder application, right-click on the application, and select “Troubleshoot Compatibility.” This will check for all issues regarding the compatibility of the application with your Windows 10 operating system.
Step 3: When the “program compatibility troubleshooter” is done, select the second option as shown in the image below, which is “Troubleshoot program.”
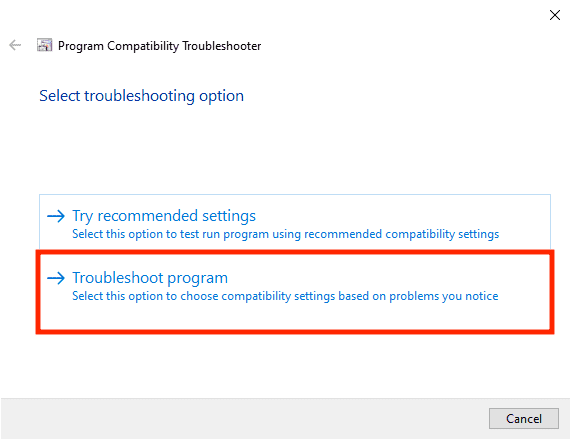
Troubleshoot program
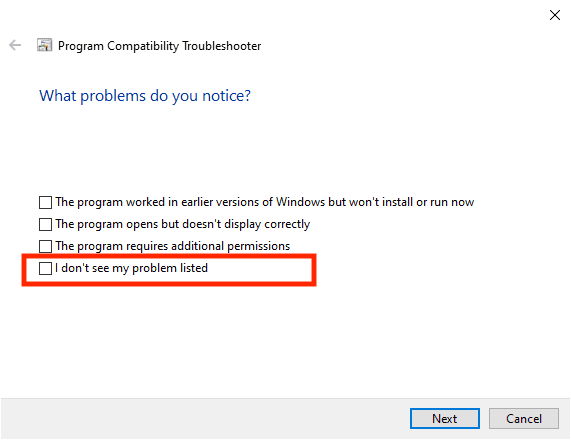
Step 4: You will be greeted with the “What problems do you notice?” screen. While here, there are four options that one has to select. For our case, select the last option, “I don’t see my problem listed,” and click on the “Next” button.
Xppader locating error
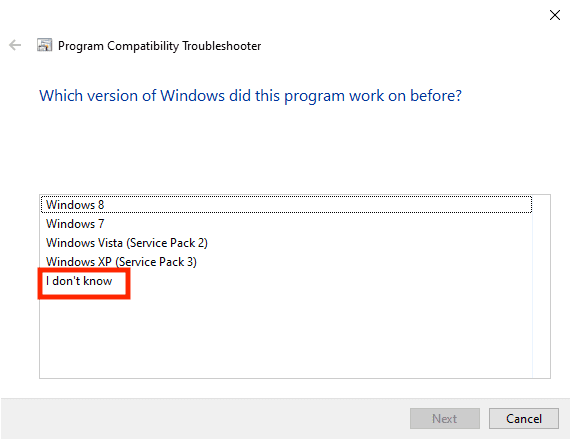
Step 5: The next screen is “Which version of Windows did this program work on before?” In this section, you have the following options:
- Windows 8
- Windows 7
- Windows Vista (Service Pack2)
- Windows XP (Service Pack 3)
- I don’t know
Because we have not yet installed the application into our operating system, we shall select the last option, which is “I don’t know.” Click “Next”
Which version of Windows did this program work on before.
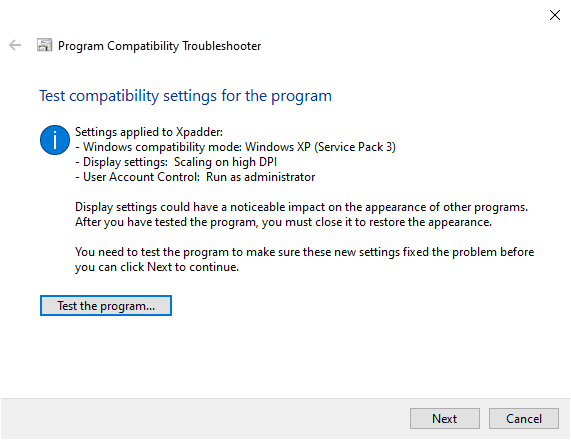
Step 6: After clicking Next on the previous screen, you will be directed to the “Test compatibility settings for the program” screen. Here some recommended options will automatically be provided for our Xpadder program. For instance, in our case, the following settings have been recommended by the troubleshooter:
Windows compatibility mode: Windows XP (Service Pack 3)
Display settings: Scaling on high DPI
User Account Control: Run as administrator
Those mentioned above are the settings that will be applied to our Xpadder program. We can test if the program works by clicking the “Test the program…” button as indicated in the image below:
Test the program
A security prompt will be provided once you click the “Test the program…” button. Click “Yes” to continue.
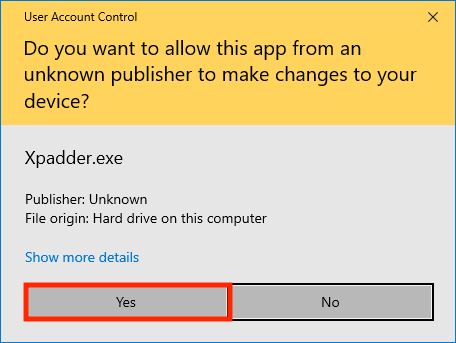
Xpadder Security prompt
Note: if you get a similar screen to the image shown below, then your program is now ready to be installed on your Windows 10 operating system. Quit the “Program Compatibility Troubleshooter” and continue with the installation process.
Step 7: Click on “Start,” as indicated in the image below, to begin the installation process.
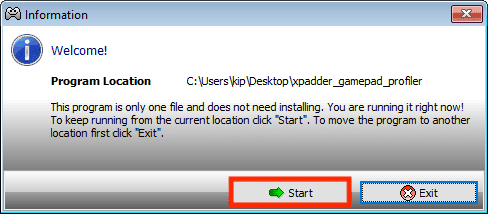
Xpadder Installation Screen
Step 8: You will be relayed to the “Default save and open location?” screen, where you will provide the program location by customizing it to your preferred location or sticking to the default location provided by the installer. For this tutorial, we shall select the “My Documents” button.
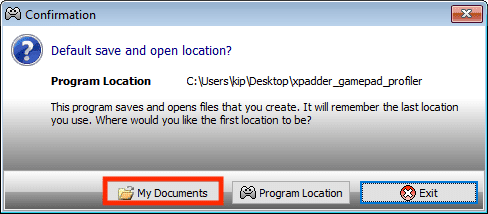
Xpadder Confirmation Screen
Step 9: The next screen is “Add file associations to Windows?” here, we shall select the “Associate” button as indicated in the image below:
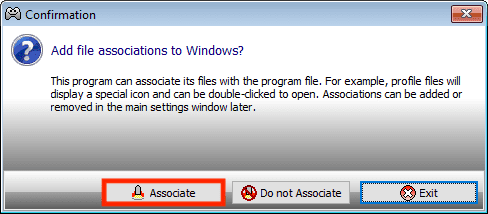
Xpadder Add file associations to Windows
Step 10: You are done installing the application, and you will be greeted with a screen similar to the one below:
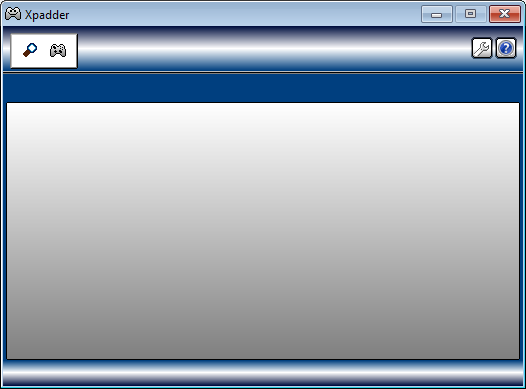
Xpadder Welcome Screen
Let us learn about the program and how to use it
Learn how to use Xpadder
This product is easy and direct; hence no need to strain about it. However, before using the program, you should first register your gaming device and customize the controls you wish on the console control pad.
Once the program has launched, you will see a pink screen requesting an image of the game controller to be pasted.
Xpadder Pink Screen
Visit your game controller’s official page and download a full clear image depicting all the gamepad keys.
- The first step is to connect your gamepad control to your Windows 10 operating system, as shown in the image below:
- Next, click on the yellow icon “Click “New” to create layout or “Open” as highlighted in the image:
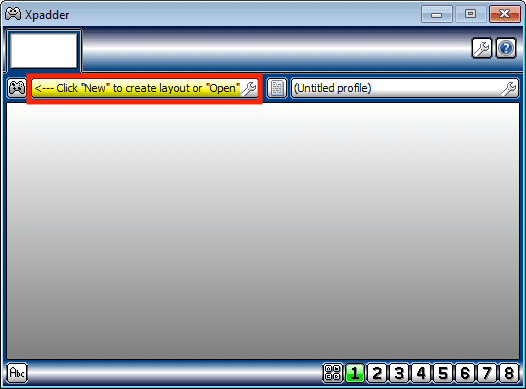
Xpadder application after connecting my game controller
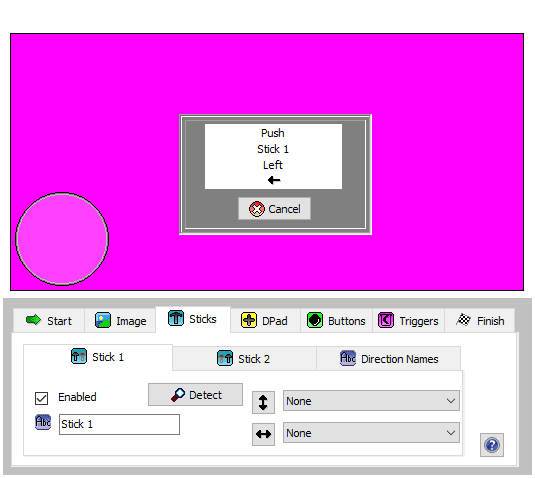
- After clicking the said icon above, you will be redirected to a page similar to the one shown in this image that contains a pink background and “Start, image, sticks, Dpad, Buttons, Triggers and Finish” icons.
In the application at the bottom of the screen, select the “image” option.
Xpadder Image Icon
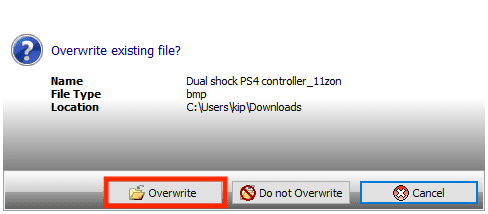
Download the image from your official gamepad providers as a BMP image. For illustration, I am using a PS4 DualShock controller. Under the images section, select the Export option below and select the download BMP image file.
- Next, you will be asked to overwrite the existing file. Select the “Overwrite” option, and you are done.
Xpadder Exporting downloaded image
Note: you can download the image as a jpeg or any other format and convert it using this link.
Now navigate to customization by mapping keys following your preference, as illustrated in this article tutorial:
- Select “Sticks” and check the “Enabled” check box. Do the same for the Dpad, Buttons, and triggers according to how you want them to be, then click on “Close,” which is on the “Finish” button to return to the main window.
Check the Enabled checkbox
After mapping the keys and delegating the controls to each key, your controller is set for use.
That’s all you have finished setting up your gamepad controller, and you can now start using it to play your favorite PC game.
Before installing the software, it is essential to note that your computer should meet the software’s minimum requirement. You can refer to the system requirements below before beginning the installation process.
System Requirements:
- Operating system: Windows XP, Windows Vista, Windows 7, Windows 8/8.1, and Windows 10
- Hard disk space: Minimum hard drive space of 100MB
- Processor speed: Minimum CPU processor speed of 233MHz.
- Memory: Minimum RAM of 256MB
- Processor: Intel Pentium 4 or later
Conclusion
Rather than straining with the olden ways of using a keyboard and a mouse, Xpadder allows users to enjoy their game using their preferred joysticks and gamepad controllers. This article has comprehensively covered how to use and the installation process of Xpadder. Therefore, if you get a problem using this program, don’t hesitate to reach out via the comments section. Thanks for reading.