Table of Contents
What is the Startup folder? It is a feature in the Windows operating systems that allows users to automate the opening of files or applications when they boot their computers. This folder lists the applications and files that the user has chosen to launch every time the computer starts automatically. This way, the user gains instant access to files or applications without clicking on them or opening them manually.
This feature works the same way in all the versions of Windows out there. The differences only come on how to access the folder. Upon starting the Windows operating system, it executes autoexec.bat. Due to the change in Windows versions and its ease of usability by introduction and takeover of the graphical user interface, this batch script ‘autoexec.bat’ is no longer required.
How does the Startup folder work in Windows?
As mentioned above, the list in this folder contains all those files and applications that will start when the computer boots. Certain applications will be automatically added to this folder when you install them, and in others, you have to add them yourself. Those added automatically include those that are essential for your computer’s performance, like antiviruses. Another set is those that are actually harmful to your computer, like virus applications.
How to access the Startup folder in Windows 10?
Now that we have what we need to know about the Startup folder, let’s look at how you can access it in Windows 10. But before that, it will be wise to look at a brief overview on how to locate this Startup folder on earlier Windows versions like Windows 7 and Windows 8.
In Windows 7
Windows 7 has a straightforward way to access the Startup folder. Click the Windows button on your keyboard or click it at the bottom left corner, and you will see the Startup folder among the list of applications and files. Click it, and you are there.
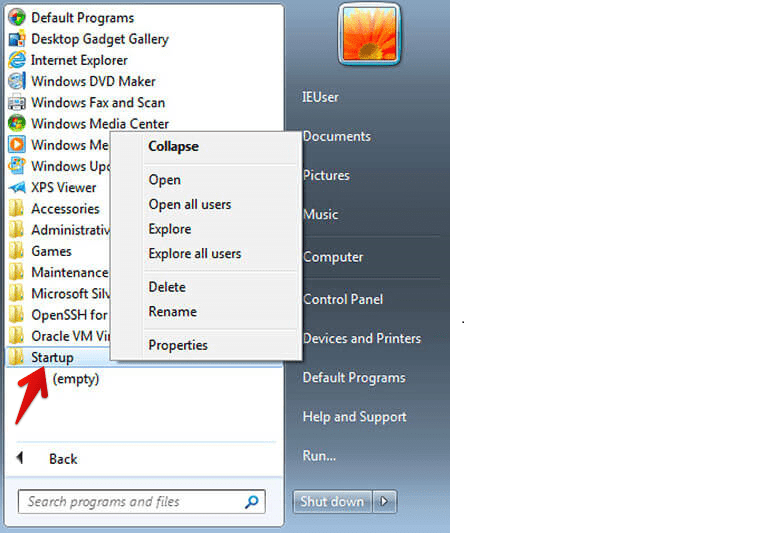
Windows 7
To add a file or application in this folder, create a shortcut of the file or application and then copy and paste the shortcut to this folder. It is as easy as that.
Windows 8 procedures and Windows 10 are similar; hence let’s head straight to Windows 10.
Startup folder in Windows 10
In Windows 10, this folder can be located in two different locations. Let’s take a scenario where we have more than one user account in Windows 10. An administrator account and a quest account. One, this Startup folder operates at the system level, which means it’s shared among all the two accounts. We can also have a Startup folder in the administrator account but not on the quest account. This operates under the user level and is only accessible to the current account user. In general, we can conclude that each account will contain a unique Startup folder apart from the universal Startup folder.
As we mentioned earlier, some applications automatically add themselves to the Startup folder. Does that mean that we cannot control this application easily on Windows 10? There is no better way to interact with these programs, only that you cannot delete them, but you can disable them from automatically starting once Windows boots. This achieved by:
Using the Task Manager
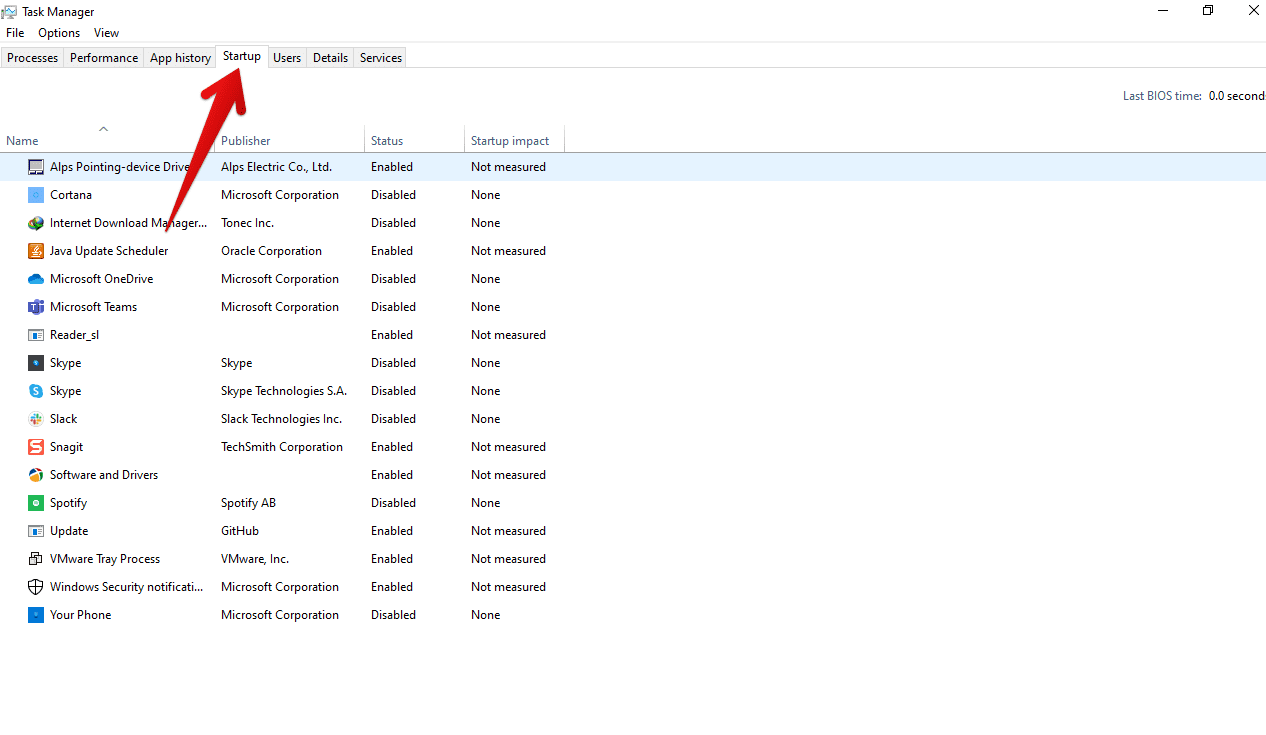
Task Manager Startup
- Press Ctrl+Shift+Esc on the keyboard simultaneously.
- On the top menu, navigate to Startup.
- On the status, right-click to make the application automatically start booting Windows or disable to make the application not automatically startup.
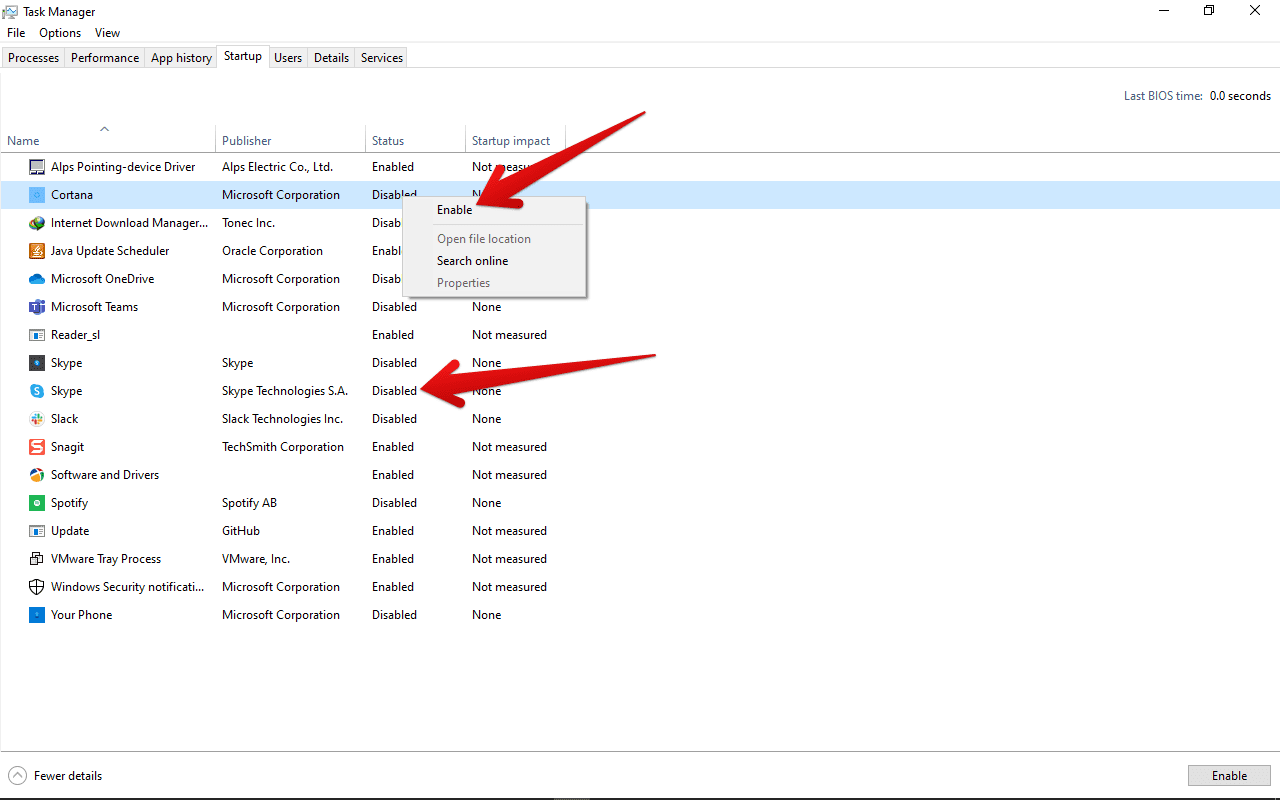
Enable and Disable Startup
Upon rebooting, the program adheres to the set rules.
To access the task manager, you can also:
- Right-click on the Taskbar.
- From the pop-up menu, select Task Manager.
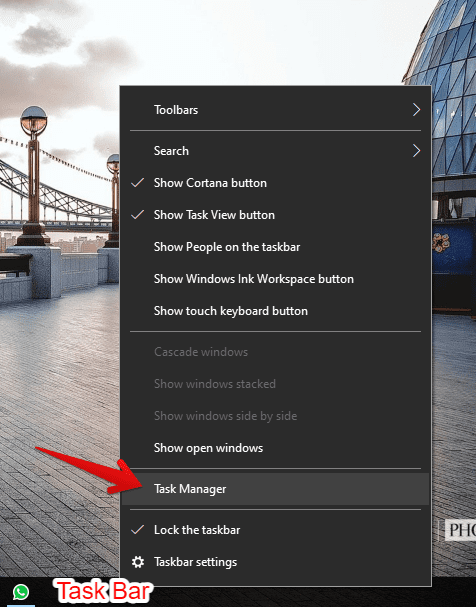
Task Bar
Accessing Startup using Windows settings
It’s also possible to enable or disable the Startup programs, or in this case, let’s say, to turn on and off without having to delete the programs from the Startup folder. Open the Windows settings window by pressing the Windows key on the search tab type settings.
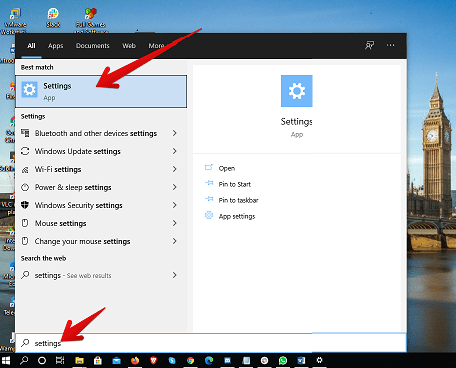
Settings
On the search field, type in Startup and select the first option.
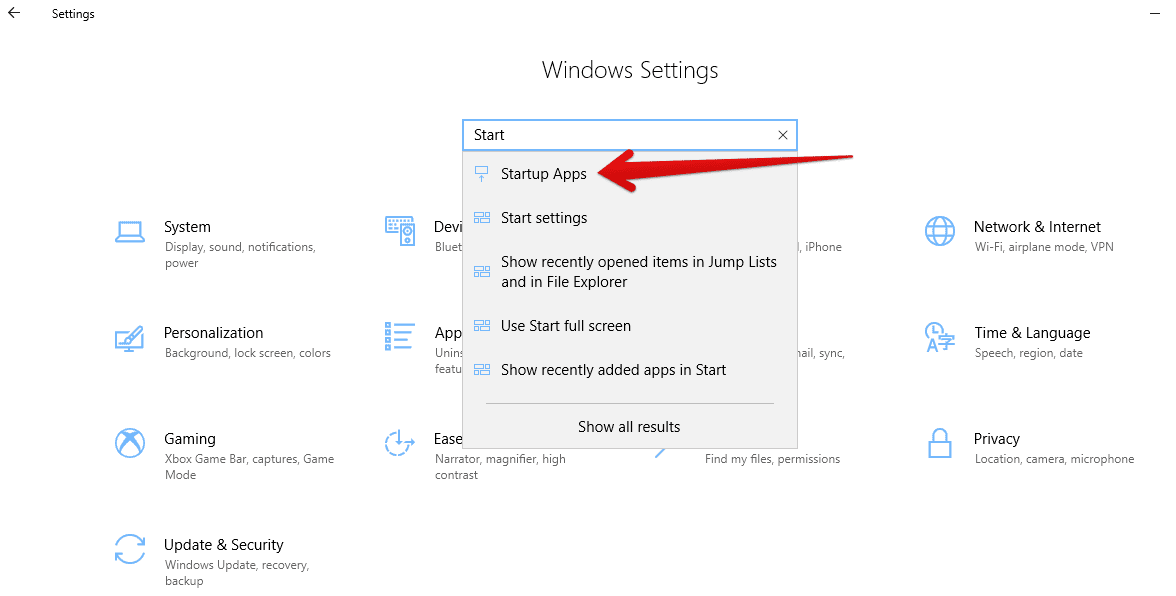
Settings Search
Use the toggle button to turn on and off to enable and disable the Startup programs.
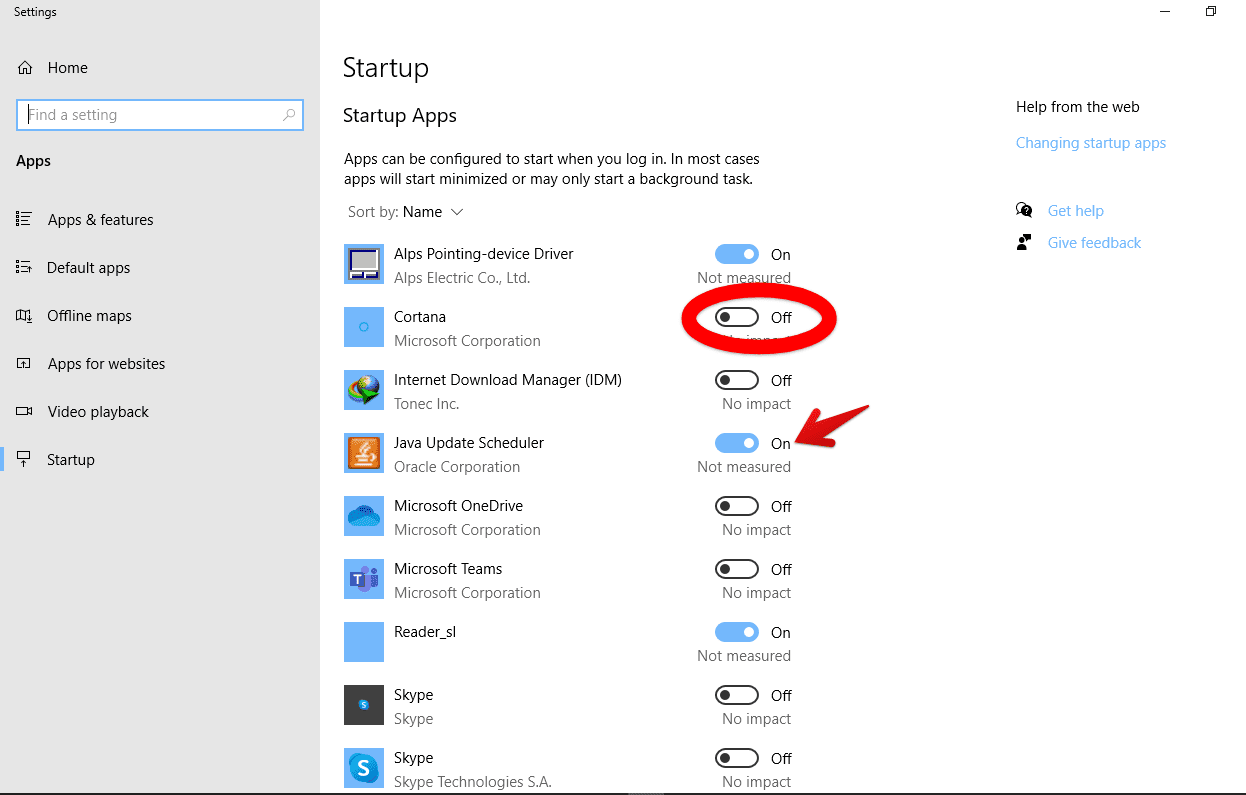
On and Off Toggle
Locating the Startup folder in Windows 10
There are different ways to access this Startup folder in Windows 10.
Using file explorer
First of all, to use this method, you must first enable the show hidden files in Windows 10. To locate this, open the file explorer -> navigate to view menu -> check ‘hidden files.’
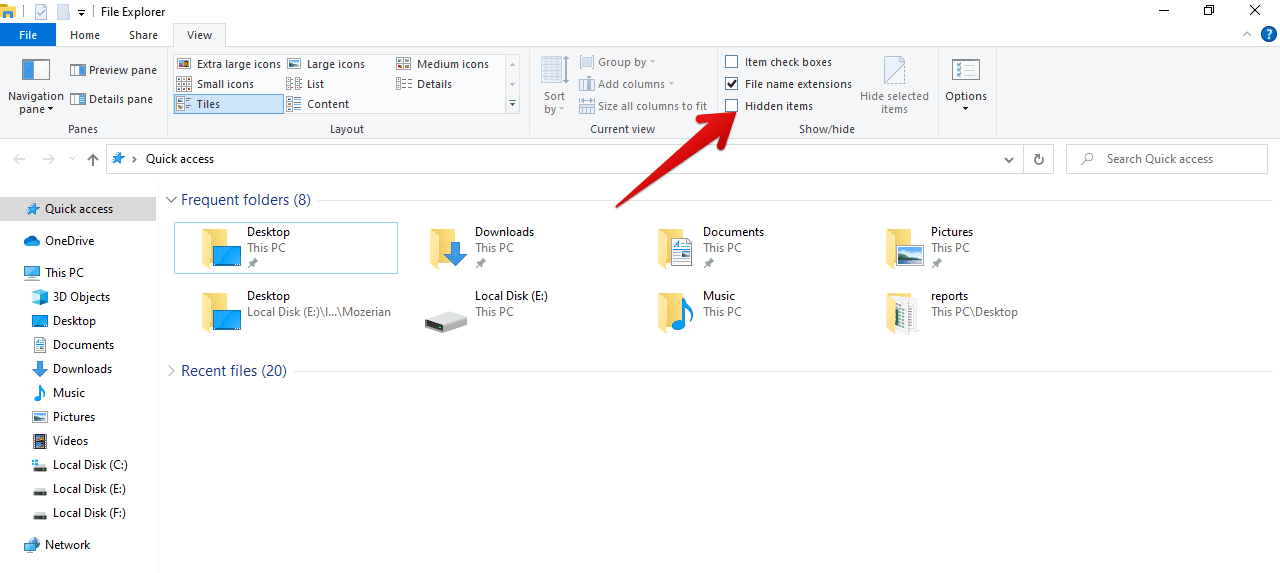
Hidden Items
Secondly, now we can locate the system level Startup folder for all users and the user Startup folder that is for the current user.
System Startup folder
Just drop this path command on the quick access bar: C:\ProgramData\Microsoft\Windows\Start Menu\Programs\Startup.
This will take you to the Startup folder and display all user’s Startup folder locations and the programs.

System Startup folder
User-level Startup folder (Current user)
Again, drop this path command:
C:\Users\[User Name]\AppData\Roaming\Microsoft\Windows\Start Menu\Programs\Startup
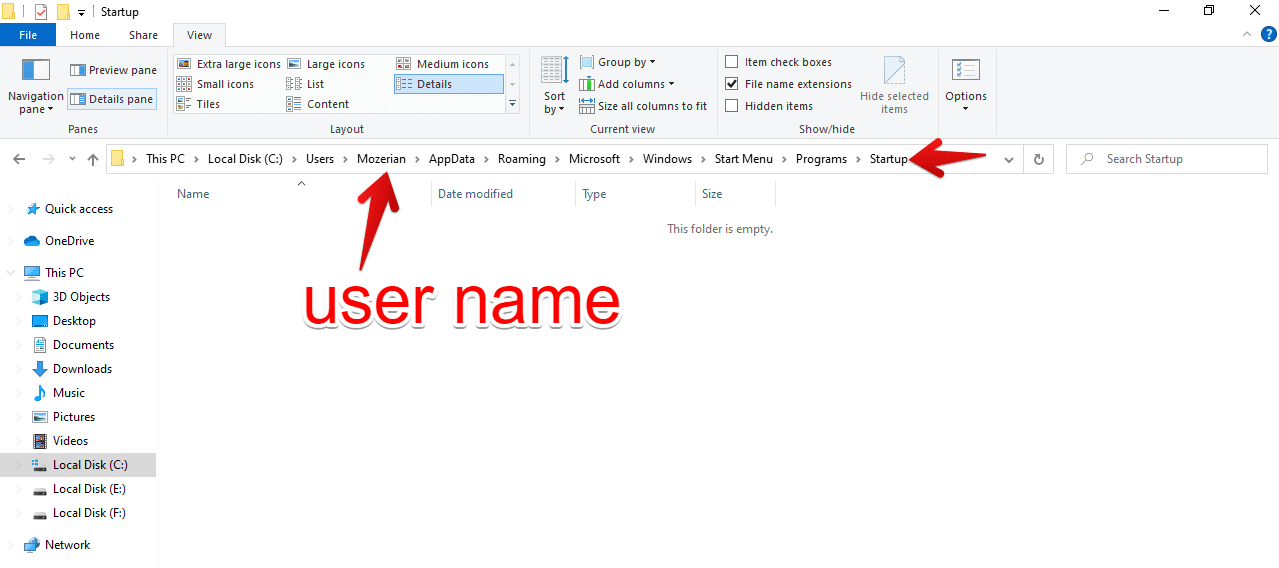
User-level Startup folder
Point to note, according to the user name that you are currently in, you must change the [user name] to match the correct user name, or else you will get an error when accessing this Startup folder as shown below.
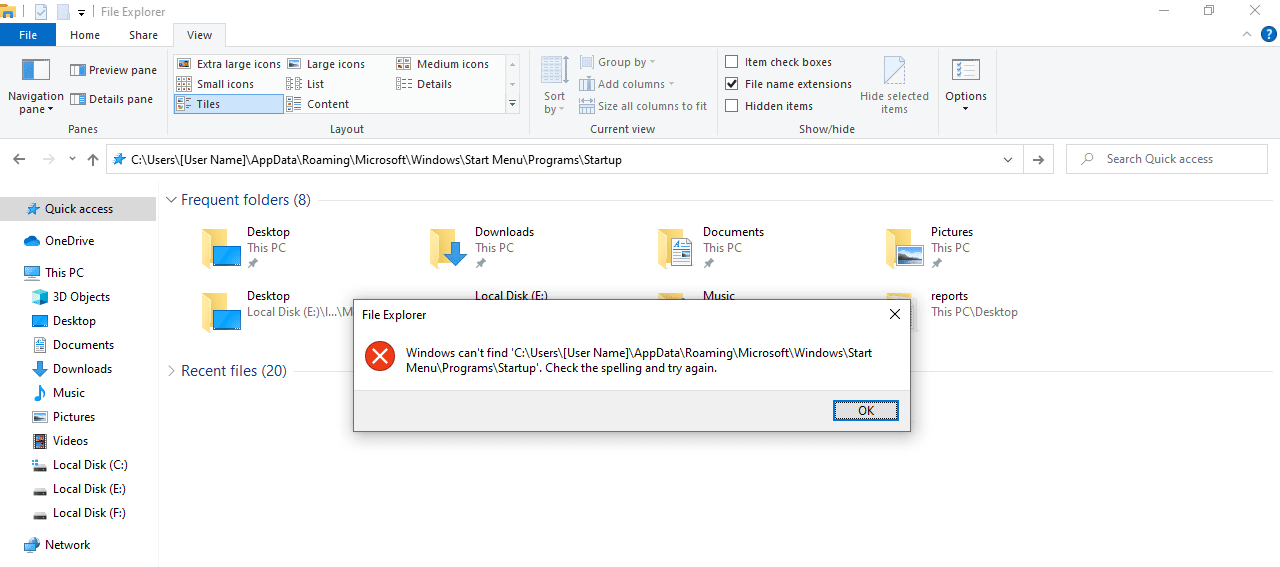
Error
From these two methods of using the file explorer, it’s easy to add programs that you need to execute whenever you boot your Windows 10 computer automatically. You create a shortcut from the desktop of the application you need to add. Then copy the shortcut and paste it to this folder, and hurry, it’s all done. To remove it, delete the shortcut.
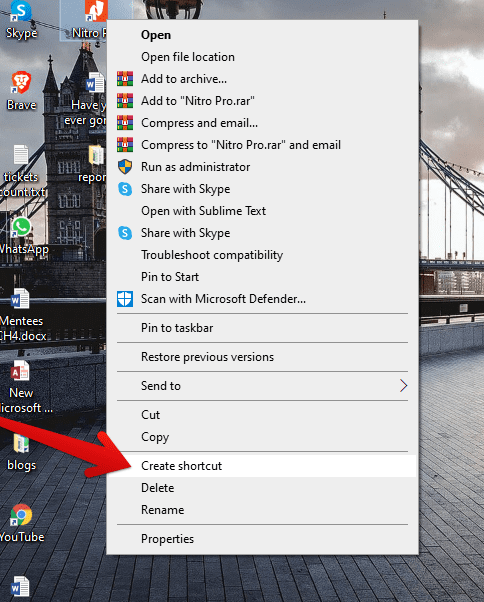
Create Shortcut
Using the run command
We can get o to locate the Startup folder using the run command. To open the run command, press the Windows button(key) + R button(key) simultaneously. Then type these commands.
System Startup folder (all users)
For all users Startup folder, type this command: Shell: common Startup
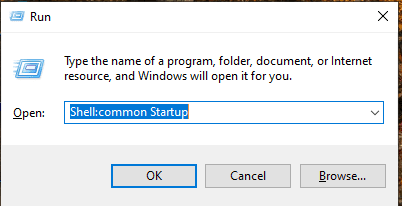
: Shell: common Startup
User-level Startup folder (Current user)
For all current Startup folder, type this command: Shell: Startup
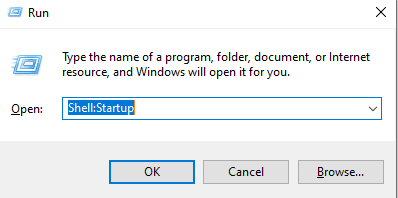
Shell: Startup
These commands will automatically direct you to the Startup folder paths to add or remove Startup programs.
Shortcomings of Windows 10 Startup folder
Now that we have managed to learn how to access the Startup folder, add and remove programs, let’s look at some of the shortcomings of adding programs on this folder.
Windows 10 launches the Startup programs in order; it begins with the system Startup processes and any items in the Task Manager’s Startup tab and then followed by programs in the Startup folder.
If we have too many programs that execute on the Startup folder in Windows 10, this may result in slowing down your computer as much of the computer memory will be in use; it is therefore recommended to place only necessary programs such as:
- Security Software – this include programs such as antiviruses that prevent attacks on your computer
- Backup Software – it will be necessary as it will make sure you will not forget to back up your data.
- Driver update software – this is to make sure no drivers are malfunctioning and are in the latest versions.
- The software is regularly used.
At the normal process, if all these applications on the Startup folder execute at the same time upon opening Windows, this might lead to your computer being unresponsive.
Conclusion
The Startup folder is an excellent feature of Windows that you need to utilize. It is easy to locate and add any application or file by adding the application’s shortcut or file to it. The Startup folder was in all the versions of Windows from Windows 95 when it was introduced. From this, you realize it must be improved for the latest versions, which means it is better and important for Windows users.
