Table of Contents
Both Windows 10 and 11 are robust operating systems with tons of functionality. If you’re a student, a teacher, or a corporate individual who frequently has to record their screen on a Windows PC, this article is for you. We’ll be showing you the exact methodologies that you can employ for screen recording with audio on Windows 10 and 11 for free without purchasing any paid software.
Therefore, keep reading until the end to find out the best ways you can accomplish the task at hand. We will leave tailored instructions in the forthcoming sections, so you will find it easier to replicate them on your end. Let’s jump right in without wasting any further time.
Best ways to record your Windows 10/11 screen with audio
The following is a round-up of the best ways you can utilize to capture your screen with the computer’s audio. Be sure to follow the tutorial carefully for the most favorable results.
Method 1. Using an in-built Windows feature to screen-record
Out of all the different methods we’re going to cover in this guide, the one that starts things for us revolves around utilizing an in-built Windows 10 and Windows 11 feature called Xbox Game Bar. Although this functionality is geared toward playing video games, primarily through the Xbox Game Pass companion app, you can also utilize it for other types of uses. These include recording your screen for educational or learning purposes.
We have penned down a complete article on recording your gameplay with the Xbox game bar, so we have to refer you to this moving forward.
For now, though, it’s worth noting down how you can fire up the Game Bar feature using the “Windows” and “G” shortcut keys and record your audio-enabled screen with it.
This feature works on both operating systems—Windows 10 and Windows 11—and can come in quite handy for capturing your screen. The following screenshot depicts what button you have to press to initiate the screen recording functionality of the Xbox Game Bar. When you’re done, you can press the same button to stop the recording, and that will be it.
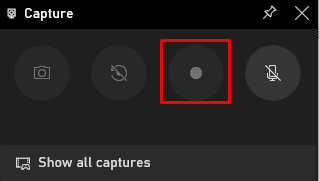
Clicking on the “Record” button
Method 2. Using a high-quality video creation software to screen-record
Another high-quality way of recording your Windows 10 or Windows 11 screen is downloading and installing a video creation software called Open Broadcaster Software or OBS. It’s free and lets users screen-record on both operating systems with audio. To get started with it right away, click on this direct link to get to the software’s official website. Once done, choose the Windows version of OBS to download the setup file.
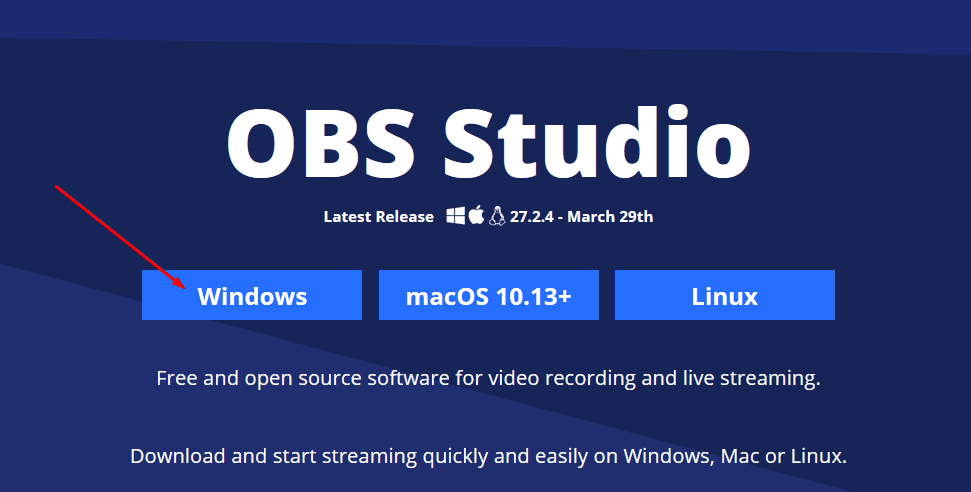
Choosing the Windows version
After running the setup file and following the on-screen instructions to install OBS Studio on your Windows PC, you’ll be taken to the application’s main user interface. You’ll find it quite effortless to start recording your screen. To get started, we first have to optimize the software, so it performs better to our needs.
When you launch OBS Studio, you’ll be greeted with a configuration wizard. The first optimization preference you’ll need to set will concern your recording. Click on “Next” after selecting the right option to continue. Check out the screenshot below for more details.

Optimizing the software
You now have to configure your video settings. Evaluate if any of the options below look off to you and make changes accordingly.
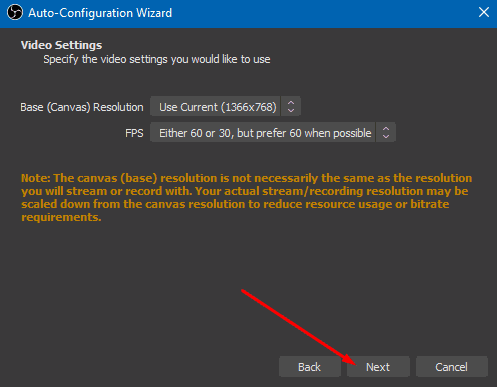
Configuring the video settings
When you’re finally done with the wizard, the next step is to add a display source to start recording. Click on the “+” button under the “Sources” area.
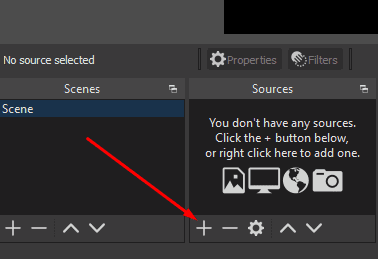
Adding a display source
After adding a source, click on “Start Recording” in the far-right section of the OBS Studio user interface. Once done, your screen will start recording on its own with audio.

Starting the recording
Once you feel you’ve recorded enough, click on “Stop Recording,” and you’ll be done with the whole process. This was the overall working of the OBS Studio and how to record your screen on Windows 10/11 with audio for free.
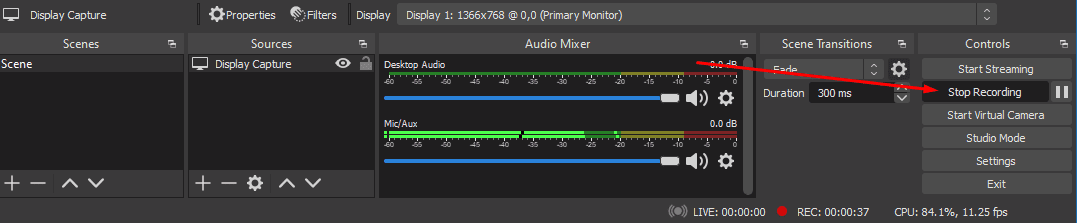
Stopping the recording
Extra method. Using Microsoft Stream to record your Windows screen
Another method that you can utilize to record your screen on Windows 10 and Windows 11 with audio is centered on Microsoft Stream. The developer’s professional-grade software makes it possible to capture your screen in corporate, enterprise, and business settings. If you’re a professional who requires high-end functionality for your everyday work requirement, Microsoft Stream is the solution for you.
However, this method is a paid one, so you must sign up for one of its subscription plans on the official Microsoft Stream website. The software is worth mentioning here due to its robust set of collaborative features, community learning access, and integration with other productivity applications. Give it a shot if you’re after a paid application rather than a free one.
Conclusion
Screen recording is a phenomenon that is simply at large in the world we live in today. A comprehensive variety of fields make it necessary to demonstrate pertinent processes and allow us to do our job subsequently. That is why it’s worth knowing in what different ways you can record your screen on Windows 10/11 with audio and avoid unwanted hassles when the time comes for you to use this functionality.
This article has talked about four different yet equally robust methods of recording your screen on Windows 10 and Windows 11. The purpose of scribbling down various methodologies was to make sure you know all your options and choose between them flexibly. In our opinion, OBS is the best of the bunch, featuring tip-top functionality for free without breaking a sweat. Do let us know down in the comments section which method you went with.