Table of Contents
An Audio Driver is responsible for connecting audio systems in the PC with speakers on external audio devices such as microphones and headphones. In cases where the sound is missing, there is a dire need to reinstall the audio driver in your PC. One of the many reasons we reinstall audio drivers is to fix all the audio-related complications in our PCs.
This article is tailored to illustrate how to reinstall audio drivers in Windows 10. Suppose your audio drivers are not working. This is the right place to be. Continue reading the article to learn how to reinstall the audio drivers.
To know if the audio driver is installed on your PC, click the “Start menu” button, which is located in the taskbar on the lower left of your PC, and search for “Device manager.”
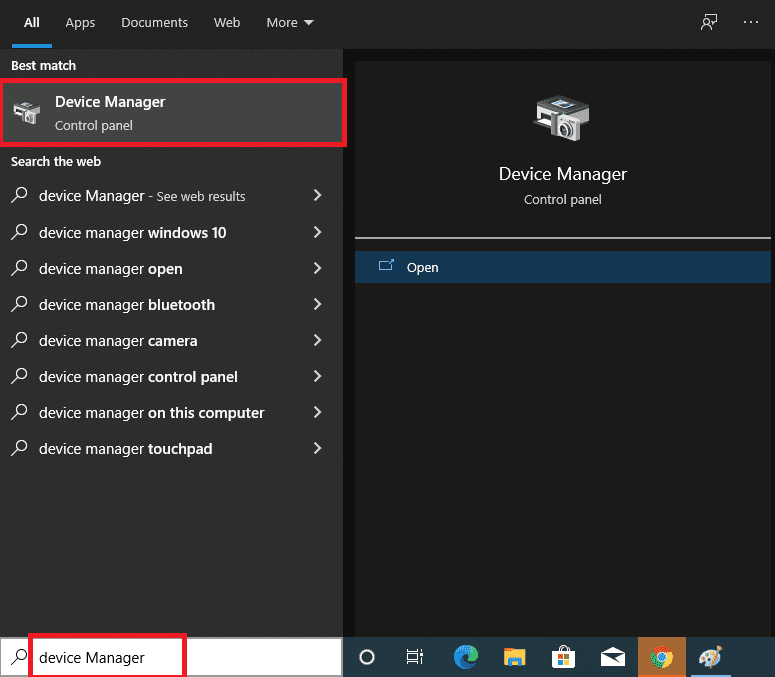
Search for device manager
After that, search for the “sound, video and game controllers” tree in the device manager. Next, press on the “sound, video and game controller” bar to see the audio device that is on your PC.
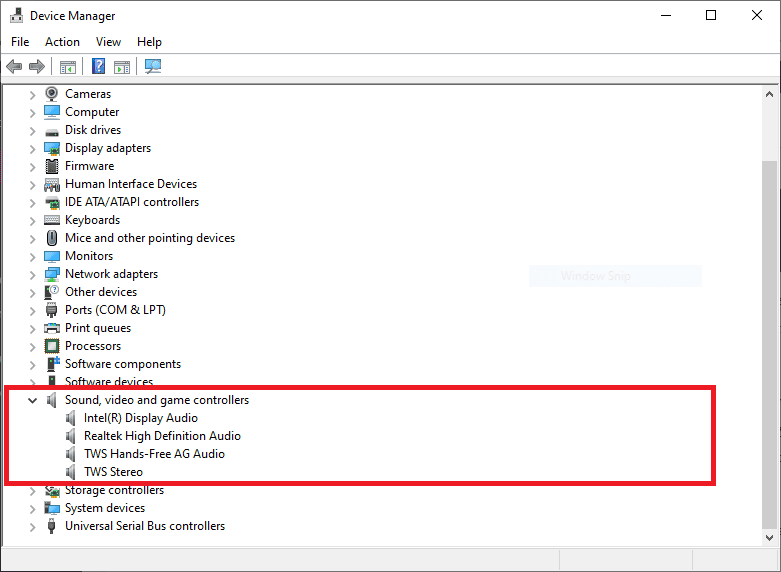
locate and expand the sound, video, and game controller menu
Double click on the audio device you have found to see its status, whether it is working correctly or not.
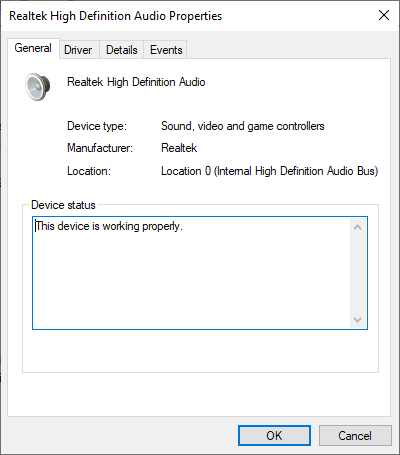
Double-click the driver to know its status
If the status of your PC shows that it is not working correctly, you will be required to reinstall the audio driver. In this case, we will have to go to the “Start menu” bar in the taskbar and type “Device Manager,” then press “Enter” on your keyboard as we did before. Next, scroll through until you locate the tab with the “sound, video and game controller,” then double click to expand it.
If you do not know the driver provider and version of your PC, you will have to click on the “Intel(R) Display Audio” option.
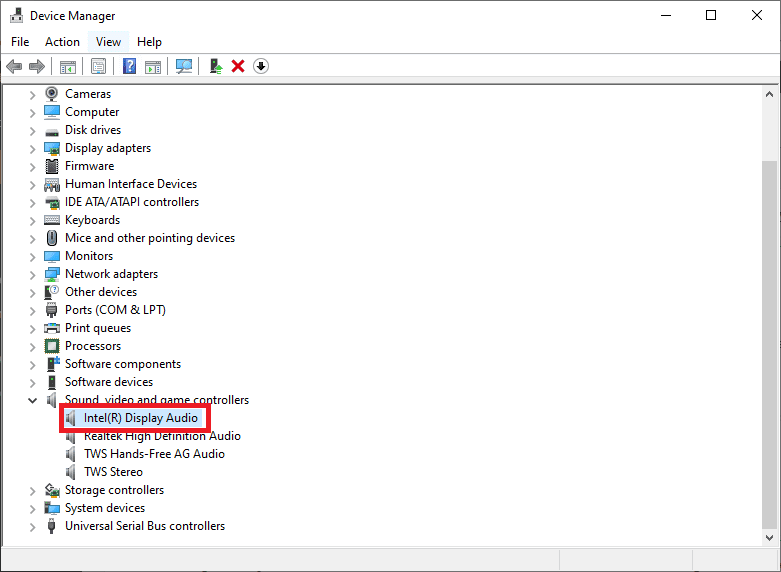
Intel (R) Display Audio
Next, select the “Properties” option, click on the “driver” tab, and jot the driver provider and the driver version.
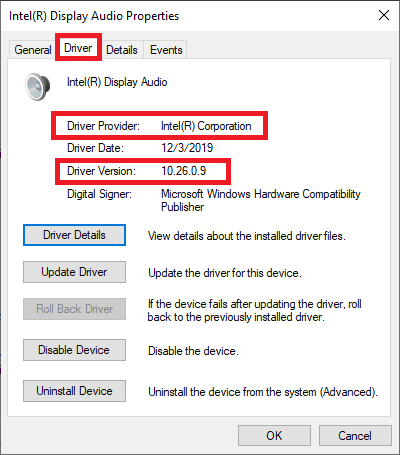
Select properties and choose the Driver tab
The driver provider and version of your machine are significant since they will be used later while reinstalling the audio driver.
Uninstalling audio drivers
Once you are done, proceed to the uninstallation process. To uninstall the audio driver, click the “Start Menu,” then type “Device Manager” and press “Enter” as we did before. Scroll and locate the “sound, video, and game controller” submenu. Click on it to expand. You will now see the name of the audio driver. Occasionally you will see something similar to “Realtek High-Definition Audio.” Right-click on the audio driver and select the “uninstall device” option.
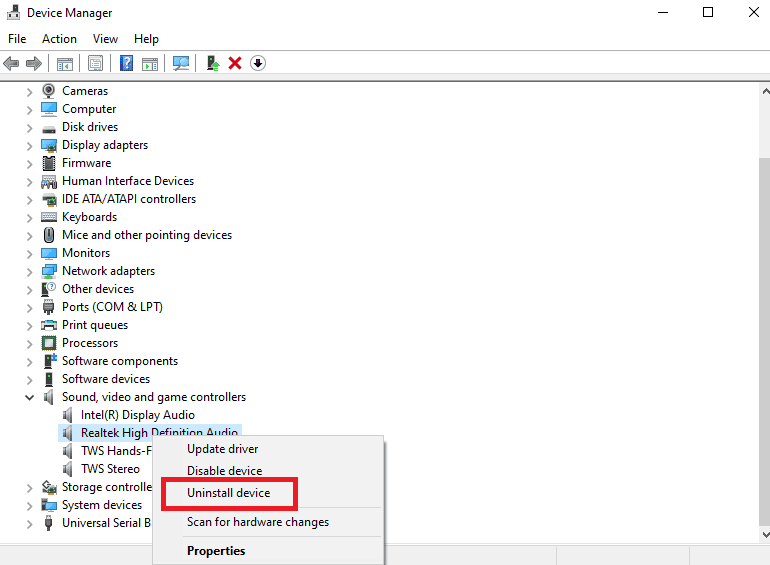
Right-click on your audio driver and select the uninstall device option
After choosing the uninstall option, you will get a checkbox with a confirmation dialogue. Confirm the uninstallation process by clicking the “delete the driver software for this device” option.
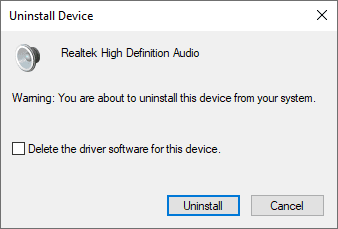
Check the delete the driver software for this device to initiate the uninstall process.
Be patient as the uninstaller removes the audio drivers from your PC. This process will not take long.
Note: If you fail to click on the prompt provided when clicking on the uninstall option, Windows will not uninstall the audio driver. Hence, make sure you click on that prompt to uninstall the drivers successfully.
Another method of uninstalling the audio driver is going to the “Start menu.” First, open the features and programs of windows by keying in “appwiz.cpl” then pressing “Enter” on your keyboard.
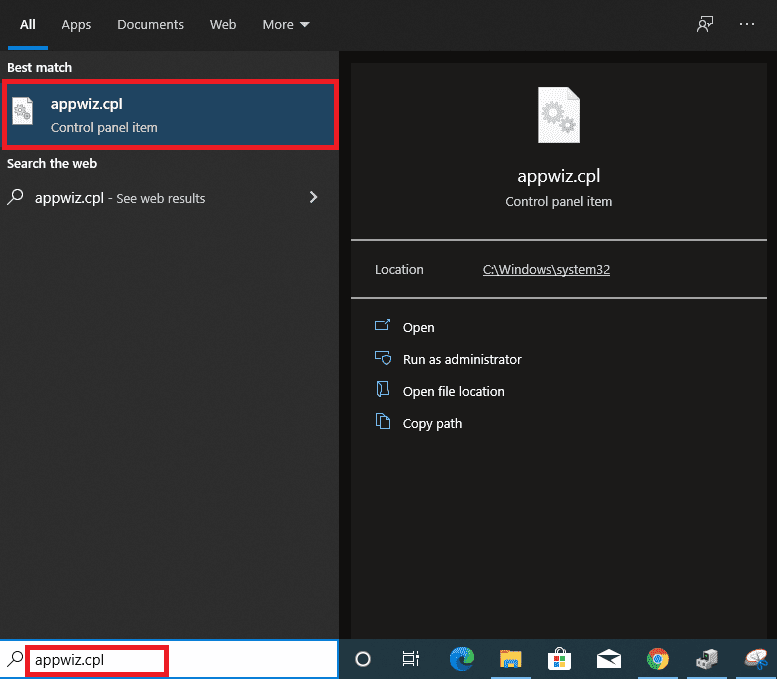
Open programs and features
Once you press enter, the control panel will open up, containing all the programs and features. You will then be required to locate the audio driver from the software list. Select the audio driver entry, right-click on it, and click on the uninstall option. Besides, after selecting the audio driver entry, you can click on the uninstall button at the top.
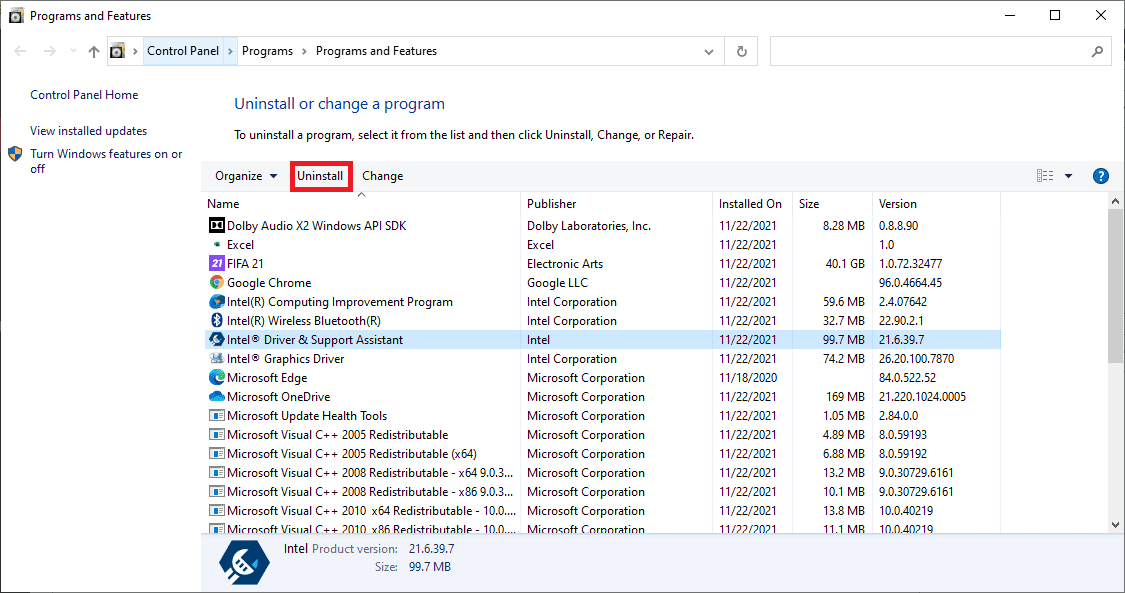
The Control panel will open.
After uninstalling the driver, restart your PC and allow the system to boot up to install the audio driver automatically. If this does not reinstall the audio driver, you can select any method provided in this article to reinstall the drivers.
Reinstalling audio drivers
There are different methods, which one can use to reinstall the audio drivers.
Method 1:
Once you have successfully uninstalled the audio drivers from the previous step, you will be required to reboot your PC. All missing drivers, including the audio driver, recently uninstalled, will be reinstalled. Windows 10 will automatically fix the missing drivers during the reboot process, thanks to Microsoft for incorporating this feature into Windows 10. Nevertheless, it is better to scan for the hardware changes for assurance purposes.
To scan for hardware changes, follow the steps provided herein:
- Navigate to the “Start menu.”
- Search for “Device manager.”
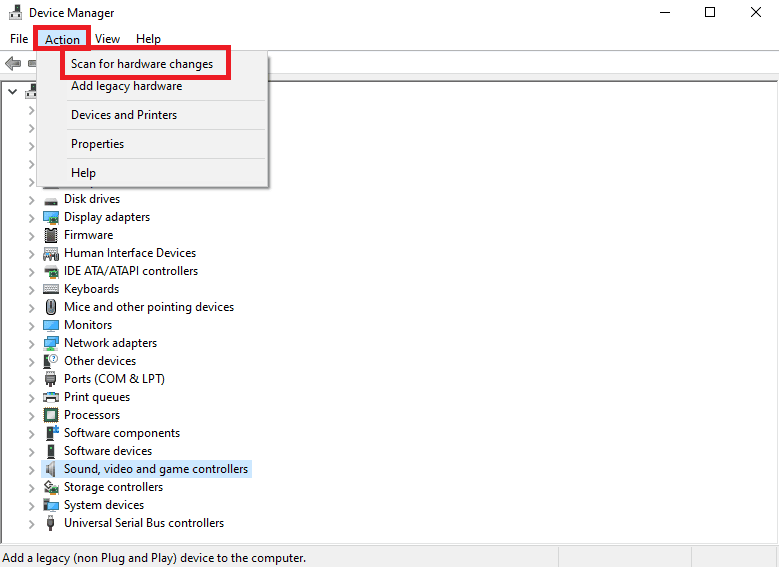
- Under the “Device Manager” screen, locate the “action” tab and left-click it on your mouse to select
- Now choose the “Scan for hardware changes” option to initiate the scan process.

Open Device Manager, select the action tab, and choose the Scan for hardware changes option.
Note: Scanning for hardware changes is crucial since it helps you know which drivers are missing on your system while at the same time fixing missing drivers
Method 2:
If the above method does not work for you, you will have to install the drivers using this method manually. Now, this is where the driver provider and version you wrote down come into play. Once your PC reboots, open your favorite browser and search for your driver provider and version.
Note: If you have no idea where to find these drivers, contact your official manufacturer providers. They will help you by providing a link to the drivers you will manually download and install on your PC.
After downloading the drivers, navigate to your downloads folder and click on the executable file, and the installation will start immediately.
Note: Alternatively, if you are not sure about the model of the audio driver, you can use google to find the correct audio driver. This is done by typing the model of your PC in the Google search. After that, you will find a link to download the audio driver from your manufacturer. This method is applied if the first method of restarting windows and scanning through hardware has declined to reinstall the audio version.
Method 3:
This is another method of reinstalling the audio driver. It is done by navigating to the settings menu > Expand the settings and selecting the “Update and Security” option. Now choose “Windows Updates.” A new settings screen will appear, click on the “check for update” option. This will automatically trigger the scanning of your system by the Windows update software. It will provide a list of updates, click on download and install to install all the missing drivers and updates, including the audio driver.
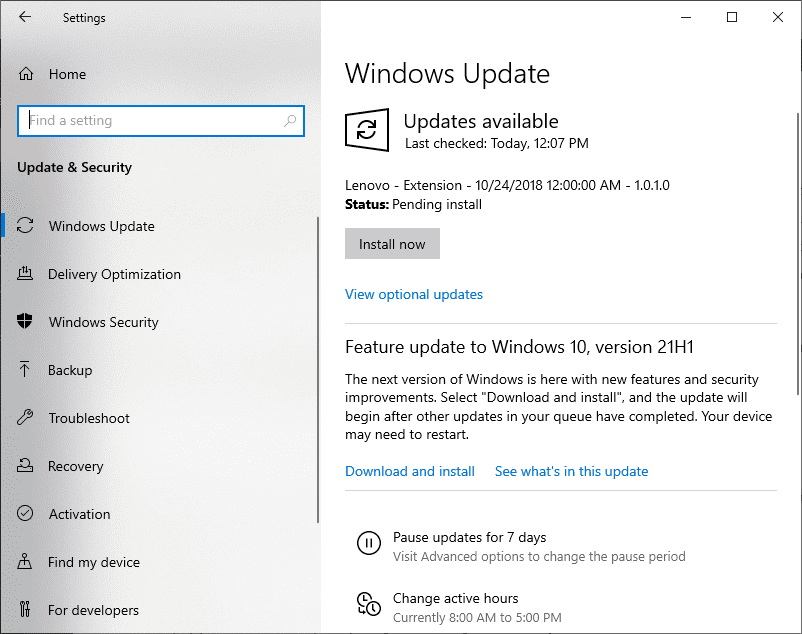
Windows Updates
Note: before using this method, ensure to be connected to the internet. The Windows update software will not download the driver updates if you are not connected.
That’s all. You have successfully reinstalled audio drivers on your PC.
Conclusion
This article covered all the steps involved in reinstalling audio drivers. We hope it was helpful. If yes, please find time and leave a remark via the comments section. We hope to catch you soon on our next article tutorial.