
Table of Contents
Cortana is a virtual assistant that Microsoft developed to perform simple tasks such as answering the user’s questions, performing simple arithmetic, and setting reminders. It uses Bing as its default search engine. Cortana virtual assistant is available on Windows. It is offered in many languages, including English, French, German, Chinese, Italian, and Japanese.
It was integrated into Windows 10 in 2016. Its sole purpose of integration was to add and perform reminders tasks. Cortana operates efficiently by making use of a natural language processing capability that is also linked to Satori, a semantic search database.
Why opt to remove Cortana?
Cortana has severally been reported to invade its user’s privacy. Many users actively say how embarrassing it is for the application to collect personal data but still fail to perform simple tasks. Some users have claimed that Cortana fails to execute given tasks such as Google searches and locating other applications.
Therefore, users actively seek to uninstall the application since it drains other system resources while failing to execute its duties as expected. In addition, uninstalling the application from Windows 10 helps prevent it from sending one’s data to Microsoft.
For those who are still in doubt about whether or not to uninstall Cortana, the application has an option for limiting the level of data collection. This function is in Cortana’s settings panel. To access that, one needs to click on the ‘start menu’ on your windows 10 computer and select the ‘settings’ icon, then select “Apps.
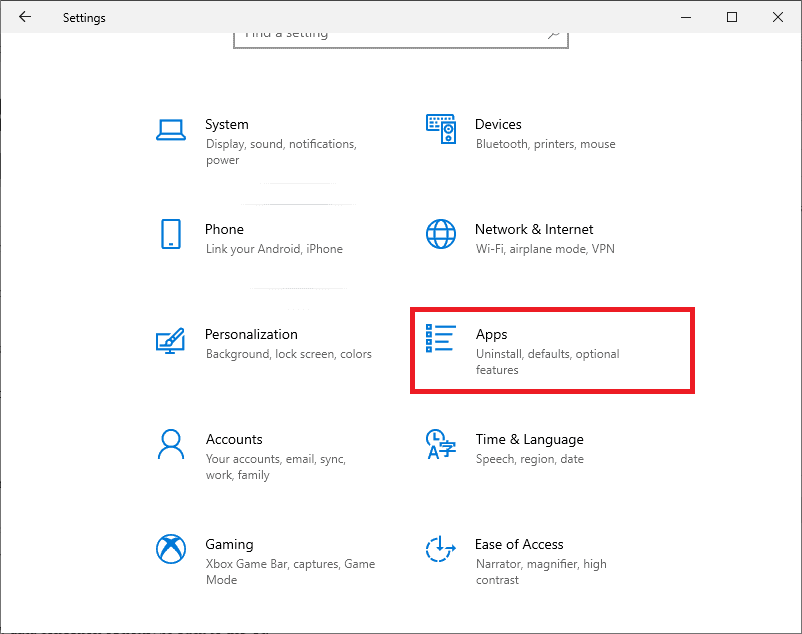
apps
Select “Apps”, then on your left panel, choose “Apps and Features” under settings as shown below:
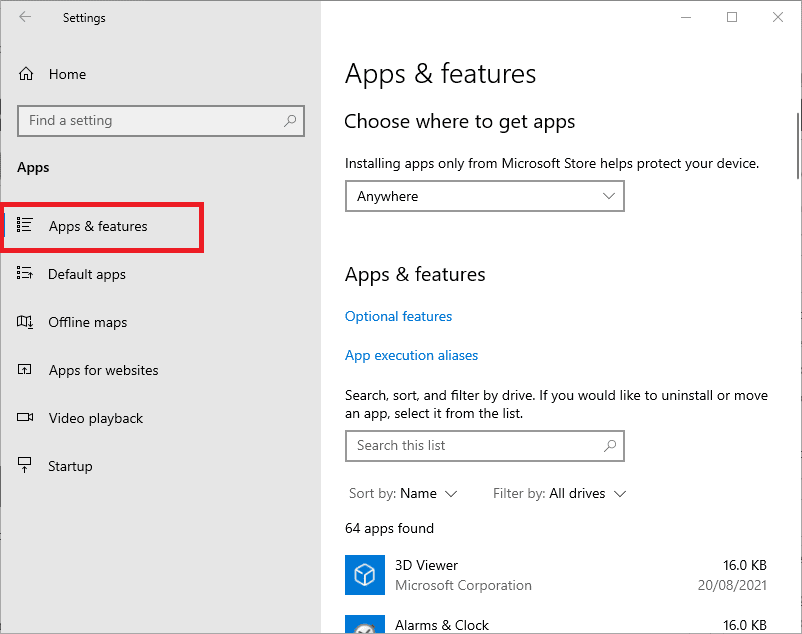
apps and features
Here you will search for ‘Cortana’, under the “Search this list.”
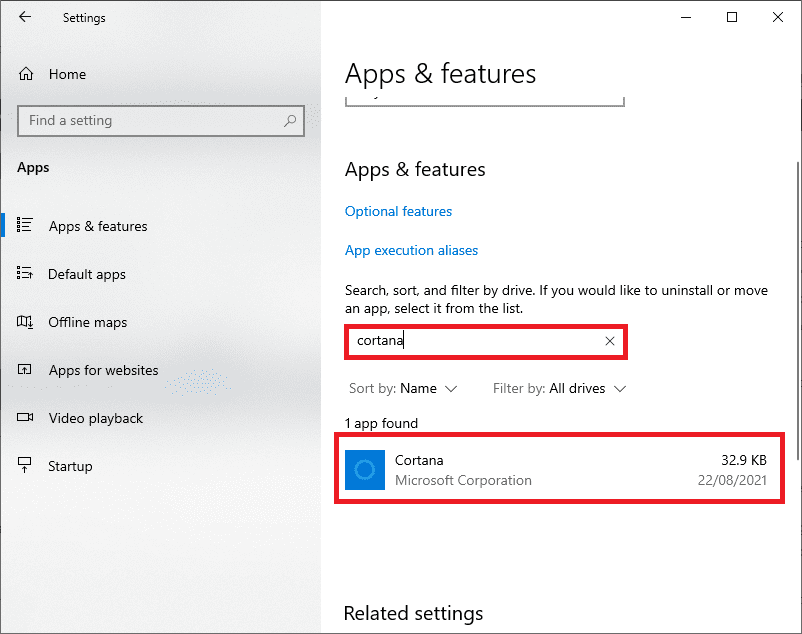
Cortana
Launch Cortana and turn off all the available toggles.
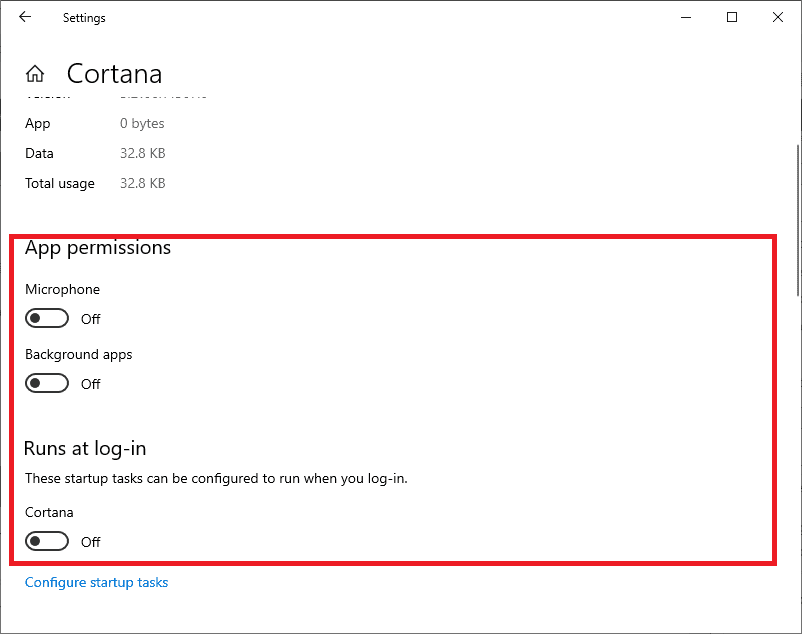
Cortana toggle off permission settings
Navigate and locate the option that states ‘Change what Cortana knows about me in the cloud’. This will automatically trigger a ‘personal Information’ response page. Once it has completed loading, scroll to the bottom of the page and click on ‘clear’.
To turn off other privacy data collection options, go back to the ‘Start Menu’ and select ‘settings,’ then choose ‘privacy’ as indicated in the image below:
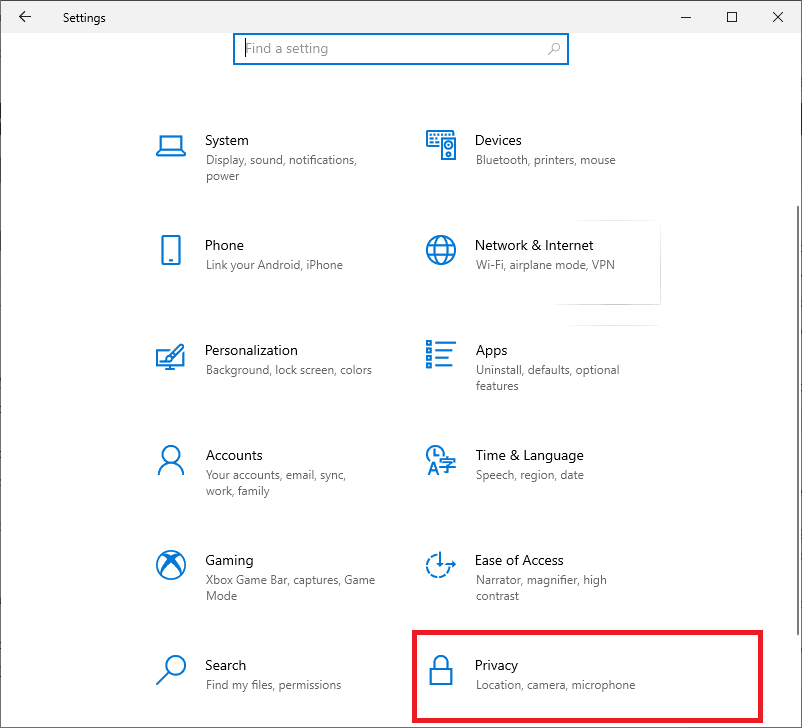
privacy settings
Next, scroll down and locate the ‘speech inking & typing’ option. Now toggle off the ‘Getting to know you’ option to disable Cortana from acquiring your data.
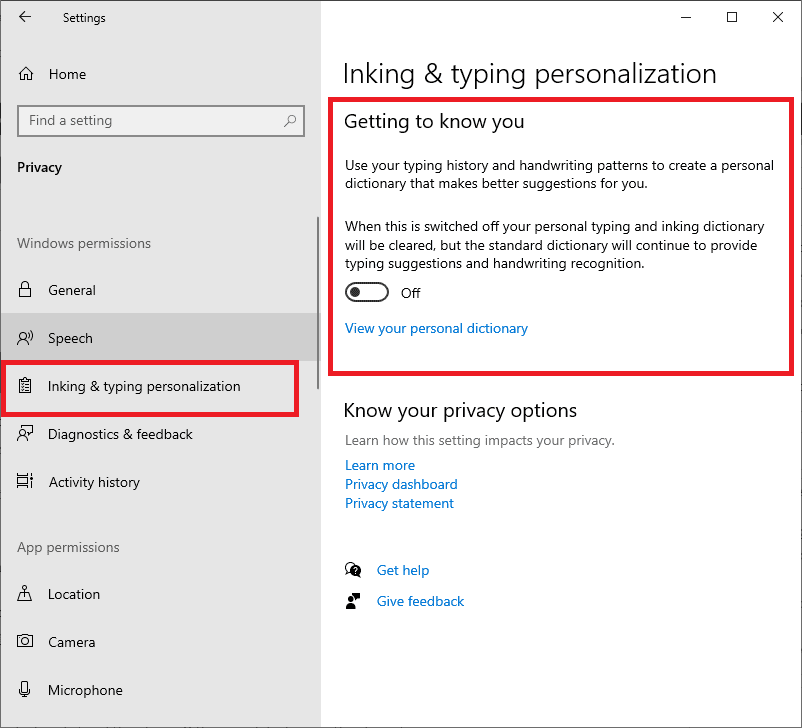
ink & typing personalization settings
Note: Stopping this option from the speech inking and typing option stops Cortana from actively collecting your talking and typing info on your Windows 10 pc.
How to prevent Cortana from fetching your data:
For those with privacy concerns regarding Cortana’s data-gathering habit, this article will take you through a step-by-step procedure to successfully prevent this action.
Step 1: on the windows start menu, type ‘Search permissions and history’ and press the ‘Enter’ key on your keyboard.
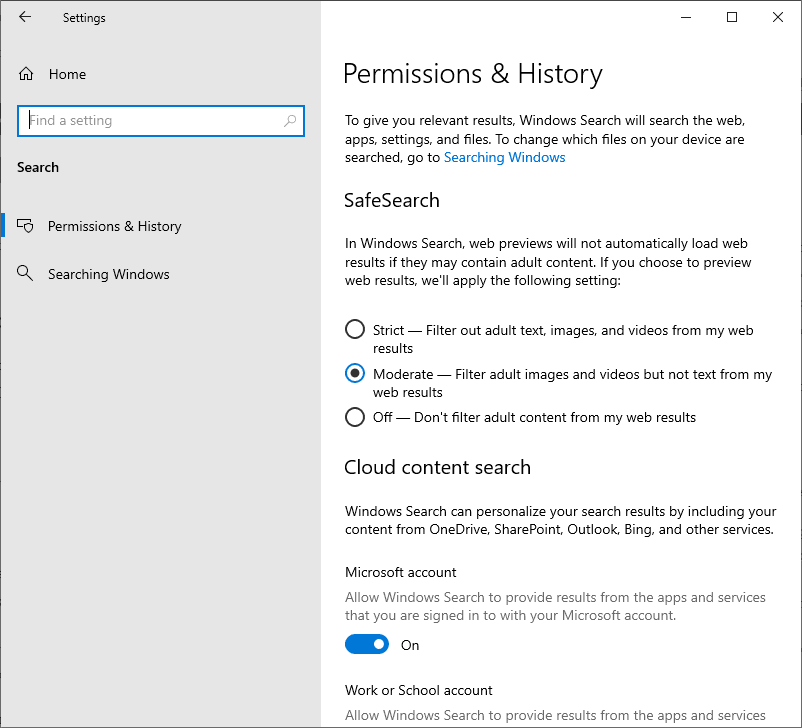
permissions & history settings
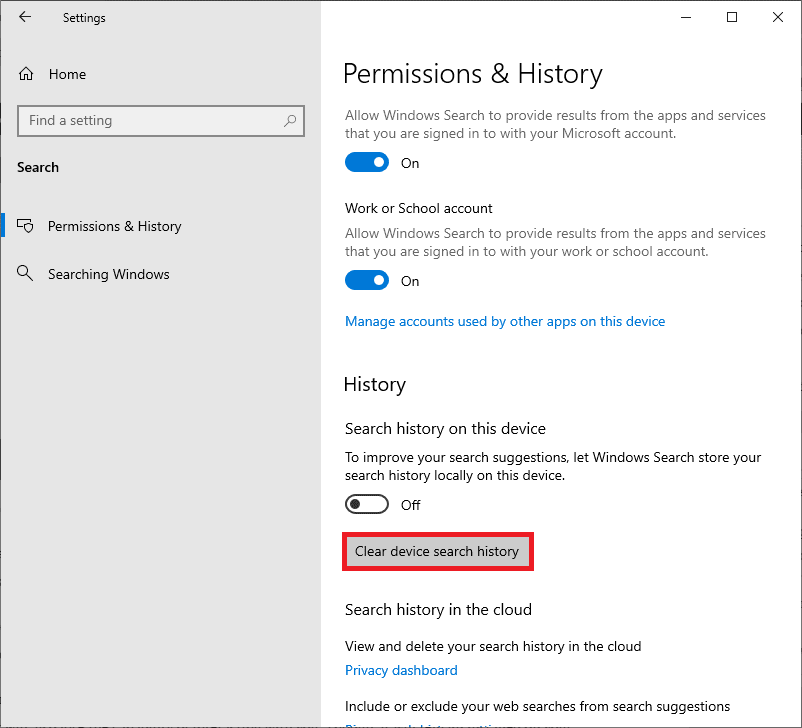
Step 2: scroll through the history list and then turn off the ‘search history on this device’.
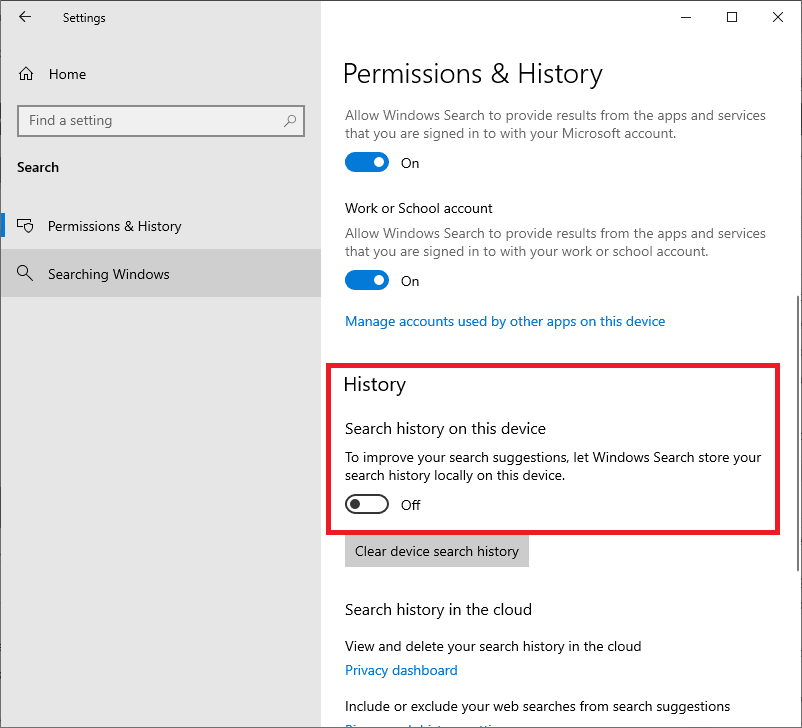
turn off search history on this device
Once this is complete, select the ‘clear device search history’ to clear the search history of the Cortana application.
clear device search history
Step 3: Locate ‘find a setting’ on the settings screen on the search bar.
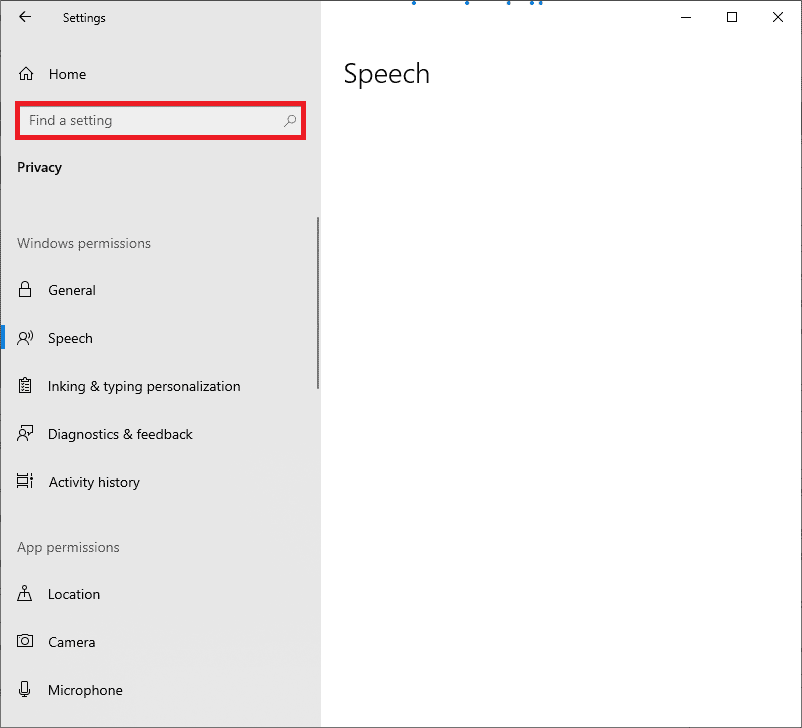
find a setting
Type ‘speech privacy settings’ and then choose the first option, ‘speech privacy settings’
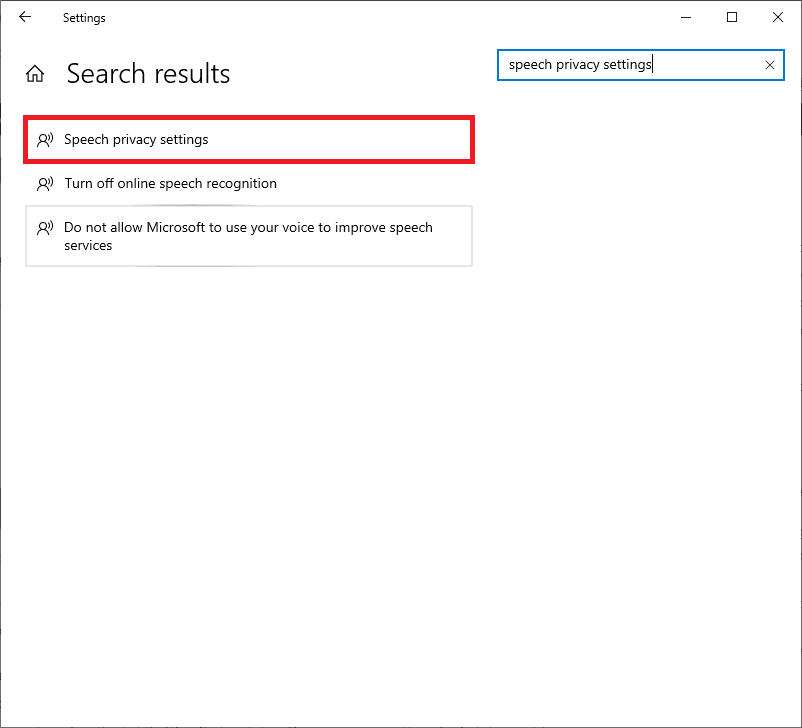
speech privacy settings
Step 4: turn off the use of your voice for dictation. This option also includes the permission of other applications in your windows 10 using your online speech recognition technology.
Once these steps are complete, Cortana will not have permission to gather your personal information and report it to Microsoft. It will also lose the capability of interacting with you. Though it will remain installed on your computer, it will have no impact since it has been disabled. This method is preferred for limiting Cortana’s functions as you may otherwise opt to use Cortana for other purposes.
How to deactivate Cortana in Windows 10:
1) For Windows 10 Pro
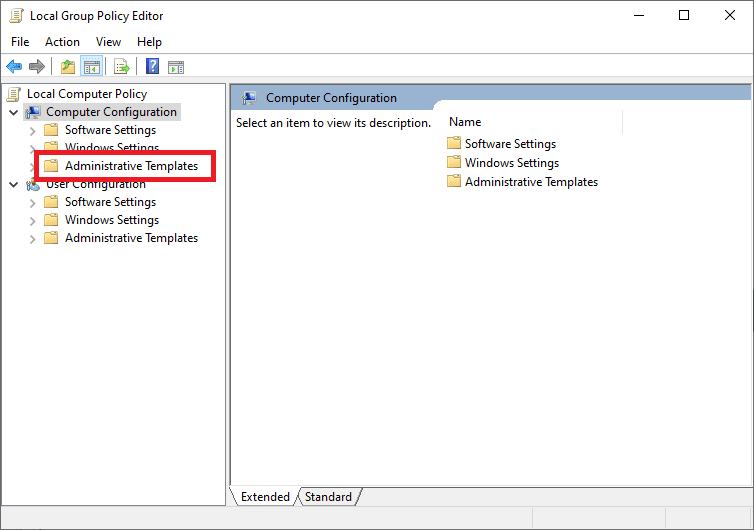
Press the ‘start menu’ key and type ‘Edit group policy’, then go to ‘computer configuration.’
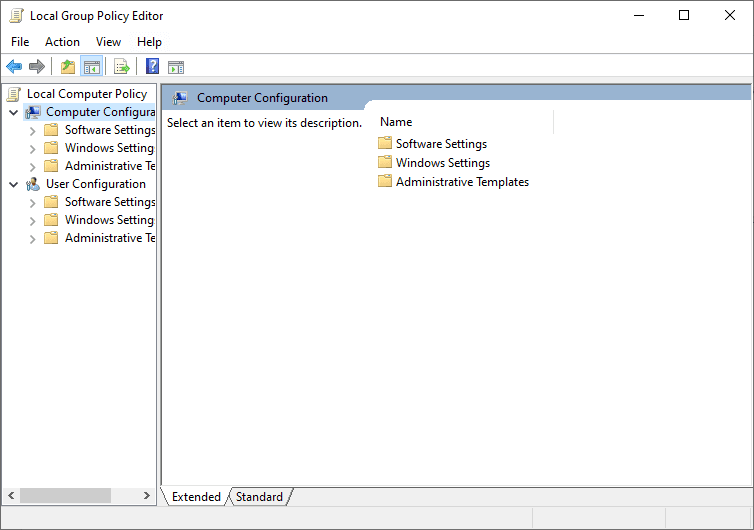
computer configuration
Next, select ‘Administrative templates’
administrative templates
Choose the ‘Windows Components’ option
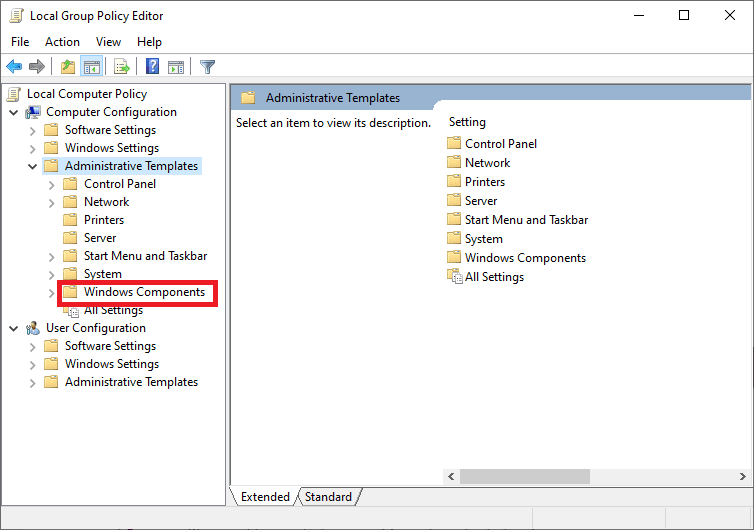
Windows components
Next, select the ‘Search’ option.

select the search option
Open the ‘Allow Cortana’ by double-clicking on it.
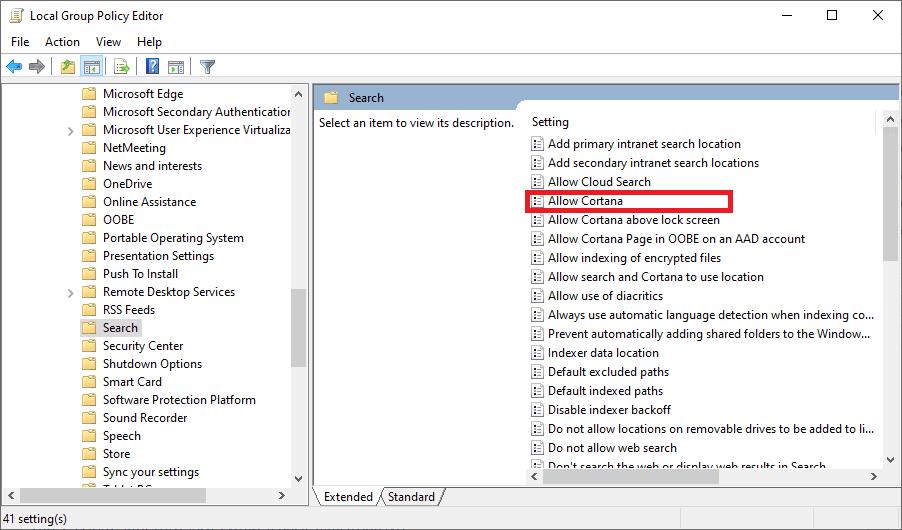
open allow Cortana
Now click ‘Disabled’, then click ‘Apply, and finally, select ‘OK’ as displayed in the image below:
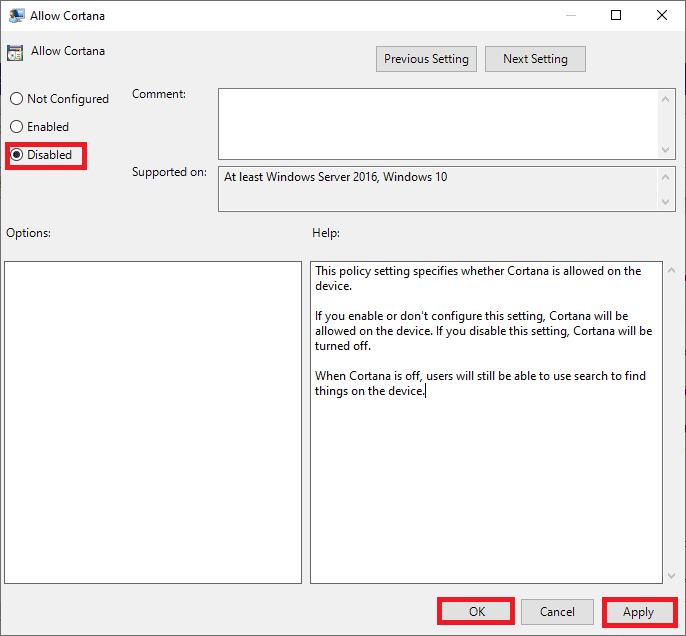
disable Cortana
Once that is complete, restart your computer.
Cortana will now stop asking you ‘Ask me anything to search windows’ like before.
2) For Windows 10 Home Edition
To deactivate Cortana on Windows 10 Home edition, follow the steps provided below:
1. Open the ‘start menu’ on the bottom left of your windows 10 computer, then type ‘Regedit’ and press the ‘Enter’ key.
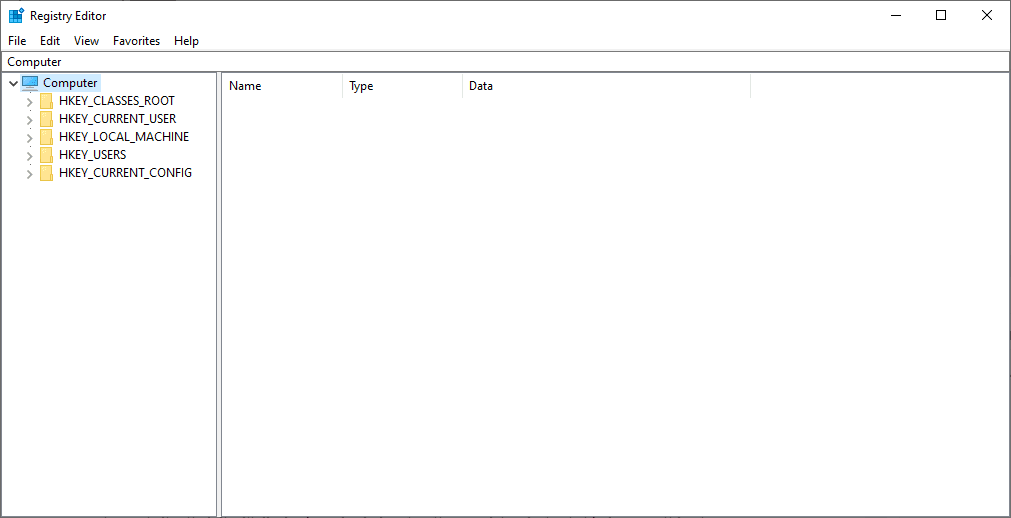
registry editor
After that is complete, locate the Windows directory by navigating through the folders provided in the command below:
HKEY_LOCAL_MACHINE\SOFTWARE\Policies\Microsoft\Windows

locating the windows directory
On the ‘Windows’ directory, right-click and choose ‘New’ then ‘key’.
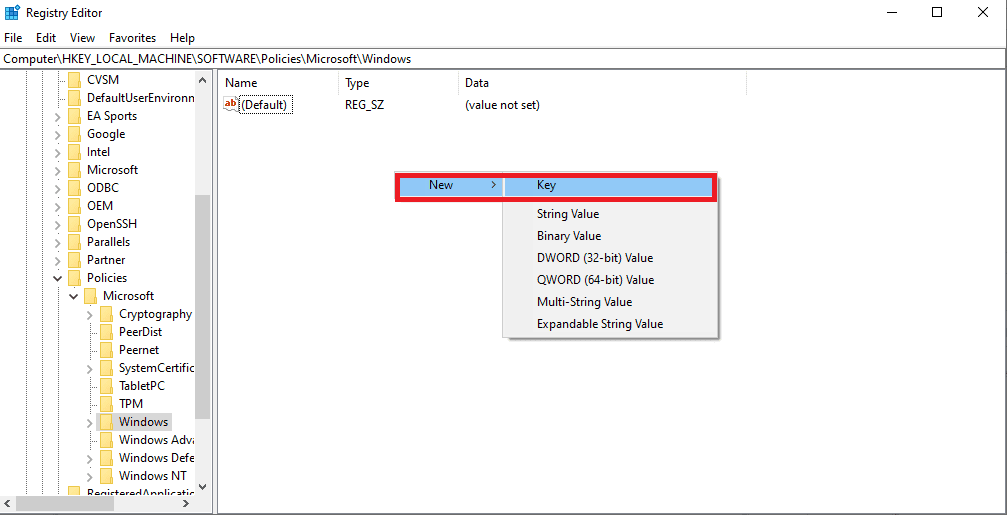
new and key (registry editor)
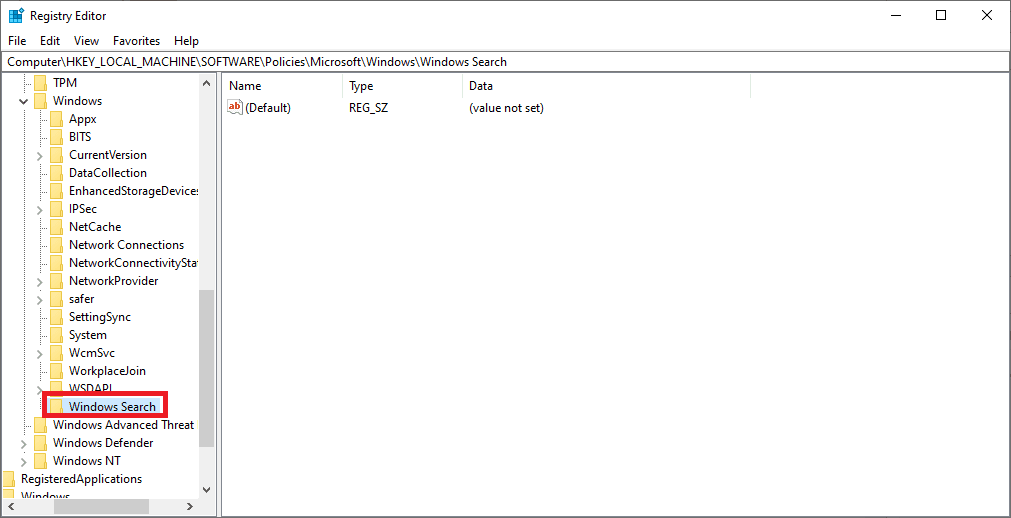
A “New Key #1” key will be generated. Rename it to “Windows search.’
windows search
Select the newly created “Windows Search” key, then proceed to the next step
You will right-click anywhere in the white section and choose ‘New’, then ‘DWORD (32-bit) Value’ in the right panel.
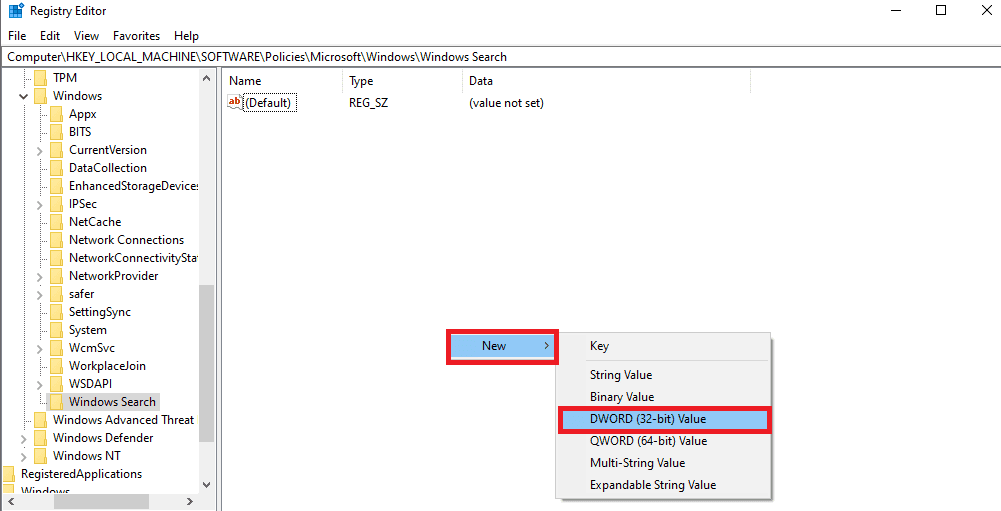
dword 32-bit value
A “New Value #1” will be created. Rename it to ‘Allow Cortana’ and set ‘Value Data’ to ‘0’ as shown below:
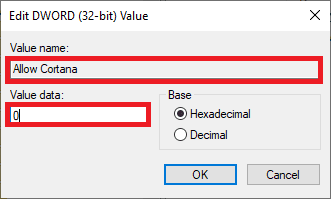
allow Cortana dword 32-bit value
Note: to edit a DWORD 32-bit value, double-click the newly created value
To save changes, we shall restart our computer. after restarting, you will realize that instead of the “Ask me anything” syntax, you will see “Search Windows”. This shows that Cortana has been deactivated successfully on your PC.
How to remove Cortana from Windows 10
Although Windows 10 allows one to remove its system applications such as Weather and voice recorder, it has always been reluctant to let you uninstall Cortana. This article explains the procedural steps to uninstall the digital assistant if it does not work well. It mainly focuses on Windows 10 operating system, the May 2020 update.
Step 1: Open the ‘start menu’ by pressing the windows key
Step 2: on the start page, search for ‘PowerShell’, then right-click on the top result and then right-click to ‘run as administrator.
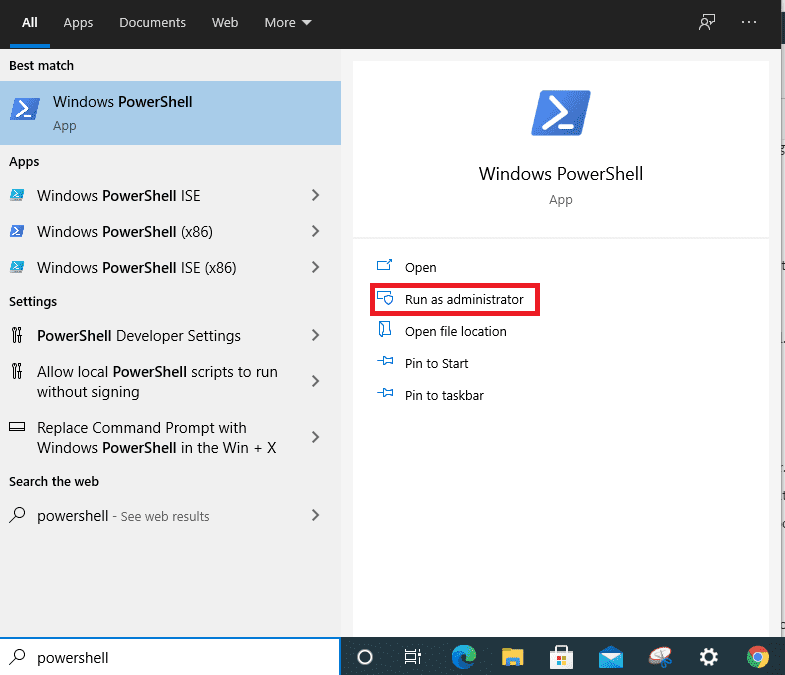
run PowerShell as admin
Step 3: to uninstall Cortana from the computer, use the following command and press ‘enter’ at the end.
Get – AppxPackage –allusers
Microsoft.549981C3F5F10 ǀ Remove-
AppxPackage
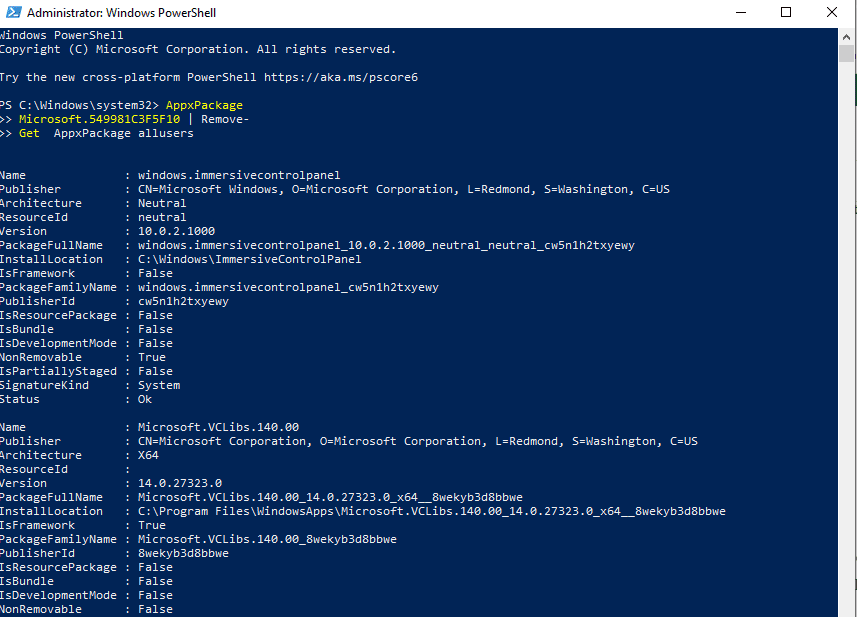
uninstall Cortana using the PowerShell
Once this command action is complete, Cortana should be uninstalled from your Windows 10 computer.
The Cortana button on the taskbar will, however, remain visible. So if you choose to keep it, it is safe, and it will no longer collect your data as before. However, right-click it on the taskbar and choose the ‘clear’ option if you decide to remove it. This will remove it from the taskbar.
Conclusion
There is a mixture of reactions as to whether it is good to keep or to uninstall Cortana. Of course, this depends on your preference. Therefore, if you wish to keep Cortana on your Windows 10, well and good. If not, you can either uninstall it entirely or disable it, as shown in the tutorial. We hope you enjoyed reading this tutorial. If you did, give a thumbs up via the comments section. You can also ask for help via the comments section.