Table of Contents
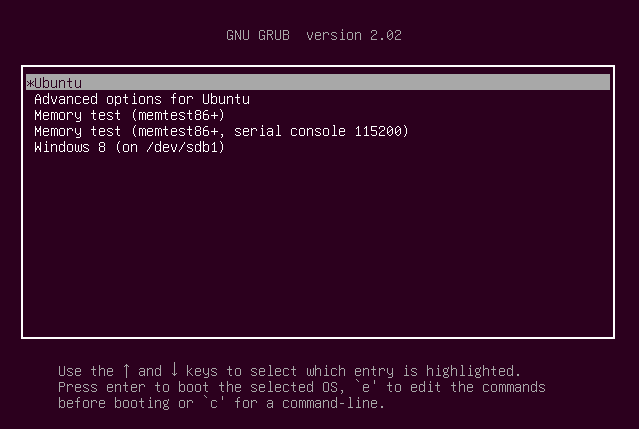
Before we start talking about removing grub from Windows, let us start by understanding what grub is. Grub stands for GRand Unified Boot-loader. It is a boot loader package that supports the installation of different operating systems on the same computer. We can also say that this is the first program your computer runs whenever it starts.
If you install a Linux distro, for instance, Ubuntu alongside Windows, the grub boot loader also gets installed, allowing you to choose the operating system would wish to boot.
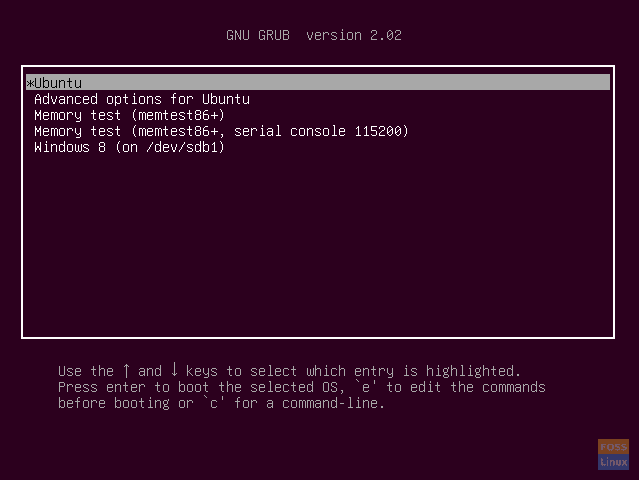
Grub Bootloader
If grub lacks the grub folder, you might get some of the errors as shown below:
Sample 1
error: no such partition.
Entering rescue mode…
grub rescue > _
Sample 2
error: unknown filesystem.
grub rescue > _
Causes of Grub rescue
Grub rescue means the grub files are corrupted, and you can no longer boot into your operating system. You simply need to “rescue” the grub boot-loader. Some of the causes of these errors occur due to deleting the Linux partition and forgetting to update the bootloader. Secondly, this might occur in the scenario where one is installing Windows after installing Linux. This is not the recommended method to dual-boot a PC. Windows initiates its own Master Boot Record. The grub is no longer available, and you will be unable to boot from Linux/Ubuntu.
With that said, to avoid getting the “grub rescue”, let’s look at how to remove grub from windows 10 after uninstalling the Linux operating system.
Removing grub from Windows 10
The first thing you want to do is open the “command prompt”. You can do this by clicking the start button and typing ‘command prompt’, it should come at the top, right-click and select ‘Run as administrator.
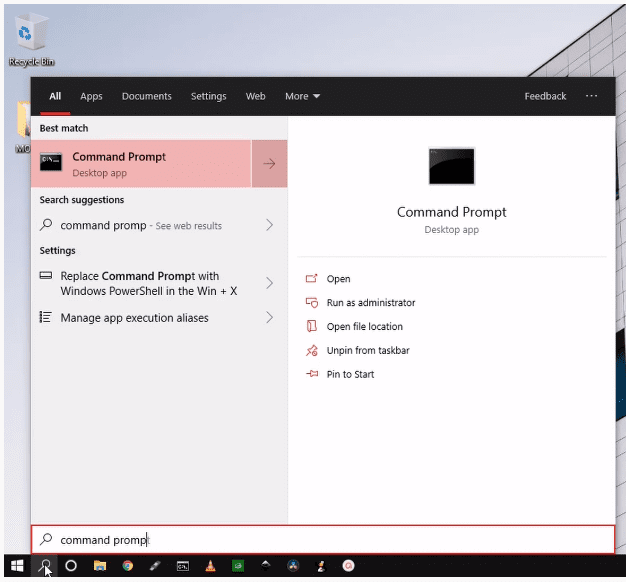
Command search
You can also achieve this by pressing Windows key + R simultaneously, which pens the run box. Type in “cmd”
Command Prompt AdministratorNow that the command prompt is open, we will use some commands to achieve what we desire. Let’s get to it.
In the first command, in the command prompt, type ‘diskpart’ and press Enter, as shown below. This command lets you manage disk partitions or volumes in windows. We intend to do just that.
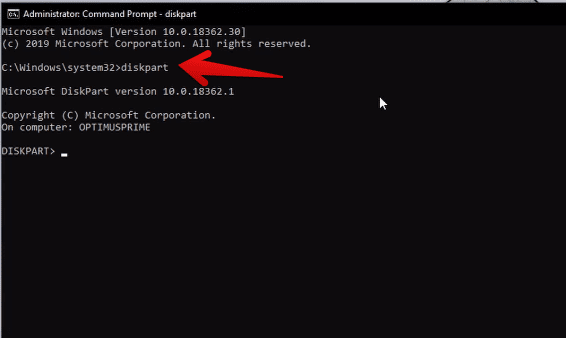
Diskpart
The second command is ‘list disk’. This command lists all the volumes installed on your computer. Type ‘list disk’ as shown below and press Enter after.
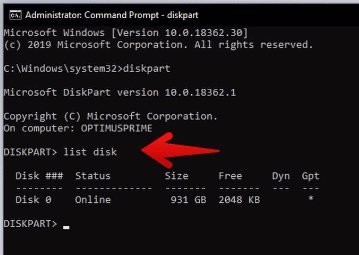
List disk partitions
The next command is ‘select disk’. This command lets you select the disk or partition you want to manage from the list of your disks. In our case, we have only one disk on the list, disk 0. This means we only have one disk installed on our computer: type ‘select disk 0’ and press Enter.
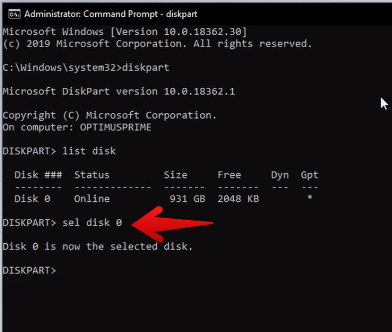
Select Disk
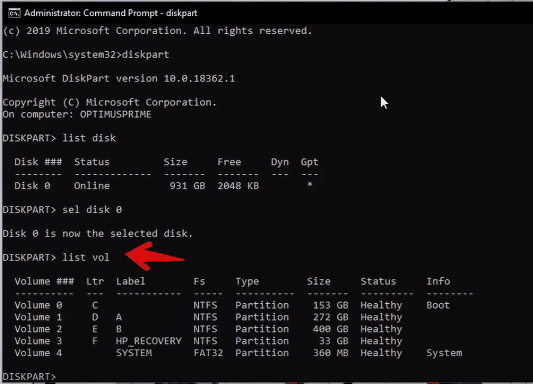
List Volume
The next command is ‘list vol’. These commands list all the volumes in the selected disk. Some people would think ‘list disk’ and ‘list vol’ are the same commands, but they are not. When you refer to ‘disk,’ it is the whole storage device and cannot shrink or expand. ‘Volumes’ are partitions of a disk. A disk, therefore, can have several volumes. Volumes can shrink and expand. So, type ‘list vol’ and press Enter.
From the list of volumes, you can see volume 4 has the label ‘System. You will also note that all the other partitions are in NTFS, but this is an EFI/system volume; hence it’s always in FAT32 format. This is the volume that has Grub boot loader, and this is why you have to select this volume in the next step. So, type ‘select vol 4’ and press Enter.
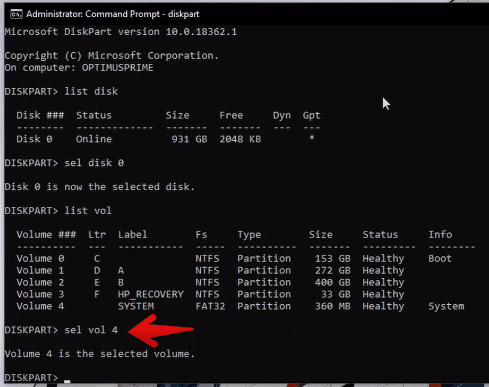
Select specific partition
Now that we have a volume selected, we want to assign a letter of the alphabet to manage it using an easier name easily. So, in the command prompt, type ‘assign letter=A:’ and press Enter.
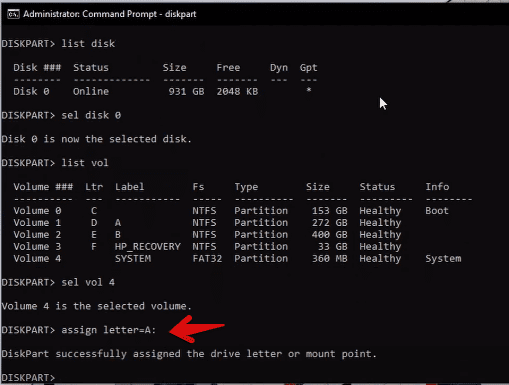
Assign letter
Exit the command prompt and open it again as administrator.
This time, we are using different commands. The first command is ‘cd /d A:’ or just “A:” to access the EFI drive. This is just selecting the path of the volume we assigned a letter to—press Enter.
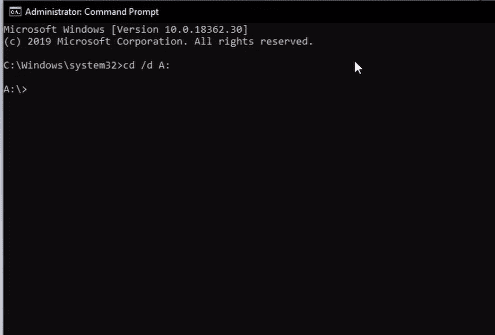
Cd to assigned letter
The command is ‘dir’ which basically displays details about the volume we selected and assigned a letter. You should have results similar to mine below. Type ‘dir’ in the command prompt and press Enter.
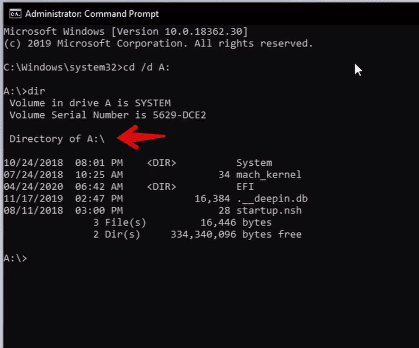
dir command and file system
If you have more partitions, you can then type in “cd EFI” to go inside the EFI directory and then “dir” to view the directory inside. You will get more than one directory, one been for Ubuntu, second for Microsoft Windows.
The second last command is ‘rmdir /s’. This command removes all directories and files in the selected volume, in our case ‘volume A’, in addition to the directory itself. Therefore in our command prompt, type ‘rmdir /s ubuntu and press Enter. If it is another operating system listed, make sure to type the label there instead of Ubuntu. Remember Ubuntu is the operating system I installed to duo boot with windows. So I am specifying to remove it from my volumes.
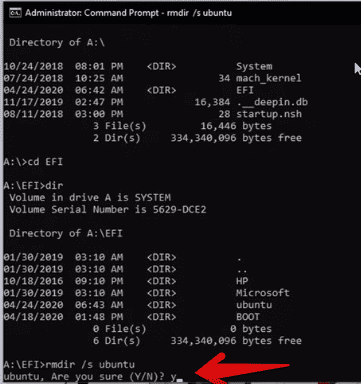
Remove Ubuntu
Lastly, you will be asked if you are sure. This is to confirm if you really want to remove everything from the volume specified, that is, volume A, and you have to say ‘yes’ by typing ‘Y’ and pressing Enter as shown below.
Conclusion
In this tutorial, we have discussed how to remove grub from Windows 10. Users assume that all is done, and their PC is back to normal after deleting the Linux partition, but that is not the case. They actually deleted the Linux partition but not the grub bootloader.
2 comments
Informative and a nice step-by-step walkthrough. However, for an article entitled “How to remove Grub Bootloader from Windows 10”, it’s sad that your conclusion ends with a statement that anyone who followed your tutorial here, “actually deleted the Linux partition but not the grub bootloader.” Not a lot of actual grub bootloader removal for an article promising precisely that. Is there a “part 2” coming?
This worked for me. Thanks a ton!