Table of Contents
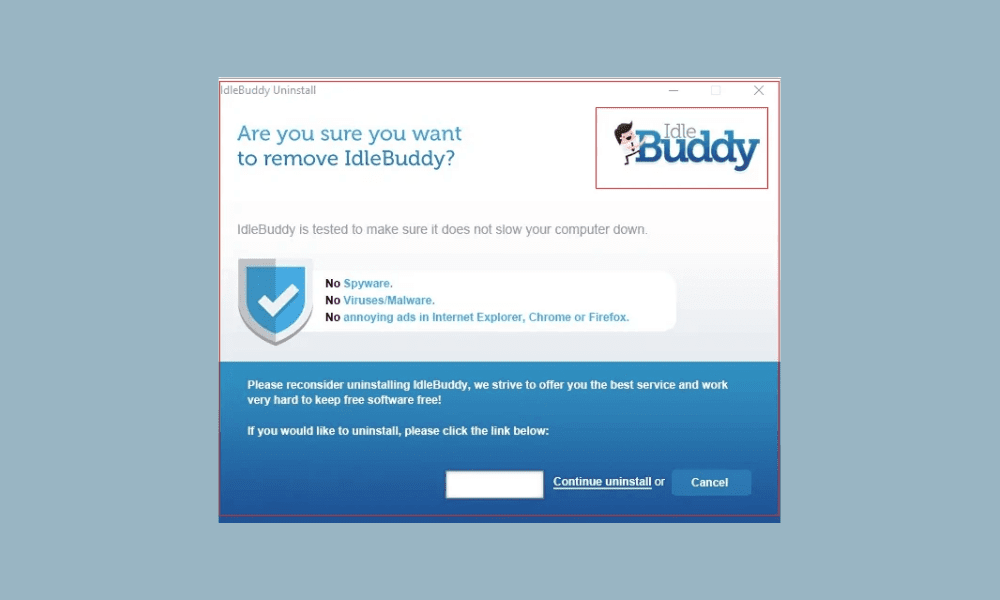
Idle Buddy – a malware file originating from the Idle Buddy Trojan – is essentially used to illegally mine cryptocurrency on your computer. As is the case with most computer viruses, users fail to identify Idle Buddy’s presence on their system. The malware’s stealth is further strengthened by the fact that it does not cause any direct threats to your PC but slowly and silently chips away at your RAM, CPU, and GPU.
Doing so generates cryptocurrency on your computer without you noticing its existence until you finally do. It is well-designed not to raise any red flags, but users catch it when they notice how slow their computer gets after a while.
Before we get into ways you can get rid of it, we would like to expand on the symptomatic behavior of one’s computer with Idle Buddy operating on it. It is worth noting that Idle Buddy only uses your system’s resources when it is not in use. That is what makes it so sneaky. You could go on for months not realizing its presence. However, there is still a possibility that Idle Buddy does, in fact, use your computer while you are using it, causing performance breakdown and speed issues. Idle Buddy also promises the users “rewards” for letting them use their computers. To be very clear, the only people being rewarded in the whole scenario are the trojan’s creator.
Removing Idle Buddy from Windows 10
Finally, we should take a look at the risks that Idle Buddy causes. Firstly, it could be collecting personal information from your computer without you knowing or permitting it to. It could add unwanted adware extensions to your browser. Idle Buddy may endanger your PC to further external threats and malware. The point is that no good comes out of it, and there isn’t much reason to keep it around. This is why we have prepared the following list of solutions that you can try to remove Idle Buddy from Windows 10!
Solution 1: Uninstalling Idle Buddy using Control Panel
Before we get into the hard and technical methods of removing this virus, let us first take a more conventional approach and hope that it bears fruit.
First, type Control Panel in the search box at the bottom-left of your taskbar and open it.
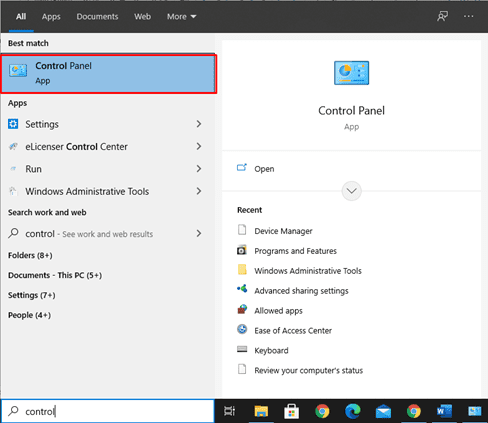
Opening Control Panel
Once done, click on Programs & Features, and you should see a list of programs installed on your PC.
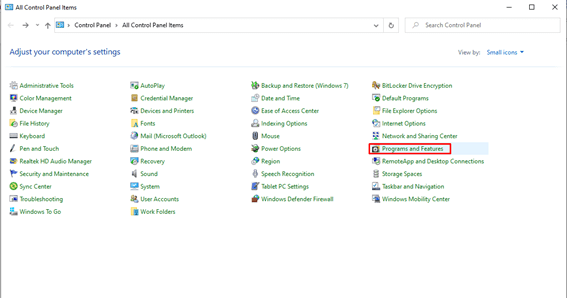
Opening Programs & Features
Find Idle Buddy in the list of programs, select it and click the uninstall button shown in the image below.
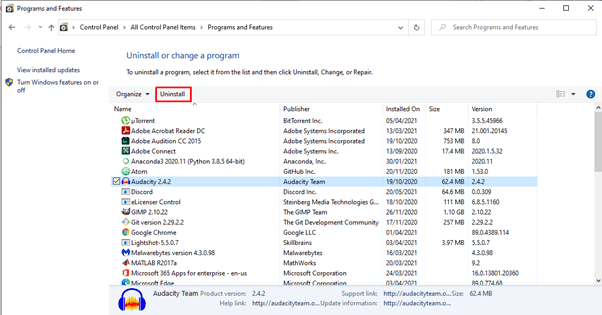
Uninstalling a program
If you are lucky enough, that should do the trick. However, malware like this is hard to get rid of as it alters your system’s settings to persist operating. If you could not find an entry for Idle Buddy in the list of programs or its symptoms is still there, move on to the next solution.
Solution 2: Removing Idle Buddy through Safe Mode
You should know that getting rid of viruses manually is a tedious and risky task. This is why you should probably consider getting an antivirus app to safeguard your computer against such threats, but we will come back to this later. For now, let us try a follow-up solution to the previous one.
Firstly, you need to enter Safe Mode on your computer. There are loads of guides on the internet on how you can do so. Check one of them out yourself before proceeding any further.
Now that you are in Safe Mode hit Ctrl + Shift + Enter on your keyboard to open the Task Manager. Go to the Processes tab and try to find an entry for Idle Buddy. If you can’t find one, select something that sounds related to this malware. A hint for malware processes is that they have strange names and always consume a huge chunk of RAM and processing power. Once you have found a suspicious process, right-click it and select “Open file location.”
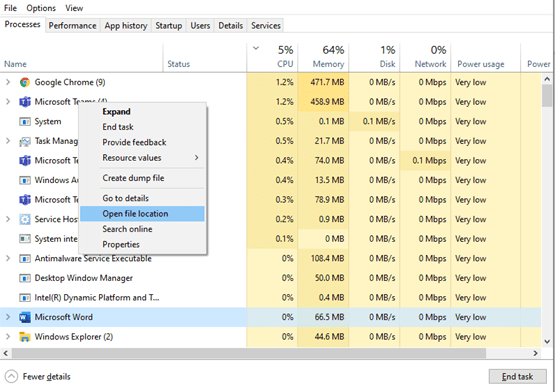
Navigating to file location through Task Manager
Next, you should scan the contents of the folder where the process originated from. We recommend going to this link and uploading it there to be checked for viruses.
If the file is detected to be malicious, it means its process is also harmful. End the process by right-clicking it, as we have shown earlier.
Now you must delete the file or contents of the folder you found. In fact, Shift + Delete it, so it is gone from your Recycle Bin as well. With that done, we move on to the final phase of the solution.
Press Windows + R on your keyboard to start Run. Once done, type in appwiz.cpl and Enter. A familiar screen should pop up, one from the first solution. Look for the Idle Buddy entry here again and uninstall it as we showed before. Why are we doing this again? Because now the files that were preventing it from being removed the first time are gone, leaving it powerless. You are also in Safe Mode this time which helps.
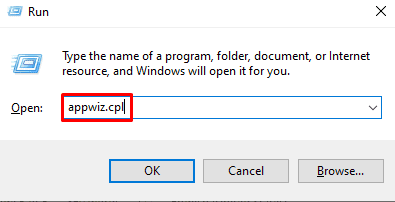
Running appwiz.cpl
Follow the steps the uninstallation guide shows you and once everything is done, reboot your PC. Check to see if Idle Buddy has left or not. If it hasn’t, go to the next solution.
Solution 3: Disabling Idle Buddy on startup
Malware tends to change your system configuration secretly and gives itself access to performing different tasks. It is reported that Idle Buddy starts up automatically as soon as users boot up their PC. Therefore we are going to revert its settings and disable it from doing so manually.
Press Ctrl + Shift + Esc again to open Task Manager. This time, go to the Startup tab instead of Processes and find Idle Buddy or any other suspicious programs in the list. Right-click the program and select Disable.
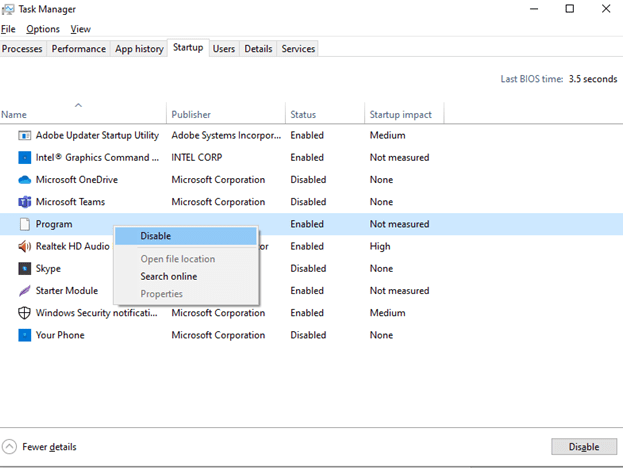
Disabling startup programs
Also, check the Publisher of the program, and if it is not a trusted source, disable those too. Now you can close Task Manager and reboot your PC. Check if strange malware behavior persists. If it doesn’t, great! But if it does, try the next solution.
Solution 4: Cleaning the hosts file
As I said earlier, malware may alter your system settings and files. As a matter of fact, Idle Buddy could add its own IP addresses to the hosts file to gain further control over your computer. But there is a way to fix it, and we are going to show you just that.
Go to the directory C:\Windows\System32\drivers\etc, and you will see a file named hosts. Right-click it and open it with Notepad.
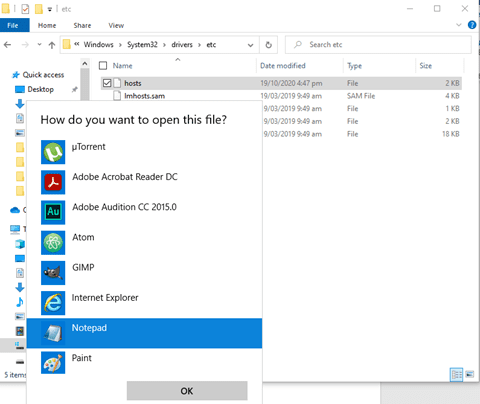
Opening hosts file
Now do not be intimidated by the look of the text file. You will not be coding or doing anything of the sort. All you have to do is identify suspicious IP addresses from sources you do not trust/cannot identify. The virus IPs will appear, as I have shown in the image below.
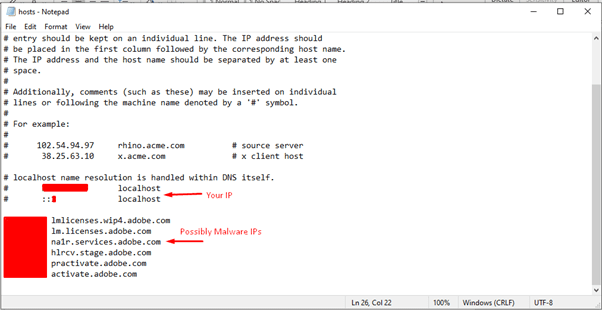
Identifying IP addresses
Please make sure the IPs you have identified are actually virus creators and not some pertinent system files. After having done that, though, you should press Ctrl + S to save changes and exit from the hosts file.
Now, type in Network Connections in the search box and hit Enter. Having opened it, right-click the network currently in use and select Properties.
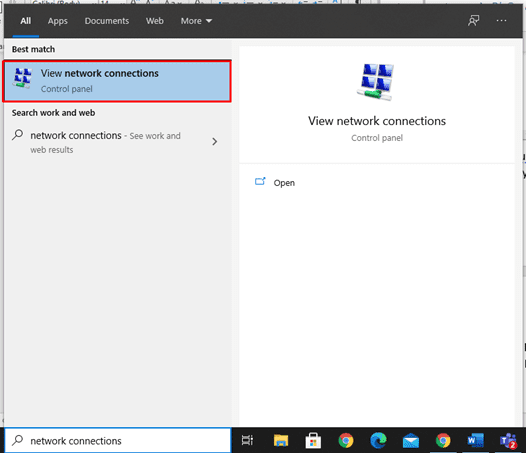
Opening Network Connections
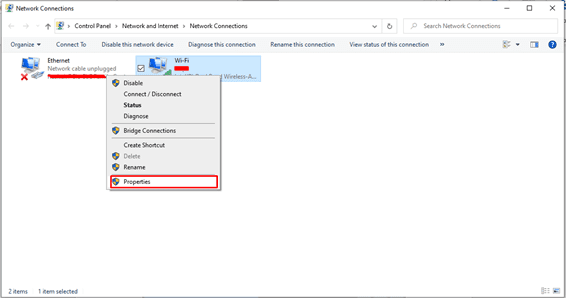
Properties of the network
In the list of items that you should now see, please select the one that says Internet Protocol Version 4 (ICP/IP) and open its Properties as shown below.
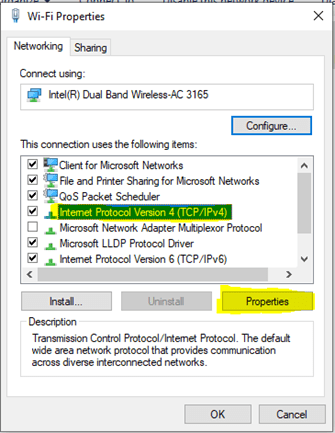
Selecting items from the network properties list
On the next screen, make sure “Obtain DNS server automatically” is checked, and then click on Advanced.
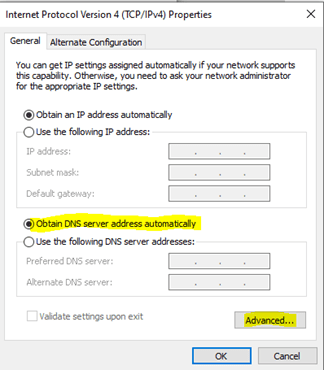
Check Obtain DNS server address automatically.
Now that you are in Advanced settings go to the DNS tab and check for bad addresses. If you identify any, select them and click the remove button.
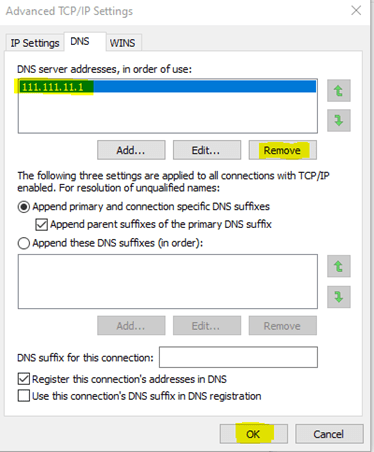
Removing DNS server addresses
You can now finish this whole process by clicking OK on all the currently opened windows.
Solution 5: Using Disk Cleanup
Windows 10 has a default cleanup feature that eliminates dormant, unnecessary files and trojans like Idle Buddy. Following is a guide to how you can use Disk Cleanup to remove Idle Buddy, hopefully.
Type Disk Cleanup in the search box and hit Enter.

Starting Disk Cleanup
You will now be asked to select the drive you want to clean. Normally viruses like to find a home in C:/ with all your important files. So, select it.
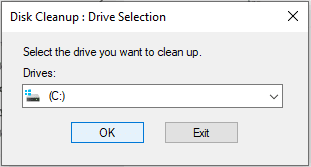
Selecting which drive to clean
Once it calculates all the expendable data in your C drive, you will be asked which of it you want to delete. Select Temporary Files, Temporary Internet Files, Downloads, and Recycle Bin.
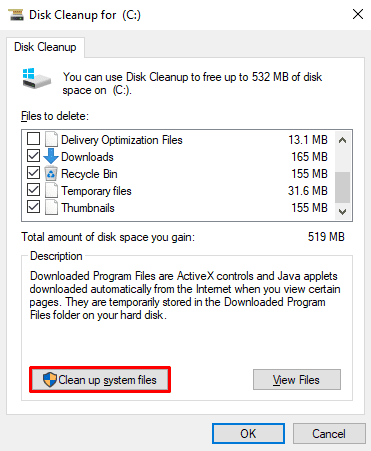
Selecting which system files are to be deleted
Click the Clean Up System Files button and once it’s done, click OK. You can further look into folders such as %WinDir%, %AppData%, %ProgramData%, and %LocalAppData% for malicious files and delete them manually.
Solution 6: Using an antivirus
If all our recommended methods have failed to work for you, you can get reputable antivirus software to take care of business. There are many out there–paid and free both. A promising choice may be Reimage. Download an antivirus that seems fit for your needs and do an extensive scan and cleanup of your full computer. Make sure you configure its settings to be thorough so it finally catches Idle Buddy.
Conclusion
We have gone over six methods you can remove Idle Buddy from Windows 10 in this article. Some are simple. Some are complicated; you should try them all until one works. Another thing to keep in mind may be that if you think Idle Buddy installed a browser hijacker, you should definitely reinstall and clean your browsers (you can find guides for this online as well). Either way, we hope that this article proved to help remove Idle Buddy.