We all have faced a time with our devices when the storage runs out. This issue is pretty common in this decade too. Windows 10 users could also struggle to store heavy files and face difficulties while making space on their devices. Today, we plan to make things easy for them and guide them through a simple set of instructions to make some storage space on their Windows 10 PC.
Although most devices come with enough internal storage, they may be insufficient in most cases, especially for users who usually deal with heavy-duty programs and files. Buying external storage is an easy way out, but then again, most users prefer to clear unnecessary files from their PC to make space instead of buying external storage devices.
Moreover, external storage isn’t the only way out since this approach is not always light on the pocket. Knowing that there is another more effective way to make storage space, an average user would find it difficult to adjust their limited budget and buy external drives. Therefore, deleting temporary files is the best way to go in this situation.
Deleting Temporary Files in Windows 10
One might ask the nature of temporary files before permanently deleting them. Well, the answer is as simple as it gets. Temporary files are those files that Windows 10 holds for a certain period. These files are everything but necessary for your device to function.
Here’s the thing, Windows 10 does not clean these files up regularly unless you have additional software or enabled storage sense to get the job done. These files include cache, logs, reports, etc. They can also take up loads of your storage if left unchecked. You can easily get rid of them on your Windows 10 PC with no hassle.
So, today we will be showing you guys how to delete temporary files on your Windows 10 PC safely. Just follow the simple steps mentioned below:
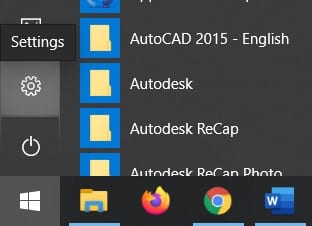
- Click on the Windows start button highlighted in blue located at the bottom left of your screen.

Accessing Start Button Menu
- On the Start button menu, go to “Settings” by clicking on the Settings icon.
Clicking on Settings
- Click on the “System” option.
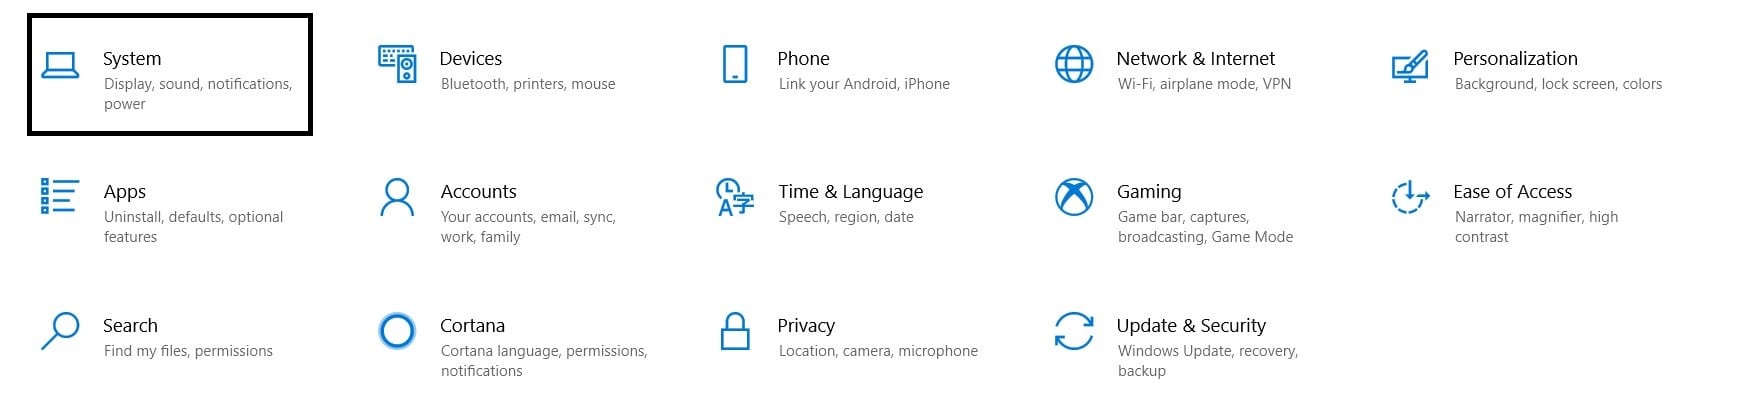
Accessing System Settings
- Now look for the “Storage” option on the list beside the main panel and click on it.
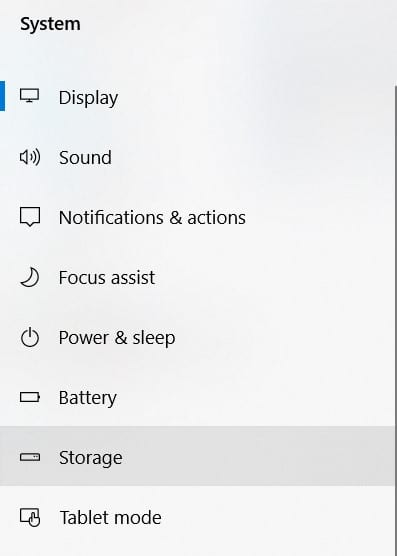
Accessing Storage Settings
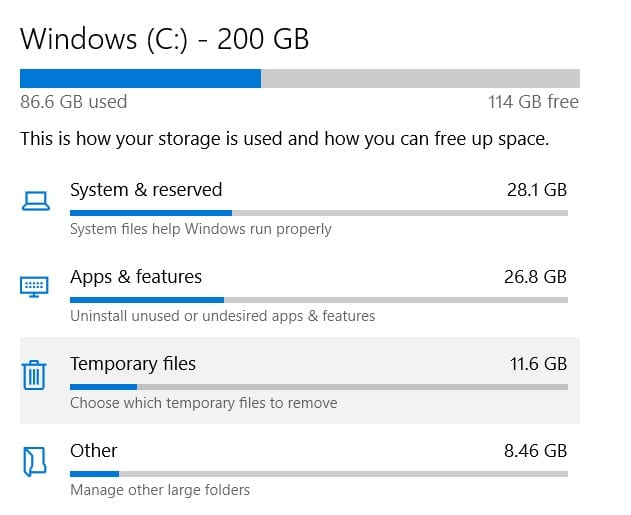
- Here you’ll find a brief overview of what takes up your storage space. Click on “Temporary Files.”
Clicking on the Temporary Files Option
- Windows 10 will give you a list of temporary file subcategories that you can check or uncheck before deleting.
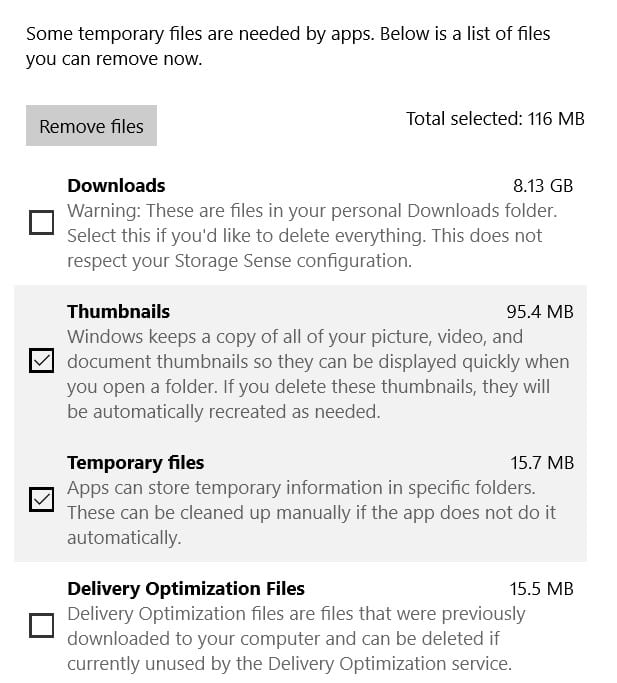
Checking and Unchecking Temporary Files
- See that “Remove Files” button? Clicking on it will delete those temporary files permanently.
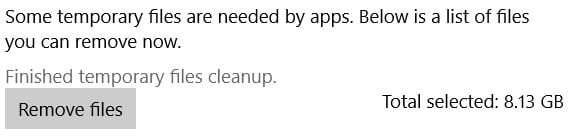
Deleting Temporary Files
Well, that was pretty easy, wasn’t it? You’ll find your PC storage a bit lighter after you clear these temporary files. However, be sure to check every option before hitting the “Remove” button. Windows also counts your downloads in these files, and they can be deleted too if you’re not careful. So, make sure you check that you’re deleting the files that are of no use to you or your PC.
Fortunately, Windows 10 also gives you an option to enable its built-in automatic cleaner. Remember that screen where you accessed the “Temporary Files” option? You’ll find the “Storage Sense” option above it. Turning it on will enable Windows to automatically clean useless files from your PC so you won’t have to do it every time yourself. You can also configure the settings to make sure nothing important gets deleted.
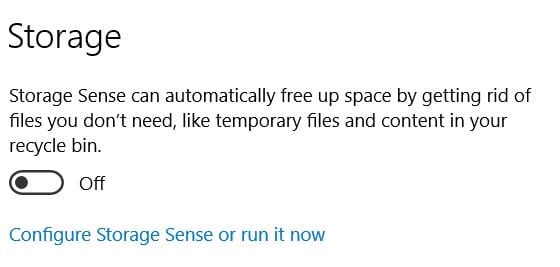
Turning On Storage Sense
Conclusion
This is by far the simplest and easiest way to safely get rid of temporary files from your PC. You’ll surely find your PC running more smoothly after this, too, since your RAM gets cleared as well. Other than that, if you have any other questions in mind regarding our method, feel free to drop them down in the comment section below.