Table of Contents
Hardware, such as a motherboard, CPU, or other components, might become damaged and create startup troubles with Windows 10/8/7. Someone may choose to upgrade or replace his current motherboard and CPU if dissatisfied with them. After the motherboard and CPU updates, most home and office customers nowadays find that completing a new install is not an issue. However, avoiding this time-consuming task is still important. Furthermore, because the clean install will delete all previously installed applications, modify system settings, and transfer data, you will need to reinstall and reactivate some programs.
As a result, you, like the majority of individuals, will most likely wish to upgrade. Upgrading the motherboard and CPU will give you faster speeds, better performance, and support for the latest components. However, besides all the improvements, the primary question is: will the user manage to keep his Windows installation intact while upgrading the motherboard and CPU?
Typically, it does not take long to perform a fresh installation.
The real issue is that one will need to reinstall or activate all the programs they previously had, retrieve personal files, and re-configure system settings once the user performs a fresh install. When they upgrade the motherboard and CPU without reinstalling Windows, older Windows operating systems like Windows XP will almost certainly fail to boot because they lack the drivers needed to boot Windows following significant hardware replacement.
There are three methods for replacing the motherboard and CPU without having to reinstall Windows. Before reviewing the three options, it’s crucial to know if you have activated your Windows 10, 8, or 7; it will remain activated after the motherboard and CPU are upgraded. Effective tricks for easy and safe hard work come in handy in such situations.
Note: OEM, Retail, and Volume are the three ways to license your Windows operating systems. If one has a retail or volume license, Windows will activate instantly when connected to the internet. OEM keys, on the other hand, are tied to the original hardware. The user must activate Windows over the phone. He will be required to send numbers back and forth, which could take a few minutes and might be hectic at times.
Upgrading motherboard and CPU without reinstalling Windows
There are three options for upgrading the motherboard without reinstalling Windows. The first method is to do a universal restore, whereas the second and third methods are connected to Registry Editor. However, the first option is more straightforward than methods 2 and 3, which involve some registry tweaks.
Method 1: Using AOMEI Backupper to replace the motherboard without reinstalling Windows
Universal Restore is a feature of AOMEI Backupper backup software that lets someone restore their Windows system to a different computer with different hardware. It ensures that the computer will boot without the need to change any settings. After replacing the CPU and motherboard, the user only needs to restore the previous system. It functions similarly to Windows bare metal recovery. The disparity is that AOMEI Universal Restore is more convenient and does not impose any limitations. Follow the phases provided below to perform a universal restore using the AOMEI Universal Backupper.
Step 1: Perform a system backup for universal restore.
- Download, Install and run AOMEI Backupper.

Download Aomei Backupper
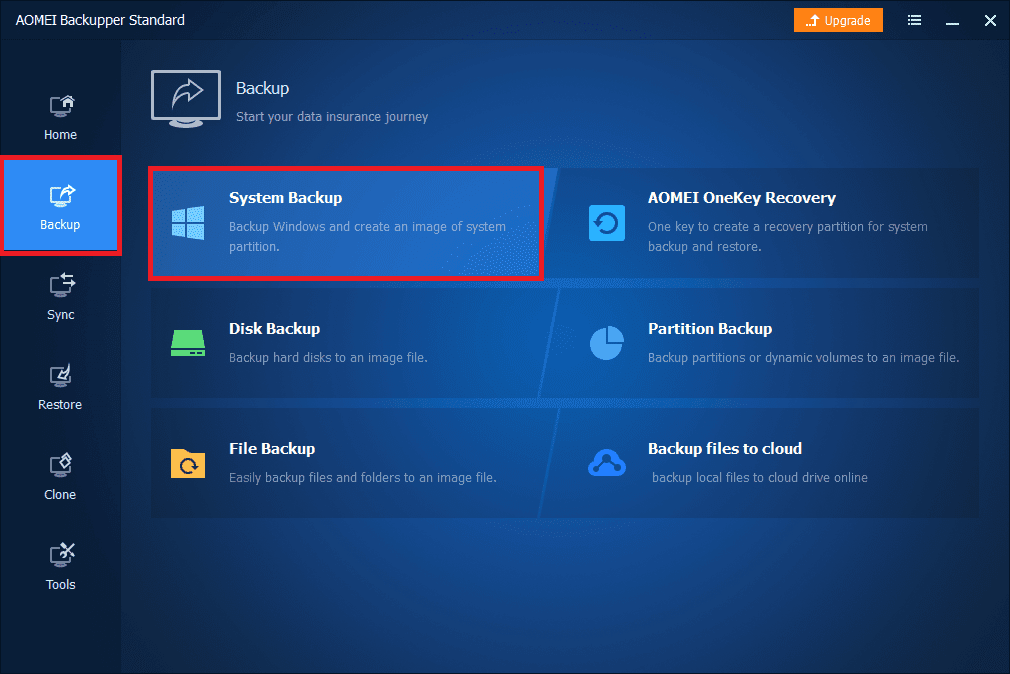
- Go to the Backup tab and select System Backup. It will choose the backup source for you automatically.
Select backup the system backup
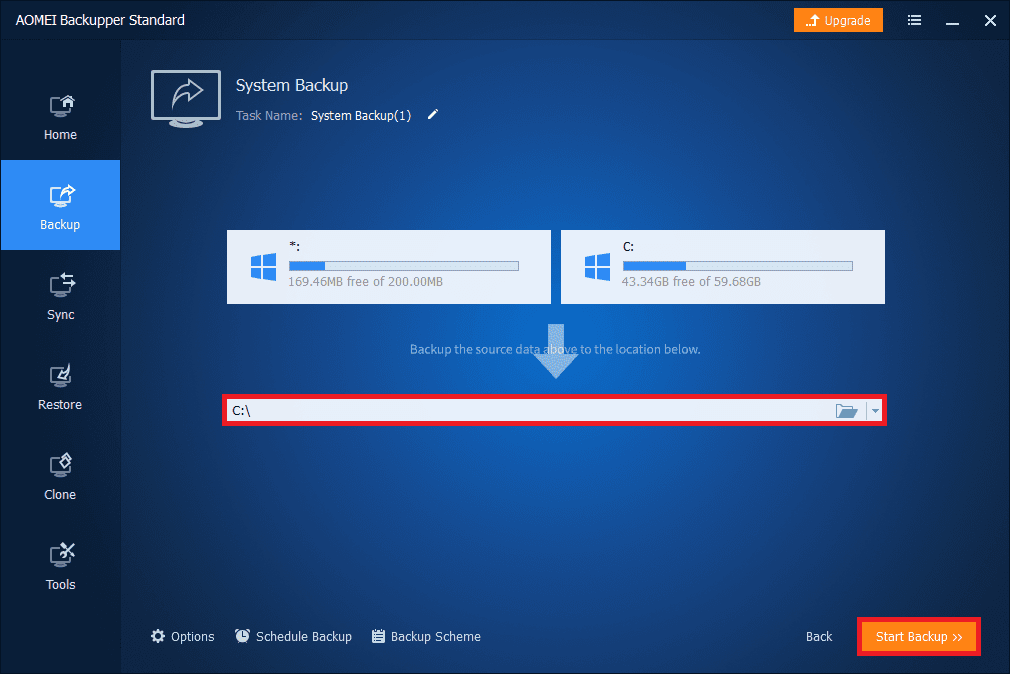
- Click Start Backup after selecting the backup destination path. The user can back up to an external hard drive, the original hard disk, or even a network path.
Select path, then click the Start backup button.

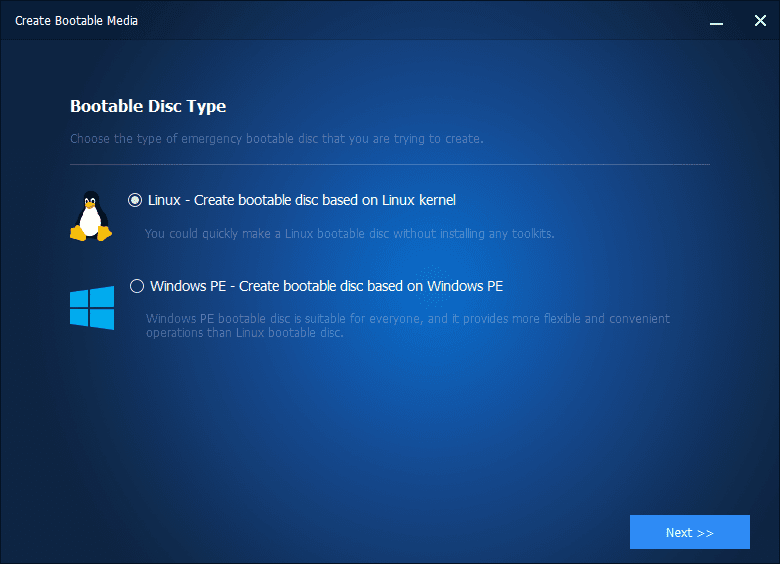
Step 2. Create bootable media for universal restore.
Since Windows may fail to boot after replacing the motherboard and CPU, the user should prepare a bootable drive ahead of time.
- To create it, go to Tools > Create Bootable Media.
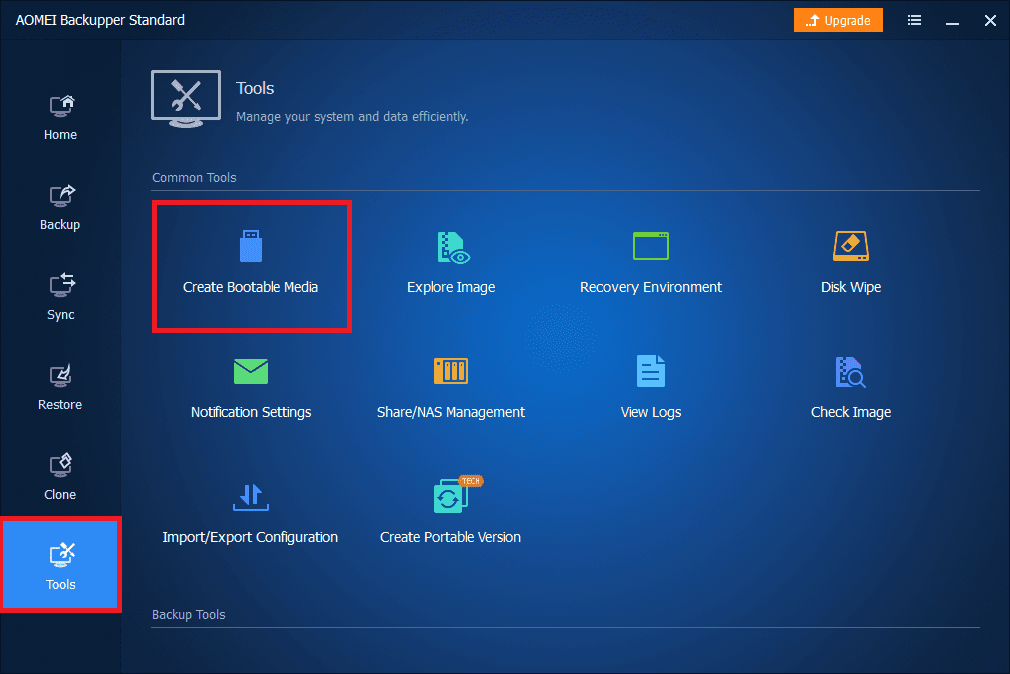
Select tools, then create new bootable media.
- If someone does not want to make a bootable drive, the user should click on Tools > Recovery Environment and turn on the AOMEI Backupper recovery environment’s boot option.
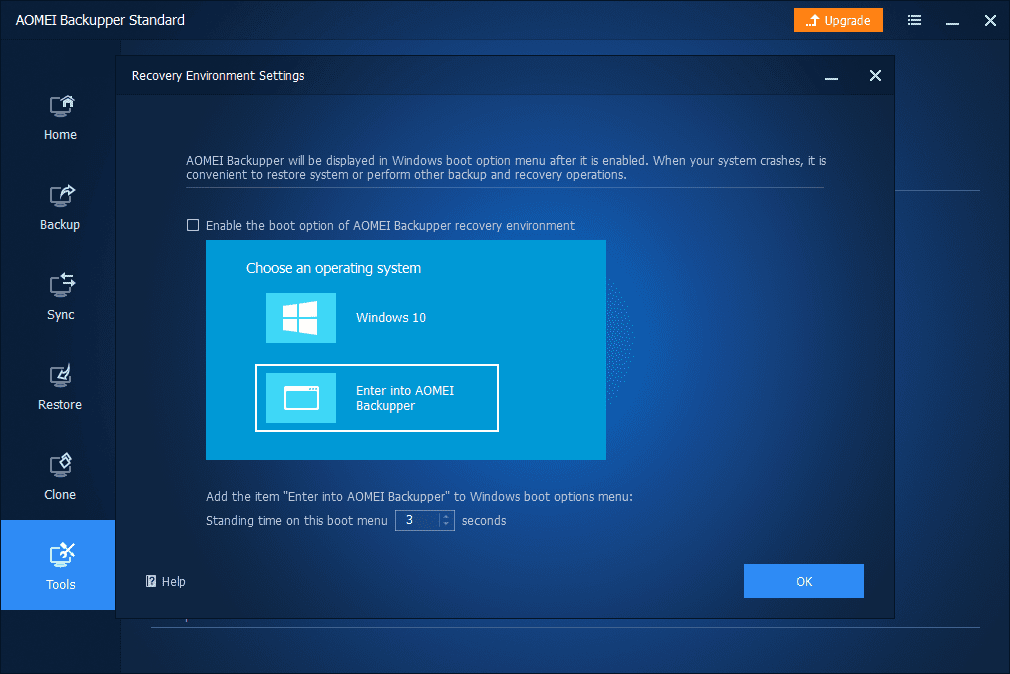
Aomei Recovery Environment
- One may also use it to boot into Windows PE and execute backup and restore operations.
Select Windows PE
Step 3. Begin restoring the entire system.
To initiate a universal restore, stick to the following procedure.
1. When the computer powers up, press DEL or F2 repeatedly to change boot order and make the bootable disk your first boot choice.
Note: the key you press will depend on your computer. For instance, I am using Lenovo Thinkpad X260. Therefore, I will press the F1 key. If you don’t know which key to press, refer to your model manufacturer for more assistance.
2. It will then load the AOMEI Backupper main interface. To select the backup produced before, click Restore and Select Task or Select Image File.
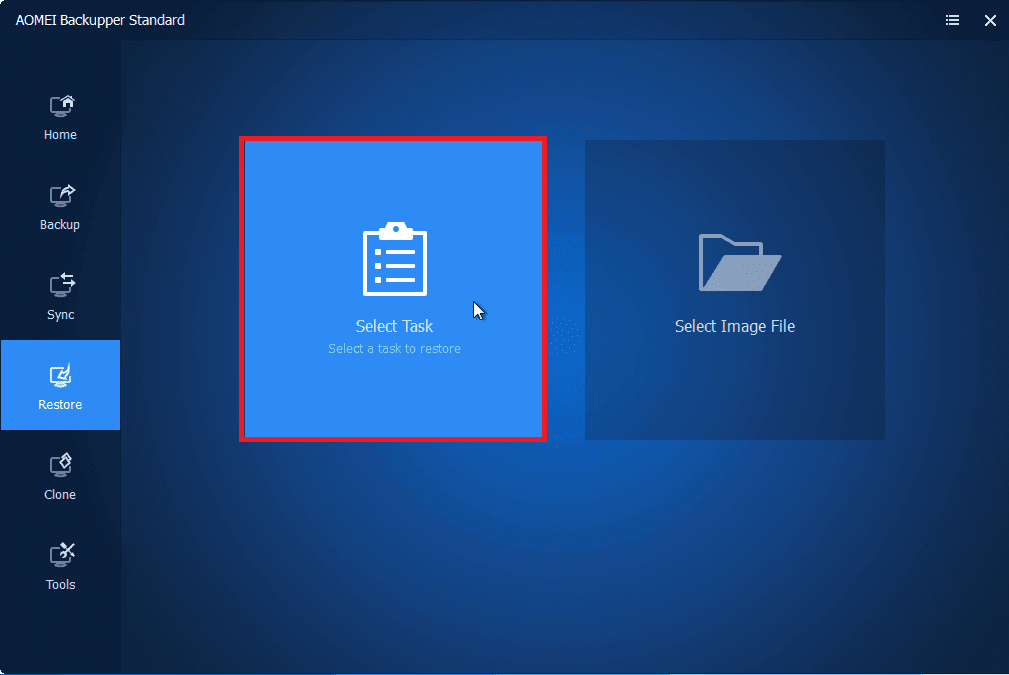
Select task
3. Choose how you want to restore the backup image now. There are two methods, one of which is described below. Restore this system backup, then restore a partition from it. One can select one based on your requirements.
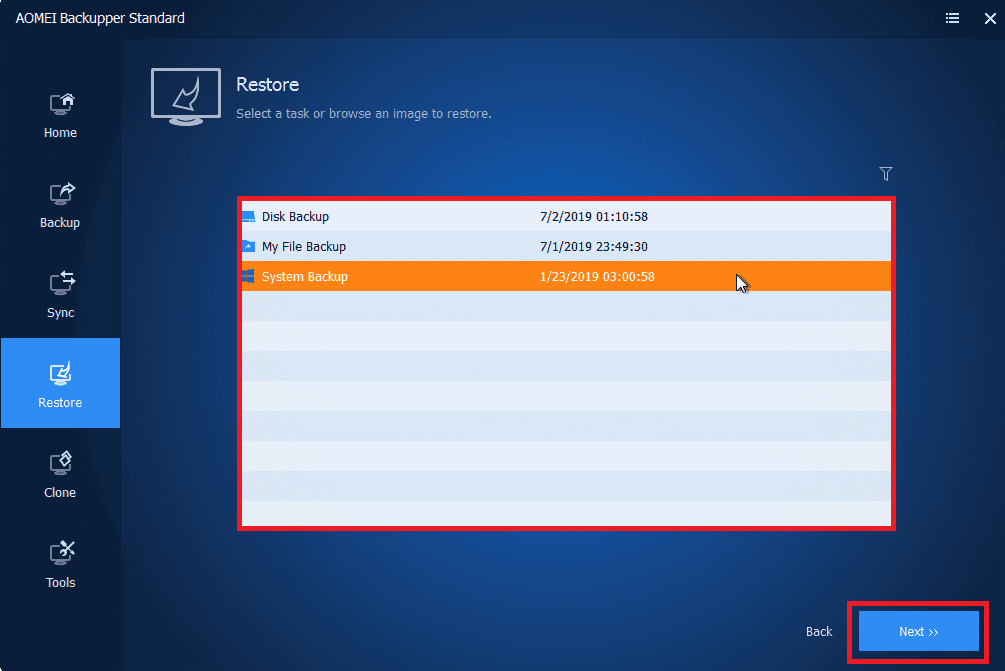
Select backup image
4. Make sure the option Universal Restore is selected before beginning the restore.
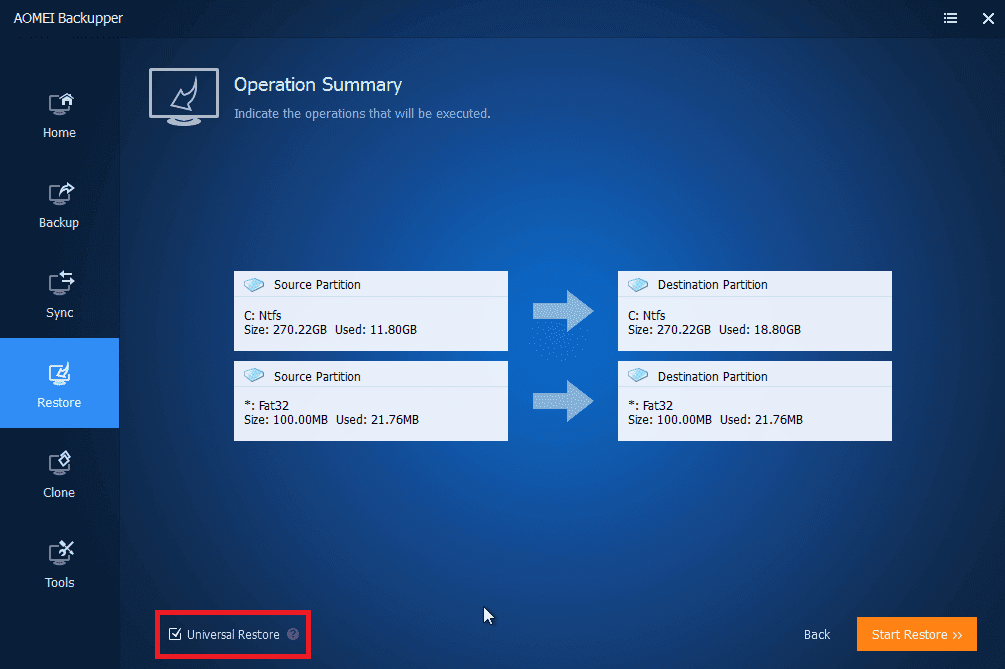
Ensure universal restore is checked
This method can also transfer an operating system from one computer to another with different hardware configurations.
Method 2: Using the Registry to replace the motherboard without reinstalling Windows.
The user must alter the “msahci or storahci” key in the registry before upgrading the motherboard and CPU in Windows 8/10 or Server 2012 since StorAHCI on these systems has replaced it. As one may be aware, altering the registry incorrectly will result in significant problems, so make a full system image backup first. In this method, one must go through all the following steps respectively.
Step 1: Connect your Windows account to your Microsoft account online.
After updating your motherboard and CPU, you can only reactivate Windows after linking your Windows 10/8 account to a Microsoft account. Therefore, it is significant to remember to link the account first by completing the procedures below.
- Go to Start > Settings > Update & security, then to the left panel, select Activation.
Windows Activation
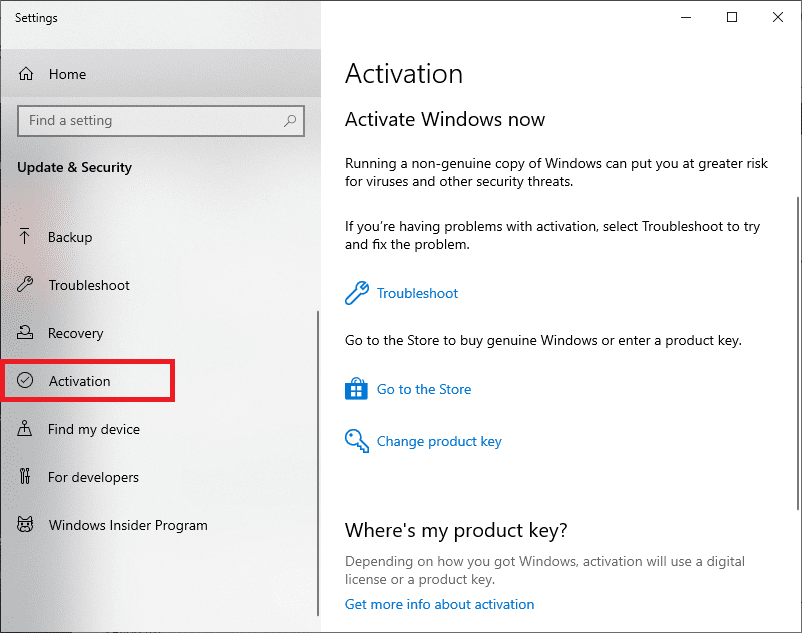
Note: ensure to add your Microsoft account to avoid losing your activation after restoring your PC.
Step 2: Change the motherboard and edit the registry.
This can be done by;
1. Launch the Run dialog box by clicking the “Windows + R” keys, typing “Regedit,” and pressing the Enter key on your keyboard.

Run dialog box and type Regedit
2. Navigate to the following key in Registry Editor.
HKEY LOCAL MACHINE\SYSTEM\CurrentControlSet\services\msahci
change msahci start value
HKEY LOCAL MACHINE\SYSTEM\CurrentControlSet\services\storahci
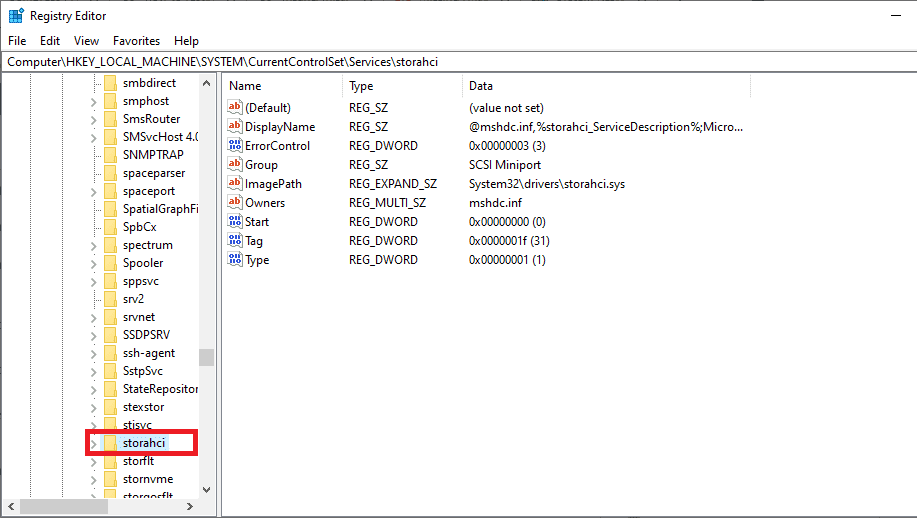
Locate the storahci service
Note: if you don’t find “msahci,” locate “storahci” since it replaces msahci.
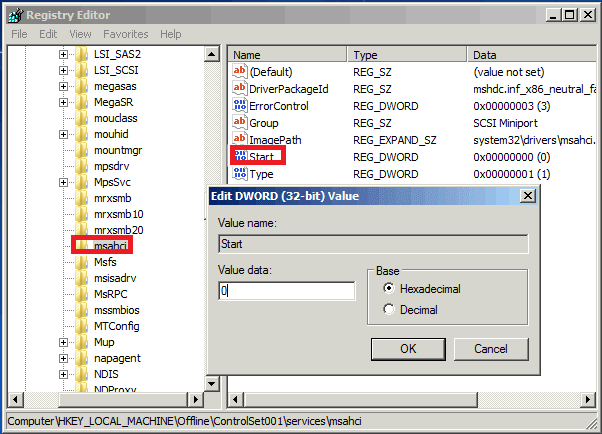
3. Double-click Start in the right pane and set its value from whatever to 0.
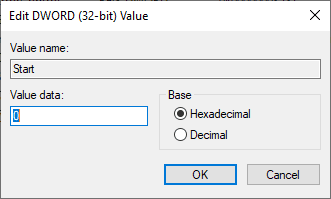
Double-click on Start and set the value to 0
4. Also, set the DWORD value data for the following key to 0:
HKEY LOCAL MACHINE\SYSTEM\CurrentControlSet\services\pciide
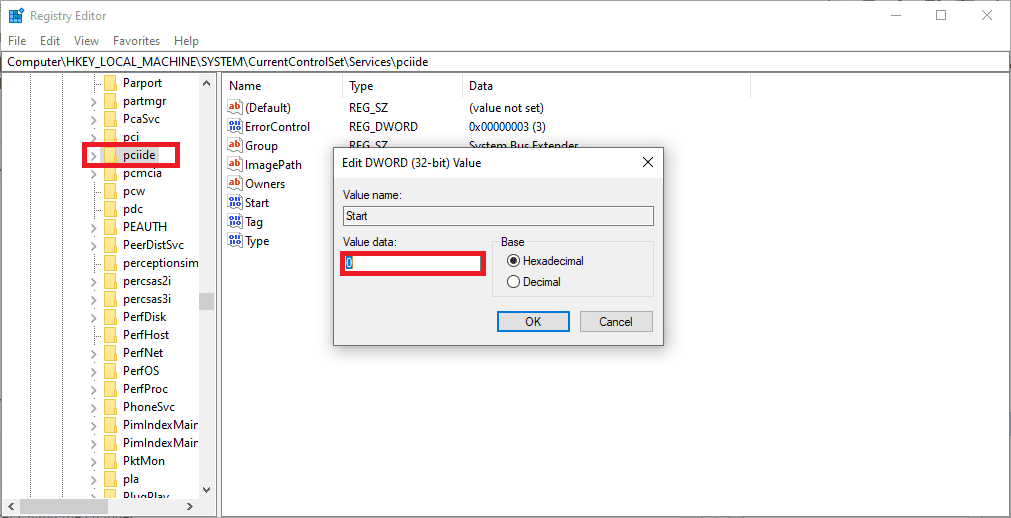
Set the start value of pciide to 0
5. Exit Registry Editor after saving the changes.
6. Replace the hardware after shutting down the computer. Then you can now boot Windows successfully.
Step 3: After replacing the motherboard and CPU, enable Windows.
After the motherboard has been changed, you may need to reactivate Windows 10/8; or you should follow the procedures below to do so. (Windows 7 will most likely reactivate on its own, so there is no need to get concerned).
1. Replace the motherboard and instruct Windows 10 to reactivate after booting: to do so, search for Troubleshoot settings on the start menu, then click on Additional troubleshooter. Next, select Update & security > I recently upgraded the hardware on this device.
Note: If you have not upgraded your system, you will not see that option.
2. Log back into your Microsoft Account and select the Activate option. The activation key will then be retrieved from your online Microsoft account.
3. You have the option to change your Windows 10/8 account back to the Local Account.
This mode can also be used to transfer a hard disk to a new computer without reinstalling Windows.
Method 3: Using the Offline Registry, replace the motherboard and CPU without reinstalling Windows
This procedure is helpful for customers who neglect to modify the registry before upgrading their motherboard or CPU, resulting in boot failure. All you have to do now is create an installation CD and boot your computer from it, after which you can alter the registry.
Follow the steps below to alter the registry settings:
1. Boot your PC from the installation media, enter BIOS by pressing F2 or Dell repeatedly, select the installation disc as the first boot option, then press F10 to save and restart.
2. Select your preferred language and other options, then click Repair your computer to proceed.
3. Next, go to Troubleshoot > Advanced options > Command Prompt.
4. To open Registry Editor, type Regedit and press Enter.
5. Select File and Load Hive from the HKEY LOCAL MACHINE key.
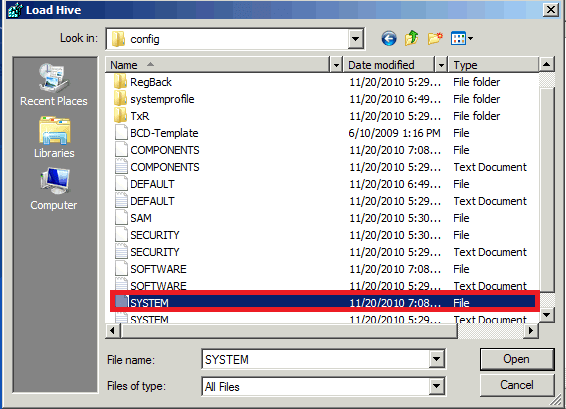
select system file
6. Open the system file on the system drive. The path is usually C: Windowssystem32configsystem.
7. Give the key a name, such as Offline, and save it by clicking OK.
8. Set the initial value of the following keys to 0 in the order shown.
HKEY LOCAL MACHINE\Offline\ControlSet001\services\msahci
change msahci start value
9. Highlight the Offline key, then select File and Unload Hive to revert your changes. Close the Registry Editor at the end.
10. To alter the BIOS settings, restart the computer, remove the CD, and continue using it normally.
After a motherboard upgrade, Windows 10 will not boot.
Following a motherboard upgrade, some users complain that Windows 10 will not boot. The most typical cause is an incorrect boot mode. For example, the original motherboard’s boot mode is Legacy BIOS, whereas the new motherboard’s boot mode is UEFI. The user should restart his PC, go to BIOS, select Boot, and switch Legacy boot option priority to alternate mode to see whether this is the issue.
That’s all. We have successfully upgraded our motherboard and CPU without reinstalling Windows.
Conclusion
The three methods mentioned in this article are helpful to aid you in upgrading your motherboard and CPU without reinstalling Windows. For most people, AOMEI Backupper is the most convenient option. To move the system, the user only needs to create a backup and then restore it once the process is complete later.
Another vital workaround is the other methods, which involve using a built-in Windows feature known as Registry editor. One can opt to use Registry Editor to upgrade the CPU and motherboard. All these methods are effective; hence you have the freedom to choose which way best suits you.
A point to note is that the entire procedure is time-consuming and difficult. It is also fraught with dangers. Any erroneous approach can result in significant consequences. It is vital to back up your files ahead of time. AOMEI Backupper Technician is an excellent option to safeguard an unlimited number of computers in your company. We hope you find the article helpful. If yes, give a thumbs up via the comments section.
3 comments
Good..BUT. As just a computer user, after reading just once, I am unable to understand some ‘technical’ terms. Could have been a little more simpler. But, I have saved it.
As I have Dell made in 2008, I may need it. However tough it is, I would love to experiment.
Also I have an ASUS laptop made around 2014 which is struggling already, which I will try if i succeed with Dell first.
Good suggestion
I don’t do any of that with windows 7 or 10. I just stick my old drive in a new system, it starts to boot, restarts, says setting up your devices then in 2-3 minutes reboots again then your back at you old desktop.